This is the full developer documentation for Promptless
# Doc Detective integration
> Test documentation workflows against your actual product with Promptless and Doc Detective
Docs describe how your product works. Every setup guide, UI walkthrough, CLI example, and API tutorial contains product assertions: this button exists, this command succeeds, this page appears, this link works.
Promptless uses [Doc Detective](https://docs.doc-detective.com/) to make each of those assertions executable. Doc Detective is an open-source implementation of the [Docs as Tests](https://www.docsastests.com/docs-as-tests/concept/2024/01/09/intro-docs-as-tests.html) framework. Under that framework, documentation should be tested against the real product experience, not just proofread for style or checked for broken links.
Note
Doc Detective is an open source documentation testing framework. You can view the core project at [doc-detective/doc-detective](https://github.com/doc-detective/doc-detective). The agent tooling Promptless uses is at [doc-detective/agent-tools](https://github.com/doc-detective/agent-tools).
Note
Executable tests are one of the tools behind [Audit and keep your docs healthy](/docs/for-docs/audit/keep-docs-healthy). They keep remediated procedures true as the product changes, so a workflow you just fixed doesn’t quietly go stale again.
## What Promptless does
[Section titled “What Promptless does”](#what-promptless-does)
When Doc Detective is enabled on a doc collection, Promptless treats tests as part of keeping your docs current.
Promptless can:
* Create Doc Detective tests when new documented workflows, UI paths, commands, or setup procedures are added
* Update existing Doc Detective tests when product changes make the old workflow stale
* Reuse your existing Doc Detective config and test layout instead of inventing a separate structure
* React to CI failures on Promptless documentation PRs and inspect the failing checks. It updates the suggestion branch when the failure is caused by the docs change
This means Promptless can update both the prose and the executable test coverage for a feature. If a new feature changes the product, Promptless can document the change and add the checks that prove the documented workflow still works.
## Setup
[Section titled “Setup”](#setup)
Enable Doc Detective from your doc collection settings.
1. Open the Promptless dashboard.
2. Go to your doc collection.
3. Click the edit button.
4. Enable **Doc Detective**.
5. Optionally enter the repo-relative path to your Doc Detective config file, such as `.doc-detective.json`, `.doc-detective.yaml`, or `.doc-detective.yml`.
If you leave the config path empty, Promptless still knows Doc Detective is enabled. It will inspect the repository for existing Doc Detective specs and config files before adding coverage.
## CI failure handling
[Section titled “CI failure handling”](#ci-failure-handling)
Doc Detective is most useful when it runs in CI with the rest of your documentation checks.
When a GitHub check suite fails on an open Promptless docs PR, Promptless:
1. Resolves the failing PR back to the Promptless suggestion that created it.
2. Fetches the failing check runs and a preview of the logs.
3. Starts a follow-on investigation with the PR, failing check names, conclusions, and log preview.
4. Determines whether the failure was caused by the suggestion.
If the failure is caused by the suggestion, Promptless updates the suggestion branch with the fix. If the failure is pre-existing or unrelated, Promptless leaves the suggestion scoped to its original work. If it finds a separate docs issue outside the suggestion’s scope, it can create separate work for that issue. It does not expand the original PR.
This lets Doc Detective failures become actionable maintenance signals instead of another queue for your team to triage manually.
# Audit and keep your docs healthy
> Find stale and inconsistent pages, restandardize legacy content, and restructure your information architecture using the Promptless capabilities you already have
Keeping docs current is as much about the pages that already drifted as the pages that might drift soon. A large corpus accumulates stale steps, off-style prose, duplicate pages, and a structure that no longer matches how the product works. Promptless treats that backlog as documentation work like any other. There is no single capability called “audit.” Instead, Promptless combines the tools described on these audit pages to surface what’s wrong, fix it at scale, and keep it fixed.
This page maps three recurring health jobs to the capability that handles each one. Most of them lean on [Deep Analysis](/docs/for-docs/get-the-most-out/pay-down-docs-debt), which is heavier and slower than a routine trigger. A run can take several hours and produce many suggestions. Reach for these jobs when the cleanup genuinely calls for that scope.
## Audit existing content for staleness
[Section titled “Audit existing content for staleness”](#audit-existing-content-for-staleness)
Before you can fix a large docs set, you need to know which pages are wrong. [Deep Analysis](/docs/for-docs/get-the-most-out/pay-down-docs-debt) is built for exactly this scope. It reviews your configured source repos and audits your existing docs for consistency, accuracy, and style compliance. It returns a coordinated set of suggestions rather than a single edit. Its **Audit for consistency** template reviews a collection for consistent terminology, formatting, and structure. The audit pass then produces reviewable diffs instead of a report you still have to act on.
## Remediate and restandardize legacy pages
[Section titled “Remediate and restandardize legacy pages”](#remediate-and-restandardize-legacy-pages)
Remediation is where most brownfield debt lives. Examples include pages that are accurate but written against an old pattern, or a section that needs rewriting to match stronger examples elsewhere.
* Use Deep Analysis to **refactor or rewrite a whole section**. Its **Refactor a bad section of docs** template improves an existing section using another set of docs as the model. Divergent legacy pages then converge on one pattern.
* Use [Vale integration](/docs/for-docs/audit/standards-enforcement) to hold that pattern going forward. When Vale is configured for a collection, Promptless lints prose before creating suggestions and fixes findings according to your config’s alert level. Restandardized pages then stay on-style instead of drifting again on the next edit.
* Use [Doc Detective](/docs/for-docs/audit/doc-detective) to keep the *procedures* on those pages true, not just their prose. When it’s enabled on the doc collection, the procedures remediation adds or rewrites become executable checks. Promptless updates those checks as the product changes. That way, a stale workflow fails a test wherever coverage exists.
Note
By default, you can review and refine every suggestion in the Promptless dashboard before anything happens with it. If you prefer to review in pull requests or merge requests, you can skip that in-dashboard review. Turn on **Auto-create PRs** when you [submit the request](/docs/for-docs/get-the-most-out/pay-down-docs-debt#submit-a-request). You can also set it in your [publishing policies](/docs/for-docs/reference/configuration-reference#policies). Check the setting before a bulk run across legacy pages.
## Restructure your information architecture
[Section titled “Restructure your information architecture”](#restructure-your-information-architecture)
Sometimes the pages are fine but the shape is wrong, like when sections have grown organically and the structure no longer matches what readers need. Restructuring is a coordinated move, and Promptless handles it in two parts:
* Use Deep Analysis to **plan and execute the content moves**. Restructuring a section to match a new pattern is one of its core use cases. It plans the work across pages before any edits land.
* [Preserve URLs and redirects](/docs/for-docs/migrate/preserve-urls-and-redirects) so the restructure doesn’t break inbound links. Redirect handling belongs to your documentation platform and host. Map every changed path to its new home and add a permanent redirect. Then crawl for broken links before and after the move.
## Where to start
[Section titled “Where to start”](#where-to-start)
[Pay down docs debt with Deep Analysis](/docs/for-docs/get-the-most-out/pay-down-docs-debt)Submit a large audit, refactor, or restructure request that produces a coordinated set of suggestions
[Vale integration](/docs/for-docs/audit/standards-enforcement)Enforce prose style standards so restandardized pages stay on-style
[Doc Detective](/docs/for-docs/audit/doc-detective)Turn the procedures remediation adds or rewrites into executable checks and keep them current as the product changes
[Preserve URLs and redirects](/docs/for-docs/migrate/preserve-urls-and-redirects)Keep inbound links working when a restructure changes your page URLs
Planning a large audit, remediation, or restructure and want help scoping it? Contact .
# Vale integration
> Enforce prose style standards in documentation suggestions with Vale
[Vale](https://vale.sh/) is an open-source prose linter that enforces style rules across documentation. When Vale is configured for a doc collection, Promptless lints prose before creating suggestions, catching style violations before they reach your review queue.
Note
Vale is one of the tools behind [Audit and keep your docs healthy](/docs/for-docs/audit/keep-docs-healthy). It holds restandardized pages on-style so legacy content doesn’t drift again after you fix it.
## What Promptless does
[Section titled “What Promptless does”](#what-promptless-does)
When Vale is enabled, Promptless:
* Downloads external style packages your config references when those styles aren’t already vendored in your repository.
* Lints every prose file it creates or substantially edits.
* Fixes findings according to your config’s `MinAlertLevel`. When you set an alert level, Promptless fixes every finding Vale reports. When it’s unset, Promptless treats error-severity violations as blocking and fixes them before creating the suggestion.
This keeps suggestions aligned with your style guide from the start, reducing back-and-forth during review.
## Setup
[Section titled “Setup”](#setup)
Vale is enabled automatically when Promptless detects a Vale configuration file in your docs repository.
### Automatic detection
[Section titled “Automatic detection”](#automatic-detection)
During doc collection setup, Promptless scans the collection for a Vale configuration file matching any of the five names Vale recognizes: `.vale`, `_vale`, `vale.ini`, `.vale.ini`, or `_vale.ini`. When Promptless finds one, Vale linting activates automatically using that config. When the scan finds more than one candidate, Promptless uses the config in the shallowest directory within the collection’s scope. It breaks ties by the filename order above.
### Manual configuration
[Section titled “Manual configuration”](#manual-configuration)
You can also set the Vale config path manually:
1. Open the Promptless dashboard.
2. Go to your doc collection.
3. Click the edit button.
4. Under **Vale config**, enter the repo-relative path to your Vale configuration file (e.g., `.vale.ini` or `docs/.vale.ini`).
Note
If your Vale config references external style packages (like Microsoft, Google, or write-good), Promptless downloads them automatically. This happens the first time it lints during a session.
## How it works
[Section titled “How it works”](#how-it-works)
Promptless runs Vale after drafting prose content:
1. **Sync packages** - Downloads any external style packages your config references.
2. **Lint prose** - Runs Vale on created or edited prose files.
3. **Apply your alert level** - Reads your config’s `MinAlertLevel` and uses it to decide which findings to fix (see [Severity handling](#severity-handling)).
4. **Match your CI** - Reads the Vale job in your repository’s GitHub Actions workflows and reproduces that invocation locally on the changed files. This confirms they pass before creating the suggestion.
Vale only runs on prose content. Code blocks, commands, configuration, frontmatter, schemas, and tables are excluded from linting.
## Severity handling
[Section titled “Severity handling”](#severity-handling)
Vale classifies violations into three severity levels:
| Severity | Behavior |
| -------------- | -------------------------------------------------------------------------------------- |
| **error** | Blocking. Promptless fixes these before creating the suggestion. |
| **warning** | Advisory. Promptless evaluates against your existing style and fixes when appropriate. |
| **suggestion** | Advisory. Promptless considers these but may preserve intentional style choices. |
How Promptless treats findings depends on whether your config sets `MinAlertLevel`.
### When MinAlertLevel is set
[Section titled “When MinAlertLevel is set”](#when-minalertlevel-is-set)
Setting `MinAlertLevel` is a deliberate choice about the severity bar your docs hold to. Promptless honors it and fixes every finding Vale reports at or above that level, including warnings and suggestions. This mirrors what your Vale CI surfaces, so Promptless resolves the findings you’d otherwise see as review comments before the suggestion reaches you.
For example, with `MinAlertLevel = suggestion`, Promptless fixes every error, warning, and suggestion Vale reports. To have Promptless fix fewer findings, raise the level (for instance, to `warning` or `error`) rather than relying on it to weigh advisory results.
### When MinAlertLevel is unset
[Section titled “When MinAlertLevel is unset”](#when-minalertlevel-is-unset)
When your config doesn’t set `MinAlertLevel`, Promptless falls back to treating error-severity rules as hard constraints. Promptless treats warning and suggestion rules as guidance and balances them against the established voice and conventions in your docs.
## CI integration
[Section titled “CI integration”](#ci-integration)
Vale errors that slip through or arise from later edits are caught by Promptless’s automated CI handling. When Vale fails in a GitHub Actions workflow on a Promptless PR, Promptless analyzes the failure and pushes fixes to the branch automatically.
This works alongside other CI checks like broken link detection and Doc Detective tests, giving you layered quality gates without manual triage.
## Create a Vale config
[Section titled “Create a Vale config”](#create-a-vale-config)
If you don’t have a Vale configuration yet, create a `.vale.ini` file in your docs repository root:
```ini
StylesPath = .vale/styles
MinAlertLevel = warning
[*.md]
BasedOnStyles = Vale
```
This minimal config enables Vale’s built-in rules. For more comprehensive style enforcement, add external packages:
```ini
StylesPath = .vale/styles
MinAlertLevel = warning
Packages = Microsoft, write-good
[*.md]
BasedOnStyles = Vale, Microsoft, write-good
```
See the [Vale documentation](https://vale.sh/docs/) for detailed configuration options and available style packages.
# Connection health & troubleshooting
> Check the health of your Promptless integrations, recognize when a connection has gone stale, and reconnect or refresh it so triggers, context, and publishing keep working.
Every integration you connect depends on an authorization that Promptless holds on your behalf. When that authorization lapses, the integration stops working quietly. No error lands in your inbox, so the first sign is usually work that simply isn’t happening. This page shows you where to check the state of your connections and how to restore one that has gone stale.
## Where to check connection health
[Section titled “Where to check connection health”](#where-to-check-connection-health)
Organization administrators manage every connected integration from the [integrations page](https://app.gopromptless.ai/integrations) in the Promptless dashboard. Each integration has a card that shows its connection status and authentication state, along with controls to reconnect, refresh, or disconnect it.
When a connection needs attention, its card flags the problem so you can act on it. A Slack card missing a permission shows an informational **Grant additional Slack permissions** callout naming what to add. A **Needs reconnect** flag marks a connection whose authorization has genuinely lapsed or been rejected. Whenever an integration seems to have stopped working, open the integrations page first. The card tells you whether the connection itself is the cause.
Note
The integrations page and its reconnect, refresh, and disconnect controls are available to organization administrators. If you’re not an admin, flag the integration to your Promptless administrator so they can check and reconnect it.
## How a lost connection shows up
[Section titled “How a lost connection shows up”](#how-a-lost-connection-shows-up)
What you notice depends on what the integration does for you:
* **Triggers** are how events reach Promptless. If a trigger integration loses access, Promptless stops receiving its events. No new suggestions come from that source, even when the rest of your setup looks healthy. Check for a lapsed connection whenever an expected suggestion never appears.
* **Context sources** are [read-only](/docs/for-docs/connect/context-sources) and optional. If a context source loses access, Promptless still creates suggestions. It can no longer pull in the background that source provided, so those suggestions draw on less context than usual.
* **Publishing** to GitHub needs an active connection with repository access. Without it, your repositories don’t appear in the dropdown when you set up a doc collection. Promptless also has nowhere to open documentation pull requests.
Tip
During a pilot, a healthy stream of suggestions is a signal that Promptless is plugged into the right parts of your workflow. If that stream dries up, confirm your trigger integrations are still connected before assuming the problem is elsewhere. See [Run a pilot](/docs/for-docs/start-here/run-a-pilot) for more on reading suggestion volume.
## Common symptoms and fixes
[Section titled “Common symptoms and fixes”](#common-symptoms-and-fixes)
An expected suggestion never appeared
Check that the trigger integration for that source is still connected on the [integrations page](https://app.gopromptless.ai/integrations), and that its card isn’t flagging a reconnect. A trigger that has lost access stops delivering events to Promptless, so no suggestion is generated from it.
No repositories appear when creating a doc collection
If the repository dropdown shows “No options,” connect GitHub first from the [integrations page](https://app.gopromptless.ai/integrations). If GitHub is already connected but repositories are missing, grant Promptless access to those specific repositories in your GitHub organization settings. See [GitHub repos (docs as code)](/docs/for-docs/connect/doc-locations/github-repos#frequently-asked-questions) for the full flow.
Slack diff files, link previews, or private channel listing stopped working
When a Slack feature stops working, your workspace is usually missing a permission that a newer version of Promptless needs. The Slack card shows a **Grant additional Slack permissions** callout naming what to add. Click **Update connection** to approve the added permissions. See [Slack troubleshooting](/docs/for-docs/reference/integrations/slack#troubleshooting) for the specific permissions behind attached diff files, link previews, and private channel listing.
A Jira reply or comment from Promptless didn’t post
Check the Atlassian card first. A service-account health badge reading **Not working** means Atlassian is refusing the account’s credential. Promptless then can’t post as its bot identity. Fix it by re-attaching the service account: re-enter its Client ID and secret from the [integrations page](https://app.gopromptless.ai/integrations). Reconnecting the Atlassian OAuth connection does not fix this, because the connection and the service-account credential are separate things. See [Atlassian service account](/docs/for-docs/reference/integrations/atlassian#atlassian-service-account) for the full setup.
## When to contact support
[Section titled “When to contact support”](#when-to-contact-support)
Contact the Promptless team at if a card doesn’t show a reconnect option. Also reach out if reconnecting doesn’t resolve the problem, or if you’re unsure which integration is at fault. See [Getting help](/docs/for-docs/reference/getting-help) for every way to get in touch.
To retire a connection instead of fixing it, disconnect the integration from its card on the [integrations page](https://app.gopromptless.ai/integrations). This immediately revokes Promptless’s access to that service. For how Promptless accesses and retains data from connected services, see [Data handling and classification](/docs/for-docs/security/data-handling-and-classification).
# Context sources
> Connect read-only context sources so Promptless draws on the tools where your team already keeps product knowledge when it drafts documentation suggestions.
Context sources are integrations that give Promptless **read-only** access to your organization’s existing tools and data. They provide additional context that helps Promptless create more accurate and comprehensive documentation suggestions.
Note
Context sources are **one-way**: Promptless reads information from these services to inform documentation updates, but never writes back to them. Your Jira tickets, Linear issues, and Confluence pages remain unchanged.
## How context sources work
[Section titled “How context sources work”](#how-context-sources-work)
Think of context sources as Promptless’s way of understanding your team’s unique ecosystem. When triggered to create documentation updates, Promptless intelligently searches through your connected tools to gather the most relevant context. This creates documentation that feels like it was written by someone who truly understands your project.

Note
Context sources are **optional** but highly recommended. They can significantly improve the quality and relevance of Promptless’s documentation suggestions.
## Available context sources
[Section titled “Available context sources”](#available-context-sources)
[Linear](/docs/for-docs/connect/context-sources/linear)Access Linear issues, projects, and team workflows for project management context
[Jira](/docs/for-docs/connect/context-sources/jira)Query Jira tickets and project data using JQL search capabilities
[Confluence](/docs/for-docs/connect/context-sources/confluence)Search Confluence spaces for existing documentation patterns, terminology, and architectural decisions
[Notion](/docs/for-docs/connect/context-sources/notion)Search Notion pages and databases for product specs, internal documentation, and team knowledge
[Google Drive](/docs/for-docs/connect/context-sources/google-drive)Search Google Drive and read Docs, Sheets, and Slides for product specs, internal notes, and reference material
[Slite](/docs/for-docs/connect/context-sources/slite)Search Slite notes for internal documentation, product specs, and team knowledge
## Examples
[Section titled “Examples”](#examples)
### Linear as a context source
[Section titled “Linear as a context source”](#linear-as-a-context-source)
When a GitHub PR mentions a new feature, Promptless searches Linear for related issues to understand additional project context. This ensures your documentation includes the “why” behind code changes, not just the “what.”
### Jira as a context source
[Section titled “Jira as a context source”](#jira-as-a-context-source)
If a GitHub PR references a Jira ticket (like “PROJ-123”), Promptless automatically reads that Jira ticket for additional context. It also proactively searches Jira using JQL for related issues and epics.
### Confluence as a context source
[Section titled “Confluence as a context source”](#confluence-as-a-context-source)
When writing documentation, Promptless searches your Confluence spaces for existing documentation patterns, terminology, and architectural decisions. This ensures new documentation matches your team’s existing style and conventions.
### Notion as a context source
[Section titled “Notion as a context source”](#notion-as-a-context-source)
When a GitHub PR references a Notion page containing feature specifications, Promptless automatically fetches that page content. It also searches your Notion workspace for related product documentation, ensuring new docs align with existing feature definitions and terminology.
### Google Drive as a context source
[Section titled “Google Drive as a context source”](#google-drive-as-a-context-source)
When a GitHub PR links to a “Rate Limiting v2” design doc in Google Docs, Promptless resolves that document. It reuses the document’s exact thresholds and rationale when updating the rate-limit reference page. It also searches your Drive for related specs and notes, so new docs match the numbers and decisions your team already recorded.
### Slite as a context source
[Section titled “Slite as a context source”](#slite-as-a-context-source)
When a GitHub PR references a feature, Promptless searches your Slite workspace for related notes containing product context. This ensures documentation includes accurate feature descriptions and terminology from your team’s knowledge base.
## Configure context sources
[Section titled “Configure context sources”](#configure-context-sources)
Context sources are configured in your organization’s [Configuration page](https://app.gopromptless.ai/configuration) using the `context_sources` section of your `promptless.yaml` file. You can:
* Connect integrations on the [Integrations page](https://app.gopromptless.ai/integrations)
* Optionally scope each source to specific projects, spaces, or databases in your configuration
* Leave a source unconfigured (or empty) to give Promptless full access to that integration
See the [Configuration Reference](/docs/for-docs/reference/configuration-reference#context-sources) for the complete YAML schema.
## Data privacy and security
[Section titled “Data privacy and security”](#data-privacy-and-security)
Promptless prioritizes your data privacy and security with context sources:
Real-time Queries Only
We do not store any of your organization’s data from context sources. Instead, our agents query the relevant APIs in real-time when documentation updates are needed. This ensures that we only access the information required for the specific documentation task at hand.
Secure Authentication
All context source integrations use:
* OAuth 2.0 authentication
* Encrypted data transmission (TLS 1.2+)
* Granular permission controls
* Token-based access that can be revoked at any time
Minimal Data Access
Promptless only accesses the specific information needed for documentation generation and does not retain or cache this data after processing.
## Request additional context sources
[Section titled “Request additional context sources”](#request-additional-context-sources)
Need integration with other tools? Contact to request additional context sources. We’re continuously expanding our integration options to better serve your documentation needs.
# Confluence
> Connect Confluence as a read-only context source so Promptless reuses your team's existing conventions, terminology, and architectural decisions in documentation suggestions.
Tip
You can connect and scope this context source by hand as this page describes. You can also ask Promptless in Slack or Microsoft Teams to do it for you. For example, “@Promptless scope the Confluence context source to my Engineering space.” See [Ask Promptless to update your configuration](/docs/for-docs/get-the-most-out/ask-promptless-to-update-config).
Confluence integration provides **read-only** access to your documentation spaces for documentation automation. When Confluence is configured as a context source, Promptless can search your Confluence spaces for relevant documentation when creating suggestions. It never modifies your Confluence pages.
## How it works as a context source
[Section titled “How it works as a context source”](#how-it-works-as-a-context-source)
When Confluence is enabled as a context source:
* **Automatic Space Searching**: Promptless searches your Confluence spaces for relevant documentation when creating suggestions
* **Documentation Patterns**: Confluence pages provide context about existing documentation styles, terminology standards, and content structures
* **Architectural Context**: Technical specifications, design decisions, and system architecture documented in Confluence inform new documentation
* **Team Knowledge**: Internal processes, guidelines, and best practices from your team’s Confluence spaces
## Example
[Section titled “Example”](#example)
Confluence is where teams keep their shared knowledge, meaning the conventions, design decisions, and standards that outlive any single feature. When new code touches an area those pages govern, that space is the source of truth for how the work should be described.
A developer merges a GitHub PR that adds a new `/v2/exports` endpoint to your public API. Your team keeps its API conventions in a Confluence space, on an “API Guidelines” page. That page mandates cursor-based pagination, the `limit` and `starting_after` parameter names, and a standard error-envelope format.
When Promptless picks up the merged PR, it searches your Confluence spaces and reads the API Guidelines page. Rather than documenting the endpoint in isolation, it describes pagination and errors using the conventions your team already agreed on. It uses the same parameter names, the same envelope shape, and the same structure every other endpoint follows. The result is a docs PR that reads like the rest of your API reference instead of a one-off.
## Configuration
[Section titled “Configuration”](#configuration)
Configure Confluence scope in your [Configuration page](https://app.gopromptless.ai/configuration) using the `context_sources` section:
```yaml
context_sources:
confluence:
source_type: confluence
space_keys:
- ENGINEERING
- PRODUCT
```
An empty entry (or no entry) gives Promptless access to all spaces. Add `space_keys` only when you need to restrict which spaces Promptless can search.
Note
Promptless inherits the permissions of the Atlassian account used during OAuth connection and only searches spaces you configure.
## Data privacy
[Section titled “Data privacy”](#data-privacy)
Promptless queries Confluence data in real-time and does not store any of your Confluence data. All searches are performed on-demand when documentation updates are needed. Promptless only reads from Confluence. It never creates, updates, or deletes pages.
## Setup instructions
[Section titled “Setup instructions”](#setup-instructions)
To connect Confluence to Promptless, see the [Atlassian Integration](/docs/for-docs/reference/integrations/atlassian) setup guide.
# Google Drive
> Connect Google Drive as a read-only context source so Promptless reads Docs, Sheets, and Slides for the specs and rationale behind a change.
Tip
You can connect and scope this context source by hand as this page describes. You can also ask Promptless in Slack or Microsoft Teams to do it for you. For example, “@Promptless scope the Google Drive context source to my Product shared drive.” See [Ask Promptless to update your configuration](/docs/for-docs/get-the-most-out/ask-promptless-to-update-config).
Google Drive integration provides **read-only** access to your team’s documents for documentation automation. When Google Drive is configured as a context source, Promptless searches your Drive and reads file content while creating suggestions. It never modifies your Drive content.
## How it works as a context source
[Section titled “How it works as a context source”](#how-it-works-as-a-context-source)
When Google Drive is enabled as a context source:
* **Drive Search**: Promptless searches files by name and full text across My Drive and shared drives when creating documentation suggestions
* **File Reading**: Promptless reads file content on demand (Google Docs as Markdown, Sheets as CSV, and Slides as plain text). It pulls product specs, internal notes, and reference material into new documentation
* **URL Resolution**: When triggers reference Google Drive or Google Docs URLs, Promptless fetches the linked file using your authenticated connection. If a file isn’t accessible to your integration but is publicly shared, Promptless falls back to fetching it as a public web page.
Note
Promptless inherits the permissions of the Google account used during OAuth connection and only accesses files that account can read.
## Example
[Section titled “Example”](#example)
A developer merges a GitHub PR that lowers the default API rate limit from 1,000 to 600 requests per minute. A code comment in the PR links to the “Rate Limiting v2” design doc in Google Docs. Promptless resolves that linked Doc and reads the rollout thresholds and the reasoning behind the new ceiling. It then reuses the exact numbers and rationale when it updates the rate-limit reference page.
## Scope access
[Section titled “Scope access”](#scope-access)
Because Promptless connects through OAuth, its Drive access is limited to whatever the authorizing Google account can read. Whoever authorizes the connection sets the scope of what Promptless sees. You can narrow access further in your configuration, and you can control it at the account level.
### Scope with `drive_ids` and `folder_ids`
[Section titled “Scope with drive\_ids and folder\_ids”](#scope-with-drive_ids-and-folder_ids)
By default, Promptless reads everything the connected account can access. To narrow that, add `drive_ids` or `folder_ids` to the `google_drive` context source entry in your `promptless.yaml`. This points Promptless at a specific shared drive (say, the one your product team owns) or at a folder holding your current-quarter specs. It does not expose unrelated files the account happens to reach.
```yaml
context_sources:
google_drive:
source_type: google_drive
drive_ids:
- 0AExampleDriveIdUk9PVA
folder_ids:
- 1BExampleFolderIdXyZ
```
Leave both fields empty (or omit them) to give Promptless access to everything the connected account can read. For the full schema, see the [Configuration Reference](/docs/for-docs/reference/configuration-reference#context-sources).
### Scope with a dedicated account
[Section titled “Scope with a dedicated account”](#scope-with-a-dedicated-account)
To be prescriptive about what Promptless can access, create a dedicated Google account to act as a service account for Promptless. Then share with that account only the specific shared drives and folders you want Promptless to read. Connecting through that account, rather than a broadly privileged individual’s account, limits Promptless’s Drive access to exactly what you share. This gives you least-privilege control.
After you connect, the Google Drive integration card shows which account authorized the connection under the label **Searching documents this person can access**. It also shows the connecting user’s name and email. Check it to confirm Promptless is limited to the dedicated account you intended rather than a broadly privileged one. If you connected before this label was added, the account appears only after you refresh or reconnect the integration.
## Data privacy
[Section titled “Data privacy”](#data-privacy)
Promptless queries Google Drive in real time and stores none of your Drive content. Searches and file reads happen on demand when documentation updates are needed. Promptless caches results briefly to improve performance during a single documentation session, then discards them.
Promptless connects with read-only Drive scopes and only reads from Google Drive. It never creates, updates, or deletes files.
## Setup instructions
[Section titled “Setup instructions”](#setup-instructions)
To connect Google Drive to Promptless:
1. Go to the [Integrations page](https://app.gopromptless.ai/integrations) in your Promptless dashboard.
2. Click **Connect** on the Google Drive integration card.
3. Authorize Promptless to access your Google Drive with read-only permissions.
# Jira
> Connect Jira as a read-only context source so Promptless reads the issues behind a change for requirements and business context.
Tip
You can connect and scope this context source by hand as this page describes. You can also ask Promptless in Slack or Microsoft Teams to do it for you. For example, “@Promptless add Jira as a context source limited to my DOCS and ENG projects.” See [Ask Promptless to update your configuration](/docs/for-docs/get-the-most-out/ask-promptless-to-update-config).
Jira integration provides **read-only** access to your project management and issue tracking data for documentation automation. When Jira is configured as a context source, Promptless can search for related issues to understand requirements and business context. It never modifies your Jira issues.
Note
This page covers Jira as a read-only context source. Promptless can also use Jira as a trigger source, comment on the issue that starts a session, and create Jira issues. See [Jira trigger](/docs/for-docs/connect/triggers/jira). Issue creation is covered under [Create a Jira issue on request](/docs/for-docs/reference/integrations/atlassian#create-a-jira-issue-on-request).
## How it works as a context source
[Section titled “How it works as a context source”](#how-it-works-as-a-context-source)
When Jira is enabled as a context source:
* **Automatic Issue Retrieval**: When a GitHub PR or other trigger references a Jira issue (like `PROJ-123`), Promptless reads that issue for context. This happens as soon as Jira is connected. It never modifies issues, and reads only what the connected Jira account can see within the projects you configure under `project_keys` (all projects by default). Each retrieval covers:
* summary and description
* status, type, priority, and resolution
* labels, components, and affected and fix versions
* parent, subtasks, and linked issues
* comments
* organization-defined custom fields, such as a `Documentation` field
* **Proactive JQL Searches**: Promptless can proactively search Jira using JQL queries to find related issues, epics, and project data
* **Business Context**: Jira issues provide requirements, business logic, and feature context that enhance documentation accuracy
## Example
[Section titled “Example”](#example)
Jira tracks work from idea to launch, and each issue records the requirements and acceptance criteria a team agreed on before any code was written. That makes a referenced issue a reliable source for what a feature is supposed to do.
A developer merges a GitHub PR whose description references `PROJ-412`, the Jira issue tracking a new bulk-import feature. The issue spells out the business requirements: which file formats are supported and the 10,000-row import cap. It also records the rule that imports run asynchronously with an email notification on completion.
When Promptless picks up the merged PR, it retrieves `PROJ-412` and runs a JQL search for related issues in the same epic. It reads the acceptance criteria (the supported formats, the row limit, and the async-with-email behavior) and carries them into the documentation suggestion. The docs then reflect what the feature is meant to do, not just what the diff happens to show.
## JQL search capabilities
[Section titled “JQL search capabilities”](#jql-search-capabilities)
Promptless uses Jira’s powerful JQL (Jira Query Language) search functionality to find relevant context. This allows intelligent searching across your Jira projects to find related issues, epics, and dependencies.
## Configuration
[Section titled “Configuration”](#configuration)
Configure Jira scope in your [Configuration page](https://app.gopromptless.ai/configuration) using the `context_sources` section:
```yaml
context_sources:
jira:
source_type: jira
project_keys:
- DOCS
- PLATFORM
- ENG
```
An empty entry (or no entry) gives Promptless access to all projects. Add `project_keys` only when you need to restrict which projects Promptless can search.
Note
Promptless inherits the permissions of the Jira account used during OAuth connection and only searches projects you explicitly configure.
## Data privacy
[Section titled “Data privacy”](#data-privacy)
Promptless queries Jira data in real-time and does not store any of your Jira data. All searches are performed on-demand when documentation updates are needed. As a context source, Promptless only reads from Jira. Retrieving context never creates, updates, or deletes an issue. Creating a Jira issue on request and replying on issues are separate write capabilities. Issue creation is covered under [Create a Jira issue on request](/docs/for-docs/reference/integrations/atlassian#create-a-jira-issue-on-request); replying is covered on the [Jira trigger](/docs/for-docs/connect/triggers/jira) page.
## Setup instructions
[Section titled “Setup instructions”](#setup-instructions)
To connect Jira to Promptless, see the [Atlassian Integration](/docs/for-docs/reference/integrations/atlassian) setup guide.
# Linear
> Connect Linear as a read-only context source so Promptless reads the issues behind your code changes for the intent a diff alone does not show.
Tip
You can connect and scope this context source by hand as this page describes. You can also ask Promptless in Slack or Microsoft Teams to do it for you. For example, “@Promptless add Linear as a context source scoped to my engineering and product teams.” See [Ask Promptless to update your configuration](/docs/for-docs/get-the-most-out/ask-promptless-to-update-config).
Linear integration provides **read-only** access to your project management data for documentation automation. When Linear is configured as a context source, Promptless can search for related issues to understand the business context behind code changes. It never modifies your Linear issues.
## How it works as a context source
[Section titled “How it works as a context source”](#how-it-works-as-a-context-source)
When Linear is enabled as a context source:
* **Automatic Issue Lookup**: When a GitHub PR mentions a Linear issue, Promptless automatically retrieves that issue for additional context
* **Proactive Searches**: Promptless can search Linear for related issues and projects to understand feature requirements
* **Business Context**: Linear issues provide the “why” behind code changes, not just the “what”
## Example
[Section titled “Example”](#example)
Linear positions itself as the product development system, the place where teams plan and track work from idea to launch. A Linear issue therefore usually holds the intent behind a change, not just a task title.
A developer merges a GitHub PR that links to `ENG-238`, the Linear issue behind a new scheduled-reports feature. The issue captures the intent the diff doesn’t. Reports can be scheduled daily or weekly, and they’re delivered to a Slack channel rather than email. The feature is gated to workspaces on the Business plan.
When Promptless picks up the merged PR, it retrieves `ENG-238` and searches Linear for related issues in the same project. It reads the issue and carries that context into the documentation suggestion: the scheduling cadences, the Slack delivery, and the plan gating. The docs then explain what users can do and who has access, not just the code that shipped.
## Configuration
[Section titled “Configuration”](#configuration)
Configure Linear scope in your [Configuration page](https://app.gopromptless.ai/configuration) using the `context_sources` section:
```yaml
context_sources:
linear:
source_type: linear
team_keys:
- engineering
- product
```
An empty entry (or no entry) gives Promptless access to all teams. Add `team_keys` only when you need to restrict which teams Promptless can search.
Note
Promptless inherits the permissions of the Linear account used during OAuth connection and only searches teams you configure.
## Data privacy
[Section titled “Data privacy”](#data-privacy)
Promptless queries Linear data in real-time and does not store any of your Linear data. All searches are performed on-demand when documentation updates are needed. Promptless only reads from Linear. It never creates, updates, or deletes issues.
## Setup instructions
[Section titled “Setup instructions”](#setup-instructions)
To connect Linear to Promptless, see the [Linear Integration](/docs/for-docs/reference/integrations/linear) setup guide.
# Notion
> Connect Notion as a read-only context source so Promptless searches your pages and databases for product specs and team knowledge.
Tip
You can connect and scope this context source by hand as this page describes. You can also ask Promptless in Slack or Microsoft Teams to do it for you. For example, “@Promptless limit the Notion context source to my Product Specs database.” See [Ask Promptless to update your configuration](/docs/for-docs/get-the-most-out/ask-promptless-to-update-config).
Notion integration provides **read-only** access to your team’s knowledge base for documentation automation. When Notion is configured as a context source, Promptless can search your Notion pages and databases for relevant information when creating suggestions. It never modifies your Notion content.
## How it works as a context source
[Section titled “How it works as a context source”](#how-it-works-as-a-context-source)
When Notion is enabled as a context source:
* **Page Search**: Promptless searches your selected Notion pages for relevant content when creating documentation suggestions
* **Database Queries**: Promptless can query Notion databases to retrieve structured information like product roadmaps, feature specs, reference tables
* **URL Resolution**: When triggers reference Notion URLs, Promptless automatically fetches the linked page content using your authenticated connection. If a page isn’t shared with your Notion integration but is publicly accessible, Promptless falls back to fetching it as a public web page.
* **Knowledge Context**: Internal documentation, product specs, and team knowledge from Notion inform new documentation
## Agent capabilities
[Section titled “Agent capabilities”](#agent-capabilities)
When Notion is connected, Promptless agents gain access to three specialized tools:
| Tool | Description |
| ------------------------- | ------------------------------------------------------------------------------------------------------------------------------------------------- |
| **Search Notion** | Searches pages and databases shared with your Notion connection by keyword. Returns up to 25 results per request with pagination support. |
| **Get Notion Page** | Fetches a specific page by ID and returns its content as markdown. Optionally includes meeting note transcripts inline. |
| **Query Notion Database** | Queries rows from a Notion database, returning page IDs, titles, URLs, and properties. Returns up to 25 rows per request with pagination support. |
## Example
[Section titled “Example”](#example)
For many teams, Notion is the single source of truth: the workspace where product specs, PRDs, and structured databases define a feature before it ships. The spec, not the diff, holds the official names and rules a team has settled on.
A developer merges a GitHub PR that adds role-based permissions to your workspace settings. The feature was specced in Notion. An entry in your “Product Specs” database defines the official role names (“Owner,” “Editor,” and “Viewer”). It also defines the exact permissions each role grants, and the rules for who can change another member’s role.
When Promptless picks up the merged PR, it resolves the Notion page URL referenced in the PR description. It then queries your Product Specs database for the matching entry. Rather than inferring the details from the code alone, it reads the spec and carries the agreed-upon terminology into the documentation suggestion. That means the same role names, the same permission matrix, and the same constraints your product team defined. The result is a docs PR that matches the spec your team wrote in Notion instead of a re-derived approximation.
## Configuration
[Section titled “Configuration”](#configuration)
Configure Notion scope in your [Configuration page](https://app.gopromptless.ai/configuration) using the `context_sources` section:
```yaml
context_sources:
notion:
source_type: notion
database_ids:
- abc123def456
page_ids:
- xyz789ghi012
```
An empty entry (or no entry) gives Promptless access to all pages and databases shared with your integration. Add `database_ids` or `page_ids` only when you need to restrict access.
Note
Promptless inherits the permissions of the Notion account used during OAuth connection and only accesses pages and databases you configure.
## Data privacy
[Section titled “Data privacy”](#data-privacy)
Promptless queries Notion data in real-time and does not store any of your Notion content. All searches are performed on-demand when documentation updates are needed. Query results are cached briefly (90 seconds) to improve performance during a single documentation session, then discarded.
Promptless only reads from Notion. It never creates, updates, or deletes pages or databases.
## Setup instructions
[Section titled “Setup instructions”](#setup-instructions)
To connect Notion to Promptless:
1. Go to the [Integrations page](https://app.gopromptless.ai/integrations) in your Promptless dashboard
2. Click **Connect** on the Notion integration card
3. Authorize Promptless to access your Notion workspace.
4. Select the specific pages and data sources you want to make available as context
To add or remove pages after initial setup, click **Add or remove pages on Notion** in the workspace picker. This deep links over into Notion so you can update your sharing selections.
# Slite
> Connect Slite as a read-only context source so Promptless reuses the feature names, limits, and rationale your team settled in its notes and PRDs.
Slite integration provides **read-only** access to your team’s knowledge base for documentation automation. When Slite is configured as a context source, Promptless can search your Slite notes for relevant information when creating suggestions. It never modifies your Slite content.
## How it works as a context source
[Section titled “How it works as a context source”](#how-it-works-as-a-context-source)
When Slite is enabled as a context source:
* **Note Search**: Promptless searches your Slite workspace for relevant notes when creating documentation suggestions
* **Knowledge Context**: Internal documentation, product specs, and team knowledge from Slite inform new documentation
* **URL Resolution**: When triggers reference Slite note URLs, Promptless automatically fetches the linked note content
## Example
[Section titled “Example”](#example)
A developer merges a GitHub PR that adds a configurable retry limit to your webhook delivery system. The feature was scoped in a PRD in your Slite workspace. The PRD spells out the official feature name (“Delivery Retry Policy”), the default and maximum retry counts, and the reasoning behind the cap.
When Promptless picks up the merged PR, it searches your Slite workspace for related notes and resolves any Slite URLs referenced in the PR description. It reads the PRD and carries those agreed-upon details into the documentation suggestion instead of inferring them from the diff alone. That means the same feature name, the same retry limits, and the same rationale your team already settled on. The result is a docs PR that matches the spec your product and engineering teams wrote, not a re-derived approximation.
## Configuration
[Section titled “Configuration”](#configuration)
Slite only supports API key authentication rather than OAuth. To connect Slite:
1. In your Slite account, go to **Settings > API** and create a new API key. The API key grants Promptless read access to all notes visible to the account that created the key. We recommend using a service account with appropriate access scope.
2. Go to the [Integrations page](https://app.gopromptless.ai/integrations) in your Promptless dashboard.
3. Click **Connect** on the Slite integration card.
4. Enter your API key and click **Connect**.
## Data privacy
[Section titled “Data privacy”](#data-privacy)
Promptless queries Slite data in real-time and doesn’t store any of your Slite content. All searches are performed on-demand when documentation updates are needed. Query results are cached briefly to improve performance during a single documentation session, then discarded.
Promptless only reads from Slite. Promptless never creates, updates, or deletes notes.
# GitHub repos
> Store your documentation in a GitHub repository and have Promptless open pull requests there, using the docs-as-code platform you already publish with.
Tip
You can set up a doc collection by hand as this page describes. You can also ask Promptless in Slack or Microsoft Teams to do it for you. For example, “@Promptless add my acme/docs repo as a doc collection.” See [Ask Promptless to update your configuration](/docs/for-docs/get-the-most-out/ask-promptless-to-update-config).
The most common documentation setup uses GitHub repositories to store documentation content that syncs to hosting providers. This “docs as code” approach allows you to version control your documentation alongside your code.
Note
**Prerequisite**: Before creating a GitHub-based doc collection, you must first [connect GitHub](/docs/for-docs/reference/integrations/github) on the integrations page. Without an active GitHub connection, you won’t see any repositories in the dropdown when setting up your doc collection.
## Supported docs platforms
[Section titled “Supported docs platforms”](#supported-docs-platforms)
Promptless publishes using any of these docs hosting platforms and frameworks:
* **Fern**
* **Mintlify**
* **ReadMe** (Refactored)
* **GitBook**
* **Docusaurus**
* **MkDocs**
* **Hugo**
* **Ghost**
* **Nextra**
* **Starlight** (Astro)
* **Vocs**
* **Custom platforms** (as long as the content is in a repo)
## How it works
[Section titled “How it works”](#how-it-works)
1. **Repository Setup**: Your documentation files live in a GitHub repository
2. **Promptless Integration**: The Promptless GitHub App has write access to your docs repository
3. **Automatic PRs**: When documentation updates are needed, Promptless creates pull requests in your docs repo
4. **Platform Sync**: Your documentation platform automatically syncs changes from GitHub
## Configuration
[Section titled “Configuration”](#configuration)
After setting up the GitHub integration, you can configure your doc collections in the [Configuration page](https://app.gopromptless.ai/configuration). Doc collections are defined in the `doc_collections` section of your `promptless.yaml` file, keyed by repository name:
```yaml
doc_collections:
acme/documentation:
docs_framework: docusaurus
docs_root_url: https://docs.acme.com
filter:
- docs/
```
Triggers that initiate documentation updates are configured separately in the `triggers` section. See the [Configuration Reference](/docs/for-docs/reference/configuration-reference) for the complete schema.
## Automatic PR creation
[Section titled “Automatic PR creation”](#automatic-pr-creation)
When automatic PR creation (`auto_create_pr`) is enabled in your [publishing policies](/docs/for-docs/reference/configuration-reference#policies):
* Promptless automatically creates a new PR in your documentation repository with suggested changes
* For GitHub PR triggers, the documentation PR is linked in a comment on the original code PR. You can disable these comments with `suppress_source_pr_comments: true` in your policy.
* For [commit triggers](/docs/for-docs/connect/triggers/github-commits), you can enable auto-merge to automatically merge documentation PRs as soon as they’re created (`auto_merge: true`)
## Read-only integrations (public repositories)
[Section titled “Read-only integrations (public repositories)”](#read-only-integrations-public-repositories)
A doc collection can be set up for a public repository and backed by a [GitHub (read-only)](/docs/for-docs/reference/integrations/github-read-only) integration. In that case, Promptless publishes through a pull request from a fork into your upstream base branch. (This doesn’t work for private repos, which need the [standard GitHub App](/docs/for-docs/reference/integrations/github).) Promptless creates the fork itself. See the [GitHub (read-only) integration](/docs/for-docs/reference/integrations/github-read-only) for how this works.
## Automated CI check and build issue resolution
[Section titled “Automated CI check and build issue resolution”](#automated-ci-check-and-build-issue-resolution)
When Promptless opens a documentation PR, it automatically monitors the pull request for quality issues. Problems include failed CI checks, linting errors, Vale rule warnings, and broken links or build problems detected by your documentation hosting provider. When any of these occur, Promptless automatically analyzes the issues and pushes fixes directly to the PR branch.
This automated issue resolution works seamlessly with your existing GitHub workflow - there’s no additional configuration needed. Quality problems get resolved in the background while you focus on content rather than troubleshooting technical issues.
## Trigger events in pull request descriptions
[Section titled “Trigger events in pull request descriptions”](#trigger-events-in-pull-request-descriptions)
When Promptless creates a pull request for documentation updates, the PR description automatically includes a list of the trigger events. These are the events that led to those changes. This provides valuable context for reviewers and creates clear traceability between documentation updates and their originating events.
The trigger events section in the PR description includes:
* Links back to the original source (e.g., Slack threads, GitHub PRs, support tickets)
* Brief descriptions of what triggered the documentation update
* Easy navigation to review the context that prompted the changes
### Slack trigger link labels
[Section titled “Slack trigger link labels”](#slack-trigger-link-labels)
For Slack triggers, the link label shows where the message came from along with a content snippet:
* **Public channels:** “Message in Slack channel #docs: please update the API guide”
* **Direct messages:** “Private Slack DM with Jane Doe: can we add an example here”
* **Group messages:** “Private Slack group message: the onboarding flow needs updating”
### Private messages and access limitations
[Section titled “Private messages and access limitations”](#private-messages-and-access-limitations)
Reviewers without access to a private Slack conversation see Slack’s “There’s been a glitch” error when clicking the trigger link. To prevent confusion, private message links are clearly labeled as such (“Private Slack DM” or “Private Slack group message”). Promptless also adds a second link to the suggestion’s Triggers & Analysis tab in the dashboard. Anyone with dashboard access can read the full message there, regardless of their Slack permissions.
## Path scope (documentation directories)
[Section titled “Path scope (documentation directories)”](#path-scope-documentation-directories)
Path scope controls which files Promptless can modify in your documentation repository. When you specify directories during doc collection setup, Promptless enforces these boundaries:
* **All files allowed (default):** If no directories are specified, Promptless can create and modify files anywhere in the repository.
* **Scoped to specific paths:** When directories are specified, Promptless can only modify files within them. A file must match one of those paths exactly or be nested inside one of those directories.
For example, if your path scope is set to `docs/guides`, Promptless can modify `docs/guides/getting-started.md` and `docs/guides/advanced/configuration.md`, but cannot modify `README.md` or `src/components/Button.tsx`.
Path scopes support both directories and individual files. A scope entry like `CHANGELOG.md` allows only that specific file, while `docs/` allows any file under that directory.
When Promptless creates a suggestion with changes outside the configured scope, the suggestion is rejected with an error listing which files are out of scope. This prevents accidental modifications to files outside your documentation area, which is useful for monorepos where docs live alongside source code.
## Edit doc collection settings
[Section titled “Edit doc collection settings”](#edit-doc-collection-settings)
You can edit certain doc collection settings directly in the dashboard. Click the edit button on any doc collection card to open the settings modal.
Note
Creating, editing, and deleting doc collections requires the organization Admin role, whether you use the dashboard or the API. An API key can perform these actions only when the user it was issued to is an admin. All members can still view the doc collection list.
**Editable settings:**
* **Docs framework**: The documentation framework your site uses (Docusaurus, MkDocs, etc.)
* **Config path**: Path to your documentation configuration file
* **Published URL**: Your public documentation site URL
* **Vale config**: Enable or disable Vale linting and set the config path
* **[Doc Detective](/docs/for-docs/audit/doc-detective)**: Enable or disable Doc Detective testing and set the config path
**Settings that require support:**
Platform, repository, and branch are scope-defining fields that cannot be edited in the dashboard. To change these settings, contact .
## Multi-platform publishing
[Section titled “Multi-platform publishing”](#multi-platform-publishing)
Promptless can publish to multiple documentation repositories simultaneously, allowing you to use the same trigger events and context sources across different doc sites.
Tip
For teams using multiple doc sites, create separate projects for each documentation location to maintain clear separation of content and workflows.
## Request additional platforms
[Section titled “Request additional platforms”](#request-additional-platforms)
Need to integrate with a Git-hosted platform beyond GitHub and GitLab? We’re continuously expanding platform support based on user feedback. Contact . Also contact us if you’re hoping to migrate to a new docs platform. We’ll be happy to help you choose and set up.
## Setup instructions
[Section titled “Setup instructions”](#setup-instructions)
To connect GitHub to Promptless, see the [GitHub Integration](/docs/for-docs/reference/integrations/github) setup guide.
## Frequently asked questions
[Section titled “Frequently asked questions”](#frequently-asked-questions)
I don’t see any repositories in the dropdown when creating a doc collection
If the repository dropdown shows “No options” when creating a doc collection, you need to connect GitHub first. Go to the [integrations page](https://app.gopromptless.ai/integrations) and click “Connect GitHub” to install the Promptless GitHub App. Once GitHub is connected, return to creating your doc collection and your repositories appear in the dropdown.
If you’ve already connected GitHub but still don’t see your repositories, you may need to grant Promptless access to those specific repositories. Visit your GitHub organization settings, find the Promptless GitHub App under “Third-party Access” → “GitHub Apps”, and add the repositories you need.
# GitLab projects
> Store your documentation in a GitLab project, on gitlab.com or self-hosted, and have Promptless open merge requests there through a connected group access token, using the docs-as-code platform you already publish with.
Tip
You can set up a doc collection by hand as this page describes. You can also ask Promptless in Slack or Microsoft Teams to do it for you. For example, “@Promptless add my acme/docs GitLab project as a doc collection.” See [Ask Promptless to update your configuration](/docs/for-docs/get-the-most-out/ask-promptless-to-update-config).
You can store your documentation in a GitLab project and have Promptless publish updates there. This docs-as-code approach keeps your documentation under version control alongside the rest of your work. It supports both gitlab.com and self-hosted GitLab.
Note
**Prerequisite**: Before creating a GitLab-based doc collection, you must first [connect GitLab](/docs/for-docs/reference/integrations/gitlab) on the integrations page. The connected group access token must have the write-capable `api` scope so Promptless can push a branch and open a merge request. If the repository picker is missing or lists no GitLab projects, one of two things is wrong. Either GitLab isn’t connected yet, or the group token’s project inventory doesn’t include the project you want. The [GitLab integration](/docs/for-docs/reference/integrations/gitlab) page covers connecting GitLab and scoping the token to the right group.
## How it works
[Section titled “How it works”](#how-it-works)
1. **Project setup**: Your documentation files live in a GitLab project.
2. **Promptless access**: Promptless reaches the project using your connected GitLab group access token, which needs the `api` scope.
3. **Automatic merge requests**: When documentation updates are needed, Promptless pushes a branch directly to your docs project and opens a merge request. There’s no fork step, unlike the GitHub open-source flow.
4. **Platform sync**: Your documentation platform automatically syncs changes from GitLab.
## Configuration
[Section titled “Configuration”](#configuration)
Add a GitLab doc collection on the **Doc collections** tab of the [Configuration page](https://app.gopromptless.ai/configuration).
Under **Which repository should Promptless document?**, the picker lists your connected GitHub and GitLab repositories, or you can type a repository path. Type the project’s full path including every namespace segment, such as `acme/platform/developer-docs` for a project in a nested subgroup. Every connected GitLab project appears here, gitlab.com and self-hosted alike. A self-hosted project needs no special path through the configuration editor.
You don’t pick a platform. Promptless derives it from the connection that reaches the repository. It shows the result as read-only text under **Where this repo lives**. For GitLab, that text is the platform name, “GitLab”, followed by “Promptless opens merge requests on this project directly.”
The **GitLab host** field tells Promptless which instance to reach. Leave it blank for gitlab.com. For self-hosted GitLab, enter just the hostname, such as `gitlab.acme.com`, with no `https://` and no path.
The rest of the form matches a GitHub doc collection: your docs framework, published URL, and the directories Promptless can modify.
In YAML, a GitLab collection sets `platform: gitlab` and is keyed by the project’s full path, including every namespace segment:
```yaml
doc_collections:
acme/docs: # gitlab.com project
platform: gitlab
docs_framework: docusaurus
acme/platform/developer-docs: # self-hosted, nested namespace
platform: gitlab
host: gitlab.acme.com
docs_framework: mkdocs
```
See the [configuration reference](/docs/for-docs/reference/configuration-reference#doc-collections) for every field a doc collection accepts.
## Automatic merge request creation
[Section titled “Automatic merge request creation”](#automatic-merge-request-creation)
When automatic PR creation (`auto_create_pr`) is enabled in your [publishing policies](/docs/for-docs/reference/configuration-reference#policies), Promptless opens a merge request in your documentation project with the suggested changes. Merge request status is tracked the same way GitHub pull request status is. Because GitLab has no draft flag at creation time, Promptless marks a draft merge request with a `Draft:` title prefix.
When Promptless opens or updates a merge request, the suggestion’s citations post as diff-positioned discussion threads on the merge request itself. They don’t appear only in the dashboard, so reviewers see each source at the line it supports. A citation that can’t be anchored to the diff falls back to an unanchored merge-request thread that names the file and line.
Promptless then resolves each citation discussion shortly after opening the merge request. The evidence stays on the diff, so projects that require all discussions resolved can still merge. If you reply to a discussion or reopen one, Promptless leaves it alone. This applies to every organization, with no setting to configure.
You can also enable automatic merging (`auto_merge`) in your publishing policies to have Promptless merge its documentation changes automatically. On GitLab, Promptless attempts an immediate squash merge as soon as it opens the merge request. See [Policies](/docs/for-docs/reference/configuration-reference#policies) for how publishing rules resolve.
GitLab auto-merge does not wait for pipelines
GitLab auto-merge behaves differently from the GitHub auto-merge path. Promptless deliberately does not use GitLab’s “merge when pipeline succeeds”. It attempts the merge right away, does not wait for a pipeline, and does not retry later. The merge request might not be able to merge at that moment. For example, a required pipeline hasn’t passed, approvals are pending, or there are conflicts. When that happens, GitLab reports a failure and Promptless leaves the merge request open for you to merge manually.
## Path scope (documentation directories)
[Section titled “Path scope (documentation directories)”](#path-scope-documentation-directories)
Path scope controls which files Promptless can modify in your documentation project, exactly as it does for GitHub repositories. When you specify directories during doc collection setup, Promptless enforces these boundaries:
* **All files allowed (default):** If no directories are specified, Promptless can create and modify files anywhere in the project.
* **Scoped to specific paths:** When directories are specified, Promptless can only modify files within them. A file qualifies if it matches one of those paths exactly or is nested inside one of those directories.
Path scopes support both directories and individual files. A scope entry like `CHANGELOG.md` allows only that specific file, while `docs/` allows any file under that directory. When Promptless creates a suggestion with changes outside the configured scope, the suggestion is rejected with an error listing which files are out of scope.
## Setup instructions
[Section titled “Setup instructions”](#setup-instructions)
To connect GitLab to Promptless, see the [GitLab integration](/docs/for-docs/reference/integrations/gitlab) setup guide.
# How Promptless learns your docs
> See how Promptless indexes your existing docs, builds a product ontology, and learns your writing style with Voice Match before drafting the first suggestion.
Before creating the first suggestion, Promptless analyzes your existing docs to understand the product, writing style, and how your docs are organized.
## Initial ingestion
[Section titled “Initial ingestion”](#initial-ingestion)
* Builds a searchable index to find relevant content when analyzing triggers
* Maps relationships between pages, sections, and topics
## Product ontology
[Section titled “Product ontology”](#product-ontology)
Promptless builds an understanding of your product’s structure - what features you have, how they relate to each other, and the terminology your team uses. This **product ontology** helps Promptless:
* Know which documentation pages are relevant when a specific feature changes
* Understand your product’s concepts and terminology
* Identify connections between features that might require coordinated documentation updates
For example, suppose your product has a “Workspaces” feature with sub-features like “Permissions” and “Invitations.” Promptless understands these relationships and can update all relevant pages when workspace behavior changes.
## Voice and style learning
[Section titled “Voice and style learning”](#voice-and-style-learning)
Promptless analyzes how your documentation is written - tone, sentence structure, formatting patterns, and terminology choices. This powers **Voice Match**, ensuring suggestions sound like they were written by your team.
Promptless learns patterns like:
* Whether you write formally or conversationally
* The specific words and phrases you use for concepts
* How you organize content, use headings, and format examples
* Your preferences for capitalization, punctuation, and code formatting
When drafting content, Promptless references similar existing pages to match their style.
## Continuous learning
[Section titled “Continuous learning”](#continuous-learning)
Promptless continues learning as you use it. When you edit suggestions or provide feedback, Promptless learns your preferences for future suggestions. As your documentation grows and changes, Promptless adapts to your evolving style and automatically re-indexes when you publish updates to stay current.
## Custom agent instructions with AGENTS.md
[Section titled “Custom agent instructions with AGENTS.md”](#custom-agent-instructions-with-agentsmd)
You can provide persistent guidance to Promptless by creating an `AGENTS.md` file in the root of your docs repository. Use this file to specify project-specific conventions, terminology, and documentation standards that the agent follows when creating suggestions.
### How it works
[Section titled “How it works”](#how-it-works)
When Promptless starts working on your documentation, it checks the root of your docs repository for an `AGENTS.md` file. If found, the content is included in the agent’s instructions, applying your custom guidance to every suggestion.
### What to include
[Section titled “What to include”](#what-to-include)
Use your `AGENTS.md` file to communicate:
* **Terminology preferences** - Specific words or phrases your team uses for concepts
* **Formatting conventions** - How to structure code examples, callouts, or headings
* **Content guidelines** - What information should always be included (or excluded)
* **Style rules** - Voice, tone, or writing patterns unique to your documentation
### Example AGENTS.md
[Section titled “Example AGENTS.md”](#example-agentsmd)
```markdown
# Documentation Guidelines
## Terminology
- Use "workspace" not "project" when referring to user containers
- Always capitalize "API" but lowercase "endpoint"
- Prefer "authentication" over "auth" in prose
## Formatting
- Use admonitions for warnings and important notes
- Include a "Before you begin" section in procedural docs
- Code examples should include comments explaining each step
## Style
- Write in second person ("you") rather than third person
- Keep sentences under 25 words when possible
- Use active voice
```
### Relationship with CLAUDE.md
[Section titled “Relationship with CLAUDE.md”](#relationship-with-claudemd)
If your repository already has a `CLAUDE.md` file (used by Claude Code CLI), Promptless uses that instead. The `AGENTS.md` file is only loaded when no `CLAUDE.md` is present, maintaining compatibility with existing Claude Code configurations.
## Use your existing skills
[Section titled “Use your existing skills”](#use-your-existing-skills)
If you already keep [Agent Skills](https://docs.claude.com/en/docs/agents-and-tools/agent-skills/overview) in your documentation repository, Promptless uses them automatically. Skills you’ve added under `.claude/skills/`, `.agents/skills/`, or `.cursor/skills/` are picked up with no extra configuration. When a documentation task matches a skill’s description, the agent runs that skill instead of deriving the workflow from scratch.
This means the same skills you’ve authored for other AI coding agents apply to your documentation work too. There’s nothing to set up in Promptless: keep your skills where they already live, and the agent uses them as appropriate.
### How Promptless discovers skills
[Section titled “How Promptless discovers skills”](#how-promptless-discovers-skills)
Promptless scans for skills before each documentation task. A skill is a directory containing a `SKILL.md` file, and Promptless checks the source directories in a fixed order: `.claude/skills/` first, then `.agents/skills/`, then `.cursor/skills/`. When the same skill name appears in more than one of these directories, the first match wins. A skill under `.claude/skills/` takes precedence over a same-named skill under `.cursor/skills/`. Skill names are case-sensitive.
### Guide how Promptless uses your skills
[Section titled “Guide how Promptless uses your skills”](#guide-how-promptless-uses-your-skills)
To shape when and how Promptless reaches for your skills, add guidance to the `PROMPTLESS.md` file in your [Knowledge Base](https://app.gopromptless.ai/settings/knowledge). For example, you can tell the agent to prefer a particular skill for changelog entries. You can also tell it to always run a formatting skill before publishing API reference pages. Promptless reads this guidance alongside your skills and applies it when deciding which skill fits the task at hand.
# Source control and access scope
> Understand how Promptless connects to GitHub, GitHub Enterprise, GitLab, and Bitbucket, what access each connection grants, and how to keep that access least-privilege.
Source control is where Promptless watches for changes and publishes documentation. A single Git provider connection can do up to three jobs: activating triggers, supplying code context, and opening documentation pull requests. Each job needs a different level of access. This page covers what each provider connection does, the access it grants, and how to keep that access scoped to the minimum Promptless needs.
## What each provider connects
[Section titled “What each provider connects”](#what-each-provider-connects)
Not every provider does every job. The table below shows what each source-control connection is used for today, drawn from each integration’s setup guide.
| Provider | Used for |
| ---------------------------------------------------------------------------- | --------------------------------------------------- |
| [GitHub](/docs/for-docs/reference/integrations/github) | Triggers, context, and publishing |
| [GitHub Enterprise](/docs/for-docs/reference/integrations/github-enterprise) | Triggers, context, and publishing (Server or Cloud) |
| [GitLab](/docs/for-docs/reference/integrations/gitlab) | Triggers, context, and publishing |
| [Bitbucket](/docs/for-docs/reference/integrations/bitbucket) | Triggers |
GitHub-based and GitLab-based collections both receive documentation changes: Promptless opens pull requests on GitHub repositories and merge requests on GitLab projects. GitLab also serves as a trigger and context source, so one GitLab connection can do all three jobs. Bitbucket connects as a trigger source only. Promptless monitors its pull requests but does not publish documentation to them. For how publishing to a GitLab project works, see [GitLab projects (docs as code)](/docs/for-docs/connect/doc-locations/gitlab-projects).
Promptless also has a [read-only GitHub app](/docs/for-docs/reference/integrations/github-read-only) that grants read access and webhooks only and publishes to public repositories through a fork.
## How each connection authenticates
[Section titled “How each connection authenticates”](#how-each-connection-authenticates)
Each provider uses its own authentication model, and each one limits Promptless to the repositories and actions you authorize.
### GitHub
[Section titled “GitHub”](#github)
Promptless connects through its official GitHub App and authenticates with JWTs generated by the app installation. The app grants read and write access to the repositories you select, and either you or Promptless can revoke that access at any time. During installation, you choose which repositories to grant. These are typically your source code and, if your docs live in GitHub, your documentation repo.
To adjust access later, open your GitHub organization settings, go to **Third-party Access → GitHub Apps**, find **Promptless**, and click **Configure**. There you can switch between **All repositories** and **Only select repositories** and add or remove individual repositories. The doc collection setup screen also links to these settings through the **Manage repository access** button. Teams that cannot grant write access can install the [GitHub (read-only) app](/docs/for-docs/reference/integrations/github-read-only) instead. It grants read access and webhooks only and publishes to public repositories through a fork.
### GitHub Enterprise
[Section titled “GitHub Enterprise”](#github-enterprise)
GitHub Enterprise Server and Cloud users configure a custom GitHub App with an explicit permission set. Promptless requires these repository permissions:
* **Pull requests: read and write**, to read pull request content, create documentation pull requests, and comment for feedback.
* **Contents: read and write**, to read repository files and create or update documentation files.
* **Commit statuses: read only**, to understand the state of pull requests and commits.
* **Webhooks: read and write**, to manage webhook configuration and receive repository events.
Note
If your GitHub Enterprise instance sits behind a firewall or uses IP restrictions, you must allow Promptless’s IP addresses. Otherwise webhook delivery and API calls cannot reach it. The full list and the primary egress IP are in the [GitHub Enterprise setup guide](/docs/for-docs/reference/integrations/github-enterprise). IP allow lists aren’t exclusive to GitHub Enterprise. Standard GitHub.com organizations can enforce them too. If your organization blocks Promptless, see [Organization IP allow lists](/docs/for-docs/reference/integrations/github#organization-ip-allow-lists).
### GitLab
[Section titled “GitLab”](#gitlab)
GitLab connects with a group access token that carries the `api` scope, which is read-write and grants access across the whole group. Publishing uses that same token. There’s no separate publishing credential.
Connecting a GitLab group always writes with the token, because it creates the merge-request webhooks and sets the bot avatar. There’s no read-only option. A trigger or context source needs the `api` scope with the **Maintainer** role (webhook management is Maintainer-gated). A docs destination needs the `api` scope with at least the **Developer** role to push a branch and open a merge request. Promptless restricts those writes to the projects you configure as doc collections. This is an application-level restriction Promptless enforces, not a limit imposed by the token itself.
For a hard technical limit, scope the group access token to a group or subgroup that contains only your documentation projects.
### Bitbucket
[Section titled “Bitbucket”](#bitbucket)
Bitbucket connects with a username and an app password scoped to a single workspace. When you create the app password, grant **Repositories: Read**, **Pull requests: Read and Write**, and **Webhooks: Read and Write**. Because the app password is workspace-scoped, Promptless reaches only the repositories and actions you explicitly authorize.
## Scope publishing access to your docs
[Section titled “Scope publishing access to your docs”](#scope-publishing-access-to-your-docs)
Publishing needs write access to the repository where your docs live. The Promptless GitHub App has write access to a GitHub documentation repository so it can open pull requests. The connected group access token lets Promptless push a branch and open a merge request on a GitLab documentation project. Use **path scope** to limit where those writes land.
Path scope controls which files Promptless can modify in a documentation repository. Specify directories during doc collection setup, and Promptless enforces those boundaries. With no directories set, it can modify files anywhere in the repo. With directories set, it can modify only files that match one of those paths or nest inside them. Path scope accepts both directories and individual files, so an entry like `docs/` allows any file under that directory, while `CHANGELOG.md` allows only that one file. If Promptless drafts a change outside the configured scope, it rejects the suggestion and returns an error listing the out-of-scope files. This is useful for monorepos where docs live alongside source code.
For the full doc collection setup, including path scope and platform support, see [GitHub repos (docs as code)](/docs/for-docs/connect/doc-locations/github-repos) and [GitLab projects (docs as code)](/docs/for-docs/connect/doc-locations/gitlab-projects).
## Keep access least-privilege
[Section titled “Keep access least-privilege”](#keep-access-least-privilege)
Promptless follows the principle of least privilege, granting only the access each job needs. Its connections give you several ways to enforce that:
* **Select only the repositories Promptless needs.** On GitHub, choose **Only select repositories** rather than **All repositories**, and manage the list from your GitHub organization settings.
* **Prefer read-only access where you don’t publish.** For a public open-source repository, the [GitHub (read-only) app](/docs/for-docs/reference/integrations/github-read-only) opens documentation pull requests from a fork. It never takes write access to your repo. For GitLab, narrow the group access token to a group or subgroup that contains only your documentation projects, as described in [GitLab](#gitlab) above.
* **Revoke access at any time.** You or Promptless can revoke the GitHub App connection. You can also rotate or remove provider tokens (GitLab group access token, Bitbucket app password) on the provider side.
For how source-control access fits Promptless’s broader security posture, see [Network architecture](/docs/for-docs/security/network-architecture) and [Data handling and classification](/docs/for-docs/security/data-handling-and-classification).
# Overview
> Choose the events that start a Promptless documentation update, from GitHub and GitLab changes to chat messages, support tickets, and API calls.
Tip
You can set up triggers by hand as this page describes, or ask Promptless in Slack or Microsoft Teams to do it for you. For example, “@Promptless add a GitHub PR trigger for my acme/api repo.” See [Ask Promptless to update your configuration](/docs/for-docs/get-the-most-out/ask-promptless-to-update-config).
Triggers are events that initiate automated documentation updates in Promptless. When a trigger event occurs, Promptless analyzes the context and determines if documentation updates are needed.
## Available trigger types
[Section titled “Available trigger types”](#available-trigger-types)
[GitHub PRs](/docs/for-docs/connect/triggers/github-prs)Automatically triggered when pull requests are opened in your GitHub repositories
[GitHub Commits](/docs/for-docs/connect/triggers/github-commits)Monitor direct commits to default branches for documentation updates
[GitHub Issues](/docs/for-docs/connect/triggers/github-issues)Mention @Promptless in issues to request documentation updates
[GitLab Merge Requests](/docs/for-docs/connect/triggers/gitlab-merge-requests)Automatically triggered when merge requests are opened in your GitLab projects
[Slack](/docs/for-docs/connect/triggers/slack-messages)Trigger updates from Slack conversations and support threads
[Microsoft Teams (Beta)](/docs/for-docs/connect/triggers/microsoft-teams-messages)Trigger updates from Microsoft Teams messages and mentions
[Intercom (Beta)](/docs/for-docs/connect/triggers/intercom-tickets)Monitor support conversations for documentation gaps based on recurring user questions
[Jira](/docs/for-docs/connect/triggers/jira)Start a session from a Jira ticket and reply on the ticket
[API](/docs/for-docs/connect/triggers/api)Trigger documentation updates from external systems via HTTP API
[Schedule](/docs/for-docs/connect/triggers/schedule)Run standing instructions on a repeating cron schedule
[MCP](/docs/for-docs/connect/triggers/mcp)Start documentation tasks from your editor over MCP—no API key required
## How triggers work
[Section titled “How triggers work”](#how-triggers-work)
When a trigger event occurs:
1. **Event Detection**: Promptless receives notification of the event (PR opened, message posted, etc.)
2. **Context Analysis**: The system analyzes the event content, including code changes, conversations, or support interactions
3. **Relevance Assessment**: Promptless determines if the event requires documentation updates
4. **Suggestion Creation**: If relevant, Promptless creates documentation suggestions based on the trigger content and connected context sources
## Configure triggers
[Section titled “Configure triggers”](#configure-triggers)
Triggers are configured in your organization’s [Configuration page](https://app.gopromptless.ai/configuration) using the `triggers` section of your `promptless.yaml` file. For each trigger, you can:
* Specify which repositories or channels to monitor
* Configure trigger-specific settings (e.g., directory filters, branch targeting)
* Set up publishing behavior through policy rules
See the [Configuration Reference](/docs/for-docs/reference/configuration-reference) for the complete YAML schema.
Note
Need a trigger type that isn’t currently supported? Contact us at - we regularly add new trigger types based on user feedback.
## Automatic PR creation
[Section titled “Automatic PR creation”](#automatic-pr-creation)
When automatic PR creation is enabled in your [publishing policies](/docs/for-docs/reference/configuration-reference#policies), Promptless automatically creates pull requests in your documentation repository with suggested changes. For [commit triggers](/docs/for-docs/connect/triggers/github-commits), you can optionally enable auto-merge to automatically merge documentation PRs as soon as they’re created.
Automatic PR creation is available for all Git-hosted documentation platforms.
## Trigger events in documentation PRs
[Section titled “Trigger events in documentation PRs”](#trigger-events-in-documentation-prs)
When Promptless creates a pull request for documentation updates, it automatically includes a list of trigger events in the PR description. These are the events that led to those changes. This provides valuable context for reviewers and creates clear traceability between documentation updates and their originating events.
## Backfill suggestions
[Section titled “Backfill suggestions”](#backfill-suggestions)
Backfill suggestions lets you run Promptless on pull requests that already exist. You can catch up on documentation for work that merged before a trigger was watching. It’s available on saved pull request and merge request triggers: GitHub PRs, GitLab merge requests, and Bitbucket PRs.
Any organization member can view backfill status, progress, and the suggestions a backfill produced, but only admins can select Launch a backfill.
Open the **Backfill suggestions** panel on a trigger row. Choose a window of the **last 7 days**, **last 14 days**, or **last 30 days**, and select **Preview**. The preview lists the pull requests opened or merged in that window that the trigger matches. It applies the same repository, topic, directory, and branch filters the trigger uses for live events. A trigger can scope repositories by GitHub topic (the **Trigger on repos with certain topics** option, covered in [Repository topics](/docs/for-docs/connect/triggers/github-prs#repository-topics)). For such a trigger, the preview lists pull requests only from repositories that carry a matching topic. Backfill covers up to 1,000 pull requests per repository in the window.
Backfill matches pull requests that were opened or merged but it doesn’t replay historical approvals. A trigger that activates only on first approval returns no backfill results because approval matching applies only to live events going forward.
When the preview looks right, select **Launch backfill** to run it. Promptless processes each pull request live, exactly as it does for a new event. Your publishing policy applies, so backfilled pull requests can create documentation PRs and send notifications. The panel updates with progress as the run works through the list.
Caution
Launching a backfill runs every matched pull request live. With automatic PR creation or auto-merge enabled, a backfill can create or merge documentation PRs and send notifications across all of those pull requests. Preview the list first so you know exactly which pull requests Promptless processes.
# API triggers
> Request documentation updates from your CI/CD pipeline or any system that can make an HTTP request, using a Promptless API trigger.
API triggers let external systems request documentation updates from Promptless. Connect your CI/CD pipelines, custom automation tools, or any system that can make HTTP requests.
Tip
For interactive editor use without managing an API key, connect over MCP instead. Choose by caller. An API key suits server-to-server and CI callers. [MCP triggers](/docs/for-docs/connect/triggers/mcp) suit your editor, with no key to create or paste.
## Use cases
[Section titled “Use cases”](#use-cases)
API triggers work well when you want to:
* Integrate Promptless into CI/CD pipelines that run after deployments
* Build custom automation workflows that trigger documentation updates
* Connect external systems (ticketing, project management, custom tools) to Promptless
* Programmatically request documentation updates without using Slack or the dashboard
## Set up API triggers
[Section titled “Set up API triggers”](#set-up-api-triggers)
API triggers are a built-in trigger type that’s always active when an API key exists, no YAML configuration required.
### Create an API key
[Section titled “Create an API key”](#create-an-api-key)
You create API keys from your dashboard, and each key authorizes requests for your whole organization. Only organization admins can create or revoke keys.
1. Go to [**Settings > API Access**](https://app.gopromptless.ai/settings/api).
2. In the **Create API key** section, enter a **Name** that says what the key is for. A clear name lets you tell your keys apart when you revoke one later.
3. Select **Create key**.
4. Copy the secret from the **Copy this key now** section as soon as it appears. Promptless shows it only once.
Caution
Store your API key securely. Promptless stores only a hash of the key for validation.
### Key management
[Section titled “Key management”](#key-management)
* **No single active key**: An organization can hold many API keys at once, each named for the integration that uses it.
* **Existing keys carry forward**: If your organization already had an API key, it keeps working and appears in the list under the name `Default`.
* **Purpose-based names**: Give each key a name that describes what it’s for, such as a CI pipeline, a Zapier connection, or a script. A separate key per integration lets you revoke or rotate that one key without touching the others. Do that after you retire that integration, or after a leak. Each active key needs a distinct name within your organization.
* **Independent revocation**: Revoking or creating a key affects only that key; the others keep working. This replaces the earlier behavior, where regenerating the key logged out every other caller. Revoking is permanent. A revoked key can’t be restored, so move any caller still using it to another key first.
* **At-a-glance status**: Each key in the list shows its **Name** and its key prefix (`sk-pl-...`, under the **Key** column). It also shows when it was **Created** and when it was **Last used**. Each key row has its own **Revoke** control; select it and confirm on that row to remove the key.
Tip
To rotate a key, create a new one, move your integrations over to it, then revoke the old one. Because both keys work at the same time, there’s no forced break and no need to cut every consumer over at once.
## Use the API
[Section titled “Use the API”](#use-the-api)
For the full request and response schemas, status codes, and an interactive explorer, see the [API Reference](/docs/for-docs/api/operations/submitapitriggerv1/). The sections below cover these endpoints with examples.
### Base URL and versioning
[Section titled “Base URL and versioning”](#base-url-and-versioning)
All requests use the base URL `https://api.gopromptless.ai`. The current API version is `/v1`. New integrations should use `POST /v1/triggers`; the unversioned `POST /triggers` is retained for callers built before versioning existed and runs the same operation through the same handler.
### Endpoint
[Section titled “Endpoint”](#endpoint)
```http
POST /v1/triggers
```
### Authentication
[Section titled “Authentication”](#authentication)
Include your API key as a Bearer token in the Authorization header:
```plaintext
Authorization: Bearer sk-pl-your-api-key
```
The bearer token determines which organization receives the trigger. There is no need to specify an organization ID in the URL.
### Request format
[Section titled “Request format”](#request-format)
Send a JSON body with your documentation instructions:
```json
{
"instructions": "Update the getting started guide with the new authentication flow",
"context": {
"ticket_id": "ENG-123",
"requested_by": "deploy-bot"
}
}
```
| Field | Type | Required | Description |
| -------------- | ------ | -------- | ----------------------------------------------------------------------------------------------------------------------------------------------------------- |
| `instructions` | string | Yes | What you want Promptless to document. Be specific about which docs to update and what changes to make. |
| `context` | object | No | Additional metadata to include with the request. This appears in trigger history for reference and is passed through to the workflow as additional context. |
### Example request
[Section titled “Example request”](#example-request)
```bash
curl -X POST "https://api.gopromptless.ai/v1/triggers" \
-H "Authorization: Bearer sk-pl-your-api-key" \
-H "Content-Type: application/json" \
-d '{
"instructions": "Document the new rate limiting feature added in v2.5",
"context": {
"release": "v2.5.0",
"jira_ticket": "DOC-456"
}
}'
```
### Response
[Section titled “Response”](#response)
A successful request returns a `202 Accepted` response:
```json
{
"trigger_event_id": "550e8400-e29b-41d4-a716-446655440000",
"deduplicated": false
}
```
`deduplicated` is `false` for a fresh submission. It is `true` only when an `Idempotency-Key` matched an earlier submission, described next.
### Idempotent submissions
[Section titled “Idempotent submissions”](#idempotent-submissions)
Send an optional `Idempotency-Key` request header to make a submission safe to retry. The key is a string of up to 255 characters.
* A fresh submission returns a new `trigger_event_id` and `"deduplicated": false`.
* A repeat submission that reuses a key already accepted returns the **original** `trigger_event_id` and `"deduplicated": true`, without creating a second trigger event.
* Keys are scoped to your organization. Two organizations can use the same key string without affecting each other.
* A failed submission (any `4xx` or `5xx`) does not consume the key, so you can retry it with the same key.
* `POST /triggers` and `POST /v1/triggers` share one idempotency scope, so a key used on one path is recognized on the other.
Reuse a key only for retries of the *same* request. Reusing one key for two genuinely different requests silently discards the second and points its `trigger_event_id` at the first request’s task. Derive the key deterministically from the request’s content, for example a hash of `instructions` plus `context`. A genuine retry then reuses the same key, while two genuinely different requests get different keys.
```bash
curl -X POST "https://api.gopromptless.ai/v1/triggers" \
-H "Authorization: Bearer sk-pl-your-api-key" \
-H "Content-Type: application/json" \
-H "Idempotency-Key: deploy-2026-08-20-v2.5.0" \
-d '{
"instructions": "Document the new rate limiting feature added in v2.5"
}'
```
A repeat with the same key returns the original trigger event:
```json
{
"trigger_event_id": "550e8400-e29b-41d4-a716-446655440000",
"deduplicated": true
}
```
### Error responses
[Section titled “Error responses”](#error-responses)
| Status | Error | Description |
| ------ | ---------------------------- | -------------------------------------------------------------------- |
| 400 | `invalid_idempotency_key` | The `Idempotency-Key` header is blank or longer than 255 characters. |
| 400 | `invalid_since` | The `since` parameter is not a valid ISO 8601 timestamp. |
| 400 | `invalid_filter` | `event` and `status` were combined in the same request. |
| 401 | `authentication_failed` | The API key is missing, invalid, or revoked. |
| 409 | `org_not_configured` | Your organization hasn’t finished setting up Promptless. |
| 409 | `no_eligible_doc_collection` | No configured doc collection is eligible to receive the request. |
| 422 | Validation error | The request body is invalid. |
| 500 | `enqueue_failed` | The trigger could not be enqueued for processing. |
| 503 | `runtime_store_unavailable` | Trigger intake is temporarily unavailable. |
`invalid_since` and `invalid_filter` come from the [suggestions endpoint](#suggestions). The API enforces no rate limits today, so it never returns a `429`.
## Read endpoints
[Section titled “Read endpoints”](#read-endpoints)
The `/v1` API also exposes read endpoints for polling integrations: a connection check, the list of your doc collections, and a suggestion lifecycle feed. All three take the same bearer token and return JSON. Each returns `401` when the key is missing, invalid, or revoked, and `503` when the read store is temporarily unavailable.
### Account
[Section titled “Account”](#account)
```http
GET /v1/account
```
Returns the organization tied to your API key. Use it to test a connection and label the account. `org_name` is `null` for an organization created before names were recorded. For the full schema, see the [Get account details reference](/docs/for-docs/api/operations/getaccount/).
```bash
curl "https://api.gopromptless.ai/v1/account" \
-H "Authorization: Bearer sk-pl-your-api-key"
```
```json
{
"org_id": "org_2b5f9c1e",
"org_name": "Acme, Inc."
}
```
### Doc collections
[Section titled “Doc collections”](#doc-collections)
```http
GET /v1/doc-collections
```
Lists the doc collections configured for your organization. Each entry carries its `id`, `name`, `platform`, and `default_branch`. The response is not paged. For the full schema, see the [List doc collections reference](/docs/for-docs/api/operations/listdoccollections/).
```bash
curl "https://api.gopromptless.ai/v1/doc-collections" \
-H "Authorization: Bearer sk-pl-your-api-key"
```
```json
{
"doc_collections": [
{
"id": "3f2504e0-4f89-41d3-9a0c-0305e82c3301",
"name": "acme/docs",
"platform": "github",
"default_branch": "main"
}
]
}
```
### Suggestions
[Section titled “Suggestions”](#suggestions)
```http
GET /v1/suggestions
```
Returns the suggestion lifecycle feed for your organization. That feed covers the suggestions Promptless has created, merged, and closed. For the full schema, see the [List suggestions reference](/docs/for-docs/api/operations/listsuggestions/).
```bash
curl "https://api.gopromptless.ai/v1/suggestions?event=merged&limit=50" \
-H "Authorization: Bearer sk-pl-your-api-key"
```
```json
{
"suggestions": [
{
"id": "7c9e6679-7425-40de-944b-e07fc1f90ae7",
"title": "Document the new rate limiting feature",
"description": "Add a rate limiting section to the API guide.",
"status": "merged",
"trigger_event_id": "550e8400-e29b-41d4-a716-446655440000",
"url": "https://app.gopromptless.ai/suggestions/7c9e6679-7425-40de-944b-e07fc1f90ae7",
"docs_pr_url": "https://github.com/acme/docs/pull/482",
"doc_collection_id": "3f2504e0-4f89-41d3-9a0c-0305e82c3301",
"doc_collection_name": "acme/docs",
"impacted_file_paths": ["docs/api/rate-limits.md"],
"impacted_file_count": 1,
"created_at": "2026-08-20T14:32:00Z",
"merged_at": "2026-08-21T09:15:00Z",
"closed_at": null,
"closed_without_merge": false,
"close_reason": null
}
]
}
```
Each suggestion carries these fields:
| Field | Type | Description |
| ---------------------- | --------------------- | -------------------------------------------------------------------------------------------------------------------------------------------------------------------------------------------------------------------------------------------------------------------------------------------- |
| `id` | string (UUID) | Stable identifier for the suggestion. Deduplicate a feed on this value. |
| `title` | string \| null | Short summary of the documentation change. |
| `description` | string \| null | Longer explanation of the change. |
| `status` | string \| null | Mirrors the docs pull request’s state: `open`, `draft`, `merged`, or `closed`. `null` when the suggestion is drafted but no docs PR has been opened yet; `draft` when a *draft* docs PR is open. |
| `trigger_event_id` | string (UUID) \| null | Identifier of the task that created the suggestion, the same id `POST /v1/triggers` returned. `null` for suggestions created before tasks were recorded. |
| `url` | string | Dashboard link to the suggestion. |
| `docs_pr_url` | string \| null | Link to the documentation pull request, or `null` before a docs PR exists. |
| `doc_collection_id` | string \| null | Identifier of the collection the suggestion targets. |
| `doc_collection_name` | string \| null | Name of that collection. |
| `impacted_file_paths` | array of string | Paths the suggestion changes. |
| `impacted_file_count` | integer | Number of impacted files. |
| `created_at` | string | ISO 8601 time the suggestion was created. |
| `merged_at` | string \| null | ISO 8601 time the docs PR merged, or `null`. |
| `closed_at` | string \| null | ISO 8601 time the suggestion closed, or `null`. |
| `closed_without_merge` | boolean | `true` when the suggestion closed without merging. Use this field to distinguish suggestions that shipped from ones that were rejected. |
| `close_reason` | string \| null | Supplementary machine-readable label for why the suggestion closed (for example, `dashboard_review`), or `null`. This set may expand over time and includes a catch-all such as `unknown_legacy`, so branch on `closed_without_merge` rather than hard-coding against `close_reason` values. |
#### Filtering
[Section titled “Filtering”](#filtering)
Narrow the feed with these query parameters, all optional:
| Parameter | Values | Notes |
| --------- | ----------------------------------- | ---------------------------------------------------------------------------- |
| `event` | `created`, `merged`, `closed` | Selects suggestions by lifecycle event and orders by that event’s timestamp. |
| `status` | `open`, `draft`, `merged`, `closed` | Selects suggestions by current status. |
| `query` | free text | Matches against the title and description. |
| `since` | ISO 8601 timestamp | Inclusive lower limit on the event timestamp. |
| `limit` | 1–100 | Number of suggestions to return. Defaults to 50. |
| `offset` | 0 or greater | Number of suggestions to skip. Defaults to 0. |
`event` and `status` cannot be combined in the same request; sending both returns `400 invalid_filter`. Use `event` to poll a lifecycle feed and `status` to search by current state.
#### Polling
[Section titled “Polling”](#polling)
Results come back newest-first, ordered by the selected `event`’s timestamp in descending order. Build an incremental loop against that order:
* Track the newest event timestamp you have seen and pass it as `since` on the next poll, rather than a wall-clock “now”. Because `since` is an inclusive lower limit, this returns an event that committed a moment after your last poll instead of skipping it.
* Since `since` is inclusive, a row whose event timestamp equals `since` is returned again. Deduplicate results by `id`.
* Omitting `since` returns from the start of the available history.
* Page through a large result set with `limit` and `offset`. A response that returns fewer than `limit` suggestions means you have reached the end of the current set.
* `event` accepts only one value per request and cannot be combined with `status`. The full lifecycle covers created, merged, and closed-without-merge. Track it by running a separate polling loop with its own `since` cursor for each `event` value.
* There is no cursor token; polling is driven entirely by `since`, `limit`, and `offset`.
A minimal incremental loop for one `event` value:
```text
# Run one loop per event value (created, merged, closed).
since = null # omitted on the first poll -> full history
seen = set() # ids already handled, for dedup
repeat on an interval:
offset = 0
newest = since
while true:
page = GET /v1/suggestions?event=merged&limit=100&offset=offset
(add "&since=" when since is set)
for s in page.suggestions: # newest-first
if s.id not in seen:
process(s)
seen.add(s.id)
newest = max(newest, s.merged_at)
if len(page.suggestions) < 100: # fewer than limit -> end of set
break
offset = offset + 100
since = newest # inclusive lower bound for next poll
```
## Task status and messages
[Section titled “Task status and messages”](#task-status-and-messages)
After you submit a task, follow its progress and continue the conversation on the same trigger event. Both operations use the same `Authorization: Bearer sk-pl-...` token. The conversation is available for tasks submitted over the API or MCP and for tasks created through MCP `request_changes`.
### Read task status
[Section titled “Read task status”](#read-task-status)
```http
GET /v1/triggers/{trigger_event_id}
```
`trigger_event_id` is the id returned by `POST /v1/triggers`. A successful request returns `200 OK` with the task’s current state:
| Field | Type | Description |
| ------------------ | -------------- | ---------------------------------------------------------------------------------------------------------------------------------------------------------------------------- |
| `trigger_event_id` | string (UUID) | The task’s id. |
| `status` | string | The task’s current status. The `status` string can change over time, so branch on `finished` to detect completion. |
| `finished` | boolean | `true` when the task has completed or been skipped. |
| `submitted_at` | string | ISO 8601 time the task was submitted. |
| `source` | string | The task’s origin. |
| `request` | string \| null | A one-line summary of the submitted request. |
| `resolution` | string \| null | A human-readable note, not a fixed set of codes, that distinguishes a deliberate no-op from a run that could not finish. Read it for context after `finished` is `true`. |
| `suggestions` | array | A per-task summary of each suggestion this task produced, with the fields listed below. This is a lighter shape than the [Suggestions](#suggestions) feed. |
| `status_guidance` | string | Human- or LLM-readable advice for polling the task and interpreting its outcome. Key on `finished`, a boolean, to detect completion. Do not parse `status_guidance` in code. |
| `messages` | array | The persisted conversation, latest 100, oldest-first. Reading the conversation never consumes it. |
Each entry in `suggestions` carries these fields:
| Field | Type | Description |
| ------------------- | --------------------- | ------------------------------------------------------------------------------------------------------ |
| `id` | string (UUID) | Stable identifier for the suggestion. |
| `title` | string \| null | Short summary of the documentation change. |
| `description` | string \| null | Longer explanation of the change. |
| `status` | string \| null | The docs pull request’s state: `open`, `draft`, `merged`, or `closed`. `null` before a docs PR exists. |
| `doc_collection_id` | string (UUID) \| null | Identifier of the collection the suggestion targets. |
| `docs_pr_url` | string \| null | Link to the documentation pull request, or `null` before a docs PR exists. |
| `branch_name` | string | The git branch in the documentation repository. |
| `labels` | array of string | Labels on the suggestion. |
| `assignees` | array of string | Assignees on the suggestion. |
| `created_at` | string | ISO 8601 time the suggestion was created. |
The `suggestions` array lists the suggestions this task produced with their current `status` and docs pull request link. To track a suggestion’s full lifecycle, including whether it merged or closed without merging, use the [Suggestions](#suggestions) feed and its `closed_without_merge` field.
Each entry in `messages` has the `TaskMessage` shape below. The send endpoint returns the same shape.
| Field | Type | Description |
| ------------------ | ------------- | ---------------------------------------------------------------------------------------------------- |
| `id` | string (UUID) | Stable, immutable identifier. Deduplicate on it. |
| `trigger_event_id` | string (UUID) | The task this message belongs to. |
| `sequence` | integer | The message’s order within the task. |
| `author` | object | `type` is `promptless` or `customer`. `name` is the customer’s email when available, otherwise null. |
| `created_at` | string | ISO 8601 time the message was created. |
| `message` | string | The message text. |
Reading status works for any task source. Promptless populates the `messages` array for tasks submitted over the API or MCP and for tasks created through MCP `request_changes`. A task you submit over the API is eligible for a conversation. An empty `messages` array on your own API task means the task has no messages yet. Tasks from other sources, such as Slack, a GitHub pull request, or the dashboard, carry no conversation, so their `messages` array is empty.
```bash
curl "https://api.gopromptless.ai/v1/triggers/550e8400-e29b-41d4-a716-446655440000" \
-H "Authorization: Bearer sk-pl-your-api-key"
```
```json
{
"trigger_event_id": "550e8400-e29b-41d4-a716-446655440000",
"status": "in_progress",
"finished": false,
"submitted_at": "2026-08-20T14:32:00Z",
"source": "api",
"request": "Document the new rate limiting feature added in v2.5",
"resolution": null,
"suggestions": [
{
"id": "7c9e6679-7425-40de-944b-e07fc1f90ae7",
"title": "Document the new rate limiting feature",
"description": "Add a rate limiting section to the API guide.",
"status": "open",
"doc_collection_id": "3f2504e0-4f89-41d3-9a0c-0305e82c3301",
"docs_pr_url": "https://github.com/acme/docs/pull/482",
"branch_name": "promptless/document-rate-limits",
"labels": ["documentation"],
"assignees": ["deploy-bot@acme.com"],
"created_at": "2026-08-20T14:35:00Z"
}
],
"status_guidance": "Keep polling until finished is true.",
"messages": [
{
"id": "b1e2c3d4-5678-90ab-cdef-1234567890ab",
"trigger_event_id": "550e8400-e29b-41d4-a716-446655440000",
"sequence": 1,
"author": { "type": "customer", "name": "deploy-bot@acme.com" },
"created_at": "2026-08-20T14:32:05Z",
"message": "Document the new rate limiting feature added in v2.5"
}
]
}
```
Poll this endpoint on an interval until `finished` is `true`. Back off and retry on a `503`. When you read the conversation, deduplicate messages by their stable `id` so a repeated poll does not reprocess one.
For the full schema, see the [Get task status reference](/docs/for-docs/api/operations/gettaskstatus/).
### Send a task message
[Section titled “Send a task message”](#send-a-task-message)
```http
POST /v1/triggers/{trigger_event_id}/messages
```
Promptless appends the message to the original task named by `trigger_event_id`. The reply stays on that task’s conversation, and no new task is created.
| Field | Type | Required | Description |
| --------- | ------ | -------- | -------------------------------------------------------------------------- |
| `message` | string | Yes | The instruction to add. Non-empty after trimming, up to 20,000 characters. |
Send an optional `Idempotency-Key` request header, up to 255 characters, to retry safely. The same key with the same text returns the original stored message with `deduplicated` set to `true`. The same key with different text returns `409 idempotency_conflict`. The key is scoped to the task and your API key, so the same key value used on a different task is independent.
A new message returns `201 Created` with body `{ "message": , "deduplicated": false }`. An idempotent replay returns `200 OK` with body `{ "message": , "deduplicated": true }`.
```bash
curl -X POST "https://api.gopromptless.ai/v1/triggers/550e8400-e29b-41d4-a716-446655440000/messages" \
-H "Authorization: Bearer sk-pl-your-api-key" \
-H "Content-Type: application/json" \
-d '{
"message": "Also document the 429 rate-limit response for this endpoint."
}'
```
```json
{
"message": {
"id": "c2f3d4e5-6789-01bc-def2-34567890abcd",
"trigger_event_id": "550e8400-e29b-41d4-a716-446655440000",
"sequence": 2,
"author": { "type": "customer", "name": "deploy-bot@acme.com" },
"created_at": "2026-08-20T14:40:00Z",
"message": "Also document the 429 rate-limit response for this endpoint."
},
"deduplicated": false
}
```
A retry that sends the same text with the same `Idempotency-Key` returns the stored message and sets `deduplicated` to `true`:
```json
{
"message": {
"id": "c2f3d4e5-6789-01bc-def2-34567890abcd",
"trigger_event_id": "550e8400-e29b-41d4-a716-446655440000",
"sequence": 2,
"author": { "type": "customer", "name": "deploy-bot@acme.com" },
"created_at": "2026-08-20T14:40:00Z",
"message": "Also document the 429 rate-limit response for this endpoint."
},
"deduplicated": true
}
```
For the full schema, see the [Send a task message reference](/docs/for-docs/api/operations/sendtaskmessage/).
### Task error responses
[Section titled “Task error responses”](#task-error-responses)
Both operations return `401 authentication_failed` when the key is missing, invalid, or revoked. Both return `404 task_not_found` for an unknown task or one in another organization. Both return `503 runtime_store_unavailable` when the read store is temporarily unavailable.
| Status | Error | Description | Applies to |
| ------ | --------------------------- | ----------------------------------------------------------------------------------------------------------------------------------------------------------------------------------------------------------------------------------------------------------------------- | ---------- |
| 404 | `task_not_found` | Unknown task, or a task in another organization. | both |
| 422 | Validation error | The `trigger_event_id` in the path isn’t a valid UUID, or the request body is malformed. | both |
| 409 | `task_finished` | The task has finished and stops accepting messages. A task that finished by reporting a blocker or a clarification request has still finished. To continue the work, submit a new trigger with `POST /v1/triggers`. | send |
| 400 | `unsupported_task_source` | Task messages are available for tasks submitted over the API or MCP and for MCP `request_changes` tasks. Read the task’s status with `GET /v1/triggers/{trigger_event_id}` (status is available for every source), or submit the work as a new API trigger to converse. | send |
| 400 | `invalid_message` | The message is empty or longer than 20,000 characters after trimming, or an `Idempotency-Key` that is blank or longer than 255 characters. | send |
| 409 | `idempotency_conflict` | The same `Idempotency-Key` was reused with different text. | send |
| 401 | `authentication_failed` | The API key is missing, invalid, or revoked. | both |
| 503 | `runtime_store_unavailable` | Task intake or lookup is temporarily unavailable. | both |
## View API triggers
[Section titled “View API triggers”](#view-api-triggers)
API-triggered events appear in your dashboard with a distinct “API” label.
### Trigger history
[Section titled “Trigger history”](#trigger-history)
View all API triggers on the [Triggers page](https://app.gopromptless.ai/triggers). API triggers show the submitted instructions and any context you included in the request.
### Suggestion history
[Section titled “Suggestion history”](#suggestion-history)
Set the **Trigger source** filter to “API” on the [Suggestions list](https://app.gopromptless.ai/suggestions) to see documentation suggestions that came from API requests.
## How it works
[Section titled “How it works”](#how-it-works)
When you submit an API request:
1. **Validation**: Promptless validates your API key and request format.
2. **Routing**: The request is routed to your configured doc collections.
3. **Processing**: Promptless analyzes your instructions along with configured context sources.
4. **Suggestion Creation**: If documentation updates are needed, Promptless creates suggestions.
Note
API triggers use the same processing pipeline as other trigger types. The suggestions appear in your dashboard and follow your configured [publishing policies](/docs/for-docs/reference/configuration-reference#policies).
# GitHub commits
> Trigger documentation suggestions from direct commits to your default branches, for teams that merge without pull requests or ship hotfixes.
Tip
You can set up this trigger by hand as this page describes, or ask Promptless in Slack or Microsoft Teams to do it for you. For example, “@Promptless add a commit trigger watching the main branch of my acme/api repo.” See [Ask Promptless to update your configuration](/docs/for-docs/get-the-most-out/ask-promptless-to-update-config).
Promptless can monitor direct commits to your default branches for documentation updates. This is useful for teams that merge changes directly without pull requests, or when you want to capture documentation needs from hotfixes and emergency changes.
## How it works
[Section titled “How it works”](#how-it-works)
When a commit is pushed directly to a monitored branch:
1. **Commit Detection**: Promptless receives notification of the new commit
2. **Analysis**: The system processes the code diff and commit message to understand the changes
3. **Relevance Assessment**: Promptless determines if the changes require documentation updates
4. **Suggestion Creation**: If relevant, Promptless creates documentation suggestions
## Commit triggers vs. pull request triggers
[Section titled “Commit triggers vs. pull request triggers”](#commit-triggers-vs-pull-request-triggers)
A commit trigger activates on commits pushed to a monitored branch, while a PR trigger activates on pull request activity. The two overlap in a standard GitHub workflow. When a pull request merges, its merge commit lands on the default branch and activates the commit trigger along with the `github_pr` merge event. The commit trigger is most useful when changes reach a branch without a pull request, such as direct pushes or hotfixes. You can use GitHub commit triggers alongside PR triggers, or on their own.
### Use commits alongside PR triggers
[Section titled “Use commits alongside PR triggers”](#use-commits-alongside-pr-triggers)
If you configure both a GitHub PR project and a GitHub Commits project for the same repositories:
* Promptless comments on PRs while they’re open, providing early feedback on documentation needs
* After the PR merges, the commit trigger updates suggestions with the final merged content
* Useful when you want PR comments during review and updated suggestions after merge
### Use commits only
[Section titled “Use commits only”](#use-commits-only)
If you configure only a GitHub Commits project, without a corresponding PR project:
* Promptless only runs after changes merge to your default branch
* Reduces notification noise if PR triggers are too frequent
* Since you won’t get PR comments, configure a Slack notification channel to stay informed about new suggestions
## Configuration
[Section titled “Configuration”](#configuration)
Configure GitHub commit triggers in your [Configuration page](https://app.gopromptless.ai/configuration) using the `triggers` section:
```yaml
triggers:
main-commits:
trigger_type: github_commit
match:
- repos:
- acme/backend
- acme/frontend
branches:
- main # omit to match only the repository's default branch
trigger_directories:
- src/
- lib/
```
See the [Configuration Reference](/docs/for-docs/reference/configuration-reference#triggers) for all available options.
## Process recent commits
[Section titled “Process recent commits”](#process-recent-commits)
When creating a new project with a GitHub commit trigger, you can enable **Process last 30 days of commits**. This generates initial documentation suggestions from your recent commit history. This is useful for:
* **Initial calibration**: Get an initial batch of suggestions to review and refine Promptless’s behavior before going live
* **Repositories without PRs**: Teams using forks or direct-commit workflows can still bootstrap their documentation suggestions
* **Migrating from PR triggers**: When switching from PR-based to commit-based triggers, catch up on recent changes
Merge commits are automatically skipped during replay to avoid duplicate processing.
## Notification channels
[Section titled “Notification channels”](#notification-channels)
Commit triggers don’t create PR comments. To receive updates when Promptless creates or updates suggestions, configure a Slack notification channel in your [publishing policies](/docs/for-docs/reference/configuration-reference#policies):
```yaml
policies:
default:
notification:
slack_channel: docs-updates
```
Note
For private Slack channels, invite Promptless first by tagging `@Promptless` in the channel.
## Directory-specific commits
[Section titled “Directory-specific commits”](#directory-specific-commits)
Similar to PR triggers, you can configure Promptless to only trigger on commits that affect specific directories. This is particularly useful for monitoring changelog directories or specific feature areas.
When trigger directories are specified, only commits that contain changes to those directories trigger documentation updates.
## Use cases
[Section titled “Use cases”](#use-cases)
GitHub commit triggers are especially useful for:
* **Changelog Monitoring**: Automatically update documentation when changelog files are modified
* **Hotfix Documentation**: Capture documentation needs from emergency fixes that bypass the normal PR process
* **Direct-to-Main Workflows**: Support teams that commit directly to main branches
* **Automated Updates**: Trigger documentation updates from automated commit processes
## Auto-merge mode
[Section titled “Auto-merge mode”](#auto-merge-mode)
Automatically merge documentation PRs into the default branch as soon as they’re created.
Auto-merge requires automatic PR creation to also be enabled.
Auto-merge is useful for:
* **Internal documentation**: When documentation PRs don’t require human review
* **High-confidence workflows**: Teams that want full automation
* **Changelog-driven updates**: When you want changelog updates to publish immediately
Enable auto-merge in your [publishing policies](/docs/for-docs/reference/configuration-reference#policies):
```yaml
policies:
rules:
- if:
trigger: main-commits
then:
publishing:
auto_create_pr: true
auto_merge: true
```
## Setup instructions
[Section titled “Setup instructions”](#setup-instructions)
To connect GitHub to Promptless, see the [GitHub Integration](/docs/for-docs/reference/integrations/github) setup guide.
# GitHub issues
> Mention @Promptless in a GitHub issue to turn a documentation request into a reviewed suggestion.
Promptless monitors GitHub issues for documentation requests. When @Promptless is mentioned in an issue, the system analyzes the issue content and creates documentation suggestions.
## How it works
[Section titled “How it works”](#how-it-works)
When @Promptless is mentioned in a GitHub issue:
1. **Acknowledgment**: Promptless adds a 👀 reaction to the issue to indicate processing has started
2. **Analysis**: Promptless reads the issue title, description, and comments to understand the documentation request
3. **Relevance Assessment**: Promptless determines if the issue content warrants documentation updates
4. **Suggestion Creation**: If relevant, Promptless creates documentation suggestions and posts results back to the issue
Note
If no doc collections are configured, Promptless posts a comment explaining that no matching configuration was found. This helps you understand why no documentation update was triggered.
## When to use GitHub issues triggers
[Section titled “When to use GitHub issues triggers”](#when-to-use-github-issues-triggers)
GitHub Issues triggers are useful for:
* **Documentation requests**: Contributors or users can open issues requesting specific documentation improvements
* **Open-source projects**: Community members can tag Promptless in issues to generate documentation updates without needing access to other tools
* **Tracking documentation gaps**: Issues provide a natural place to discuss and track documentation needs before they’re addressed
## Configuration
[Section titled “Configuration”](#configuration)
GitHub Issues triggers are a built-in trigger type that’s always active when the GitHub integration is connected, no YAML configuration required. When @Promptless is mentioned in an issue on any repository where the GitHub App is installed, Promptless processes the request.
Publishing behavior and notifications are controlled by your [policies configuration](/docs/for-docs/reference/configuration-reference#policies).
Note
GitHub Issues triggers require the GitHub App installation. See the [GitHub Integration](/docs/for-docs/reference/integrations/github) setup guide if you haven’t connected GitHub yet.
## Setup instructions
[Section titled “Setup instructions”](#setup-instructions)
To connect GitHub to Promptless, see the [GitHub Integration](/docs/for-docs/reference/integrations/github) setup guide.
# GitHub PRs
> Trigger documentation suggestions from your GitHub pull requests, and choose whether they run when a PR opens, is approved, merges, or gets a new push.
Tip
You can set up this trigger by hand as this page describes, or ask Promptless in Slack or Microsoft Teams to do it for you. For example, “@Promptless add a GitHub PR trigger for my acme/api repo that only runs on the src/ directory.” See [Ask Promptless to update your configuration](/docs/for-docs/get-the-most-out/ask-promptless-to-update-config).
Promptless monitors your GitHub repositories for pull requests. You can choose when documentation updates trigger. They can run when a PR is opened, when it receives its first approval, or when it merges. They can also run on each new push while the PR is open.
## Trigger modes
[Section titled “Trigger modes”](#trigger-modes)
GitHub PR triggers support these modes:
### Opened (default)
[Section titled “Opened (default)”](#opened-default)
Triggers when a pull request is opened. This works well for teams that want documentation suggestions ready alongside code changes, giving reviewers time to evaluate both.
### First approval
[Section titled “First approval”](#first-approval)
Triggers when a pull request receives its first approval from a reviewer. Use this mode when you want documentation updates to start only after code has been reviewed. Promptless then analyzes final changes rather than work in progress.
Note
The first-approval mode only triggers once per PR, on the first approval. Subsequent approvals or re-approvals after requested changes do not trigger additional documentation updates.
### Merge
[Section titled “Merge”](#merge)
Triggers when a pull request merges. Use this mode when you want documentation only for changes that have actually landed, rather than for work still under review.
### Updated
[Section titled “Updated”](#updated)
Triggers when new commits are pushed to an open pull request, re-reviewing it on every push. This mode is available for GitHub PR triggers only. It turns Promptless into a review bot for pull requests, keeping its suggestions current as the PR evolves. Use it when you want an open pull request re-reviewed continuously as it changes, rather than analyzed once. `opened`, `first_approval`, and `merge` each fire once; `updated` fires on every push.
This mode is opt-in and inert by default: nothing fires on pushes unless a `github_pr` clause explicitly lists `trigger_on: [updated]`.
Every push produces a re-review pass, so a PR with many incremental commits yields many passes. That is more activity than the single-shot modes above. That volume is why the mode is gated behind explicit configuration. Scope it tightly: name an explicit `repos` list and narrow it further with `trigger_directories`.
Caution
A match clause that lists `updated` in `trigger_on` must name an explicit `repos` list; it cannot use `repos: all`. Other clauses in the same trigger are unaffected.
On a push, Promptless applies the same guardrails as its other triggers: it skips draft PRs (see [Draft pull requests](#draft-pull-requests)) and skips Promptless-authored PRs. Pushes from any other contributor, including external and first-time contributors, re-trigger the review. The review keeps pace with the PR no matter who pushes to it. An `@promptless` mention does not bypass these filters or re-fire on a push.
## How it works
[Section titled “How it works”](#how-it-works)
When a pull request event occurs in your monitored repositories (opened, first approval, merge, or a new push if `updated` is enabled):
1. **Automatic Detection**: Promptless receives notification of the PR event
2. **Analysis**: The system processes the full PR context to understand the changes
3. **Relevance Assessment**: Promptless determines if the changes require documentation updates
4. **Suggestion Creation**: If relevant, Promptless creates documentation suggestions
### What Promptless reads
[Section titled “What Promptless reads”](#what-promptless-reads)
Promptless analyzes the full pull request context, not just the description:
* **PR title and description**: The summary provided when opening the PR
* **Code changes**: The actual diff showing what files changed and how
* **Review comments and conversations**: Feedback from reviewers, including line comments and general discussion
* **Commit messages**: All commits in the PR, including those added after the initial submission
This means Promptless understands the *why* behind changes, even when reviewers request modifications that aren’t reflected in the PR description. When a reviewer asks for changes and the author addresses them with new commits, Promptless picks up both. It reads the feedback explaining what needed to change and the commits that address it.
Note
Information from PRs is processed in real-time and not stored by Promptless. The analysis happens only when the configured trigger event occurs.
## Configuration
[Section titled “Configuration”](#configuration)
Configure GitHub PR triggers in your [Configuration page](https://app.gopromptless.ai/configuration) using the `triggers` section:
```yaml
triggers:
my-pr-trigger:
trigger_type: github_pr
match:
- repos:
- acme/backend
- acme/frontend
trigger_on:
- opened # When PR opens (default)
- first_approval # After first approval
- merge # When PR merges
trigger_directories:
- src/
```
To turn `updated` on, add it to an existing clause’s `trigger_on` list. That clause must already name an explicit `repos` list, because an `updated` clause can’t use `repos: all`:
```diff
triggers:
my-pr-trigger:
trigger_type: github_pr
match:
- repos:
- acme/backend
- acme/frontend
trigger_on:
- opened # When PR opens (default)
- first_approval # After first approval
- merge # When PR merges
- updated # Re-review on each new push
trigger_directories:
- src/
```
### Review-bot setup with `updated`
[Section titled “Review-bot setup with updated”](#review-bot-setup-with-updated)
To run the review-bot cadence on its own, give the `updated` clause an explicit `repos` list and scope it with `trigger_directories`:
```yaml
triggers:
docs-review-bot:
trigger_type: github_pr
match:
- repos:
- acme/docs
trigger_on:
- updated # Re-review on each new push
trigger_directories:
- docs/
```
The explicit-`repos` requirement is enforced per match clause, not per trigger. One trigger can therefore pair a broad clause for other events with a scoped `updated` clause. The `repos: all` restriction applies only to the clause that lists `updated`; other clauses in the same trigger can still use `repos: all`:
```yaml
triggers:
my-pr-trigger:
trigger_type: github_pr
match:
- repos: all # broad clause for one-shot events
trigger_on:
- opened
- merge
- repos: # scoped clause required for updated
- acme/docs
trigger_on:
- updated
trigger_directories:
- docs/
```
See the [Configuration Reference](/docs/for-docs/reference/configuration-reference#triggers) for all available options.
## Replay recent PRs
[Section titled “Replay recent PRs”](#replay-recent-prs)
When setting up a new GitHub PR trigger, you can enable “Replay recent PRs” to process pull requests from the last 30 days. This generates an initial batch of suggestions, which helps you:
* Calibrate Promptless with your documentation style before going live
* Catch up on documentation that may have been missed
* Evaluate how Promptless handles your typical PR content
After enabling this option, your Project card shows the replay progress:
* **Processing last 30 days of PRs** with a spinner while replay is running
* **Processed recent PRs** with a checkmark once replay completes
Note
Replay runs in the background and doesn’t block normal trigger processing. New PRs opened while replay is running are still processed immediately.
Tip
Replay is also available for [GitLab merge requests](/docs/for-docs/connect/triggers/gitlab-merge-requests#replay-recent-merge-requests). It is available for [Bitbucket pull requests](/docs/for-docs/reference/integrations/bitbucket#replay-recent-prs) too. When you enable multiple code review triggers during onboarding, the replay preview groups results by provider.
## Directory-specific triggers
[Section titled “Directory-specific triggers”](#directory-specific-triggers)
You can configure Promptless to only trigger when changes are made to specific directories within your repositories. This is particularly useful when you want to focus documentation updates on changes to certain parts of your codebase.
To set up directory-specific triggers:
1. Open the **Configuration** page and select the **Triggers** tab.
2. Expand an existing **GitHub pull requests** trigger, or create one.
3. Open **More filters (optional)**.
4. Enable **Only when files in these folders change**.
5. Add each folder path as its own chip, separated by a comma or Enter.
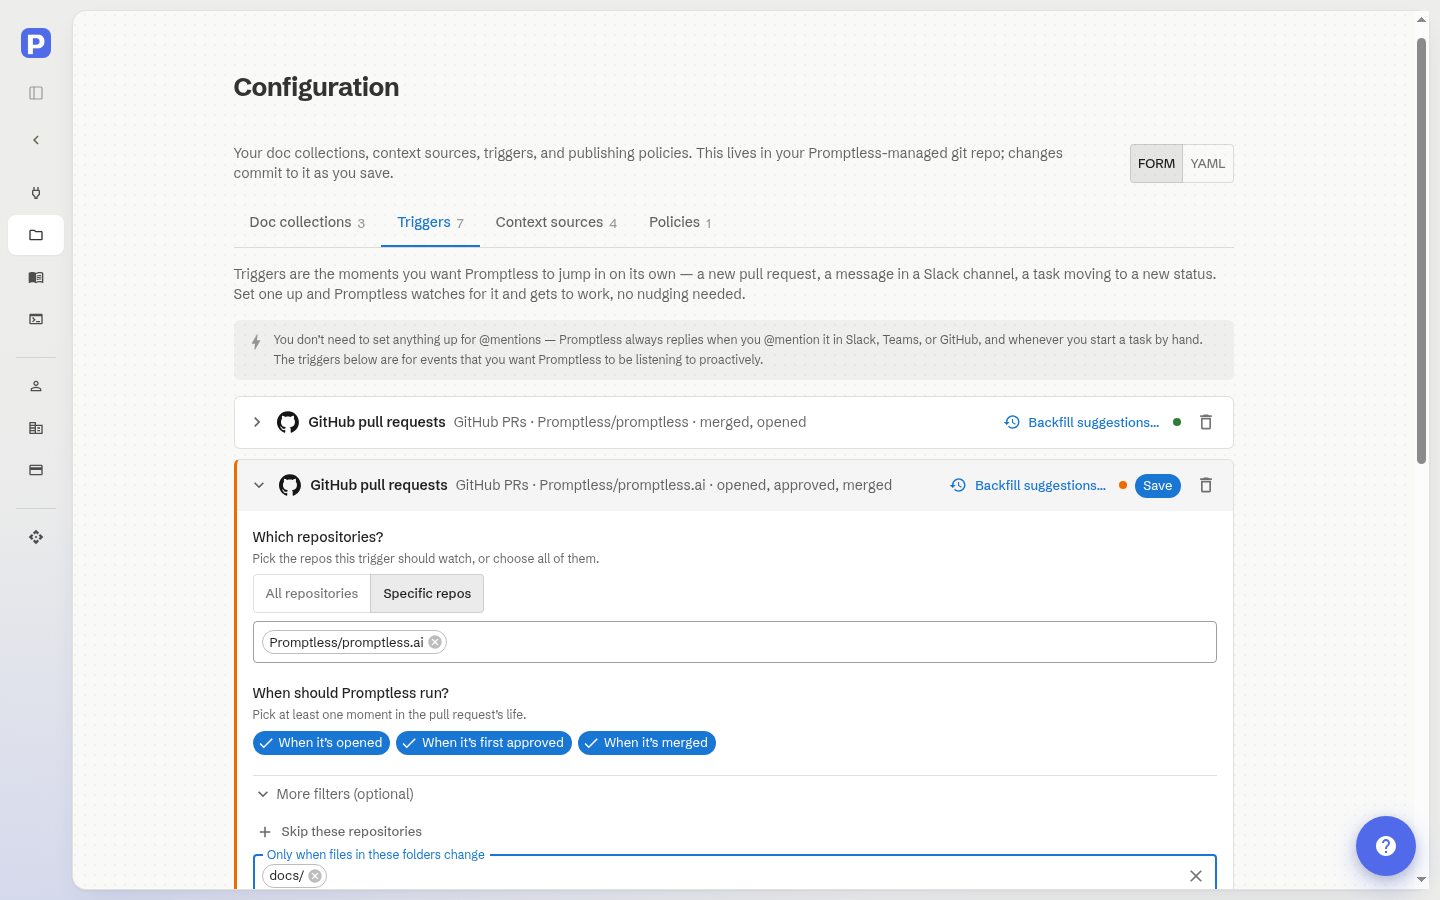
When trigger directories are specified, Promptless considers only PRs that contain changes to those directories and ignores updates to other files.
## Repository topics
[Section titled “Repository topics”](#repository-topics)
If you have many repositories, you can use GitHub topics to control which ones trigger Promptless. This is especially helpful for organizations with dozens or hundreds of repos where only some need documentation automation.
1. **Tag your repositories in GitHub**: Add topics to the repositories you want Promptless to monitor (e.g., “docs-watch”, “promptless”). To add topics to a repository, go to the repository’s main page and click “Add topics” in the About section.
2. **Configure your project**: When creating or editing a GitHub project, check the “Trigger on repos with certain topics” option. Enter the topic(s) you want to monitor. You can specify multiple topics, and Promptless triggers on any repository that has at least one of those topics.
3. **Manage through GitHub**: To add a new repository to Promptless, tag it with the configured topic in GitHub. To remove a repository, remove the topic from the repository settings.
Note
See [GitHub’s topics documentation](https://docs.github.com/en/repositories/managing-your-repositorys-settings-and-features/customizing-your-repository/classifying-your-repository-with-topics).
## Automatic PR creation
[Section titled “Automatic PR creation”](#automatic-pr-creation)
When automatic PR creation is enabled in your [publishing policies](/docs/for-docs/reference/configuration-reference#policies), Promptless automatically creates a new PR in your documentation repository with suggested changes.
## Source PR comments
[Section titled “Source PR comments”](#source-pr-comments)
Promptless posts a summary comment on source PRs linking to any documentation changes. This keeps documentation updates visible alongside the code changes that triggered them.
The comment links directly to the documentation suggestions, so reviewers can see proposed updates while reviewing the code.
Tip
Slack notifications are separate from source PR comments and are always sent according to your project’s notification settings.
### Suppress source PR comments
[Section titled “Suppress source PR comments”](#suppress-source-pr-comments)
Set `suppress_source_pr_comments: true` in your [publishing policies](/docs/for-docs/reference/configuration-reference#policies) to prevent comments on source PRs. Documentation suggestions are still created normally.
```yaml
policies:
default:
publishing:
suppress_source_pr_comments: true
```
This option is commonly used:
* During pilot or onboarding periods, before Promptless has been introduced to the broader engineering team
* On public repositories, while keeping comments enabled for private repos
## Draft pull requests
[Section titled “Draft pull requests”](#draft-pull-requests)
Caution
Promptless automatically skips draft pull requests. Documentation updates are only triggered when the pull request is marked as ready for review.
## Configuration files and dot-directories
[Section titled “Configuration files and dot-directories”](#configuration-files-and-dot-directories)
Promptless automatically skips pull requests that only contain changes to dot-directories (like `.github/`, `.circleci/`, `.beads/`) or root-level dot-files (like `.gitignore`, `.editorconfig`). These are typically CI and tooling configuration rather than product changes that need documentation updates.
If a PR contains both dot-files and regular source files, Promptless processes it normally. It only skips when the entire PR is dot-file changes.
## Request documentation via PR title or description
[Section titled “Request documentation via PR title or description”](#request-documentation-via-pr-title-or-description)
An `@promptless` mention in a PR’s title or description is a direct request, so Promptless reviews the PR regardless of your listening configuration. If your project only reviews after a first approval, the mention triggers a review as soon as the PR opens. If the PR targets your documentation repository (normally outside your source scope), the mention pulls it in anyway. Tagging Promptless does what you expect: Promptless reviews the PR.
Include the mention anywhere in the title or description:
```markdown
## Summary
Added new authentication endpoints for SSO integration.
@promptless please document these API changes
```
Mention `@promptless` or `@promptless-for-oss` (matching is case-insensitive).
Note
The mention triggers on PR open, reopen, and ready-for-review events. It also triggers when you edit the title or description to add a `@promptless` mention that wasn’t there when the PR opened. A mention left in a merged PR’s description does not re-trigger on merge.
## Request documentation via PR comments
[Section titled “Request documentation via PR comments”](#request-documentation-via-pr-comments)
Beyond automatic triggers, you can request documentation updates by @mentioning Promptless in a comment on any source pull request.
### How to use
[Section titled “How to use”](#how-to-use)
Tag Promptless in a comment on a source PR to request documentation work:
```plaintext
@promptless please update the docs for this API change
```
### When to use
[Section titled “When to use”](#when-to-use)
PR comment mentions are useful when:
* A PR was created before your trigger was set up
* You want documentation for a PR that’s already merged or closed
* The automatic trigger didn’t activate for your PR
* You want to provide specific instructions about what to document
### Supported PR states
[Section titled “Supported PR states”](#supported-pr-states)
Promptless responds to comment mentions on pull requests in any state:
* Open PRs
* Draft PRs
* Merged PRs
* Closed PRs
### Trigger from automated accounts
[Section titled “Trigger from automated accounts”](#trigger-from-automated-accounts)
A direct `@promptless` mention doesn’t have to come from a person. It takes priority over Promptless’s bot filter. A comment from an automated account, like a GitHub Actions workflow, triggers documentation work just as a comment from a teammate does. This lets you build docs requests into your CI: have an Action post an `@promptless` comment whenever you want docs updated or reviewed.
For example, a GitHub Actions step can comment on a pull request to ask Promptless to document the change:
```yaml
- name: Ask Promptless for docs
run: gh pr comment "$PR_NUMBER" --body "@promptless please update the docs for this change"
env:
GH_TOKEN: ${{ secrets.GITHUB_TOKEN }}
PR_NUMBER: ${{ github.event.pull_request.number }}
```
The comment must include a direct `@promptless` mention. Promptless still ignores bot comments that don’t mention it. This works for any automated account, including CI or review Actions that run checks like Doc Detective or snippet validation.
The same priority over the bot filter applies when an automated account submits a formal PR review rather than a plain comment. You can place the `@promptless` mention in the review summary body or in any inline review comment, and either one triggers documentation work. A mention in the summary body gets a 👀 reaction on the review up front. A mention that appears only in an inline comment gets the 👀 reaction on that comment instead. Promptless still ignores bot reviews that don’t mention it. When Promptless does act, its reply names the `@promptless` mention as the reason, so the other account can decide whether to keep tagging it.
### Requirements
[Section titled “Requirements”](#requirements)
* The GitHub integration must be installed for your repository
* You must explicitly @mention Promptless in the comment. Comments without a direct mention are ignored
### Mentions in a review summary
[Section titled “Mentions in a review summary”](#mentions-in-a-review-summary)
You can mention `@promptless` in the summary body of a submitted PR review, as opposed to an inline review comment. Promptless treats it as a direct request and reviews the PR, just as it does for a comment mention.
Note
When you mention `@promptless` in a PR title, description, comment, or review summary, Promptless adds a 👀 reaction so you know it saw your request. The reaction shows up even when Promptless decides no documentation change is needed, so a missing suggestion doesn’t mean your mention was ignored.
## Setup instructions
[Section titled “Setup instructions”](#setup-instructions)
To connect GitHub to Promptless, see the [GitHub Integration](/docs/for-docs/reference/integrations/github) setup guide.
# GitLab merge requests
> Trigger documentation suggestions from merge requests in your GitLab projects when they open or update.
Tip
You can set up this trigger by hand as this page describes, or ask Promptless in Slack or Microsoft Teams to do it for you. For example, “@Promptless add a GitLab merge request trigger for my acme/backend project.” See [Ask Promptless to update your configuration](/docs/for-docs/get-the-most-out/ask-promptless-to-update-config).
Promptless monitors your GitLab projects for merge requests. When a merge request is opened or updated, Promptless analyzes the changes and creates documentation suggestions if needed.
## How it works
[Section titled “How it works”](#how-it-works)
When a merge request event occurs in your monitored GitLab projects:
1. **Automatic Detection**: Promptless receives notification of the new or updated merge request.
2. **Analysis**: The system processes the code diff, MR title, and MR description to understand the context.
3. **Relevance Assessment**: Promptless determines if the changes require documentation updates.
4. **Suggestion Creation**: If relevant, Promptless creates documentation suggestions.
Note
Information from merge requests is processed in real-time and not stored by Promptless. The analysis happens only when the configured trigger event occurs.
## Configuration
[Section titled “Configuration”](#configuration)
Configure GitLab merge request triggers in your [Configuration page](https://app.gopromptless.ai/configuration) using the `triggers` section:
```yaml
triggers:
gitlab-mrs:
trigger_type: gitlab_mr
match:
- repos:
- acme/backend
- acme/api
trigger_on:
- opened
- merge
trigger_directories:
- src/
```
See the [Configuration Reference](/docs/for-docs/reference/configuration-reference#triggers) for all available options.
## Replay recent merge requests
[Section titled “Replay recent merge requests”](#replay-recent-merge-requests)
When setting up a new GitLab MR trigger, you can enable “Replay recent MRs” to process merge requests from the last 30 days. This generates an initial batch of suggestions, which helps you:
* Calibrate Promptless with your documentation style before going live
* Catch up on documentation that may have been missed
* Evaluate how Promptless handles your typical MR content
After enabling this option, your Project card shows the replay progress:
* **Processing last 30 days of MRs** with a spinner while replay is running
* **Processed recent MRs** with a checkmark once replay completes
Note
Replay runs in the background and doesn’t block normal trigger processing. New MRs opened while replay is running are still processed immediately.
## Directory-specific triggers
[Section titled “Directory-specific triggers”](#directory-specific-triggers)
Use the `trigger_directories` field to only trigger when changes are made to specific directories. When specified, Promptless considers only merge requests that contain changes to those directories.
## Automatic PR creation
[Section titled “Automatic PR creation”](#automatic-pr-creation)
When automatic PR creation is enabled in your [publishing policies](/docs/for-docs/reference/configuration-reference#policies), Promptless automatically creates a new PR in your documentation repository with suggested changes.
## Source MR comments
[Section titled “Source MR comments”](#source-mr-comments)
Promptless posts a summary comment on source merge requests linking to any documentation changes. This keeps documentation updates visible alongside the code changes that triggered them.
The comment links directly to the documentation suggestions, so reviewers can see proposed updates while reviewing the code.
Tip
Slack notifications are separate from source MR comments and are always sent according to your project’s notification settings.
## Comment mention acknowledgment
[Section titled “Comment mention acknowledgment”](#comment-mention-acknowledgment)
When you @mention `@promptless` in a comment on a merge request, Promptless adds a 👀 reaction to your comment so you know it saw the request. This works for comments on both a source merge request and a merge request Promptless opened for your documentation.
Note
The reaction shows up even when Promptless decides no documentation change is needed, so a missing suggestion doesn’t mean your mention was ignored.
## Configuration files and dot-directories
[Section titled “Configuration files and dot-directories”](#configuration-files-and-dot-directories)
Promptless automatically skips merge requests that only contain changes to dot-directories (like `.gitlab/`, `.gitlab-ci/`) or root-level dot-files (like `.gitignore`, `.gitlab-ci.yml`). These are typically CI and tooling configuration rather than product changes that need documentation updates.
If an MR contains both dot-files and regular source files, Promptless processes it normally. It only skips when the entire MR is dot-file changes.
## Setup instructions
[Section titled “Setup instructions”](#setup-instructions)
To connect GitLab to Promptless, see the [GitLab Integration](/docs/for-docs/reference/integrations/gitlab) setup guide.
# Intercom tickets (beta)
> Turn recurring questions in closed Intercom support conversations into documentation suggestions that close the gaps behind them.
Intercom integration enables automated documentation updates based on support conversations and ticket patterns. This helps identify gaps in documentation based on recurring customer questions.
## How it works
[Section titled “How it works”](#how-it-works)
When a support conversation is closed:
1. **Conversation Analysis**: Promptless analyzes the closed conversation content and customer interaction
2. **Pattern Detection**: The system identifies common questions or issues that indicate documentation gaps
3. **Context Evaluation**: Promptless determines whether the conversation represents a broader documentation need
4. **Suggestion Creation**: If relevant, Promptless creates documentation suggestions to address the gap
## Configuration
[Section titled “Configuration”](#configuration)
Intercom triggers are configured through the Promptless team during beta. Contact to set up Intercom triggers for your organization. Publishing behavior and notifications are controlled by your [policies configuration](/docs/for-docs/reference/configuration-reference#policies).
Note
The Intercom trigger feature is in beta. Contact for more information about enabling this feature for your organization.
## Use cases
[Section titled “Use cases”](#use-cases)
Intercom triggers are especially useful for:
* **FAQ Development**: Automatically identify common questions that should be added to documentation
* **Knowledge Base Gaps**: Discover areas where documentation is missing or unclear
* **Customer Pain Points**: Surface recurring issues that need better documentation
* **Support Deflection**: Reduce ticket volume by improving documentation based on actual customer needs
## Setup instructions
[Section titled “Setup instructions”](#setup-instructions)
To connect Intercom to Promptless, see the [Intercom Integration](/docs/for-docs/reference/integrations/intercom) setup guide.
# Jira
> Start a Promptless session from a Jira ticket and have Promptless reply on the ticket with the documentation PR linked.
A Jira ticket can start a Promptless session, and Promptless replies on the ticket when the work is done. This is separate from using [Jira as a read-only context source](/docs/for-docs/connect/context-sources/jira). That capability lets Promptless read tickets for background but never acts on them or writes back. Creating a Jira issue on request is a separate capability, documented on the [Atlassian integration](/docs/for-docs/reference/integrations/atlassian#create-a-jira-issue-on-request) page.
## How a Jira ticket starts a session
[Section titled “How a Jira ticket starts a session”](#how-a-jira-ticket-starts-a-session)
Four paths start a session from a ticket. Three are built in and need no YAML to configure; the fourth is a Jira trigger you configure.
* **The built-in label path**: Adding a label whose first token is `promptless` (for example `promptless` or `promptless-urgent`). This path is always on whenever Atlassian is connected. These `promptless`-prefixed labels are reserved for this built-in path and never route to a configured Jira trigger.
* **The mention path**: @mentioning the account Promptless acts as in a comment. The mention is matched by the account’s ID, not the literal handle text. An @mention picked from Jira’s autocomplete inserts the account’s display name, so no literal `@promptless` string appears in the comment. This path requires an attached Atlassian service account (see [Attach a service account for mentions and assignments](#attach-a-service-account-for-mentions-and-assignments)).
* **The assignment path**: Assigning an issue to the account Promptless acts as. This path requires an attached Atlassian service account (see [Attach a service account for mentions and assignments](#attach-a-service-account-for-mentions-and-assignments)).
* **The configured-trigger path**: Creating an issue, adding a label, or changing an issue’s status, per your configured triggers. It is unaffected by the service account and starts sessions whether or not one is attached (see [Configuration](#configuration)).
The built-in label path needs no [Atlassian service account](/docs/for-docs/reference/integrations/atlassian#atlassian-service-account): it starts a session whenever Atlassian is connected. The mention path and the assignment path require an attached service account. Without one, a mention or assignment delivery is dropped and no session starts.
On any built-in path, Promptless comments on the ticket and flags it for follow-up if it goes unanswered. This is the same way it tracks an unanswered Slack thread. (The label, mention, and assignment paths are subtypes of one built-in `jira_mention` trigger and route through a single `jira_mention` key. A policy rule therefore targets `jira_mention` rather than a per-path key.)
A single delivery can carry more than one built-in path. Three rules resolve that:
* At most one built-in session dispatches per delivery: the highest-precedence surviving path.
* A `promptless` label still starts a session even when the same delivery’s mention or assignment was dropped. The label path is never dropped merely because another path on the delivery was.
* With a service account attached, a delivery that both assigns the issue and adds a `promptless` label dispatches as the assignment, since assignment outranks the label.
## Reply on the ticket
[Section titled “Reply on the ticket”](#reply-on-the-ticket)
Promptless answers on the ticket and attaches the documentation PR as a remote link (a linked reference on the Jira issue). The link is deduplicated by a stable identifier, so re-posting never adds a duplicate link.
## How a configured trigger activates
[Section titled “How a configured trigger activates”](#how-a-configured-trigger-activates)
Each trigger type names the edge an issue crosses: the moment it activates on. That moment is the issue being created, a label being added, or the status changing. A trigger activates once per crossing, never on a later delivery about an issue that still matches. Editing the description of a `DOCS` issue does not re-activate a new-issue trigger. Commenting on an issue that already carries `needs-docs` does not re-activate a label trigger.
Creating an issue crosses every edge at once: the issue comes into existence with its labels and its status. A new `DOCS` issue filed with `needs-docs` matches both the new-issue trigger and the label trigger, and dispatches once tagged with both keys. The keys are the trigger names you give in the `triggers:` map (for example `jira-new-docs-issue` and `jira-needs-docs-label`).
Match semantics follow the same rules as other triggers: within one clause the fields are ANDed; multiple clauses are ORed. All Jira fields match case-insensitively.
Multi-value matches compare each value on its own. A second listed label activates the trigger even when the issue already holds the first. A move between two listed statuses activates it again.
## Configuration
[Section titled “Configuration”](#configuration)
Configure Jira triggers in your [Configuration page](https://app.gopromptless.ai/configuration) using the `triggers` section. Each type names the moment it activates on (an issue created, a label added, or a status change):
```yaml
triggers:
jira-new-docs-issue:
trigger_type: jira_new_issue
match:
- project_key: [DOCS]
jira-needs-docs-label:
trigger_type: jira_label_added
match:
- new_label: [needs-docs]
jira-ready-for-docs:
trigger_type: jira_status_change
match:
- is_done: true
- new_status: ["In Review", "Pull Request"]
```
The trigger map keys (`jira-new-docs-issue`) are yours to name; the `trigger_type` values (`jira_new_issue`) are the fixed type identifiers.
Fields inside a clause (each `-` item under `match:`) are ANDed and clauses are ORed. So `jira-ready-for-docs` above activates when an issue reaches any done status, and separately when it reaches `In Review` or `Pull Request`.
### Scoping to projects
[Section titled “Scoping to projects”](#scoping-to-projects)
`project_key` is required on `jira_new_issue`, which would otherwise activate on every issue created anywhere in the site. It is optional on the other two types, and worth setting unless you mean the whole site. As written, `jira-needs-docs-label` above matches a `needs-docs` label in any project. A `jira_status_change` clause may hold `project_key` alone, which matches any status movement within those projects.
### Labels
[Section titled “Labels”](#labels)
Labels whose first token is `promptless` are reserved for the built-in `jira_mention` path (see [How a Jira ticket starts a session](#how-a-jira-ticket-starts-a-session)). That path claims them before any configured trigger is consulted. A `new_label` listing one never matches, so name the label something else (`needs-docs`). A label that merely contains the word (`docs-promptless`, `not-promptless`) is not reserved and is free to use.
### Matching done statuses
[Section titled “Matching done statuses”](#matching-done-statuses)
`new_status` names statuses one by one, which is brittle. Status names are per-project, anyone can rename them, and a done-like status added later is silently uncovered. `is_done: true` matches Jira’s done category instead, which is stable across projects and renames. One clause covers every done status a site has, whatever it is called.
`is_done` accepts only `true`. There is no way to say “moved to something not done.” That would match ordinary in-progress churn, and the statuses worth acting on are better named with `new_status`.
Note
An issue moved between two done statuses (`Shipped` to `Closed`) activates an `is_done: true` trigger a second time. This is expected, not a bug. The move is a second status change into a done status, so it is a second crossing of the edge the trigger names.
### Instructions and output
[Section titled “Instructions and output”](#instructions-and-output)
`instructions` is optional on all three types (it is required on schedule triggers) and carries the same meaning: standing work handed to Promptless on each run. It is how a label carries a standing job: apply the label and Promptless runs those instructions against the issue. Omit it to work from the issue alone; a present-but-blank value is invalid.
```yaml
triggers:
jira-docs-plan:
trigger_type: jira_label_added
instructions: Scope the docs impact, do not publish.
match:
- new_label: [docs-plan]
project_key: [DOCS]
```
A Jira trigger’s output lands wherever the run’s `escalation` and publishing settings send it. That is a docs suggestion and PR, plus the usual Slack or Teams notification. Like the built-in `jira_mention` trigger, Promptless comments on the ticket and flags it for follow-up if it goes unanswered (see [Reply on the ticket](#reply-on-the-ticket)). A blocker or escalation from the run also comments on the ticket and notifies any configured `escalation` channel.
See the [Configuration Reference](/docs/for-docs/reference/configuration-reference#triggers) for the full schema.
## Attach a service account for mentions and assignments
[Section titled “Attach a service account for mentions and assignments”](#attach-a-service-account-for-mentions-and-assignments)
The mention path and the assignment path require an attached Atlassian service account. Without one, @mentioning or assigning the connecting account simply does nothing. The delivery is dropped and no session starts. Promptless does not reply on the ticket and does not notify you in Slack or Teams. Check the Atlassian integration card to confirm whether a service account is attached. Only the built-in label path and configured triggers start sessions, and they read the ticket as, and comment as, the connecting account.
Attaching a dedicated Atlassian service account gives Promptless its own bot identity: it posts as that bot, and the mention and assignment paths are active. Either way, Promptless ignores its own activity. Self-echo suppression keys on the connecting account when no service account is attached, and on the service account when one is.
Gating the mention and assignment paths behind a service account is deliberate. Without a bot identity, the account Promptless acts as is a real person (the connecting account). Ordinary ticket traffic addressed to that colleague cannot be told apart from a request to summon Promptless. Requiring a service account keeps anyone from making Promptless act as the connecting account without the team opting in.
Attach the service account from the Atlassian integration card by entering its **Client ID** and **Client secret**, then clicking **Attach**. See the [Atlassian integration](/docs/for-docs/reference/integrations/atlassian#atlassian-service-account) guide for the full setup.
Note
Reading Jira for context is a separate, read-only capability. See the [Jira context source](/docs/for-docs/connect/context-sources/jira) page.
## Example
[Section titled “Example”](#example)
A team adds the `jira-docs-plan` trigger above. A writer adds the `docs-plan` label to ticket `DOCS-204` in the `DOCS` project. Applying that label activates the trigger. Following the standing instructions (Scope the docs impact, do not publish), Promptless analyzes the linked change and scopes what documentation is affected. It then comments on the ticket with that scope, the same way the built-in paths comment on the ticket. Because this run is do-not-publish, there’s no PR to link.
Later, the same team moves `DOCS-204` into `In Review`. That status crossing activates the `jira-ready-for-docs` trigger, which watches for the `In Review` and `Pull Request` statuses. And when someone files a brand-new `DOCS` issue that already carries `needs-docs`, it crosses both the new-issue edge and the label edge at once. It matches both `jira-new-docs-issue` and `jira-needs-docs-label`, and Promptless dispatches once, tagged with both keys.
Separately, because the team has attached a service account, an engineer @mentions the account Promptless acts as on `DOCS-204` to ask for the update. Promptless replies on the ticket and attaches the documentation PR as a remote link.
## Setup instructions
[Section titled “Setup instructions”](#setup-instructions)
To connect Atlassian and attach a service account, see the [Atlassian integration](/docs/for-docs/reference/integrations/atlassian#atlassian-service-account) guide. The Atlassian integration card then shows the attached account’s details. A **Not working** or **Unconfirmed** badge on the service-account section flags a problem to fix.
# MCP triggers
> Connect Claude Code, Cursor, or another MCP editor to Promptless. Start, track, message, search, and revise documentation tasks by asking, then get each task's outcome and docs pull request link back. Authorize with OAuth. No API key needed.
Connect an MCP-capable editor (Claude Code, Cursor, or another) to Promptless. Then, from the editor you already have open, start a documentation task and follow it to its outcome in the same conversation. Its docs pull request link comes back too. You can also ask Promptless to revise a suggestion it already made. You can send a follow-up instruction into a running task and read that task’s conversation. You can set a suggestion’s labels, assignees, and title, open its pull request, or close it yourself. There’s no API key to create, store, or rotate: you authorize once in a browser instead.
[MCP](https://modelcontextprotocol.io) is an open protocol that editors use to connect to external tools; any editor with an “MCP servers” setting can connect to Promptless. It’s a built-in surface that’s always available. It needs no `promptless.yaml` `triggers:` entry and no setup on the Configuration page.
Tip
MCP is the no-key, interactive editor path. The [API trigger](/docs/for-docs/connect/triggers/api) is the server-to-server and CI path: an API key plus `POST /triggers`. Both dispatch through the same pipeline, so a task behaves identically whichever way you start it.
Before you start
You need an MCP-capable editor, such as Claude Code or Cursor. Your organization must have [finished setting up Promptless](https://app.gopromptless.ai/configuration). No API key is required.
## Connect the server
[Section titled “Connect the server”](#connect-the-server)
Connect the server once per editor. The server URL is `https://api.gopromptless.ai/mcp`. For Claude Code, one command sets it up:
```bash
claude mcp add --transport http promptless https://api.gopromptless.ai/mcp
```
The same URL and command also appear in the dashboard under **Settings**, in the **Editor connection (MCP)** section. Every organization member can see that section (the app is at [app.gopromptless.ai](https://app.gopromptless.ai)).
### Claude Code
[Section titled “Claude Code”](#claude-code)
1. Run the add command shown above.
2. Run `/mcp` and pick **promptless**.
3. Authorize the connection in the browser tab that opens. See [Authorize in the browser](#authorize-in-the-browser).
### Cursor
[Section titled “Cursor”](#cursor)
1. Add an HTTP MCP server named `promptless`. Use the URL `https://api.gopromptless.ai/mcp`, either in Cursor’s MCP settings or by adding the entry to `mcp.json`:
```json
{
"mcpServers": {
"promptless": {
"url": "https://api.gopromptless.ai/mcp"
}
}
}
```
The `url` key tells Cursor to use HTTP transport. Or add the server in one step with the [Add to Cursor](cursor://anysphere.cursor-deeplink/mcp/install?name=promptless\&config=eyJ0eXBlIjoiaHR0cCIsInVybCI6Imh0dHBzOi8vYXBpLmdvcHJvbXB0bGVzcy5haS9tY3AifQ%3D%3D) deep link, which registers the `promptless` server for you.
2. Click **Needs login**.
3. Authorize the connection in the browser tab that opens. See [Authorize in the browser](#authorize-in-the-browser).
### VS Code
[Section titled “VS Code”](#vs-code)
1. Add the `promptless` server with the `code` CLI:
```bash
code --add-mcp "{\"name\":\"promptless\",\"type\":\"http\",\"url\":\"https://api.gopromptless.ai/mcp\"}"
```
2. Run **MCP: List Servers** from the Command Palette and start **promptless**.
3. Authorize the connection in the browser tab that opens. See [Authorize in the browser](#authorize-in-the-browser).
### Codex CLI
[Section titled “Codex CLI”](#codex-cli)
1. Add the `promptless` server; Codex infers HTTP transport from the `--url` flag:
```bash
codex mcp add promptless --url https://api.gopromptless.ai/mcp
```
2. Run `codex mcp login promptless` to start authorization.
3. Authorize the connection in the browser tab that opens. See [Authorize in the browser](#authorize-in-the-browser).
### Other MCP clients
[Section titled “Other MCP clients”](#other-mcp-clients)
Any client that supports HTTP transport and OAuth connects at the same URL, `https://api.gopromptless.ai/mcp`. The exact steps vary by client.
## Authorize in the browser
[Section titled “Authorize in the browser”](#authorize-in-the-browser)
Your editor handles authorization automatically over OAuth; you approve the connection once in the browser.
1. A browser tab opens to the Promptless consent page.
2. The page names the client (your editor), the target organization (an organization picker that defaults to your active organization), and your role. The approve button reads **Authorize as {your email}**.
3. Before you approve, check the destination. The page names the callback host (the web address your editor is sent back to). It also flags the client name as self-declared (typed in by whoever built the integration, not verified by Promptless). Cancel unless you started this connection yourself from an application you trust.
4. Approve. Your editor stores the token and returns you to the editor.
Note
There’s no permission picker: an approved client acts with the same access its approver has. An approved connection can:
* start tasks;
* list your collections;
* read the status of any task in your organization, and follow a running one to its outcome. That covers tasks started from Slack, a GitHub pull request, the dashboard, and the API;
* revise a suggestion Promptless already produced;
* send an additional instruction into a running task;
* update a suggestion’s labels, assignees, and title and open its docs pull request;
* close a suggestion (which also closes its docs pull request);
* list your recent tasks;
* search suggestions.
Like the read tools, the write actions (revise, update, and close) act on any suggestion in your organization, not only ones you created. MCP access isn’t gated by your [organization role](/docs/for-docs/security/access-and-permissions), so any active member can authorize a connection. MCP is always available to your active organization members, and access can’t be limited to specific members or roles. To control what gets submitted rather than who can connect, use your [publishing policies and relevance filtering](/docs/for-docs/tune/noise-and-relevance-filtering).
A token is tied to one organization. To connect a second organization, authorize again and pick that organization at consent. Your editor can hold one Promptless connection per organization.
## Available tools
[Section titled “Available tools”](#available-tools)
Through your editor, these 11 tools let you check on your collections, tasks, and suggestions, or queue and change your documentation work. Five tools are read-only: `list_doc_collections`, `get_task_status`, `list_recent_tasks`, `search_suggestions`, and `wait_for_task_update`. Your editor can auto-approve them, so routine status checks stop prompting you each time. Six tools queue or change work: `submit_documentation_task`, `send_task_message`, `answer_task_question`, `request_changes`, `update_suggestion`, and `close_suggestion`. These always ask before they run.
Note
If you already have an MCP connection, refresh or reconnect the `promptless` server in your editor. That loads the `send_task_message`, `answer_task_question`, and `wait_for_task_update` tools and the updated tool descriptions. `submit_documentation_task` and `request_changes` now return a `next_call` for following the task. In Claude Code, run `/mcp` and pick **promptless** again, or start a new conversation. In Cursor, remove the `promptless` server and add it again.
### `submit_documentation_task`
[Section titled “submit\_documentation\_task”](#submit_documentation_task)
Starts a documentation task and returns a task ID (the `trigger_event_id`) you can check with `get_task_status`. It also returns a `next_call`, the next tool call your editor should make. It names `wait_for_task_update` with its arguments, so your editor can follow the task automatically.
| Argument | Required | Description |
| ------------------- | -------- | --------------------------------------------------------------------------------------------------------------------------------------------------------------------------------------------------------------------------- |
| `instructions` | Yes | What you want documented. |
| `doc_collection_id` | No | Target one collection. Omit to route across all your collections. |
| `context` | No | Optional metadata attached to the request; appears in trigger history. |
| `attachments` | No | Links to material that explains the change, such as a screenshot, design file, or spec. Each attachment is a URL (required) with an optional description; nothing is uploaded, so a link Promptless can’t reach is skipped. |
When you omit `doc_collection_id`, the request routes across all your collections, and your [relevance filtering](/docs/for-docs/tune/noise-and-relevance-filtering) still applies per collection; pass a `doc_collection_id` (from `list_doc_collections`) to target one collection.
A run takes several minutes. The submission returns a `next_call`, and your editor follows the task with `wait_for_task_update` until `next_call` is null. The outcome surfaces in the same conversation. To check status at a point in time instead, call `get_task_status` on request. There’s no separate call to list your tasks. Use `list_recent_tasks`, which also surfaces tasks you didn’t start over MCP.
### `list_doc_collections`
[Section titled “list\_doc\_collections”](#list_doc_collections)
Lists your documentation collections. Use it to get a `doc_collection_id` to pass to `submit_documentation_task`.
### `get_task_status`
[Section titled “get\_task\_status”](#get_task_status)
Checks the status of any documentation task in your organization by its `trigger_event_id`, not only tasks you submitted over MCP. Tasks started from Slack, a GitHub pull request, the dashboard, or the API are all readable. The task’s submitted instructions and context appear in its trigger history.
It also returns the suggestions the task produced. Each comes with its docs pull request link and review status, using the same `draft`, `open`, `merged`, or `closed` values `search_suggestions` uses. The response also says whether the task has finished. Together those let you tell three outcomes apart. A task that hasn’t finished yet is still working. A finished task with no suggestions needs no documentation change. A finished task with one or more suggestions has documentation changes ready to review. A `resolution` note flags a deliberate no-op, which finishes with nothing to document. That distinguishes it from a run that couldn’t finish.
It also returns the task’s conversation. The `messages` array is the persisted conversation between the customer and Promptless for that task, capped at the latest 100 messages and returned oldest-first. The `messages` array is populated for tasks submitted over the API or MCP and for tasks created by calling `request_changes` over MCP. An empty `messages` array means either the task has no messages yet or its source doesn’t carry a conversation. Reading the conversation never consumes it.
Each message carries a stable, immutable `id`, a `sequence` number, an `author` object, a `created_at`, and the `message` text. The `id` lets a caller dedupe, relaying each new message only once. Your editor tracks these `id`s for you, so it doesn’t relay the same message twice. Incremental message delivery comes from `wait_for_task_update`’s `cursor`. `get_task_status` reads the conversation so far at a single point in time. The `author` object’s `type` is `promptless` or `customer`, and its `name` is the customer’s email when available, otherwise null.
A `status_guidance` field is a short text string carrying server-generated advice about following the task and interpreting its outcome. That advice is distinct from the conversation itself, which `messages` carries.
### `wait_for_task_update`
[Section titled “wait\_for\_task\_update”](#wait_for_task_update)
Follows a running task in the same conversation. It waits for new messages, a changed result, or completion. You get the outcome without checking status by hand. It’s read-only, and your editor can auto-approve it.
| Argument | Required | Description |
| ------------------ | -------- | ----------------------------------------------------------------------------------------------------------- |
| `trigger_event_id` | Yes | The task to follow. |
| `cursor` | No | Omit for an immediate initial snapshot. Reuse the `cursor` a prior call returned to receive later messages. |
| `wait_seconds` | No | How long one wait lasts, from 0 to a server maximum of 30 seconds. Defaults to 30 when omitted. |
Each call returns a page of new conversation messages in `messages`, plus a `cursor` to pass to the next call. Each `messages` entry has the same shape as the ones `get_task_status` returns, with a stable `id`, a `sequence`, an `author`, and the message text. Reads never consume messages. Retrying the same call with the same `cursor` is safe. It may repeat messages your editor already saw, which your editor dedupes by `id`. A `has_more_messages` flag is true when more pages are ready. The `update_type` is `snapshot` on the first call for a cursor, which is when you omit `cursor`. It’s `changed` when new messages or a new result arrived, and `timeout` when nothing changed during the wait. The `result` and `finished` fields report the task’s outcome and whether it has finished. The `result` mirrors the outcome payload `get_task_status` returns. It carries the task’s `resolution` note and its `suggestions`, each with its docs pull request link and review status. Every call also returns a `next_call`, which names `wait_for_task_update` and its arguments.
Follow `next_call` until it’s null. `next_call` stays set while `has_more_messages` is true or the task isn’t finished. It becomes null only once the task is `finished` and `has_more_messages` is false. Your editor never stops on `finished` alone, so it never drops a trailing message page. A `timeout` is normal: your editor keeps waiting through the next `next_call` without a separate sleep and without narrating unchanged state. Your editor keeps calling `wait_for_task_update` while `has_more_messages` is true, even after `finished` is true, so it doesn’t miss a trailing message. Waiting doesn’t cancel the cloud work.
You stay in control of following. Ask your editor to follow just once, or to stop at any time. `get_task_status` stays available to check a long-running task on demand.
### `send_task_message`
[Section titled “send\_task\_message”](#send_task_message)
Use `send_task_message` to add an instruction to a task that’s still running. Use `submit_documentation_task` to start a new task, and `request_changes` to revise a suggestion Promptless already produced.
Sends an additional instruction into a task that’s already running. The instruction folds into that running task’s work, and no new task starts. A task stops accepting messages once it finishes, including one that finished by reporting a blocker or by marking a clarifying question. To answer a clarifying question, use [`answer_task_question`](#answer-a-clarifying-question) instead; it answers a finished task’s marked question.
| Argument | Required | Description |
| ------------------ | -------- | ---------------------------------------------------------------------------------------------------------------------------------------------------------------------------- |
| `trigger_event_id` | Yes | The original task’s ID (the one returned at submission). Reusing it keeps the reply on the same task; it does not create another task. |
| `message` | Yes | The instruction to add. Up to 20,000 characters after trimming. |
| `idempotency_key` | No | A safe-retry key. Retrying with the same key and the same text returns the original message marked deduplicated. The same key with different text is rejected as a conflict. |
It returns the stored `message` plus a `deduplicated` boolean. When the message is newly stored, `deduplicated` is `false`; it comes back `true` only when an `idempotency_key` retry matches an already-stored message. That stored `message` has the same shape as an entry in `get_task_status`’s `messages` array.
Like reading a task’s status, sending isn’t limited to tasks you started. You can send to an eligible task in your organization by its `trigger_event_id`. Task conversations apply to tasks submitted over the API or MCP, and to tasks created by calling `request_changes` over MCP. Reading a task’s status with `get_task_status` stays available for every task source.
Like the other work-changing tools, it prompts before it runs and isn’t auto-approved.
### `answer_task_question`
[Section titled “answer\_task\_question”](#answer_task_question)
Use `answer_task_question` to answer a clarifying question a finished task marked. Use `send_task_message` to add an instruction to a task that’s still running. For the full walkthrough, see [Answer a clarifying question](#answer-a-clarifying-question).
Answers the one clarifying question a finished task marked, so Promptless continues the work.
| Argument | Required | Description |
| --------------------- | -------- | ------------------------------------------------------------------------------------------------------------------------------------------------ |
| `trigger_event_id` | Yes | The finished task whose question you’re answering (UUID). |
| `question_message_id` | Yes | The marked question’s message ID (UUID). |
| `answer` | No | The answer text, 1–8000 characters. Omit it to have your editor open its native input form. Supply it only when you’ve already given the answer. |
Supply `answer` only when you’ve already given the answer. Otherwise, omit it so your editor collects it.
It returns the `question` text, an `outcome`, an optional continuation `trigger_event_id`, an optional `next_call`, and a `message`. The `outcome` is one of five values:
* `submitted`. The answer is accepted, and Promptless starts a new continuation task. That continuation carries the original request, context, clarification history, and links to any results. `next_call` and `trigger_event_id` point at it, so follow `next_call`.
* `already_answered`. The question already had an answer committed, by an earlier call or an overlapping native form. Retrying with the same answer returns that committed answer instead of erroring. If a different answer won first, yours isn’t submitted. Follow the task the returned `trigger_event_id` names, which points at the continuation already created.
* `unavailable`. Your editor can’t show a native form, so it asks the question in chat and calls `answer_task_question` again with the answer.
* `decline` or `cancel`. You declined or canceled the question, so following stops.
Like the other work-changing tools, it prompts before it runs and isn’t auto-approved.
### `request_changes`
[Section titled “request\_changes”](#request_changes)
Use `request_changes` when you want Promptless to make the change for you. Use `update_suggestion` to set the suggestion’s labels, assignees, or title, or to open its pull request yourself. Use `close_suggestion` to end a review without shipping it.
Asks Promptless to revise a suggestion it already produced. This is the revision loop.
| Argument | Required | Description |
| --------------- | -------- | ------------------------------------------------------------------------------------ |
| `suggestion_id` | Yes | The ID of the suggestion to change (from `search_suggestions` or `get_task_status`). |
| `instructions` | Yes | What to change about the suggestion. |
Promptless updates that suggestion’s existing docs pull request instead of opening a second one. It returns a task ID you check with `get_task_status`, plus a `next_call` that follows the revision task with `wait_for_task_update`. If the suggestion’s pull request is no longer one Promptless can revise, the tool reports that back; start a new task with `submit_documentation_task` instead.
### `update_suggestion`
[Section titled “update\_suggestion”](#update_suggestion)
Sets a suggestion’s metadata (its labels, assignees, and title) yourself, and optionally opens its docs pull request. This is the path where you make the change yourself. By contrast, `request_changes` has Promptless make it, and `close_suggestion` ends a review without shipping it. Pass the suggestion’s ID (from `search_suggestions` or `get_task_status`).
| Argument | Required | Description |
| ------------------- | -------- | ------------------------------------------------------------------------------------------------------------------------------------ |
| `suggestion_id` | Yes | The suggestion to update. |
| `labels` | No | Replaces the suggestion’s stored labels. Omit to leave them alone; pass an empty list to clear them. |
| `assignees` | No | Replaces the suggestion’s stored assignees. Omit to leave them alone; pass an empty list to clear them. |
| `title` | No | Sets the suggestion’s title. |
| `open_pull_request` | No | Pass `true` to open the suggestion’s docs pull request in this call. Any `labels` or `assignees` edits in the same call apply first. |
The title can be set here, but a suggestion’s description can’t. Labels and assignees are applied before the title. The title edit is pushed to the host GitHub or GitLab pull request before it’s stored. While a suggestion’s pull request is open, the host owns its title. So a title edit has to reach the pull request to stick. If the suggestion has no open pull request yet, the title is stored directly, since there’s no pull request to push to. If the host rejects the push, the call fails and the stored title is left unchanged. Any labels or assignees applied in the same call stay applied. The call is idempotent, so repeating it with the same arguments leaves the suggestion unchanged.
It returns the updated `labels`, `assignees`, and `title`. It also returns the docs pull request URL (`docs_pr_url`), which is null when the suggestion has no open pull request. Finally, it reports whether this call opened the pull request (`pull_request_opened`).
Because `labels` and `assignees` each replace the stored list, adding one without dropping the others means sending the full desired list. Read the current values first with `search_suggestions`, which returns each suggestion’s `labels` and `assignees`. Setting them tags this one suggestion; it isn’t a standing rule that auto-assigns or auto-labels future suggestions.
Opening the pull request is idempotent too. If the suggestion’s docs pull request is already open, setting `open_pull_request` to `true` returns the existing pull request. It then reports `pull_request_opened` as false rather than opening a second one.
### `close_suggestion`
[Section titled “close\_suggestion”](#close_suggestion)
Ends a review without shipping it. This is the close path. It contrasts with revising the suggestion using `request_changes`, or opening its pull request yourself with `update_suggestion`.
| Argument | Required | Description |
| --------------- | -------- | -------------------------------------- |
| `suggestion_id` | Yes | The suggestion to close. |
| `reason` | No | An optional note saved with the close. |
Closing the suggestion closes its docs pull request on the host first. If the host refuses to close the pull request, the suggestion stays open and the call reports why. A pull request that already merged, or otherwise shipped, can’t be closed. If there’s no open pull request to close, the close still succeeds. There’s simply nothing to close on the host, and the suggestion closes normally.
Closing can’t be undone from your editor: no MCP tool reopens a closed suggestion. To pursue the change again, start a new task with `submit_documentation_task`.
The close is attributed to your MCP client, so it’s distinguishable from a close done in the dashboard. It also records who closed it: you, plus your editor’s registered client name. Any `reason` you pass is saved with the close.
Closing over MCP never checks the dashboard’s **Remember this feedback for future suggestions** option. The close dialog offers that opt-in. This tool exposes no such option. So don’t expect a follow-up task from a close over MCP.
The call returns the `suggestion_id`, the resulting `status`, and a `message`. Like the other work-changing tools, it prompts before it runs. It’s destructive and can’t be auto-approved.
### `list_recent_tasks`
[Section titled “list\_recent\_tasks”](#list_recent_tasks)
Lists your organization’s recent documentation tasks, newest first, each with the `trigger_event_id` you pass to `get_task_status`. Use it when you’ve lost a task’s ID, or to see what Promptless has been working on. Like `get_task_status`, it surfaces tasks started from Slack, a GitHub pull request, or the dashboard, not only tasks submitted over MCP. A task submitted over the API is read by ID with `get_task_status`.
### `search_suggestions`
[Section titled “search\_suggestions”](#search_suggestions)
Searches your existing suggestions by keyword and status. Use it to check whether a change is already covered before starting a new task, or to find a suggestion to revise.
| Argument | Required | Description |
| -------- | -------- | -------------------------------------------------------------------------------------------------------------------------------------------------------------------------------------------------------------------------------------------------------------------------------------------------------------------------------------------------------------------------------------------- |
| `query` | No | Matches a suggestion’s title and description. |
| `status` | No | Restricts results to one of `draft`, `open`, `merged`, or `closed`. |
| `labels` | No | A list of label strings. Returns only suggestions carrying at least one of the given labels. This is an any-of match. Omit it or pass an empty list to apply no label filter, so results come back across all labels. Matches exactly, including case, so a label in the wrong case returns nothing; call `search_suggestions` without `labels` first to see the exact stored label strings. |
| `limit` | No | Caps how many results come back. Defaults to 25, never exceeds 100. |
When more suggestions match than were returned, the result sets a `truncated` flag so you know to narrow the query. Calling with no arguments returns your suggestions up to the limit. Filtering by `labels` pulls a labeled queue, such as every `P0` suggestion, in one call. That saves you fetching everything and filtering client-side, and the suggestion-triage workflow below relies on it. A `draft` or `open` suggestion is still live; a `merged` or `closed` one is already resolved. Each result also carries its `labels` and `assignees`, each a list of strings, and its `branch_name` (the git branch in the documentation repository the suggestion targets, always present). Use them to pick the suggestion to hand to `update_suggestion` or `request_changes`. You can also check out and diff the proposed change locally, even before its docs pull request opens. Once the suggestion’s pull request has merged or closed, the branch may no longer exist, since hosts often delete it. So a local checkout applies to a still-open suggestion.
## Answer a clarifying question
[Section titled “Answer a clarifying question”](#answer-a-clarifying-question)
A task can finish by marking one clarifying question in your editor. This applies to a task you started over MCP. Answering it starts a new continuation task. That task carries the original request, the original context, the clarification history, and links to any results already produced. You pick up directly from the clarification.
To answer through the native form, you need an MCP client that negotiates a recent protocol version and declares an elicitation capability. That capability is the MCP feature that lets a server show an input form inside your editor.
A clarifying question reaches you through the same task-following loop this page documents. As your editor follows the task with `wait_for_task_update`, or as you check it with `get_task_status`, the response surfaces the marked `question` and a `next_call` pointing at `answer_task_question`. Your editor follows that `next_call` the same way it follows any other task.
How you answer depends on your MCP client:
* A client that declares an elicitation capability shows a native single free-text field titled **Your answer**, with the question as its prompt. The answer runs 1–8000 characters.
* A client without that capability receives `outcome: unavailable`. Your editor posts the question as a chat message. Reply in the same conversation, and your editor relays your answer by calling `answer_task_question` again.
Your editor follows the accepted answer via its `next_call`, which points at the new continuation task. The first committed answer wins. Answering the same question again returns `already_answered`, and a matching answer comes back unchanged. If a different answer won first, yours isn’t submitted. You follow the task the response names, the continuation already created, to pick up the committed one. If you decline or cancel the question, no continuation is created and following stops. The original finished task and anything it already produced, such as suggestions, remain. To pursue the change, start a new task with `submit_documentation_task`.
## Workflow skills
[Section titled “Workflow skills”](#workflow-skills)
If your editor supports it, Promptless can hand it step-by-step guidance for multi-step workflows that chain several of these tools together. This is guidance for the [tools above](#available-tools), not a new set of tools. The catalog is unchanged. The editor decides when to load a skill; you ask for what you want as usual.
One skill ships today: `suggestion-triage`, a workflow for working through a backlog of suggestions. It pulls the backlog with `search_suggestions` and checks the `truncated` flag to see whether more are waiting. Then it reads each proposal in turn. Next it gives each suggestion one outcome, then hands the queue back to you. It can label or assign a suggestion with `update_suggestion`, send it back for a revision with `request_changes`, or close it with `close_suggestion`. That sequence is the point. It keeps the editor from treating a truncated result set as your whole backlog. And it gives each suggestion exactly one outcome, instead of you prompting each step and risking a missed part of the queue.
A skill doesn’t change how the tools behave. This skill’s work-changing tools are `update_suggestion`, `request_changes`, and `close_suggestion`. They still prompt before each run, just as they do when you call them directly. A skill only guides the sequence; it doesn’t bypass those confirmations.
Note
If your editor doesn’t support skills, you lose nothing, since it calls the same tools directly. Skills reach it over the draft **Skills extension (SEP-2640)**. The MCP endpoint declares this as the `io.modelcontextprotocol/skills` capability in its `initialize` response. Many clients don’t support it yet, so they won’t surface skills at all. To check whether yours does, see its MCP settings or release notes. And because the extension is still a draft, its shape can change.
Skills are purely additive. A client that doesn’t support the extension, or ignores it, sees exactly the same tools; the guidance costs nothing when it goes unused.
## Ask your editor
[Section titled “Ask your editor”](#ask-your-editor)
Ask in plain language. For example: “List my Promptless doc collections, then start a task to document the new authentication flow in the API docs collection.” Your editor maps that to `list_doc_collections`, then `submit_documentation_task`. It follows the task automatically in the same conversation, using the `next_call` it gets back. It reports the outcome and docs pull request link back to you, without you checking status by hand.
To avoid duplicating work, search before you submit. Your editor runs `search_suggestions` first, and if nothing live comes back, submits the task. For example: “Before I ask Promptless to document the new webhook retries, search existing suggestions for ‘webhook retries.’”
To check a task at a point in time, ask by its ID: “What’s the status of Promptless task ``?” Your editor calls `get_task_status` and reports the outcome and any docs pull request link. This is the on-request check, not the primary way you get an outcome. Reach for it for a task you didn’t follow to completion, or to look in again later or from another session. It works for any task.
To read a task’s conversation, ask for it: “What has Promptless said so far about task ``?” Your editor calls `get_task_status` and reports the conversation.
To add to a task that’s still running, tell Promptless what else to cover: “Tell Promptless task `` to also cover the error responses.” Your editor maps that to `send_task_message`, and the instruction folds into the running task. This works for tasks you started over the API or MCP, or created with `request_changes` over MCP. Check back with `get_task_status` to see the message added to the conversation.
A task can finish by marking one clarifying question. Answer it in plain language: “Answer Promptless task ``’s clarifying question: yes, cover the deprecation notice.” Your editor calls `answer_task_question`, and Promptless picks up your answer in a new task. Your editor follows that task via its `next_call`.
To change a suggestion Promptless already made, ask for a revision: “Revise Promptless suggestion `` to also cover single sign-on.” Your editor calls `request_changes`, and Promptless updates that suggestion’s existing pull request instead of opening a new one. Your editor follows the revision task via `next_call` until it’s done, the same way it follows a new task.
To set a suggestion’s labels, assignees, or title, or open its docs pull request yourself, ask for that. For example: “Assign Promptless suggestion `` to @alex, retitle it ‘SSO setup,’ and open its docs PR.” Your editor calls `update_suggestion`, which applies the change and opens the pull request in the same step. To just retitle it without opening a pull request, leave that part out: “Retitle Promptless suggestion `` to ‘SSO setup.’”
To close a suggestion you won’t ship, ask for that: “Close Promptless suggestion ``. We decided not to document this.” Your editor calls `close_suggestion` and saves your reason with the close; closing also closes the suggestion’s docs pull request.
If you’ve lost track of a task’s ID, ask for your recent ones: “What are my recent Promptless tasks?” Your editor calls `list_recent_tasks` and lists them newest first, so you can pick the ID to check.
To work through a backlog, ask for a triage pass: “Triage my open Promptless suggestions, label the P0s, and close anything we’ve decided against.” If your editor supports [workflow skills](#workflow-skills), it can follow the `suggestion-triage` steps; if not, it calls the same tools directly. Either way the work-changing tools still prompt before they run, so you stay in control of what changes.
## See your MCP tasks in the dashboard
[Section titled “See your MCP tasks in the dashboard”](#see-your-mcp-tasks-in-the-dashboard)
On the [Triggers page](https://app.gopromptless.ai/triggers), a task started over MCP shows an **MCP Task** pill with a byline reading ` · submitted by @`. That’s distinct from the **API Task** pill shown for `sk-pl-`/`POST /triggers` submissions.
To find MCP-originated suggestions on the [Suggestions list](https://app.gopromptless.ai/suggestions), set the **Trigger source** filter to “API”. That filter groups MCP together with API-key submissions rather than separating them.
## Manage and revoke your connection
[Section titled “Manage and revoke your connection”](#manage-and-revoke-your-connection)
Connections re-authorize automatically, so you rarely notice. The connection you approved lasts 90 days; after that, automatic refresh stops and you re-consent in the browser the way you did at setup.
To revoke a connection, remove the `promptless` server from your editor: in Claude Code, remove the `promptless` server; in Cursor, remove it from your MCP settings. There’s no revoke button in the dashboard. The **Editor connection (MCP)** section there is instructional only.
Promptless re-checks your organization membership on every call; if you lose active membership, the connection is revoked. Each member manages their own connection. An admin can’t revoke another member’s connection for them.
## Troubleshooting
[Section titled “Troubleshooting”](#troubleshooting)
Tool failures come back as errors your editor’s model sees, each surfaced as `code: message`. Common ones:
* **Empty `instructions`**: resubmit with a specific `instructions` string.
* **A `doc_collection_id` that isn’t a valid ID (UUID)**: call `list_doc_collections` and pass an `id` from the returned list.
* **An unrecognized `search_suggestions` status**: use one of `draft`, `open`, `merged`, or `closed`.
* **The organization hasn’t finished setting up Promptless**: the tool returns “This organization has not finished setting up Promptless.” Finish setup on the [Configuration page](https://app.gopromptless.ai/configuration), or ask a member with admin access to finish it.
* **A requested collection isn’t configured**: the tool returns “The requested doc collection is not configured.” Call `list_doc_collections` for a valid `id`, or configure the collection first.
* **A suggestion that can no longer be revised**: `request_changes` reports that the suggestion is no longer one Promptless can revise. Its pull request has moved beyond where a revision applies. Start a new task with `submit_documentation_task` instead.
* **An `update_suggestion` call that can’t be applied**: a `suggestion_id` that isn’t a valid ID (UUID) or matches no suggestion returns an error. Call `search_suggestions` for a valid ID. Setting a suggestion’s labels, assignees, or title still succeeds even on a closed or merged suggestion. Only opening a pull request is refused for a closed suggestion that hasn’t merged, and the tool reports why. If the host rejects the title push, the call fails and the stored title is left unchanged. Any labels or assignees from the same call stay applied. No MCP tool retracts a pull request while keeping the suggestion open for further editing. Closing over MCP with `close_suggestion` closes the suggestion and its pull request together. If you opened a pull request by mistake and want to keep working the suggestion, close the pull request on the host directly. The host is GitHub or GitLab.
* **A `close_suggestion` call that can’t be applied**: a `suggestion_id` that isn’t a valid ID (UUID) or matches no suggestion returns an error. Call `search_suggestions` for a valid ID. If the host refuses to close the pull request, the suggestion stays open and the tool reports why. A pull request that already merged can’t be closed. A suggestion that’s already closed can’t be closed again, and the tool reports so.
* **Sending to a finished task**: the tool rejects it with `task_finished`. A task that finished by reporting a blocker or a clarification request has still finished, so it also rejects messages. Start a new task with `submit_documentation_task` to continue. If the finished task marked a clarifying question, answer it with [`answer_task_question`](#answer-a-clarifying-question). That continues the work in a new task.
* **Sending to a task that isn’t API- or MCP-sourced**: the tool rejects it with `unsupported_task_source`. Task conversations are scoped to API and MCP submissions and to tasks created by calling `request_changes` over MCP. Read the task’s status instead, or start an API or MCP task to converse.
* **An empty or over-length message**: the tool rejects it with `invalid_message`. The limit is 20,000 characters after trimming.
* **A retried message that conflicts with a stored one**: the tool rejects it with `idempotency_conflict`. The retry reused the same `idempotency_key` with different text. Resend with a new `idempotency_key`, or with the original text.
* **A `wait_for_task_update` cursor that’s invalid or from another task**: the tool rejects it with `invalid_cursor`. Omit the cursor to read from the beginning. If task storage doesn’t respond in time, the tool returns `task_read_timeout`; retry the same task and cursor. Set `wait_seconds` between 0 and 30, the server maximum.
* **`answer_task_question` returns `unavailable`**: your editor can’t show a native form. It asks the clarifying question in chat and calls `answer_task_question` again with your answer.
* **`answer_task_question` returns `already_answered`**: the question already had an answer committed. Follow the task the returned `trigger_event_id` names, which is the continuation already created. If a different answer won first, yours wasn’t submitted; following that task shows the committed answer.
* **`answer_task_question` returns `decline` or `cancel`**: you declined or canceled the question. No work continues and following stops. The original task and anything it already produced remain. To pursue the change, start a new task with `submit_documentation_task`.
* **An answer reference that points at an unrelated task**: `answer_task_question` rejects it with `continuation_conflict`. This happens when the `idempotency_key` matches a task other than this question’s own continuation. That covers a different parent task, a different question, or a task ineligible for a clarifying answer. Promptless doesn’t reuse that task. Start a new task with `submit_documentation_task`, restating your original request and your answer.
* **A deduplicated answer whose continuation can’t be found**: `answer_task_question` rejects it with `continuation_unavailable`. This case is transient. A concurrent identical answer to the same question was still committing its continuation when this call looked for it. Retry `answer_task_question` with the same arguments.
* **Denied, canceled, or expired consent**: re-run the authorize step. In Claude Code, run `/mcp` and pick **promptless** again. In Cursor, click **Needs login** again.
### Setup issues
[Section titled “Setup issues”](#setup-issues)
First-run snags usually clear with a retry:
* **The browser consent tab doesn’t open**: re-run the authorize step. In Claude Code, run `/mcp` and pick **promptless**; in Cursor, click **Needs login**.
* **No promptless entry under `/mcp` in Claude Code**: confirm the add command ran, then re-open the client.
* **Cursor’s Needs login button doesn’t respond**: remove the server and add it again.
# Microsoft Teams messages (beta)
> Trigger documentation updates from Microsoft Teams messages and mentions, so questions raised in chat become documentation suggestions.
Tip
You can set up this trigger by hand as this page describes, or ask Promptless in Slack or Microsoft Teams to do it for you. For example, “@Promptless turn on passive listening for my Teams `support` channel.” See [Ask Promptless to update your configuration](/docs/for-docs/get-the-most-out/ask-promptless-to-update-config).
Note
The Microsoft Teams trigger feature is in beta. Contact for more information about enabling this feature for your organization.
Microsoft Teams integration enables documentation updates directly from your team conversations. This is particularly useful for support conversations or internal discussions where questions arise that could be better addressed in your documentation.
## Trigger methods
[Section titled “Trigger methods”](#trigger-methods)
### Use a message action
[Section titled “Use a message action”](#use-a-message-action)
Right-click any Teams message (or use the message menu) and select **Update docs with Promptless** to trigger documentation analysis. You can optionally add instructions to guide the update. For example, “Focus on the error handling steps” or “Update the API reference section.”
Teams displays a confirmation after you submit, and the suggestion typically appears within a few minutes.
### Mention @Promptless in a Channel
[Section titled “Mention @Promptless in a Channel”](#mention-promptless-in-a-channel)
Tag @Promptless in a Teams channel with specific instructions or questions. Promptless analyzes the full thread context to create relevant documentation updates.
### Send a direct message
[Section titled “Send a direct message”](#send-a-direct-message)
Send documentation requests directly to @Promptless in a personal chat. This is useful for private documentation requests with comprehensive context support.
## How it works
[Section titled “How it works”](#how-it-works)
When triggered in Microsoft Teams:
1. **Message Analysis**: Promptless reads the message and conversation context where it was triggered
2. **Context Gathering**: The system analyzes text content and conversation flow
3. **Documentation Suggestions**: Promptless creates suggestions based on the conversation content
4. **Follow-up Editing**: Continue editing suggestions within the same thread using @Promptless mentions
## Thread reply auto-listening
[Section titled “Thread reply auto-listening”](#thread-reply-auto-listening)
Promptless automatically monitors threads where it’s participating. When someone replies to a thread where Promptless has posted or been @mentioned, Promptless treats the reply as a follow-on trigger. No additional @mention is required.
This means you can:
* Reply to a notification thread with feedback or additional context
* Continue a conversation Promptless started without tagging it again
* Provide additional details or clarifications that Promptless requested
Opting Out of Individual Messages
Promptless tries to reason about whether each message in a thread is actionable, so not every reply will trigger a documentation update. However, if you want to explicitly tell Promptless to ignore a message, start it with `aside` or `/aside`:
```plaintext
aside This is an internal discussion point, not for docs.
```
### Thread reply trigger mode
[Section titled “Thread reply trigger mode”](#thread-reply-trigger-mode)
Open **Settings** and select **Organization** to configure how Promptless handles thread replies:
* **Listen to all replies** (default): Process all replies in threads where Promptless is participating. Use the aside prefix to skip specific messages.
* **Require @promptless**: Only process replies that explicitly @mention Promptless.
This setting applies organization-wide to both Slack and Teams threads.
## Passive channel listening (optional)
[Section titled “Passive channel listening (optional)”](#passive-channel-listening-optional)
You can optionally enable passive listening for specific Teams channels. When enabled, Promptless automatically monitors conversations in your selected channels and creates documentation suggestions when threads become inactive.
Before You Begin
Make sure the Promptless app is installed in the team containing the channels you want to monitor.
To enable passive listening:
1. Edit your Microsoft Teams trigger project
2. Check the box for “Listen for all messages in specific channels”
3. Select which Teams channels to monitor
4. Save your configuration
Caution
Passive listening is completely opt-in and only applies to channels you explicitly select. Promptless cannot access channels in teams where it hasn’t been installed.
Customizing Behavior
You may want Promptless to follow specific instructions when processing messages in a monitored channel. If so, add those instructions to your [Agent KB](https://app.gopromptless.ai/settings/knowledge) in the `PROMPTLESS.md` file. By default, Promptless uses its best judgment to decide what should be documented, but custom instructions can help tailor the output for your needs.
## Configuration
[Section titled “Configuration”](#configuration)
@Promptless mentions in Microsoft Teams are a built-in trigger type that’s always active when the Teams integration is connected, no YAML configuration required.
To enable passive channel listening, add an `msteams_listen` trigger to your [Configuration page](https://app.gopromptless.ai/configuration):
```yaml
triggers:
teams-support:
trigger_type: msteams_listen
match:
- channel_ids:
- 19:abc123@thread.tacv2
```
Publishing behavior and notifications are controlled by your [policies configuration](/docs/for-docs/reference/configuration-reference#policies).
## Teams notifications
[Section titled “Teams notifications”](#teams-notifications)
When Promptless creates documentation suggestions from Teams triggers, it replies directly in the thread with a rich Adaptive Card showing:
* Suggestion title and description
* Status details including creation date, branch name, and affected files
* Interactive action buttons
### Interactive action buttons
[Section titled “Interactive action buttons”](#interactive-action-buttons)
Teams suggestion cards include buttons that let you take action directly from Teams:
* **Publish**: Merges the docs PR and publishes the changes. The card updates in-place to show the result.
* **Create PR**: Opens a documentation pull request. The card refreshes to show the new PR link.
* **View PR**: Opens the docs PR in your browser.
* **Review in Promptless**: Opens the suggestion in the Promptless dashboard.
Publish and Create PR execute server-side and update the card with the result, so you can manage documentation directly from Teams without switching contexts.
## Privacy and channel access
[Section titled “Privacy and channel access”](#privacy-and-channel-access)
By default, Promptless only reads Teams content when you explicitly trigger it by @mentioning @Promptless or using a message action. If you enable passive listening, Promptless monitors only the specific channels you select in your project configuration.
## Setup instructions
[Section titled “Setup instructions”](#setup-instructions)
To connect Microsoft Teams to Promptless, see the [Microsoft Teams Integration](/docs/for-docs/reference/integrations/microsoft-teams) setup guide.
Note
Microsoft Teams integration requires admin center access to install the Promptless Teams app. See the setup guide for detailed installation instructions.
# Schedule triggers
> Run any standing instructions you write on a repeating cron schedule, with no triggering event required. Use it for recurring audits, content checks, and drift sweeps across your doc collections, repos, and context sources.
Tip
You can set up this trigger by hand as this page describes, or ask Promptless in Slack or Microsoft Teams to do it for you. For example, “@Promptless add a schedule trigger every Monday at 9am to check my changelog against recent releases.” See [Ask Promptless to update your configuration](/docs/for-docs/get-the-most-out/ask-promptless-to-update-config).
A schedule trigger runs your standing instructions on a repeating clock schedule. Think of it as the API trigger with a clock attached. It carries free-text standing instructions that Promptless dispatches to the agent each time a scheduled time comes due.
Before you start
A schedule trigger runs against your active doc collections. Your organization needs at least one active doc collection and a saved configuration. A scheduled run is dropped if neither is in place.
Only [organization admins](/docs/for-docs/reference/configuration-reference#permissions-and-conflict-detection) can create or edit triggers.
## Use cases
[Section titled “Use cases”](#use-cases)
Schedule triggers work well when you want to:
* Run a weekly check that your release notes reflect what actually shipped
* Periodically audit a changelog against a release-notes page
* Sweep for documentation drift on a recurring basis when there’s no triggering event of its own
## Set up a schedule trigger in the dashboard
[Section titled “Set up a schedule trigger in the dashboard”](#set-up-a-schedule-trigger-in-the-dashboard)
1. Open your organization’s [Configuration page](https://app.gopromptless.ai/configuration) and select the **Triggers** tab.
2. Choose the **“On a schedule”** group and its catalog entry, “A recurring schedule”. Its description reads “Run instructions you write on a repeating schedule you pick.”
3. Under **“When should Promptless run?”**, set the schedule. The help text reads “Start from a preset or write your own schedule. Schedules can run at most once an hour.” Choose a preset chip, or enter your own cron expression:
* **“Every day at 9am”** (`0 9 * * *`)
* **“Every weekday at 9am”** (`0 9 * * 1-5`)
* **“Every Monday at 9am”** (`0 9 * * 1`)
* **“First of the month”** (`0 9 1 * *`)
The raw cron text field takes the placeholder `0 9 * * 1` and the helper “Five fields: minute, hour, day of month, month, day of week.” When you enter a cron expression, a live gloss reads “Runs {plain-English description}.” so you can confirm the cadence.
4. Under **“In which timezone?”**, pick the timezone the schedule runs in. It defaults to UTC, and the help text reads “Schedules keep this wall-clock time across daylight-saving changes.”
5. Under **“What should Promptless do each time?”**, write your standing instructions. The help text reads “There’s no pull request or message behind a scheduled run, so these standing instructions are the whole job.”
6. Save your configuration. After you save, the schedule runs at its next matching occurrence. Promptless doesn’t run it retroactively for times that have already passed.
## Cron schedule rules
[Section titled “Cron schedule rules”](#cron-schedule-rules)
A schedule uses a standard five-field cron expression: minute, hour, day of month, month, day of week. Six-field expressions that add seconds and shorthand aliases like `@daily` are both rejected.
A schedule can run at most once an hour. Promptless validates this by sampling real occurrences of the expression, so a schedule disguised as sub-hourly is caught too.
| Accepted | Rejected (too frequent) |
| -------------- | ----------------------- |
| `0 9 * * 1` | `*/5 * * * *` |
| `0 9 * * *` | `0,30 * * * *` |
| `0 * * * *` | `0-10 * * * *` |
| `0 9,10 * * *` | `* * * * *` |
| `0 9 1 * *` | |
| `30 2 * * 1-5` | |
Expressions with the wrong number of fields, such as `@daily` or a six-field expression, are also rejected.
## Timezones and daylight saving
[Section titled “Timezones and daylight saving”](#timezones-and-daylight-saving)
The timezone is an optional IANA name, such as `America/Los_Angeles`, and defaults to UTC when you leave it unset. A schedule keeps its wall-clock meaning across daylight-saving changes. A schedule set for 9am local stays at 9am local through both spring-forward and fall-back.
Note
A schedule keeps its wall-clock time. A 9am-local run therefore stays at 9am local on both sides of a daylight-saving transition rather than shifting by an hour.
## Write standing instructions
[Section titled “Write standing instructions”](#write-standing-instructions)
The standing instructions are the whole job. There’s no inbound event describing the work, so be explicit about which repos and files to compare and what to open a suggestion for.
Instructions are required and can’t be empty. Promptless trims leading and trailing whitespace, and there’s no maximum length.
Any repositories or context sources you name in your instructions need to be connected first so Promptless can read them. Connect them through [source control](/docs/for-docs/connect/source-control) and [context sources](/docs/for-docs/connect/context-sources).
## Configure in YAML
[Section titled “Configure in YAML”](#configure-in-yaml)
For precise control, configure the schedule trigger in the `triggers` section of your `promptless.yaml` file:
```yaml
triggers:
weekly-release-notes-check:
trigger_type: schedule
match:
- cron: "0 9 * * 1"
timezone: America/Los_Angeles # optional; defaults to UTC
instructions: |
Compare the changelog in acme/api against docs/release-notes.md and open a
suggestion for anything that shipped but isn't documented.
```
| Field | Description |
| -------------- | ---------------------------------------------------------------------------------------- |
| `trigger_type` | Set to `schedule`. |
| `cron` | Required. Five-field cron expression inside a `match` clause. Runs at most once an hour. |
| `timezone` | Optional. IANA timezone name inside a `match` clause; defaults to UTC. |
| `instructions` | Required, non-empty. The standing instructions Promptless runs each time. |
The `instructions` field sits alongside `match`, not inside a clause. This is the one trigger type with a top-level `instructions` field, because no inbound event describes the work.
Each `match` clause is a `{cron, timezone}` pair, and at least one clause is required. Multiple clauses run the same instructions on multiple cadences, for example a Monday 9am run and a Thursday 9am run:
```yaml
triggers:
twice-weekly-check:
trigger_type: schedule
match:
- cron: "0 9 * * 1"
timezone: America/Los_Angeles
- cron: "0 9 * * 4"
timezone: America/Los_Angeles
instructions: |
Compare the changelog in acme/api against docs/release-notes.md and open a
suggestion for anything that shipped but isn't documented.
```
## What to expect
[Section titled “What to expect”](#what-to-expect)
* A missed occurrence is skipped rather than run late. If Promptless is briefly unavailable when a scheduled time passes, it doesn’t run that occurrence after the fact.
* If a previous run of the same schedule is still in progress, Promptless skips the next occurrence rather than stacking runs.
* A run that finds nothing worth changing finishes quietly, with no suggestion and no notification.
* A scheduled run flows through the same pipeline as every other trigger. It’s addressable by its trigger key in your `policies` rules, and it’s dropped if your org has no active doc collections or configuration.
Tip
A scheduled run’s only signals are the suggestions it opens and the notifications your policy sends. Set a notification channel and shape your instructions to control noise. See [Notifications](/docs/for-docs/tune/notifications) and [Noise and relevance filtering](/docs/for-docs/tune/noise-and-relevance-filtering).
Note
Scheduled suggestions follow your configured [policies](/docs/for-docs/reference/configuration-reference#policies) for publishing and notifications, just like suggestions from any other trigger.
## View schedule triggers
[Section titled “View schedule triggers”](#view-schedule-triggers)
Scheduled runs appear on the [Triggers page](https://app.gopromptless.ai/triggers) like any other trigger, labeled as a scheduled run. You can see when each occurrence ran and what it produced.
## How it works
[Section titled “How it works”](#how-it-works)
When a scheduled time comes due:
1. **Dispatch**: Promptless dispatches your standing instructions to the agent.
2. **Analysis**: Promptless analyzes your docs against those instructions and your configured context sources.
3. **Suggestion Creation**: If updates are needed, Promptless creates suggestions. Otherwise the run finishes quietly.
Note
See the [triggers section](/docs/for-docs/reference/configuration-reference#triggers) of the Configuration Reference for the full schema.
# Slack messages
> Trigger documentation updates from Slack conversations, by message action or by mentioning @Promptless, so support and internal threads become documentation suggestions.
Tip
You can set up this trigger by hand as this page describes, or ask Promptless in Slack or Microsoft Teams to do it for you. For example, “@Promptless passively listen to my #support and #docs-feedback channels.” See [Ask Promptless to update your configuration](/docs/for-docs/get-the-most-out/ask-promptless-to-update-config).
Slack integration enables documentation updates directly from your team conversations. This is particularly useful for support conversations or internal discussions where questions arise that could be better addressed in your documentation.
## Trigger methods
[Section titled “Trigger methods”](#trigger-methods)
### Use a message action
[Section titled “Use a message action”](#use-a-message-action)
Use the Promptless message shortcut on any Slack message to trigger documentation analysis. This method allows you to trigger updates without interrupting the conversation flow.
### Mention @Promptless in a channel
[Section titled “Mention @Promptless in a channel”](#mention-promptless-in-a-channel)
Tag @Promptless in a channel with specific instructions or questions. Promptless analyzes the full thread context to create relevant documentation updates.
### Send a direct message
[Section titled “Send a direct message”](#send-a-direct-message)
Send documentation requests directly to @Promptless in a DM. This is useful for private documentation requests with comprehensive context support.
## How it works
[Section titled “How it works”](#how-it-works)
When triggered in Slack:
1. **Thread Analysis**: Promptless reads the entire thread where it was triggered
2. **Context Gathering**: The system analyzes text, images, and file attachments in the thread
3. **Documentation Suggestions**: Promptless creates suggestions based on the conversation content
4. **Follow-up Editing**: Continue editing suggestions within the same thread using @Promptless mentions
## Image and file processing
[Section titled “Image and file processing”](#image-and-file-processing)
Promptless can process images and file attachments shared in Slack threads when triggered, enhancing documentation with visual elements and additional context when appropriate.
### How it works
[Section titled “How it works”](#how-it-works-1)
1. When you tag @Promptless or use the “Update docs” message action in a thread containing images or file attachments, Promptless analyzes the thread. It reads both the text and the attached files.
2. Promptless evaluates whether the images or file content provide valuable context that should be included in the documentation.
3. If an image or file is deemed relevant, Promptless:
* Uploads the image to a secure S3 bucket
* Extracts and incorporates relevant content from file attachments (including images from PDFs)
* Includes the image in the documentation updates it suggests
* Formats the image appropriately for the documentation platform
4. When reviewing the suggestion in the Promptless app, the added images appear at the bottom of the review interface. You can approve or reject their inclusion.
## Thread reply auto-listening
[Section titled “Thread reply auto-listening”](#thread-reply-auto-listening)
Promptless automatically monitors threads where it’s participating. When someone replies to a thread where Promptless has posted or been @mentioned, Promptless treats the reply as a follow-on trigger. No additional @mention is required.
This means you can:
* Reply to a notification thread with feedback or additional context
* Continue a conversation Promptless started without tagging it again
* Provide images, files, or clarifications that Promptless requested
Opting Out of Individual Messages
Promptless tries to reason about whether each message in a thread is actionable, and not every reply triggers a documentation update. However, if you want to explicitly tell Promptless to ignore a message, start it with `aside` or `/aside`:
```plaintext
aside This is an internal discussion point, not for docs.
```
### Thread reply trigger mode
[Section titled “Thread reply trigger mode”](#thread-reply-trigger-mode)
Open **Settings** and select **Organization** to configure how Promptless handles thread replies:
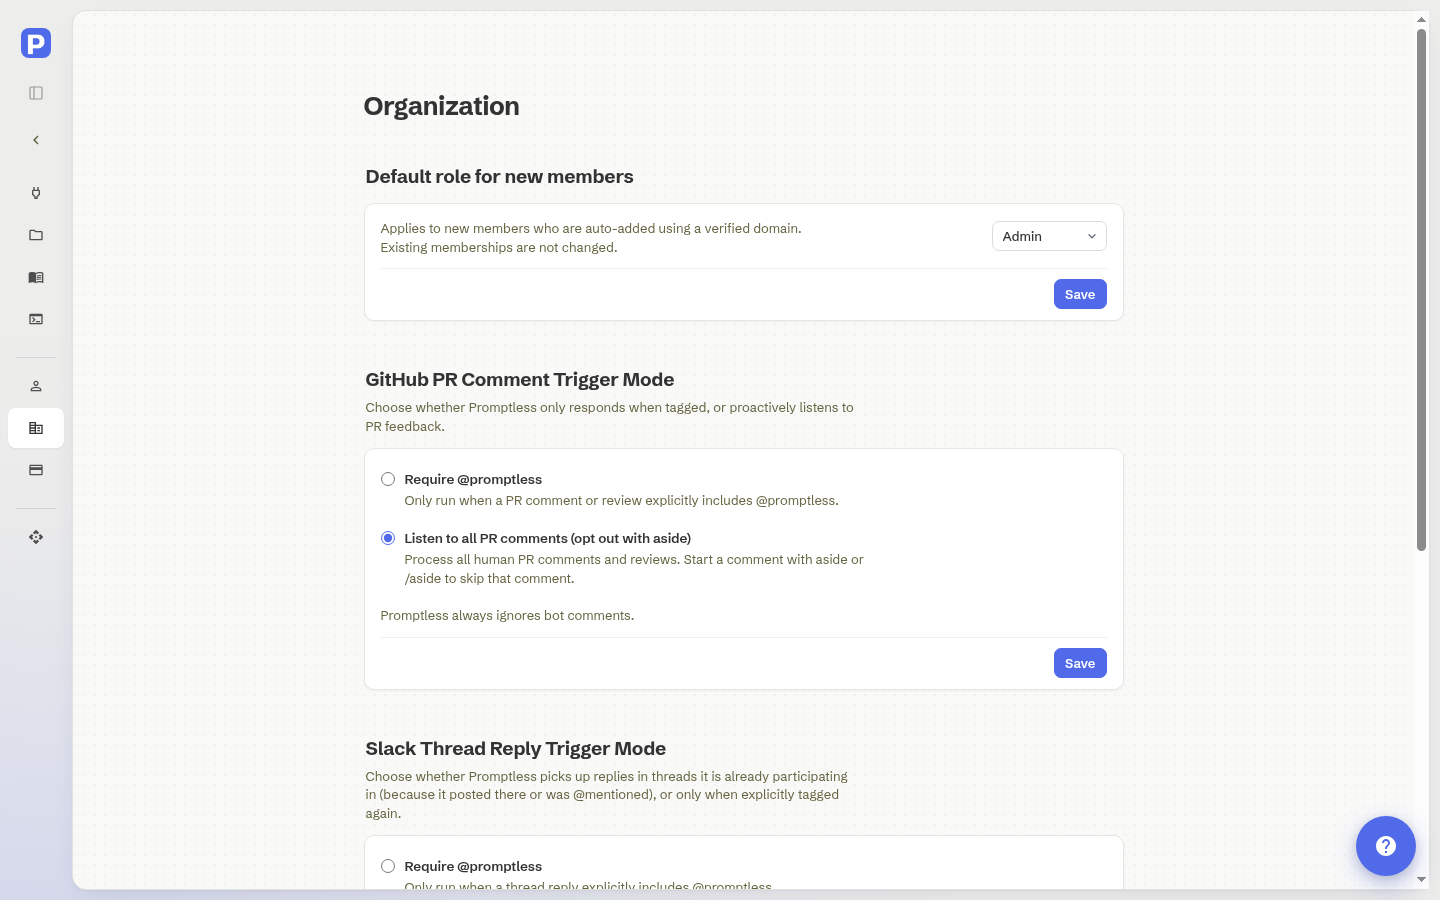
* **Listen to all replies** (default): Process all replies in threads where Promptless is participating. Use the aside prefix to skip specific messages.
* **Require @promptless**: Only process replies that explicitly @mention Promptless.
This setting applies organization-wide to all Slack threads.
## Passive channel listening (optional)
[Section titled “Passive channel listening (optional)”](#passive-channel-listening-optional)
You can optionally enable passive listening for specific channels. When enabled, Promptless immediately monitors and responds to conversations in your selected channels, creating documentation suggestions as messages are posted.
Before You Begin
Make sure the Promptless bot is added to any channel you want to monitor. Promptless cannot view messages in channels where it hasn’t been invited.
To enable passive listening, add a `slack_listen` trigger to your configuration:
```yaml
triggers:
my-slack-trigger:
trigger_type: slack_listen
match:
- channels:
- support
- docs-feedback
```
Caution
Passive listening is completely opt-in and only applies to channels you explicitly select. Promptless cannot access private channels unless it has been specifically invited to those channels.
Customizing Behavior
Promptless can follow specific instructions when processing messages in a monitored channel. Add those instructions to your [Agent KB](https://app.gopromptless.ai/settings/knowledge) in the `PROMPTLESS.md` file. By default, Promptless uses its best judgment to decide what should be documented, but custom instructions can help tailor the output for your needs.
## Configuration
[Section titled “Configuration”](#configuration)
Configure Slack passive listening in your [Configuration page](https://app.gopromptless.ai/configuration) using the `triggers` section:
```yaml
triggers:
support-channels:
trigger_type: slack_listen
match:
- channels:
- customer-support
- product-questions
```
Channel names don’t need the `#` prefix. When Slack channels are renamed, Promptless automatically updates your configuration.
@Promptless mentions and message actions work automatically when the Slack integration is connected. No configuration is required. See the [Configuration Reference](/docs/for-docs/reference/configuration-reference#triggers) for details.
## Privacy and channel access
[Section titled “Privacy and channel access”](#privacy-and-channel-access)
By default, Promptless only reads Slack content when you explicitly trigger it by tagging @Promptless or using the “Update Docs” message action. If you enable passive listening, Promptless monitors only the specific channels you select in your project configuration.
## Setup instructions
[Section titled “Setup instructions”](#setup-instructions)
To connect Slack to Promptless, see the [Slack Integration](/docs/for-docs/reference/integrations/slack) setup guide.
# Build an agent knowledge base
> View and edit the files that help Promptless understand your documentation style, product context, and workflow preferences
Promptless updates these files automatically as it learns from your feedback. Organization admins can edit them directly, while other members have read-only access.
## Access the Agent Knowledge Base
[Section titled “Access the Agent Knowledge Base”](#access-the-agent-knowledge-base)
In the left sidebar, open **Settings** and select **Agent Knowledge Base**.
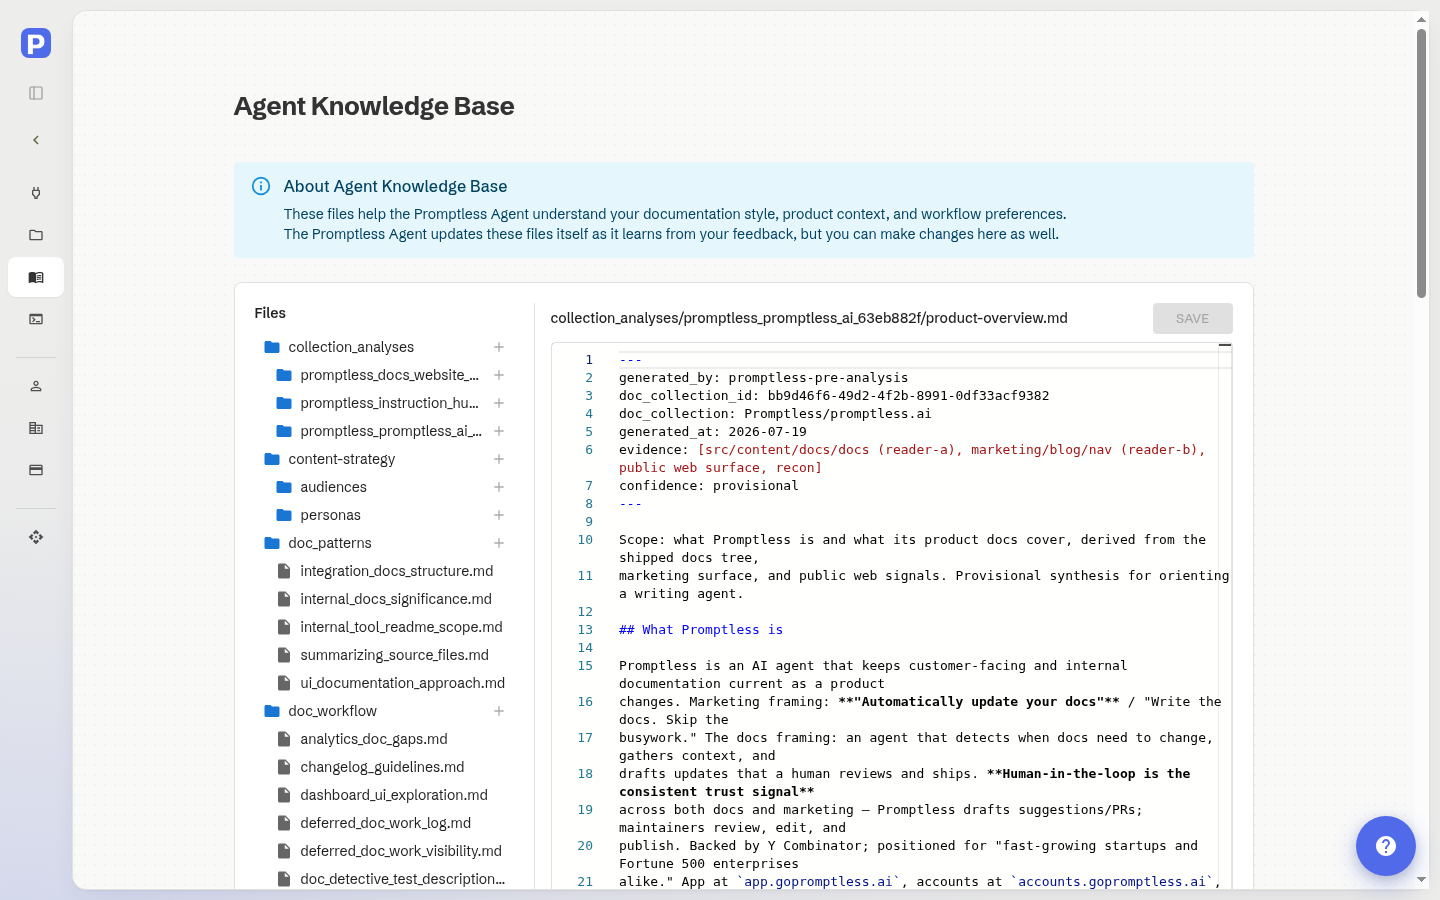
## Recent updates by Promptless
[Section titled “Recent updates by Promptless”](#recent-updates-by-promptless)
View recent updates Promptless has made to these files based on your feedback.
Each update includes:
* Date of the update
* Files changed
* Link to the suggestion that triggered the update
This shows how your feedback shapes Promptless’s understanding of your documentation preferences.
## Knowledge Base files
[Section titled “Knowledge Base files”](#knowledge-base-files)
| File | Purpose |
| -------------------------- | --------------------------------------------------------------------------------------------------------------------------------------------------------------------------------------------------- |
| `client_instructions.md` | Guidelines for how Promptless approaches documentation tasks. Updated when Promptless learns new preferences from your feedback. |
| `default_plan_skeleton.md` | Template structure for documentation plans. Updated when you provide feedback on plan organization. |
| `client_style_guide.md` | Writing style rules and conventions. If your repo includes a style guide or Vale rules, reference those files here. Promptless updates this file as it learns your style preferences from feedback. |
## Doc collection analysis
[Section titled “Doc collection analysis”](#doc-collection-analysis)
When you connect a docs repository, Promptless studies it as a whole. This covers your existing documentation, the repository’s full commit history, and your public docs site. Promptless records what it learns in a `collection_analyses/` folder in the Agent Knowledge Base. Each connected docs repository gets its own subfolder. Promptless reads this analysis at the start of every documentation task, so its suggestions reflect how your product and docs actually work.
Each analysis folder contains:
| File | Contents |
| -------------------------- | --------------------------------------------------------------------------------------------------------------- |
| `README.md` | An index of the analysis and its headline findings. |
| `product-overview.md` | What your product does, its key concepts, and terminology. |
| `audience-and-personas.md` | Who your documentation serves and what knowledge each reader is assumed to have. |
| `content-strategy.md` | Critical user journeys, where new content belongs, and gaps in your information architecture. |
| `team-workflows.md` | Patterns from your commit history, such as update cadence, authorship, and which pages tend to change together. |
| `style-observations.md` | Voice, formatting, and terminology patterns observed in your docs. |
Note
These files are Promptless’s best inferences from your docs, commit history, and public site. They are not confirmed facts. Organization admins can [edit any of them](#edit-files) to correct or refine what Promptless assumes. Promptless treats those edits as ground truth for future tasks.
### How the analysis is generated
[Section titled “How the analysis is generated”](#how-the-analysis-is-generated)
Promptless generates the analysis when you connect a docs repository during setup, so it reflects your documentation at that time. You can edit the analysis files anytime to correct or refine them, and Promptless treats your edits as ground truth on future tasks.
If you’ve connected Slack or Microsoft Teams, Promptless notifies you in your configured channel when the analysis finishes. Without a chat integration, the files simply populate in the Agent Knowledge Base when the analysis finishes.
Caution
If you point a collection at a different repository in your collection’s configuration, Promptless re-analyzes from scratch. It replaces all six files, including any edits you’ve made. Copy anything you want to keep first.
## View files
[Section titled “View files”](#view-files)
Click any file in the tree view to open it in the editor. All organization members can view these files to understand how Promptless has been configured.
When you open a file, the URL updates with a `?file=` query parameter for that file. You can bookmark or share a link that opens the editor directly to it. Recipients still need their own access to your organization to open the link. Your browser’s back and forward buttons move between the files you’ve viewed.
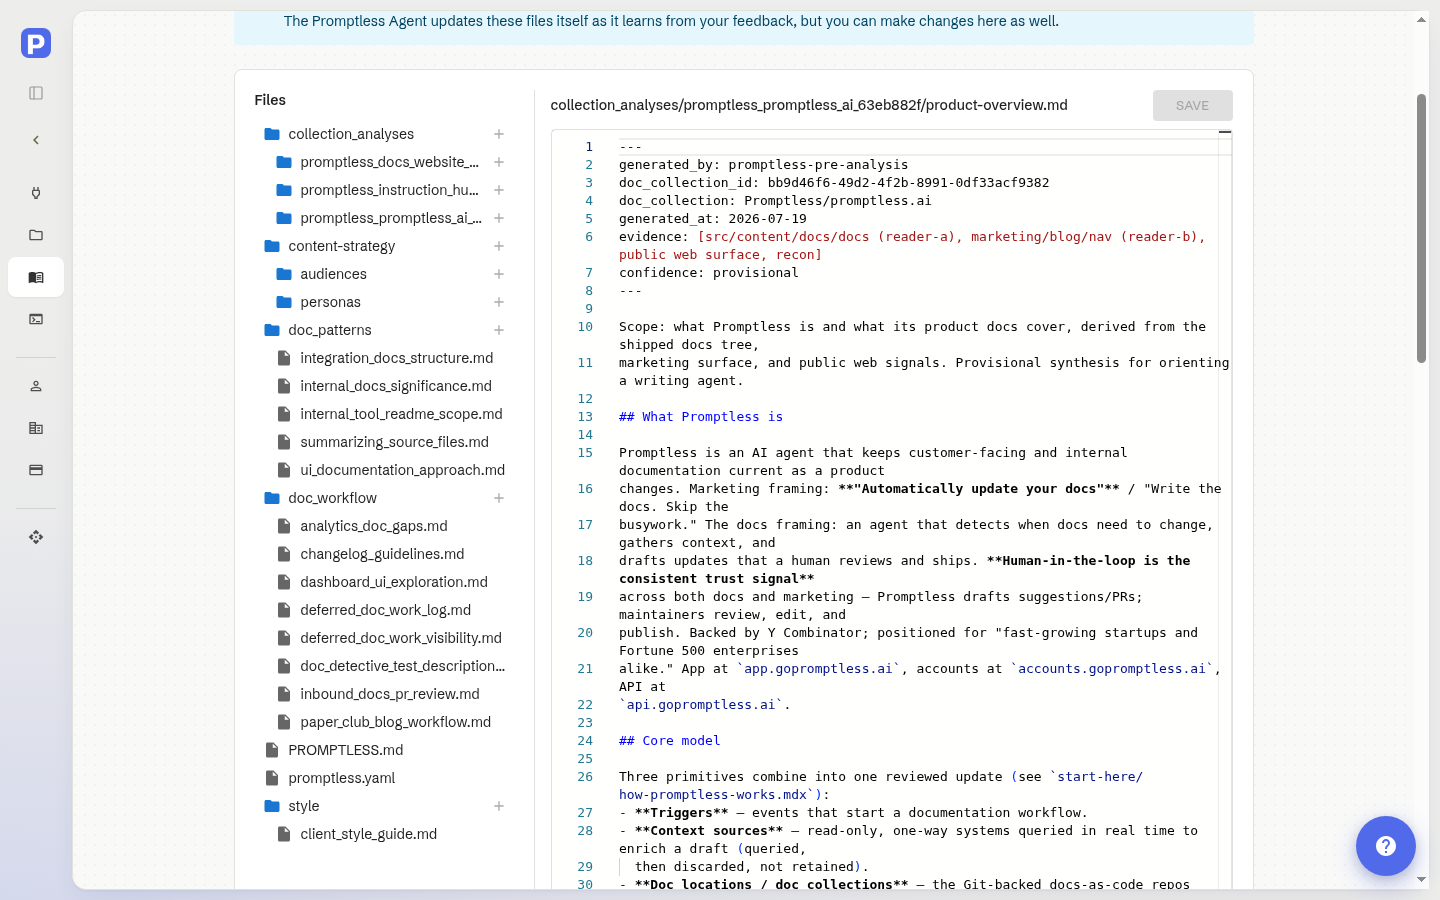
## Edit files
[Section titled “Edit files”](#edit-files)
Note
Only organization admins can edit Agent Knowledge Base files. If you’re not an admin, you’ll see a read-only view. A “View only” label noting that admins can edit appears instead of the Save button.
To edit a file:
1. Make your changes in the editor
2. Click **Save**
3. Your changes are committed directly to the repository
Caution
Switching files with unsaved changes will discard those changes. This includes switching files with your browser’s back and forward buttons.
## Create files
[Section titled “Create files”](#create-files)
Click the **+** button next to any folder to create a new file inside it. Or click the new-file icon at the root to create a top-level file.
In the dialog:
1. Enter a file name without the `.md` extension (Promptless adds it automatically)
2. Click **Create**
The file opens in the editor immediately. To create nested paths, enter `nested/path/filename` in the dialog. Promptless creates any intermediate folders automatically.
## How Promptless uses these files
[Section titled “How Promptless uses these files”](#how-promptless-uses-these-files)
Promptless reads these files at the start of every documentation task to understand your documentation approach, product terminology, and writing style.
When you provide feedback on suggestions (through PR comments, the web interface, or Slack), Promptless may update these files. It applies what it learned to future tasks.
Need help? Contact us at .
# Ask Promptless to update your configuration
> Ask Promptless in Slack or Microsoft Teams to change your triggers, doc collections, and other promptless.yaml settings directly
You can ask Promptless in Slack or Microsoft Teams to change your configuration, and it makes the change directly. This is a conversational alternative to editing your configuration yourself in the Promptless dashboard. Describe the change you want in chat, and Promptless applies it.
## What you can change
[Section titled “What you can change”](#what-you-can-change)
All Promptless configuration lives in a single `promptless.yaml` file in your [Agent Knowledge Base](/docs/for-docs/get-the-most-out/agent-knowledge-base), organized into four sections. Asking in chat can edit any of them:
* **Triggers**: add, modify, or remove a trigger, such as a [`github_pr` trigger](/docs/for-docs/reference/configuration-reference#triggers) scoped to a repo, a `slack_listen` trigger for a channel, or a commit trigger.
* **Doc collections**: add, remove, or rescope a [doc collection](/docs/for-docs/reference/configuration-reference#doc-collections).
* **Context sources**: add or remove a [context source](/docs/for-docs/reference/configuration-reference#context-sources).
* **Policies**: adjust publishing and notification rules, such as the [notification channel or `auto_create_pr`](/docs/for-docs/reference/configuration-reference#policies).
These are common examples. You can change any setting that `promptless.yaml` supports, not just these. For the full field reference, see the [Configuration reference](/docs/for-docs/reference/configuration-reference).
## How to ask
[Section titled “How to ask”](#how-to-ask)
Mention `@Promptless` in Slack or Microsoft Teams the same way you already trigger doc updates. Then phrase a natural-language request describing the configuration change you want.
For how to interact with the bot in Slack and Teams (message actions and mentions), see [Review from Slack and Teams](/docs/for-docs/work-the-queue/reviewing-from-slack-and-teams). Also see the [Slack](/docs/for-docs/reference/integrations/slack) and [Microsoft Teams](/docs/for-docs/reference/integrations/microsoft-teams) integration pages.
## Example requests
[Section titled “Example requests”](#example-requests)
These are illustrative. You can describe the change in your own words rather than following a fixed command syntax. The same requests work in Slack and Microsoft Teams. The `@Promptless` phrasing here isn’t tool-specific.
You can manage your triggers:
* `@Promptless add a github_pr trigger for the acme/api repo`
* `@Promptless stop watching the #random channel`
* `@Promptless watch all repos in the acme org for docs changes`
* `@Promptless only trigger on the docs/ directory in acme/api`
You can add, remove, or rescope your doc collections:
* `@Promptless add the acme/docs repo as a doc collection`
* `@Promptless limit the acme/docs collection to the docs/ folder`
You can manage which context sources Promptless can query:
* `@Promptless remove the Notion context source`
You can adjust your publishing and notification policies:
* `@Promptless send suggestion notifications to #docs-review`
* `@Promptless turn on auto-create PRs for the acme/docs collection`
## What happens: a direct config change, not a suggestion
[Section titled “What happens: a direct config change, not a suggestion”](#what-happens-a-direct-config-change-not-a-suggestion)
Promptless applies the change directly and commits it to your `promptless.yaml` in the [Agent Knowledge Base](/docs/for-docs/get-the-most-out/agent-knowledge-base). No documentation suggestion and no pull request is created for a config change. This is distinct from the documentation-suggestion flow.
The two paths differ. Asking Promptless to *update your docs* produces a suggestion you review and merge. Asking it to *update your configuration* changes your settings directly.
Promptless validates the resulting configuration before it applies the change, so an invalid or unrecognized change isn’t committed. If a request is unclear, Promptless may ask you to clarify before making the change.
Each change is committed to your `promptless.yaml` in the Agent Knowledge Base. You can review the current configuration on the [Configuration page](/docs/for-docs/reference/configuration-reference#configuration-editor), and the change can be reverted like any other commit.
## Who can make changes
[Section titled “Who can make changes”](#who-can-make-changes)
By default, anyone who can @mention Promptless in a connected Slack or Microsoft Teams channel can ask it to make configuration changes. This is different from editing configuration on the [Configuration page](/docs/for-docs/reference/configuration-reference#configuration-editor), which is limited to admins.
To restrict who can make changes, add an allowlist of usernames or handles in `PROMPTLESS.md` in your [Agent Knowledge Base](/docs/for-docs/get-the-most-out/agent-knowledge-base), alongside `promptless.yaml`. When an allowlist is present, Promptless enforces it at runtime, so only the listed users can make configuration changes through chat.
To pair a trigger with written workflow instructions for a repeatable custom task, see [Teach Promptless a custom task](/docs/for-docs/get-the-most-out/teach-promptless-a-custom-task).
# Keep localized docs current
> Pair a trigger on your source-language directory with written instructions so Promptless drafts translated updates when your source docs change
Tip
You can set this up by hand as this page describes, or ask Promptless in Slack or Microsoft Teams to do it for you. For example, “@Promptless watch my English-language docs directory for changes, and use those changes to update my localized docs.” See [Ask Promptless to update your configuration](/docs/for-docs/get-the-most-out/ask-promptless-to-update-config).
When your docs ship in more than one language, the translated pages are the first to fall behind whenever source content changes. Most teams author in one language (commonly English) and mirror it into the others. This page applies the trigger-plus-instructions pattern to that job. You point a trigger at the directory you author in, and Promptless drafts translated updates for the rest of your documentation.
Caution
AI-assisted drafting speeds the work, but it doesn’t remove the need for human review. Idiom, tone, terminology, and locale conventions are easy to get subtly wrong. A person reviews the translated output before it ships (see step 3 below).
Note
There are no native localization settings in Promptless. You assemble this from two ingredients: a **trigger** that decides when Promptless runs, and a **workflow written as instructions** that describes what it does. This is the same pattern documented for [custom tasks](/docs/for-docs/get-the-most-out/teach-promptless-a-custom-task).
## Pair a trigger with translation instructions
[Section titled “Pair a trigger with translation instructions”](#pair-a-trigger-with-translation-instructions)
1. **Scope a trigger to your source-language directory.** Open the **Triggers** tab on the [Configuration page](https://app.gopromptless.ai/configuration). Choose **Add a trigger**, then pick **GitHub commits**. A [commit trigger](/docs/for-docs/connect/triggers/github-commits) runs when new commits are pushed to a branch. It runs regardless of whether those commits were in PRs. Expand **More filters (optional)**. Under **Only when files in these folders change**, enter the path you author in, such as `docs/en`, and press **Enter** to add it. Only commits that contain changes to those folders trigger documentation updates, so a commit touching just the translated directories doesn’t match.
2. **Write the translation instructions in `PROMPTLESS.md`.** The trigger decides when Promptless runs, but the instructions are your preferences for how Promptless should handle those localization tasks. `PROMPTLESS.md` lives in your [Agent Knowledge Base](/docs/for-docs/get-the-most-out/agent-knowledge-base) and is loaded into the agent’s instructions on every run. A rule you record there is visible every time. Name the directory you author in, the directories to update, and any terms to leave in the source language. For example, “`docs/en` is the documentation source directory. Localize changes into `docs/es` and `docs/ja`, and keep product names untranslated.” See [Teach Promptless a custom task](/docs/for-docs/get-the-most-out/teach-promptless-a-custom-task) for the “If, then” hook format and where longer workflows live.
3. **Review the drafted updates.** Promptless opens a suggestion with the translated changes. Have someone fluent in the target language review and publish it. Unlike a source-language edit, you can’t judge a translation’s correctness from the diff alone.
## Teach translation conventions with feedback
[Section titled “Teach translation conventions with feedback”](#teach-translation-conventions-with-feedback)
Plan to refine your translation instructions across the first few suggestions rather than landing them on the first run. This is especially true when you maintain several target languages or are catching up a stale backlog. Product names, terms of art, and phrases you deliberately leave untranslated need to come out the same way every time. When you correct a translation, [teach the convention with feedback](/docs/for-docs/tune/teaching-conventions) and check **Remember this feedback for future suggestions**. That way it shapes what Promptless proposes next time, not just this once. Promptless records what it learns in your Agent Knowledge Base: which terms stay in the source language, or how a feature name is rendered.
## Catch up translations that are already behind
[Section titled “Catch up translations that are already behind”](#catch-up-translations-that-are-already-behind)
The trigger-plus-instructions pattern is event-driven: it acts on new commits and does not retroactively scan pages that are already out of date. For one-time, corpus-wide work, use [Deep Analysis](/docs/for-docs/get-the-most-out/pay-down-docs-debt), which takes free-text instructions and returns a coordinated set of suggestions. Once you’re current, new commits to your source-language directory start a run as usual.
## Publish translated updates automatically
[Section titled “Publish translated updates automatically”](#publish-translated-updates-automatically)
Start by reviewing localization PRs, but consider turning on auto-merge once you trust the output. On the **Policies** tab of the [Configuration page](https://app.gopromptless.ai/configuration), add a rule scoped to your translation trigger. Turn on both **Open a pull request automatically** and **Merge the pull request automatically**. [Auto-merge](/docs/for-docs/connect/triggers/github-commits#auto-merge-mode) requires automatic PR creation to also be enabled, and it’s available only for GitHub commit triggers. A policy rule scopes to a single trigger, so full automation stays where you want it. With the [GitHub (read-only) app](/docs/for-docs/reference/integrations/github-read-only), which covers public repositories only, Promptless opens PRs from a fork. Confirm the automation behaves the way you expect before you rely on it.
Caution
Auto-merge on a trigger applies to every target locale that trigger drafts for, so it publishes all of them without per-change review. Turn it on only once a reviewer fluent in each of those languages trusts Promptless’s output for all of them. To automate some locales while still reviewing others, scope a separate trigger per locale. Either way, treat it as a deliberate choice rather than a default.
## Translation management systems
[Section titled “Translation management systems”](#translation-management-systems)
Promptless localizes content based on the instructions you provide. There is no documented integration with a translation management system (TMS) such as Phrase, Crowdin, or Lokalise. If your team runs a TMS and wants Promptless to hand off to it rather than draft the content itself, contact us. Email to discuss your requirements.
# Get the most out of passive channel listening
> Point Promptless at your highest-signal Slack and Teams channels so it drafts documentation updates from real conversations, no @mention required.
Tip
You can set this up by hand as this page describes, or ask Promptless in Slack or Microsoft Teams to do it for you. For example, “@Promptless start passively listening to my `#support` channel. Draft updates from doc issues or gaps in those conversations.” See [Ask Promptless to update your configuration](/docs/for-docs/get-the-most-out/ask-promptless-to-update-config).
Passive listening lets Promptless read the Slack and Microsoft Teams channels you choose and draft documentation updates from real conversations without anyone tagging it. Promptless evaluates messages as they’re posted and only drafts a suggestion when the conversation warrants one.
## How passive listening decides what to document
[Section titled “How passive listening decides what to document”](#how-passive-listening-decides-what-to-document)
Promptless reads matching-channel conversations as they happen. It drafts a suggestion only when the conversation reveals a real gap or error in your docs. It also drafts one when the conversation surfaces new information worth documenting or would clearly improve the docs. That outcome can be a correction or update to an existing page, not only a brand-new one. Much of the time it makes no change at all. That’s expected and by design. The value is that Promptless stays quiet on ordinary chatter and speaks up only when there’s something to document. Promptless processes the messages it reads to draft suggestions and doesn’t retain them; see [Data handling](/docs/for-docs/security/data-handling-and-classification).
Passive listening needs at least one active doc collection. Without one, listening has nowhere to send suggestions and does nothing.
Suggestions from passive listening are quiet at the source: Promptless does not post an “I’m on it” acknowledgment back in the channel. They show up in your [review queue](/docs/for-docs/work-the-queue/web-interface) and route to your configured notification channel, which you set through your [policies configuration](/docs/for-docs/reference/configuration-reference#policies).
When a monitored thread keeps evolving, Promptless can update the suggestion it already opened for that thread instead of creating a duplicate. You see updates to a single suggestion rather than a flood of separate ones.
Note
Passive listening uses Promptless’s judgment about what’s worth documenting, so it stays quiet on ordinary chatter. When you want to guarantee Promptless acts on a specific message, @mention it directly. See [Steer it in the moment](#steer-it-in-the-moment).
## Pick the right channels
[Section titled “Pick the right channels”](#pick-the-right-channels)
Point passive listening at low-volume, high-signal channels, and keep it off busy general chat. Good candidates include a Slack Connect channel shared with a customer, a dedicated `#docs-feedback` channel, or an internal channel where product decisions get made. Avoid a busy `#general`. High message volume means Promptless evaluates far more messages, most of which aren’t documentation-worthy.
For example, a team points passive listening at the Slack Connect channel they share with a customer. Over a week, three separate people ask some variant of “how do I rotate our API key?” Promptless notices the recurring question has no answer in the docs and drafts a new FAQ entry answering it. The team reviews and publishes it, turning a support-channel pattern into a doc that deflects the next ask. The same pattern applies to internal or community channels. A contributor or team channel where the same question keeps coming up is just as good a candidate.
## Set up listening
[Section titled “Set up listening”](#set-up-listening)
Configure passive listening on the **Configuration** page under the **Triggers** tab.
Before You Begin
* **Invite the Promptless bot to every Slack channel you want monitored** with `/invite @promptless`. This applies to public and private channels alike. Promptless can’t see messages in a channel it hasn’t been added to.
* **For Microsoft Teams, install the Promptless Teams app** with permission to read channel messages, plus admin consent. This lets it read channel conversations without an @mention. Teams support is in beta. Contact to enable it for your organization. See the [Microsoft Teams integration](/docs/for-docs/reference/integrations/microsoft-teams) setup guide for installation.
* **Have at least one [active doc collection](/docs/for-docs/connect/doc-locations/how-promptless-learns-your-docs)** so Promptless has somewhere to send suggestions.
1. **Add a Slack passive-listening trigger.** Choose the channels to monitor. Slack matches on channel names (no `#` prefix). Promptless tracks Slack channel renames automatically, so renaming a monitored channel doesn’t break the trigger.
2. **Add a Microsoft Teams passive-listening trigger.** Pick channels from the channel selector, or paste a channel’s conversation ID, which looks like `19:...@thread.tacv2`.
Each trigger you configure in the dashboard is stored as YAML. If you prefer config as code, add or edit these trigger blocks directly in `promptless.yaml` and push via git instead of using the dashboard. See the [Configuration Reference](/docs/for-docs/reference/configuration-reference#triggers). For reference, the underlying shape looks like this, with one `slack_listen` block and one `msteams_listen` block:
```yaml
triggers:
support-channels:
trigger_type: slack_listen
match:
- channels:
- slack-connect-acme
- docs-feedback
teams-support:
trigger_type: msteams_listen
match:
- channel_ids:
- 19:abc123@thread.tacv2
```
For Slack trigger details, see [Slack messages](/docs/for-docs/connect/triggers/slack-messages). For Teams trigger details, see [Microsoft Teams messages](/docs/for-docs/connect/triggers/microsoft-teams-messages). For the full set of match fields, see the [Configuration Reference](/docs/for-docs/reference/configuration-reference#triggers).
To stop monitoring a channel, remove or edit its trigger on the **Configuration** page (or delete the trigger block from `promptless.yaml`).
## Steer it in the moment
[Section titled “Steer it in the moment”](#steer-it-in-the-moment)
You don’t have to wait for passive listening to decide. Mention @Promptless directly in a monitored channel to trigger it immediately for a specific message or thread. This runs right away as a normal mention and isn’t subject to the passive “is this worth documenting?” judgment. Use it when you want something documented now.
Once Promptless is active in a thread, it keeps listening to replies so you can refine a suggestion or add context without tagging it again. To tell it to skip a specific reply, start the message with `aside` or `/aside`. Whether Promptless listens to all replies or only @mentions is an organization-level setting.
For how follow-up replies are handled, see [Thread auto-reply](/docs/for-docs/work-the-queue/reviewing-from-slack-and-teams#thread-auto-reply). To change the reply mode, see [Thread reply trigger mode](/docs/for-docs/connect/triggers/slack-messages#thread-reply-trigger-mode).
Need help getting the most out of passive listening? Contact us at .
# Pay down docs debt with Deep Analysis
> Submit large, complex documentation requests that require extended research and may create multiple suggestions across your docs
Use Deep Analysis when a request needs more research or scope than a regular trigger can handle. Instead of producing a single drive-by edit, Promptless reviews your source code, audits your existing docs, and returns a coordinated set of suggestions.
## When to use Deep Analysis
[Section titled “When to use Deep Analysis”](#when-to-use-deep-analysis)
Deep Analysis is built for projects that span multiple pages, need background research, or call for a coherent plan before any edits land:
* **Refactoring documentation sections**: restructure or rewrite an entire section to match a new pattern or stronger examples.
* **Documentation audits**: check the whole collection for consistency, accuracy, or style compliance.
* **Writing docs from scratch**: produce comprehensive documentation for a new feature or product.
* **Filling in OpenAPI specs**: add error codes, examples, or other structured data across an API reference.
For routine updates, stick with Slack, GitHub PR triggers, or a regular New Task. Deep Analysis is heavier and slower, so reach for it when the work genuinely calls for it.
Tip
Auditing, remediating, or restructuring an existing docs set? See [Audit and keep your docs healthy](/docs/for-docs/audit/keep-docs-healthy). It explains how Deep Analysis fits alongside Vale, Doc Detective, and redirects on those jobs.
## Submit a request
[Section titled “Submit a request”](#submit-a-request)
Deep Analysis runs through the New Task composer. Set **Mode** to **Deep analysis**, then describe the project in the instructions field.
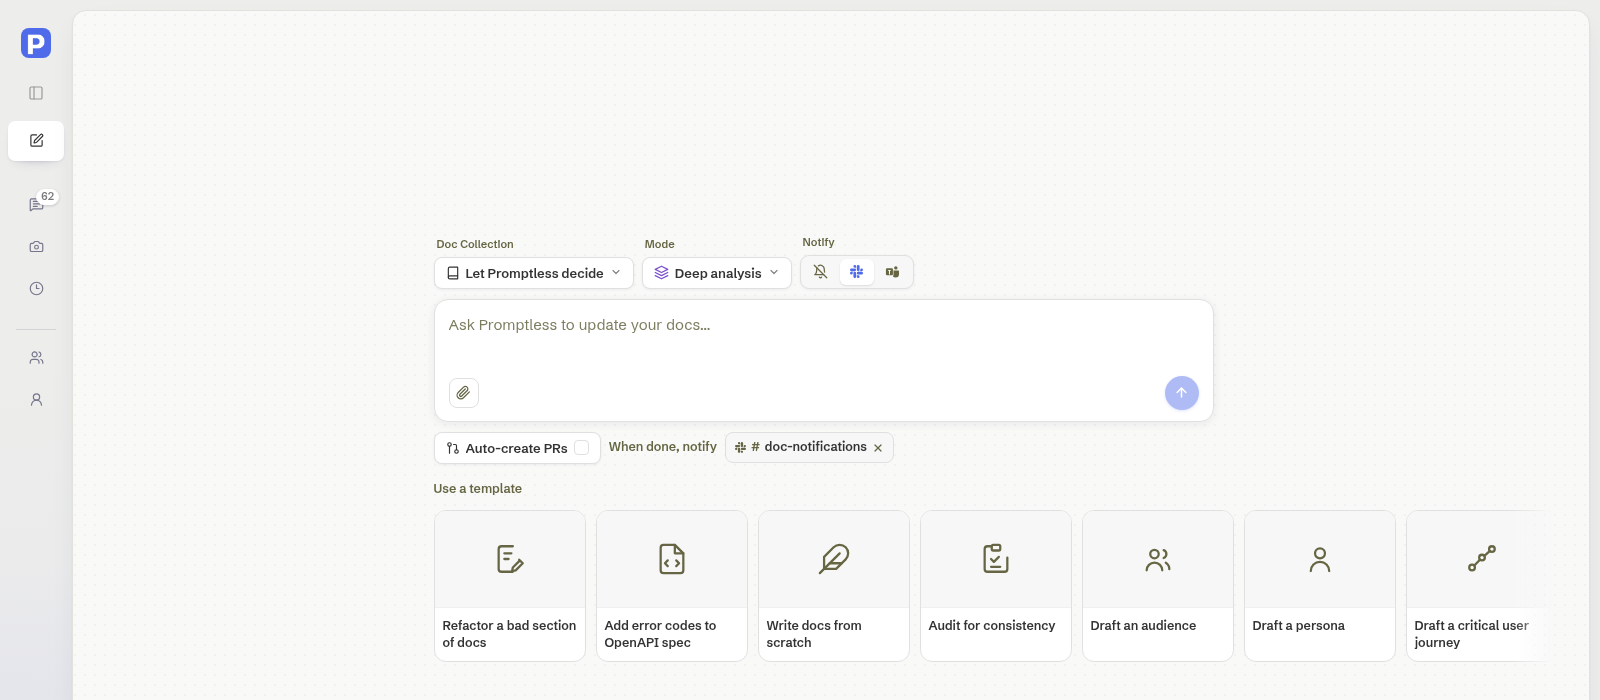
1. **Open New Task.** Click **New Task** in the sidebar. You can also use the [Deep Analysis deep link](https://app.gopromptless.ai/new-task?mode=deep). It opens New Task with **Deep analysis** already selected in the **Mode** chip.
2. **Choose a doc collection (optional).** The **Doc Collection** chip defaults to **Let Promptless decide**, which picks the collection or collections the task affects. Choose a specific collection if you want to scope the run yourself. Only collections that have finished initial analysis appear in the list.
3. **Set Mode to Deep analysis.** Open the **Mode** chip and choose **Deep analysis** (many agents, many PRs). **Default** runs the full writer workflow and is selected until you change it. (Already set if you used the deep link or picked a template.)
4. **Pick a template (optional).** Under **Use a template**, choose one of the four template cards to fill the instructions field with a starter prompt. Templates include placeholder hints in `{curly braces}` so you know what context to add. **Choosing a template replaces anything already in the instructions field**, including instructions you already typed. **Clicking the selected card again clears the field entirely.** Pick your template before you write your own instructions. Selecting a template also switches **Mode** to **Deep analysis**.
5. **Write the instructions.** Describe the project in the instructions field. Include the product area, source code or APIs Promptless should inspect, examples to model, and the changes you want to focus on. There is no separate title field: the first line of your instructions becomes the request title. If you pick or change a template after writing, it overwrites what you’ve written (see step 4).
6. **Attach files (optional).** Click the paperclip in the instructions field (**Attach files**) to add supporting material like screenshots, PDFs, or specs. You can also paste an image directly into the field. You can include up to 5 files, 10 MB each.
7. **Choose delivery settings.** The **Notify** control preselects your organization’s configured Slack channel. Promptless resolves it from your `promptless.yaml` policies: the notification channel, or the escalation channel when that’s the only one set. The preselected channel follows the **Doc Collection** you choose, so it matches where this run posts. It stays on **No notification** when your organization has no Slack channel configured. You can still pick a different Slack channel, or set it to **No notification**. Turn on **Auto-create PRs** to open PRs automatically for this task’s suggestions and skip the manual review step for each one.
8. **Submit.** Click the submit arrow at the bottom right of the instructions field. Pressing Enter adds a newline instead of submitting. Promptless confirms the submission and links to the Triggers page so you can follow progress.
Note
Deep Analysis runs may take several hours and can produce multiple suggestions across your documentation. They run in the background, so you don’t need to keep the tab open.
## Templates
[Section titled “Templates”](#templates)
Deep Analysis ships with four templates for the most common project shapes:
* **Refactor a bad section of docs**: improve an existing section using another set of docs as a model.
* **Add error codes to OpenAPI spec**: add comprehensive error codes and examples to your API specification.
* **Write docs from scratch**: produce new documentation with guidance on outline, audience, and style.
* **Audit for consistency**: review all documentation for consistent terminology, formatting, and structure.
Each template seeds the **Instructions** field with a title line, a description, and bracketed placeholders that prompt you for the context Promptless needs. You can edit the prefilled text freely before submitting.
## What happens after you submit
[Section titled “What happens after you submit”](#what-happens-after-you-submit)
A Deep Analysis trigger is routed to a fresh agent with the Deep Analysis workflow enabled. Before drafting any documentation, that agent runs two mandatory research passes:
* A **source code review** of the configured source repos to confirm how the feature actually behaves today.
* A **docs audit** of the target collection to find related pages, gaps, duplicates, terminology, and writing conventions.
Once both reviews are complete, the agent plans the work and produces one or more suggestions. The trigger appears on the Triggers page labeled `Deep Analysis: `, so it’s easy to spot among regular tasks.
If Slack is connected and you picked or kept a notification channel, Promptless posts updates there as the run progresses. It posts again when the suggestions are ready for review.
Need help with Deep Analysis? Contact us at .
# Keep changelogs and release notes current
> Point Promptless at your changelog, activate updates when it changes, publish them automatically, and teach it how you like changelog entries written.
Tip
You can set this up by hand as this page describes, or ask Promptless in Slack or Microsoft Teams to do it for you. For example, “@Promptless set yourself up to auto-merge changelog updates.” See [Ask Promptless to update your configuration](/docs/for-docs/get-the-most-out/ask-promptless-to-update-config).
Changelogs and release notes drift the same way the rest of your docs do. They fall behind what actually shipped. Promptless keeps them current alongside everything else. It drafts changelog entries as suggestions when new features ship and updates your existing changelog structure as changes land. It also follows the conventions you set for how entries read. This page shows how to point Promptless at your changelog from the Configuration page and set up the trigger that keeps it fresh.
Note
This page covers the changelog-specific setup. It explains where your changelog lives, which changes activate an update, and how to publish entries without reviewing them by hand. For the fuller treatment of *when* Promptless drafts and publishes across your release stages, see [Release timing](/docs/for-docs/tune/release-timing). See [publishing policies](/docs/for-docs/reference/configuration-reference#policies) for the full list of fields that control PR creation and auto-merge.
## What Promptless does with changelogs
[Section titled “What Promptless does with changelogs”](#what-promptless-does-with-changelogs)
Before drafting a changelog suggestion, Promptless first assesses whether the change needs documentation at all. A change that touches no documented behavior produces no suggestion. See [Filter noise and tune relevance](/docs/for-docs/tune/noise-and-relevance-filtering) for how that assessment works. When it does draft an entry, it follows your existing changelog structure rather than imposing a new one. Entries land in the format your project already uses.
## Point Promptless at your changelog
[Section titled “Point Promptless at your changelog”](#point-promptless-at-your-changelog)
Tell Promptless where your changelog lives so it can keep that content current:
* **Scope a doc collection to your changelog.** On the Configuration page, open your doc collection under **Doc collections** and expand **More filters (optional)**. Name your changelog path under **Only watch these folders** (“Leave empty to watch the whole repo.”). Despite the folder-oriented label, this field also accepts an individual file, so an entry like `CHANGELOG.md` limits Promptless to that one file. See [GitHub repos (docs as code)](/docs/for-docs/connect/doc-locations/github-repos) for how path scope works.
* **Add a separate collection when your changelog lives in another repository.** A repository can have at most one doc collection. A second collection makes sense only when your changelog sits in a different repository from your main docs. Use **Add doc collection** on the Configuration page to track it on its own, and see [Doc collections](/docs/for-docs/reference/configuration-reference#doc-collections) for how that works. A changelog in a different folder of the same repository stays in your existing collection, so scope its path there instead.
## Publish changelog updates immediately
[Section titled “Publish changelog updates immediately”](#publish-changelog-updates-immediately)
For changelog updates you don’t need to review by hand, let them publish on their own.
* **Turn on auto-merge.** On the **Policies** tab of the Configuration page, find the **Publishing** group. Turn on **Merge the pull request automatically** (“Skip review and merge Promptless’s PRs as soon as they’re created”). This also requires **Open a pull request automatically** to stay on, since Promptless has to open the PR before it can merge it. The [GitHub commits](/docs/for-docs/connect/triggers/github-commits) page calls out changelog-driven updates as a good fit for this. Use it when you want entries to publish the moment they’re ready.
* **Watch for branch protection.** Branch protection on the branch Promptless targets can block an automatic merge.
* **Limit which suggestions auto-merge.** The defaults on the **Policies** tab apply to every suggestion. Turning on auto-merge there auto-merges your API reference edits and migration guides too, not just changelog entries. Scope the automation to the trigger that covers your changelog. When your changelog has its own doc collection because it lives in a different repository, scope it to that collection instead. [Control when a suggestion publishes](/docs/for-docs/tune/release-timing#control-when-a-suggestion-publishes) covers how publishing policies resolve and how to limit them to a class of change you trust.
## Teach Promptless how you write changelog entries
[Section titled “Teach Promptless how you write changelog entries”](#teach-promptless-how-you-write-changelog-entries)
Promptless follows the conventions you give it for changelog content:
* **Keep changelog entries in their own suggestion.** Feedback like “I always want changelog entries in their own suggestion, please move” is a documented example. It shows the kind of convention you can teach through [feedback](/docs/for-docs/tune/teaching-conventions).
* **Teach it which changes deserve an entry.** Where you draw that line is your team’s convention, not a setting. Close a changelog suggestion you don’t want with “This change is too insignificant.” “This change is self-explanatory and doesn’t need docs” works too. Then check **Remember this feedback for future suggestions** so it sticks. Or write the rule down up front. See [Teach Promptless what to skip](/docs/for-docs/tune/noise-and-relevance-filtering#teach-promptless-what-to-skip) for both paths.
* **Point to a skill for changelog entries.** In the `PROMPTLESS.md` file in your [Agent Knowledge Base](/docs/for-docs/get-the-most-out/agent-knowledge-base), tell the agent to prefer a particular skill when writing changelog entries. See [How Promptless learns your docs](/docs/for-docs/connect/doc-locations/how-promptless-learns-your-docs) for how that guidance is applied.
# Keep screenshots current with Promptless Capture
> Use Promptless Capture to keep product screenshots in sync with your UI, regenerating them from your current interface when code changes
Promptless Capture keeps product screenshots in sync with your UI. When code changes affect a documented feature, Promptless Capture identifies which screenshots need updating and regenerates them from your current interface.
Note
Promptless Capture generates screenshots and keeps them current. Use the [Screenshot Updates](/docs/for-docs/work-the-queue/web-interface#screenshot-updates) tab to review screenshots already attached to your open suggestions.
## Set up credentials
[Section titled “Set up credentials”](#set-up-credentials)
Promptless Capture needs credentials to authenticate with your application. Store them as [environment variables](/docs/scale/environment-variables) under **Agent Env Vars** in **Settings**.
1. **Open Settings.** Navigate to the [Settings page](https://app.gopromptless.ai/settings) in your Promptless dashboard and select **Agent Env Vars**.
2. **Add Credential Variables.** Add variables for your application’s login credentials. In the **Add Variable** form, type each variable’s **Key Name** and **Value**. Then turn on the **Secret** toggle for any variable marked **Yes** in the table’s Secret column below. For example:
| Key Name | Description | Secret |
| ------------------- | -------------------------------------- | ------ |
| `TEST_ACCOUNT_URL` | The login URL for your application | No |
| `TEST_ACCOUNT_USER` | Username or email for the test account | No |
| `TEST_ACCOUNT_PASS` | Password for the test account | Yes |
You might use names like `STAGING_LOGIN_URL`, `QA_USER`, or any descriptive names that fit your organization’s conventions.
3. **Submit Each Variable.** Click **Add Variable** to submit the credential you just entered, then repeat the form for the next one. Promptless adds variables one at a time. Promptless hides values marked secret after you save them.
Caution
Use a dedicated test account for screenshot capture rather than a personal or production account. This ensures screenshots don’t contain sensitive data and provides a consistent UI state.
Tip
Create a test account with access to all features you want to document. If certain features require specific permissions or plan tiers, ensure your test account has the appropriate access level.
## Test your setup
[Section titled “Test your setup”](#test-your-setup)
After adding your credentials, verify that Promptless can capture screenshots correctly.
1. **Start a Manual Task.** Go to the [New Task page](https://app.gopromptless.ai/new-task) and request a documentation update that involves screenshots.
2. **Review the Results.** Check the suggestion to see if screenshots were captured correctly. Look for:
* Successful authentication (no login screens in screenshots)
* Correct page navigation (screenshots show the intended feature)
* Appropriate cropping (relevant UI elements are visible)
3. **Iterate on Configuration.** If screenshots aren’t captured correctly, adjust your environment variables or provide additional context in your Long-Term Context files.
## Troubleshooting
[Section titled “Troubleshooting”](#troubleshooting)
Promptless can’t log into my application
Verify that your `TEST_ACCOUNT_URL`, `TEST_ACCOUNT_USER`, and `TEST_ACCOUNT_PASS` variables match what you use to manually log in. If your screenshots show the login page, the credentials may be incorrect or the login flow may require additional steps. For applications that use multi-factor authentication, consider creating a test account that bypasses MFA. You can also contact for guidance on handling MFA flows.
Screenshots capture the wrong page
Promptless may need additional navigation guidance. You can add instructions in your Long-Term Context to describe how to navigate to specific features. Include details about menu paths, URL patterns, or button sequences needed to reach documented screens.
Screenshots show features that should be hidden
Check your feature flag configuration. The test account may have access to features that typical users don’t see. Consider creating a test account with permissions that match your target documentation audience.
Cropping cuts off important elements
The automatic cropping may need refinement. You can use the Screenshot Editor in the Promptless dashboard to manually adjust crops, or provide feedback that Promptless will learn from for future captures.
Screenshots show loading states or spinners
The page may not have fully loaded before capture. Contact if you consistently see loading states in your screenshots.
## Screenshot Editor
[Section titled “Screenshot Editor”](#screenshot-editor)
After Promptless captures screenshots, you can refine them in the built-in Screenshot Editor. Click any image in the Created Assets section to open the editor.
### Editing tools
[Section titled “Editing tools”](#editing-tools)
The editor includes tools to refine your screenshots:
* **Crop** to focus on specific UI elements
* **Annotate** with arrows, boxes, and highlights
* **Add text** to call out features
* **Adjust** image dimensions
### Manage edits
[Section titled “Manage edits”](#manage-edits)
The toolbar provides controls for your editing session:
* **Save edits** commits changes to the screenshot
* **Reset edits** discards unsaved changes and reverts to the last saved version, which is useful for starting over without closing the editor
* **Cancel Crop** exits crop mode without applying the crop, letting you adjust the selection or switch tools
Saved changes are immediately reflected in your documentation suggestions.
## When screenshots update automatically
[Section titled “When screenshots update automatically”](#when-screenshots-update-automatically)
Promptless Capture monitors your triggers and automatically updates screenshots when:
* A GitHub PR modifies UI components referenced in documentation
* A commit changes routes, layouts, or visual styling
* You explicitly request a screenshot update via Slack or the web interface
* Promptless edits a page and finds a screenshot on it that has fallen out of date with your current interface, whatever triggered that edit
Note
Screenshots are only regenerated when Promptless detects changes that likely affect documented UI. Minor code changes that don’t impact the visual interface won’t trigger unnecessary screenshot updates. Review the regenerated screenshots on the [Screenshot Updates](/docs/for-docs/work-the-queue/web-interface#screenshot-updates) tab.
Need help setting up Promptless Capture? Contact us at .
# Teach Promptless a custom task
> Give Promptless a new or customized workflow by pairing a trigger with written instructions. Covers the general process, plus complete examples
Tip
You can set this up by hand as this page describes, or ask Promptless in Slack or Microsoft Teams to do it for you. For example, “@Promptless I have a new workflow I’d like you to support. Can you help me set it up?” See [Ask Promptless to update your configuration](/docs/for-docs/get-the-most-out/ask-promptless-to-update-config).
Promptless ships with default behaviors, like reviewing code PRs for documentation impact. You can teach it new or customized tasks on top of those defaults. A custom task pairs two ingredients: a **trigger** that decides when Promptless runs, and a **workflow written as instructions** that describes what it does. This page covers the general process, including prerequisites, the workflow, the trigger, and how a run unfolds.
## The two ingredients of a custom task
[Section titled “The two ingredients of a custom task”](#the-two-ingredients-of-a-custom-task)
Every custom task combines two pieces:
* **A trigger** determines when Promptless runs. You configure it in the **Triggers** section of the [Configuration page](https://app.gopromptless.ai/configuration).
* **A written workflow** is the set of instructions the agent follows when that trigger activates. It lives as a file under `doc_workflows/` in your Knowledge Base or as an Agent Skill in a doc collection. A hook in `PROMPTLESS.md` points to it (see [Write the workflow](#write-the-workflow)).
Promptless follows written instructions well, so the guidance you provide can redirect or augment its built-in default behavior.
This trigger-plus-instructions pattern is general: you pair written instructions with [any supported trigger type](/docs/for-docs/reference/configuration-reference#trigger-types) so the same mechanism drives many different custom tasks. Examples at the end of this page illustrate the pattern.
Note
This page builds on [How Promptless learns your docs](/docs/for-docs/connect/doc-locations/how-promptless-learns-your-docs). That page covers where Promptless reads custom guidance. Those places are `AGENTS.md`/`CLAUDE.md` in your docs repo and `PROMPTLESS.md`. They also include Agent Skills under `.claude/skills/`, `.agents/skills/`, or `.cursor/skills/`.
## Prerequisites
[Section titled “Prerequisites”](#prerequisites)
Before you build a custom task, make sure you have:
* **The relevant integration or trigger source connected.** For example, the GitHub integration for a GitHub PR task.
* **The ability to chat with Promptless** in Slack or Teams to make edits for you, or **admin access** to edit the Knowledge Base directly.
## Write the workflow
[Section titled “Write the workflow”](#write-the-workflow)
The workflow is the *what*: the concrete instructions the agent follows once a trigger activates. Give the workflow a home and pair it with an “If, then” hook in `PROMPTLESS.md`. The workflow can live in one of two places:
* **As a markdown file under `doc_workflows/` in your Knowledge Base.** Write the instructions as their own file (for example, `doc_workflows/review-inbound-doc-prs.md`).
* **As an Agent Skill in a doc collection** (your docs repo, under `.claude/skills/`, `.agents/skills/`, or `.cursor/skills/`).
Add the hook in `PROMPTLESS.md`, and if the skill lives in a doc collection, the hook should name *which* doc collection. For example, “When a contributor PR is opened in `acme/docs`, use the `contributor-workflow` skill from the Acme doc collection.”
Caution
For a custom workflow to activate reliably, have an explicit “If, then” hook in `PROMPTLESS.md`, of the form “If \[condition], then \[do this].” `PROMPTLESS.md` is loaded into the agent’s instructions on every run, so a hook there is always visible to the agent. Workflows and Agent Skills are only loaded on demand. A workflow that lives only in a separate workflow or Skill may not fire consistently unless a hook in `PROMPTLESS.md` points to it. See [How Promptless learns your docs](/docs/for-docs/connect/doc-locations/how-promptless-learns-your-docs) for how these files are loaded.
There are two ways to add or update these instructions:
* An organization admin edits `PROMPTLESS.md` in the Agent Knowledge Base (in the left sidebar, open **Settings** and select **Agent Knowledge Base**).
* You can ask Promptless to make these changes for you, for example by requesting the update the next time you’re working with Promptless. It edits `PROMPTLESS.md` (or the custom skill) and commits the change.
Good workflow instructions are concrete. Spell out what to check, what to prioritize, and what output to produce, so the agent knows exactly what a successful run looks like.
## Configure the trigger
[Section titled “Configure the trigger”](#configure-the-trigger)
The trigger is the *when*. You manage triggers in the dashboard: in the left sidebar, open **Settings** and select **Configuration**, open the **Triggers** tab, and choose **Add a trigger**. You might set up a GitHub PR trigger that activates when a PR is opened. Or you might set up a Slack trigger that listens for messages in a channel and acts when it finds particular criteria you specify.
Caution
The GitHub PR trigger dashboard toggles cover *Opened*, *First approval*, and *Merged* events. For a review on every new push, set `trigger_on: [updated]` in `promptless.yaml`. See [Trigger modes](/docs/for-docs/connect/triggers/github-prs#trigger-modes) for the full behavior. You can also request a one-off review outside your configured triggers via an `@promptless` mention in a PR comment.
Custom tasks built this way are event-driven. A trigger activates on new events (like a PR opening) and does not retroactively scan or audit your existing pages. For one-time, corpus-wide work such as audits, retrofits, or writing from scratch, use [Pay down docs debt with Deep Analysis](/docs/for-docs/get-the-most-out/pay-down-docs-debt).
## How a run unfolds
[Section titled “How a run unfolds”](#how-a-run-unfolds)
Once the workflow and trigger are in place, a custom task runs the same way every time:
1. The trigger activates on a qualifying event (like a pull request being opened).
2. Promptless reads the relevant context for that event.
3. It follows your written workflow step by step.
4. It produces the output your instructions define.
The specifics (what context is read and what output lands) depend entirely on the workflow you define.
The **review inbound documentation PRs** example demonstrates the full process end to end as a written review workflow paired with a GitHub PR trigger. It shows the concrete prerequisites, workflow instructions, trigger YAML, and `PROMPTLESS.md` updates for one real task.
[Example: review inbound documentation PRs](/docs/for-docs/get-the-most-out/teach-promptless-a-custom-task/review-inbound-doc-prs)An end-to-end GitHub PR custom workflow.
The **turn docs analytics into doc-gap suggestions** example demonstrates the same process on a different trigger type. Instead of a triggering event, it runs on a schedule. Once a week, it turns your documentation-site analytics into prioritized doc-gap suggestions.
[Example: turn docs analytics into doc-gap suggestions](/docs/for-docs/get-the-most-out/teach-promptless-a-custom-task/analytics-docs-gaps)An end-to-end schedule-trigger custom workflow.
# Example: Turn docs analytics into doc-gap suggestions
> Teach Promptless a weekly schedule trigger that turns documentation-site analytics into prioritized doc-gap suggestions.
Tip
You can set this up by hand as this page describes, or ask Promptless in Slack or Microsoft Teams to do it for you. For example, “@Promptless add a weekly schedule trigger that turns our docs analytics into doc-gap suggestions.” See [Ask Promptless to update your configuration](/docs/for-docs/get-the-most-out/ask-promptless-to-update-config).
This example teaches Promptless to turn your documentation-site analytics into prioritized doc-gap suggestions once a week. It’s an example of pairing a written workflow with a trigger as described in [Teach Promptless a custom task](/docs/for-docs/get-the-most-out/teach-promptless-a-custom-task). The [review inbound documentation PRs](/docs/for-docs/get-the-most-out/teach-promptless-a-custom-task/review-inbound-doc-prs) example pairs that workflow with a GitHub PR trigger. This one pairs it with a schedule trigger, which runs on a repeating clock with no triggering event. The steps below write the workflow, configure the trigger, then save the workflow, hook, and trigger.
Note
This example uses PostHog as an analytics source. The workflow can be generalized to support whichever tool or platform you use to store your analytics.
## The two analytics signals
[Section titled “The two analytics signals”](#the-two-analytics-signals)
PostHog measures reader behavior on your docs site, including page traffic, exit rate, and site-search queries. This workflow reads two signals from that data:
* Recurring site-search queries that return zero results, which mean a reader is looking for a page that’s missing or doesn’t surface.
* High traffic combined with a high exit rate on an existing page, which means readers reach it but leave underserved.
Customize your workflows to the signals that matter most to your team.
## Prerequisites
[Section titled “Prerequisites”](#prerequisites)
Before you set up this task, make sure you have:
* **Access to PostHog**, with its credentials stored as [environment variables](/docs/for-docs/scale/environment-variables) Promptless can read. The variable names are yours to choose, but this example references `POSTHOG_PROJECT_API_KEY`, `POSTHOG_PROJECT_ID`, and `POSTHOG_HOST`, all found in your PostHog project settings.
* **At least one active doc collection**.
* **The ability to chat with Promptless** in Slack or Teams to make edits for you, or **admin access** to edit the Knowledge Base directly.
## Set up the task
[Section titled “Set up the task”](#set-up-the-task)
Set up the task in three steps: write the workflow, configure the trigger, then save the workflow, hook, and trigger.
1. **Write the workflow.** The workflow captures *how* to read analytics and act on what it shows. That covers what to query, which signals matter, how to prioritize, and how much to open. Write the workflow *body* as a markdown file under `doc_workflows/` in your Knowledge Base. For example, `doc_workflows/analytics-docs-gaps.md`. The following is an example body to adapt to your own analytics tool and docs:
```markdown
# Analytics-derived documentation gaps
When the weekly analytics doc-gaps schedule runs:
1. Scope every query to your documentation paths only — on-site analytics
filtered to your docs URL prefix (for example, `promptless.ai/docs`).
Never pull product analytics.
2. Read two signals from the last 7 days:
- **Recurring reader searches with no good answer** (site-search
queries that return zero results). Each recurring instance is a reader
asking for a page that does not exist or does not surface. A one-off
search is noise, not a signal.
- **Page-level performance** for existing docs pages: traffic and exit
rate. High traffic combined with a high exit rate points to a page
readers reach but leave without their answer.
3. Prioritize what to act on:
- Propose **new content** for recurring missing results. A reader is
telling you a page is missing or isn't surfacing, which shows up as a
zero-result on-site search.
- For **existing pages**, prioritize by traffic volume combined with how
recently the underlying feature changed, not by page age. A stable,
correct old page needs no work.
4. Redact before publishing. Never paste a raw search-query string or raw
URL parameters into a suggestion title, description, or PR body — they
can carry customer names, internal identifiers, or tokens. Describe the
gap in your own words.
```
Then add an explicit “If, then” hook in `PROMPTLESS.md` that points to this workflow, so it activates reliably (`PROMPTLESS.md` is always loaded into the agent’s instructions, whereas the workflow file is loaded on demand):
```text
If the weekly analytics doc-gaps schedule runs, then follow the workflow in `doc_workflows/analytics-docs-gaps.md`.
```
Alternatively, define the workflow as an Agent Skill living in a doc collection, like under `.claude/skills/analytics-docs-gaps/SKILL.md` in `acme/docs`. In that case the `PROMPTLESS.md` hook must name that doc collection and skill:
```text
If the weekly analytics doc-gaps schedule runs, then use the `analytics-docs-gaps` skill from `acme/docs`.
```
2. **Configure the trigger.** Add a schedule trigger so the workflow runs on a repeating clock. Create it in the dashboard: in the left sidebar, open **Settings** and select **Configuration**, open the **Triggers** tab, and choose **Add a trigger**. Choose the **“On a schedule”** group and its recurring-schedule catalog entry (see [Schedule triggers](/docs/for-docs/connect/triggers/schedule) for the full path). Then set the schedule and timezone and write the instructions. Build the trigger in the **Form** view (the default). The **YAML** view shows the underlying `promptless.yaml`, which looks like this:
```yaml
triggers:
analytics-docs-gaps:
trigger_type: schedule
match:
- cron: "0 0 * * 1"
timezone: America/Los_Angeles # optional; defaults to UTC
instructions: |
Follow the weekly analytics doc-gaps workflow in
doc_workflows/analytics-docs-gaps.md.
```
The cron `0 0 * * 1` with its timezone runs the workflow once a week, at midnight on Mondays. Keep `instructions` a short pointer to the workflow file. What you type into the dashboard’s instructions field is that same short pointer sentence, matching the YAML `instructions`. That differs from a schedule trigger whose standing instructions carry the whole job. Here, they only point to the workflow file where the full judgment lives. You can pause or adjust the trigger later from the same **Configuration** > **Triggers** page.
3. **Save the workflow, hook, and trigger.** The trigger is saved from the Configuration page in Step 2. Save the workflow file (`doc_workflows/analytics-docs-gaps.md` or the Agent Skill) and the “If, then” hook in `PROMPTLESS.md` from the Agent Knowledge Base. There are two ways to do this:
* An organization admin edits the files directly in the [Agent Knowledge Base](/docs/for-docs/get-the-most-out/agent-knowledge-base) (in the left sidebar, open **Settings** and select **Agent Knowledge Base**).
* You can ask Promptless to make these changes for you. It edits `PROMPTLESS.md`, the workflow file, and `promptless.yaml` then commits the change.
## What Promptless does on each weekly run
[Section titled “What Promptless does on each weekly run”](#what-promptless-does-on-each-weekly-run)
When the weekly schedule runs, Promptless:
1. Pulls the last 7 days of documentation-site analytics from PostHog, scoped to your docs paths.
2. Applies both signals, recurring reader searches with no good answer and page traffic combined with exit rate, along with the workflow’s prioritization.
3. Opens suggestions, describing each gap in its own words rather than pasting raw queries or URL parameters.
4. Finishes quietly when it finds nothing worth changing.
Set a notification channel to see what each run produced. A scheduled run’s only outward signals are the suggestions it opens and the notifications your policy sends. A quiet week means the run found nothing worth changing, not that it failed. A credential or access problem surfaces as an *escalation* notification rather than a suggestion notification, so specify an escalation channel to catch a broken integration. See [Notifications](/docs/for-docs/tune/notifications) and its [Escalation channel](/docs/for-docs/tune/notifications#escalation-channel) section to route problem and failure alerts separately from suggestion alerts. See [Noise and relevance filtering](/docs/for-docs/tune/noise-and-relevance-filtering) to tune what counts as a suggestion.
# Example: review inbound documentation PRs
> Teach Promptless to review contributor documentation PRs, covering prerequisites, trigger, workflow instructions, and PROMPTLESS.md updates
Tip
You can set this up by hand as this page describes, or ask Promptless in Slack or Microsoft Teams to do it for you. For example, “@Promptless add a GitHub PR trigger on my docs repo to review inbound documentation PRs.” See [Ask Promptless to update your configuration](/docs/for-docs/get-the-most-out/ask-promptless-to-update-config).
This example teaches Promptless to automatically review a documentation PR opened by someone *other than* Promptless. The review focuses on documentation quality and style adherence as well as correctness against the source code. It is an example of the general process described in [Teach Promptless a custom task](/docs/for-docs/get-the-most-out/teach-promptless-a-custom-task), a written review workflow paired with a GitHub PR trigger. The steps below write the workflow, configure the trigger, then save the workflow, hook, and trigger.
## Prerequisites
[Section titled “Prerequisites”](#prerequisites)
Before you set up this task, make sure you have:
* **The GitHub integration connected** to your documentation repository, for example `acme/docs`.
* **The ability to chat with Promptless** in Slack or Teams to make edits for you, or **admin access** to edit the Knowledge Base directly.
Set up the task in three steps: write the workflow, configure the trigger, then save the workflow, hook, and trigger.
1. **Write the workflow.** The workflow captures *how* to review a contributor documentation PR: when it applies, what to check, and how to act. Write the workflow *body* as a markdown file under `doc_workflows/` in your Knowledge Base (for example, `doc_workflows/review-inbound-doc-prs.md`). Give it contents like this:
```markdown
# Inbound documentation PR review
When a pull request is opened in the docs repo (acme/docs) or you are requested to perform a PR review, and the PR touches documentation content the governed agent instructions (`SKILL.md`, `AGENTS.md`, agent definitions, prompts, etc ):
1. Acknowledge the review before starting it. Before doing any review work (reading/verifying the content or making edits), acknowledge that the review is underway so the author and team can see Promptless has picked it up:
- **Set Promptless as an in-progress reviewer** on the PR (request/assign Promptless as a reviewer so the PR shows a review is pending), and
- **Leave a comment on the PR that a review is in progress.**
Don't comment on or review out-of-scope PRs.
2. Review every in-scope PR on the following dimensions:
- **Quality and style.** Check that the edits match your voice, structure, and formatting conventions, plus any Vale rules the repo enforces.
- **Correctness against the source code.** Verify the PR's claims against the actual product source, and flag or fix anything stale or unsupported.
3. Act on your findings.
- **Make direct edits** on the PR branch for clear fixes, like typos, broken links, wrong flag names, outdated values, awkward sentences with obvious better phrasing, or factual corrections you verified against source. Do not leave a comment asking them to make a change you could make yourself.
- **Leave comments** when there is ambiguity that needs the contributor to resolve it, like two valid interpretations, a design/intent question, a claim you can't verify from source, or a change that would alter meaning in a way the author should confirm. Comments are for judgment calls, not for changes you're confident about.
4. Leave a top-level summary comment that states what you reviewed, what you changed directly (with a short list), what you left as open questions/comments and why, and the overall assessment. The summary comment must be present even when you made only direct edits and left no inline comments, and even when you found nothing to change (in which case say so).
5. Set a GitHub review state. If the docs are correct and ready, approve the PR. Otherwise, submit the review with a Comment state, including when the inline comments from step 3 are still unresolved.
```
Then add an explicit “If, then” hook in `PROMPTLESS.md` that points to this workflow, so it fires reliably (`PROMPTLESS.md` is always loaded into the agent’s instructions, whereas the workflow file is loaded on demand):
> If a pull request that touches documentation content is opened in `acme/docs`, then follow the inbound documentation PR review workflow in `doc_workflows/review-inbound-doc-prs.md`.
Alternatively, define the review workflow as an Agent Skill living in the doc collection, like under `.claude/skills/review-inbound-doc-prs/SKILL.md` in `acme/docs`. In that case the `PROMPTLESS.md` hook must name that doc collection and skill:
> If a pull request that touches documentation content is opened in `acme/docs`, then use the `review-inbound-doc-prs` skill from `acme/docs`.
2. **Configure the trigger.** Scope a GitHub PR trigger to your documentation repository so the workflow fires when a contributor opens a PR there. Create it in the dashboard: in the left sidebar, open **Settings** and select **Configuration**, open the **Triggers** tab, and choose **Add a trigger**. Build the trigger in the **Form** view (the default); the **YAML** view shows the underlying `promptless.yaml`. The trigger you create listens for PRs opened in the docs repo, and looks like this in YAML:
```yaml
triggers:
review-inbound-doc-prs:
trigger_type: github_pr
match:
- repos:
- acme/docs
trigger_on:
- opened
```
**`opened`** starts the review as soon as a contributor opens the PR. That is the primary moment for this task.
3. **Save the workflow, hook, and trigger.** The trigger is saved from the Configuration page in Step 2. Save the workflow file (`doc_workflows/review-inbound-doc-prs.md` or the Agent Skill) and the “If, then” hook in `PROMPTLESS.md` from the Agent Knowledge Base. There are two ways to do this:
* An organization admin edits the files directly in the [Agent Knowledge Base](/docs/for-docs/get-the-most-out/agent-knowledge-base) (in the left sidebar, open **Settings** and select **Agent Knowledge Base**).
* You can ask Promptless to make these changes for you. It edits `PROMPTLESS.md`, the workflow file, and `promptless.yaml` and commits the change.
## What Promptless does on each qualifying PR
[Section titled “What Promptless does on each qualifying PR”](#what-promptless-does-on-each-qualifying-pr)
When a contributor opens a qualifying PR, Promptless:
1. Detects and acknowledges the qualifying PR.
2. Reads the full PR context: title and description, the diff, review comments, and commits.
3. Reviews the changes.
4. Updates the review state and posts a summary comment describing what it reviewed and what it found.
# Measure the impact of Promptless
> Track the value of keeping docs current with Promptless using the signals the product surfaces today, and turn them into a case you can take to leadership
When leadership asks what the Docs function is worth, you need numbers you can defend. If you use Promptless, much of that story already lives in the product and in your Git history. It covers doc updates drafted, reviewed, and merged, plus the changes that no longer wait on someone finding the time. This page shows which signals to track, where to read each one, and how to assemble them into a case for spend or headcount. You may have no manager to report to, say because you maintain an open-source project. In that case, the same numbers make the case to a foundation, a sponsor, or your community, or simply justify the hours you put in.
Note
Promptless does not ship a built-in reporting dashboard or a metrics export. The signals below come from surfaces you already use, so you assemble the report yourself. Track the handful of numbers that matter to your leadership rather than everything you could possibly count.
## What you can observe today
[Section titled “What you can observe today”](#what-you-can-observe-today)
Three surfaces carry raw signal, and each answers a different question about the value Promptless is adding.
* **Suggestions list.** Every draft Promptless creates, with status buckets (**Ready**, **PR Open**, and **Closed**) and a per-suggestion review-time estimate. This is your view of drafting volume and review load. Filter by **Docs location** to attribute activity to a specific collection, or by **Trigger source** to see which signals produce the most drafts.
* **Triggers page.** Every event Promptless reacted to over the recent window, split by the **Suggestion Status** filter into **Created Suggestion** and **No Suggestion**. This shows coverage: how many of your product’s changes Promptless caught. Through the no-suggestion outcomes, it also shows how well Promptless is tuned to skip changes that don’t need docs. Search reaches events older than the default window, and the **From** and **To** date fields scope a specific range.
* **Your Git history.** Merged documentation PRs are the ground truth for shipped work. A merged Promptless PR is a doc change that went live. The PR’s author, reviewers, and timestamps live in GitHub, GitLab, or Bitbucket, where your team already reviews them. Promptless opens these PRs under its own account, so you can filter to that author to isolate its contribution. Read the exact account name off any docs PR Promptless has opened in your repo.
## Metrics worth tracking
[Section titled “Metrics worth tracking”](#metrics-worth-tracking)
Pick the few that map to the question your leadership is actually asking. Each one below is grounded in a surface above, so no metric here depends on a feature Promptless doesn’t have.
* **Doc updates shipped.** Count merged Promptless PRs over a period. This is the cleanest proxy for output: work that reached readers instead of sitting in a backlog. Read it from your Git history, filtered to the Promptless author.
* **Share of doc changes automated.** Compare merged Promptless PRs against all merged doc PRs in the same repo over the same period. A high share is a direct answer to “how much of the docs work is Promptless carrying?”
* **Coverage of product changes.** On the Triggers page, set **Suggestion Status** to **Created Suggestion**, then **No Suggestion**, and compare the two results. Scope the range with the **From** and **To** date fields. The count shown tops out at 100 triggers, so narrow the range until the unfiltered count sits below 100. Otherwise the split is drawn from a truncated set rather than your full window. This shows how much of your product’s movement Promptless is catching rather than letting drift.
* **Review throughput and load.** Use the Suggestions list buckets and review-time estimates to show how much review the queue represents and how quickly your team clears it. This is the effort Promptless converts from writing into reviewing.
* **Time saved.** Multiply doc updates shipped by your team’s own estimate of the hours a comparable manual update takes. Promptless doesn’t measure this for you, so state your assumption plainly. A defensible estimate lands better than a precise-looking number no one can source.
Caution
These counts describe activity and output, not documentation quality. Pair them with the outcome signals in the next section, so the story is about outcomes, not just volume.
## Pair output with outcomes
[Section titled “Pair output with outcomes”](#pair-output-with-outcomes)
The metrics above count what Promptless produces. To show whether that output actually helped readers or reduced cost, pair it with outcome signals from tools your team already runs. Promptless does not produce, measure, or export any of these outcome numbers. Instead, they live in your own analytics, support, and docs-platform tools, and you read them there. The same signals point to what to improve next, not just what to report.
* **Support-ticket deflection / self-service rate.** This is the strongest dollar lever and the clearest before/after comparison. Read it from your helpdesk or support platform, such as Zendesk or Intercom. A free channel like GitHub Issues or Discussions also works if that is where your users ask questions. After a Promptless-driven update to a documented topic, compare ticket volume on that topic before and after. The value is tickets deflected multiplied by your support team’s fully-loaded cost per ticket, a figure support ops usually already has. Attribution here is an estimate, so show it as before/after on a specific topic.
* **“Was this helpful?” ratings and feedback comments.** This is a per-page reader verdict, directly attributable to a specific updated page. That makes it ideal for before/after on a Promptless-driven change. It is often built into your docs platform (such as Mintlify, GitBook, or ReadMe, or similar) or added with a feedback widget. This signal is self-selected and skews negative, so read it as a trend and a triage signal, not an absolute score.
* **Site-search “no-results” rate and top queries.** This is the highest-signal content-gap map, because users describe in their own words what they cannot find. Read it from your site-search analytics (such as Algolia, a docs platform’s built-in search dashboard, or similar). Recurring no-result or high-volume queries tell you which gaps to close next and give you language to match. A falling no-results rate on a topic after an update is a reader-side outcome.
* **Page views and engagement on changed pages.** Confirms reach, meaning that the audience for an updated page actually exists. Read it from your web or product analytics (such as GA4, Plausible, or similar). Traffic is not success. A high bounce can be fine on a page that answers a question fast. Read engagement (such as GA4’s engaged sessions or average engagement time) alongside raw views, and treat traffic as context, not proof.
* **Task or completion success rate.** This is the truest outcome: can readers actually do the thing? It also takes the most effort, since it needs usability testing or an instrumented funnel rather than a passive metric. Treat it as the goal to aspire to when a topic is high-stakes enough to justify the measurement.
* **Softer leading indicators.** Content freshness/staleness percentage and doc coverage percentage round out the picture. So does organic/SEO traffic via a search console (such as Google Search Console, or similar). Frame any growth or conversion attribution as correlation only.
If you have the cost inputs, you can put a dollar figure on the outcomes. If you don’t, the raw before/after trend carries the story on its own. That means tickets or questions avoided, ratings climbing, or a falling no-results rate.
Turn these metrics into money with a few standard formulas:
* **Deflection value** = tickets deflected × fully-loaded cost per ticket.
* **Contributor time saved** = doc updates shipped × hours saved per update × fully-loaded hourly rate. “Doc updates shipped” is the same output count you read from your Git history for the **Time saved** metric above. It plugs straight into your own cost model.
* **Composite ROI %** = (attributed value − program and tool cost) ÷ cost × 100.
Caution
Attribution is imperfect: you cannot prove a pageview replaced a ticket. State every assumption you make (cost per ticket, hours per update, deflection percentage). Prefer before/after and cohort comparisons over absolute claims, and present ranges rather than false-precision figures.
## Build the case for leadership
[Section titled “Build the case for leadership”](#build-the-case-for-leadership)
Turn the signals into a short, repeatable report rather than a one-off scramble.
1. **Fix a period and a scope.** Choose a reporting window (usually a month or a quarter) and the doc collections it covers. Use the Triggers page **From** and **To** date fields to hold coverage numbers to that range. Read merged-PR dates from your Git history so every figure spans the same window.
2. **Pull the core counts.** Read merged Promptless PRs from your Git history and drafting and review activity from the Suggestions list. Read coverage from the Triggers page outcomes for that window.
3. **Frame output as added capacity.** Lead with doc updates shipped and share of doc changes automated, the numbers that show the Docs function keeping pace with the product. Add time saved with your stated per-update assumption.
4. **Attach an outcome signal.** Pull one or two outcome metrics from your own tools for the same collections and window: ticket deflection, helpfulness ratings, or a search-gap trend. This way the report speaks to reader experience, not just throughput. Where you have the inputs, convert them to a dollar figure using the formulas above.
5. **Keep the sources visible.** Note which surface each number came from. Leadership trusts a figure it can trace back to the Suggestions list, the Triggers page, or a merged PR far more than a bare total.
Note
Learn your way around the surfaces this page draws on. The Suggestions list and Triggers page are covered in [Use the web interface](/docs/for-docs/work-the-queue/web-interface). Where lasting context lives is covered in the [Agent Knowledge Base](/docs/for-docs/get-the-most-out/agent-knowledge-base).
# Choose a platform
> Pick a Git-backed documentation platform Promptless supports, weighing the tradeoffs between hosted docs tools and open-source static site generators
The right target docs platform is any Git-backed one that fits how your team works. Promptless supports any documentation platform as long as your content lives in a GitHub repository. The decision comes down to your team’s needs rather than Promptless compatibility.
Do I have to use Markdown?
No. Promptless can suggest updates to any text-based file format, including DITA XML, reStructuredText, AsciiDoc, and just about anything else.
## What Promptless supports
[Section titled “What Promptless supports”](#what-promptless-supports)
Promptless doesn’t require a specific platform. It requires that your content live as files in a GitHub repository it can open pull requests against. Any docs-as-code platform that builds from a Git-backed source works. That includes a static site generator you host yourself or a hosted docs tool that keeps its content in a repository. Some platforms aren’t natively Git-based but sync or mirror their content to GitHub, and those setups are fully supported too. Promptless only needs to reach the source through a repository.
Note
Some platforms are more common on Promptless than others. For those, see the [supported platforms](/docs/for-docs/connect/doc-locations/github-repos#supported-platforms) section of Doc locations & collections. If you’re not sure whether your platform is supported, contact . Support expands based on user feedback, and the team can help you choose and set up a docs platform.
## How to choose
[Section titled “How to choose”](#how-to-choose)
Every supported platform works with Promptless, so weigh them on the factors that matter to your team:
* **Hosted docs tools vs. open-source generators.** Hosted, docs-focused platforms like Mintlify, Fern, GitBook, and ReadMe pair a managed publishing experience with Git-backed content. Open-source static site generators like Starlight, Docusaurus, MkDocs, Hugo, Nextra, and Vocs give you full control over hosting and theming. They have no per-seat cost, but the price is owning the build and deploy yourself.
* **Content format.** Most static site generators build from Markdown or MDX, though structured-authoring toolchains publish from their own source formats. If your team already authors in the target’s format, the migration is mostly moving files. If you’re coming from a WYSIWYG editor or a different source format, expect a conversion step (see [Migrate to a new docs platform](/docs/for-docs/migrate/migrate-to-a-new-platform)).
* **Authoring experience.** If writers on your team don’t work in code, weigh how each platform handles day-to-day editing. The options are raw Markdown in a repository, an in-app editor, or a Git-backed WYSIWYG. Hosted docs tools tend to offer a friendlier editing surface for non-engineer contributors. Open-source generators expect writers to edit Markdown and use the PR workflow directly.
* **Component and API-reference needs.** If you rely heavily on interactive components or generated API references, favor a platform built for that. Fern, Mintlify, and Starlight, for example, have strong API-reference and MDX component support.
* **Existing toolchain.** Teams already deploying on a given stack usually hit the least friction by staying close to it. A React/Astro shop lands naturally on Starlight, Docusaurus, or Nextra, while a Python team may prefer MkDocs.
Tip
You don’t have to decide alone. If you’re planning a migration, the Promptless team can help you pick a platform and set it up. Reach out at .
## After you pick
[Section titled “After you pick”](#after-you-pick)
Once you’ve chosen a platform and your content is in a GitHub repository, connect it as a doc collection. Promptless can then start proposing updates. See [Doc locations & collections](/docs/for-docs/connect/doc-locations/github-repos) for the setup steps and the `promptless.yaml` `docs_framework` field.
# Migrate to a new docs platform
> Move documentation off Doc360, ReadMe, Fern, HubSpot, or RoboHelp onto a Git-backed docs-as-code stack, preserving content and structure
Teams often reach Promptless while still on a hosted platform that doesn’t expose their docs as files in a Git repository. Moving that content onto a [supported docs-as-code platform](/docs/for-docs/migrate/choose-a-platform) is what unblocks adoption. This guide covers the migration pattern every source shares and where the source-specific work lives.
Note
A migration is a one-time project. The effort scales with how much content you have and how far your source format is from the target’s. The export, conversion, and scaffolding steps usually involve someone comfortable with Git and a static site generator. Plan to pair a writer with an engineer if your docs team doesn’t write code. No two platforms export the same way, and the Promptless team regularly helps teams move. If you’re planning one, reach out at before you start.
## The migration pattern
[Section titled “The migration pattern”](#the-migration-pattern)
However you export, the shape of the work is the same across source platforms:
1. **Export your existing content.** Pull your content out of the source platform in the most portable format it offers. Some platforms export Markdown directly; others export HTML or a proprietary format that needs a conversion pass to your target’s source format. Capture images and other assets alongside the text so links don’t break.
2. **Choose and scaffold a target platform.** Pick a [supported platform](/docs/for-docs/migrate/choose-a-platform) and scaffold a new project in a GitHub repository. This repository becomes the source of truth for your docs.
3. **Convert and import the content.** Move the exported content into the new project’s file and folder structure, converting to the target’s source format and conventions. Rebuild the navigation and any frontmatter (titles, slugs, sidebar placement) the new platform expects.
4. **Map old URLs to new ones.** Record where every existing page lands in the new structure so you can preserve inbound links. See [Preserve URLs and redirects](/docs/for-docs/migrate/preserve-urls-and-redirects) for how to build and apply that mapping.
5. **Connect the repository to Promptless.** Once the content builds and the site is in a GitHub repository, connect it as a doc collection. From that point, Promptless keeps it current. See [Doc locations & collections](/docs/for-docs/connect/doc-locations/github-repos).
## After the migration
[Section titled “After the migration”](#after-the-migration)
With your docs in a GitHub repository on a supported platform:
1. Apply your [URL redirect mapping](/docs/for-docs/migrate/preserve-urls-and-redirects) so existing links keep resolving.
2. [Connect the repository as a doc collection](/docs/for-docs/connect/doc-locations/github-repos) and let Promptless finish its [initial analysis of your docs](/docs/for-docs/connect/doc-locations/how-promptless-learns-your-docs).
3. Configure the [triggers](/docs/for-docs/connect/triggers) that should start keeping the migrated docs current.
Need a hand with any of this? Contact .
# Preserve URLs and redirects
> Keep inbound links, search rankings, and bookmarks working after a docs migration by mapping old paths to new ones and adding redirects
A migration usually changes your page URLs. The new platform lays out paths differently, and section names shift as you restructure. Left unhandled, every inbound link, bookmark, and search result that points at an old URL breaks. Redirects are the difference between a migration your readers never notice and one that scatters 404s across your traffic.
Caution
Don’t skip redirects because “the content is all still there.” Search engines and every external link still point at the old paths. Without redirects, that accumulated link equity and those bookmarks land on 404 pages the day you cut over.
## Build a URL map
[Section titled “Build a URL map”](#build-a-url-map)
Before you flip the switch, record where every old URL lands in the new structure. A simple two-column mapping (old path to new path) is enough:
| Old path | New path |
| ------------------------- | -------------------------------------- |
| `/kb/getting-started` | `/docs/for-docs/start-here/quickstart` |
| `/reference/api-overview` | `/docs/for-docs/reference/api` |
Capture this while you’re moving content, when the correspondence is freshest. Every page whose URL changes needs an entry; pages whose URL is unchanged don’t.
Note
If your source platform can export a list of published URLs, start from that export so you don’t miss a page. Crawling your live site is another way to enumerate every URL that needs a destination.
## Add the redirects
[Section titled “Add the redirects”](#add-the-redirects)
How you apply the map depends on the target platform, but the mechanism is always the same. You add a permanent (HTTP 301) redirect from each old path to its new one.
1. **Find your platform’s redirect mechanism.** Most static site generators and hosts support redirects through a config file or a hosting-level rules file. Examples include a redirects map in your site config, or a `redirects`/rewrites file for your host. Check your target platform’s and host’s documentation for the supported format.
2. **Add an entry for every changed URL.** Translate each row of your URL map into a redirect rule from the old path to the new path. Mark it permanent (301) so search engines transfer ranking to the new URL.
3. **Handle whole-section moves.** When an entire section moves under a new prefix, a single wildcard or pattern redirect often covers all its pages. That saves you one rule per page. This requires a platform that supports pattern-based rules.
## Verify before and after cut-over
[Section titled “Verify before and after cut-over”](#verify-before-and-after-cut-over)
Confirm the redirects resolve before you point your domain at the new site, and again once it’s live:
* **Spot-check high-traffic URLs** from your analytics. Your most-visited old paths should land on the right new pages.
* **Crawl for broken links** with a link checker so no internal link or redirect points at a dead path.
* **Watch for 404s after cut-over** in your host or analytics logs, and backfill any redirect you missed.
## Redirects and Promptless
[Section titled “Redirects and Promptless”](#redirects-and-promptless)
Redirect handling belongs to your documentation platform and host, not to Promptless. Promptless proposes content changes through pull requests and doesn’t manage your hosting-level redirects. That said, once your migrated docs are connected as a [doc collection](/docs/for-docs/connect/doc-locations/github-repos), Promptless keeps the *content* current from that point forward. The migration is the one-time cost, and staying current is automatic afterward.
The same URL-mapping and redirect steps apply when you restructure an existing docs set rather than move platforms. See [Audit and keep your docs healthy](/docs/for-docs/audit/keep-docs-healthy) for how a restructure fits with the rest of the audit-and-health jobs.
Planning a migration and want help getting the redirect strategy right? Contact .
# Understand docs-as-code
> Docs-as-code is a prerequisite for Promptless. Understand what it means and why moving to a Git-backed stack unblocks automated documentation updates
Promptless keeps your documentation current by opening pull requests against the repository that holds your content. That model works when your docs live in a repository as files a pull request can change, the approach known as **docs-as-code**. Your team may still be on a hosted platform that stores content in a proprietary database or WYSIWYG editor. If so, moving to docs-as-code is the first step to adopting Promptless.
Note
Docs-as-code is a hard prerequisite, not a preference. Promptless publishes by committing changes to a Git repository and opening a documentation PR. A platform Promptless can’t reach through a Git repository can’t receive suggestions.
## What docs-as-code means
[Section titled “What docs-as-code means”](#what-docs-as-code-means)
Docs-as-code treats documentation the same way engineering teams treat source code:
* **Content lives in a Git repository** as source files instead of inside a proprietary CMS. Those files are often Markdown or MDX. They can just as easily be DITA, reStructuredText, a MadCap Flare project, or another authoring format. What matters is that the source lives in Git.
* **Changes go through pull requests**, so every edit is reviewable, diffable, and revertable with the same tools your engineers already use.
* **A static site generator** builds the published site from those files. The repository is the source of truth and the live site is a build artifact.
Because the content is versioned files rather than database rows, an automated collaborator like Promptless proposes an edit the same way a teammate would. It branches, changes the files, and opens a PR you review before it ships.
## Why Promptless requires it
[Section titled “Why Promptless requires it”](#why-promptless-requires-it)
Promptless integrates into your existing workflow rather than replacing it. When a trigger activates (a merged code PR, a Slack thread, a support ticket), Promptless drafts the documentation change. It commits the change to a branch in your docs repository. Then it opens a pull request with citations back to the sources that informed it. You review and merge that PR like any other.
Every part of that loop depends on the docs being versioned files in a Git repository:
* Promptless **reads** the current content to understand your product, voice, and structure.
* It **writes** changes as a branch and a reviewable diff.
* Your platform **rebuilds** the published site from the merged files.
Hosted editors that keep content in a proprietary store don’t expose the docs as files a PR can change. There’s nothing for Promptless to branch from or commit to.
## What “supported” looks like
[Section titled “What “supported” looks like”](#what-supported-looks-like)
Once your documentation lives in a GitHub repository, Promptless publishes to any docs-as-code platform that builds from that source. What matters is a Git-backed source, not a particular tool or file format. Promptless works with Markdown and MDX, and also with DITA, reStructuredText, MadCap Flare, and FrameMaker (through a MIP intermediary). Some platforms aren’t natively Git-based but sync or mirror their content to GitHub. Those setups are fully supported too, because Promptless only needs to reach the source through a repository it can branch from. See the [supported platforms list](/docs/for-docs/connect/doc-locations/github-repos#supported-platforms) for the tools teams most often run on Promptless.
Tip
If you’re already on a Git-backed static site generator, you can skip the migration entirely. Head to [Doc locations & collections](/docs/for-docs/connect/doc-locations/github-repos) to connect your repository. Then set up your [triggers](/docs/for-docs/connect/triggers). This section is for teams still on a hosted platform that need to move first. Open-source maintainers can start from the [open-source quickstart](/docs/for-docs/start-here/open-source-quickstart), which covers the free program.
## Where to go next
[Section titled “Where to go next”](#where-to-go-next)
If you’ve confirmed docs-as-code is the move, the rest of this section walks the migration end to end:
* [Choose a platform](/docs/for-docs/migrate/choose-a-platform): pick a supported static site generator that fits your team.
* [Migrate to a new docs platform](/docs/for-docs/migrate/migrate-to-a-new-platform): move content off Doc360, ReadMe, Fern, HubSpot, or RoboHelp.
* [Preserve URLs and redirects](/docs/for-docs/migrate/preserve-urls-and-redirects): keep existing links working after the move.
# Account management
> Manage your Promptless organization, team members, and access controls from the dashboard.
Manage your Promptless organization, team members, and access controls through the account management interface.
## Create an account
[Section titled “Create an account”](#create-an-account)
You can sign up for an account at [accounts.gopromptless.ai](https://accounts.gopromptless.ai), or contact the team at .
## Manage team members
[Section titled “Manage team members”](#manage-team-members)
### Add team members
[Section titled “Add team members”](#add-team-members)
To add other users to your team account:
1. Click on your organization name in the upper left corner of the dashboard
2. Select “Manage” from the dropdown menu
3. In the management modal, you’ll find options to invite new team members
### User roles
[Section titled “User roles”](#user-roles)
Promptless supports different user roles with varying levels of access:
**`Admin`** (*role*)
Full access to organization settings, team management, and all documentation suggestions. Can edit suggestions, manage integrations, configure projects, and edit the Agent Knowledge Base.
**`Editor`** (*role*)
Can edit documentation suggestions and create new tasks, but cannot manage organization settings, integrations, or team members. Perfect for team members who work directly on docs without needing admin access.
**`Collaborator`** (*role*)
Can view documentation suggestions and leave comments for feedback, but cannot edit or modify suggestions. Perfect for stakeholders who need to review content without making direct changes.
Note
Some organization-wide configuration is admin-only. Only admins can change agent behavior settings or create, edit, and delete doc collections. All members can view the current agent behavior settings and the list of doc collections. Doc collection management is admin-only through the API as well. An API key can create, edit, or delete doc collections only when the user it was issued to is an admin. Agent behavior settings are editable only in the dashboard; there is no API path to change them. Editing the Agent Knowledge Base and the Configuration page (`promptless.yaml`) is also limited to admins, while everyone can view them.
## Domain verification and auto-enrollment
[Section titled “Domain verification and auto-enrollment”](#domain-verification-and-auto-enrollment)
### Set up automatic team member joining
[Section titled “Set up automatic team member joining”](#set-up-automatic-team-member-joining)
You can add domains to your organization to simplify the process of adding new members with email addresses from your company domain. When a verified domain is added, users with email addresses from that domain can join your organization based on your selected enrollment mode.
1. Click on your organization name in the upper left corner of the dashboard
2. Select “Manage” from the dropdown menu
3. In the “Verified domains” section, click “Add domain”
4. Enter your domain (e.g., “yourcompany.com”) and click “Save”
5. After verification, you’ll be prompted to select an enrollment mode:
6. Click “Save” to apply your selected enrollment mode
Once configured, new users with email addresses matching your verified domain will be able to join your organization. They join according to the enrollment mode you’ve selected.
### Set the default role for new members
[Section titled “Set the default role for new members”](#set-the-default-role-for-new-members)
The **Default role for new members** setting controls which role auto-enrolled members receive when they join through a verified domain. In the dashboard, open **Settings** and select **Organization**.
Only an organization admin can change this setting. An admin can set the default role to any of the available roles: **Admin**, **Editor**, or **Collaborator**.
This setting applies only to members who are auto-added through a verified domain. It does not change the roles of existing members.
## Organization settings
[Section titled “Organization settings”](#organization-settings)
### Security and access controls
[Section titled “Security and access controls”](#security-and-access-controls)
Promptless provides enterprise-grade security features for organization management:
* **Single Sign-On (SSO)**: Integration with Google, GitHub, and enterprise identity providers
* **Two-Factor Authentication (2FA)**: TOTP-based authentication for enhanced security
* **SAML 2.0**: Just-in-time provisioning for enterprise customers
* **OpenID Connect (OIDC)**: Modern authentication standards support
Note
Enterprise customers have access to additional security features including custom data retention policies and advanced audit logging.
## Billing
[Section titled “Billing”](#billing)
Billing is a page in the dashboard Settings, visible only to **`Admin`** users in organizations on a paid plan. Organizations that aren’t on a paid plan (including free and trial organizations) and non-admins won’t see it. Anyone who navigates to it directly sees a restricted-access message.
### View your current plan
[Section titled “View your current plan”](#view-your-current-plan)
The Billing page (visible to admins on a paid plan) shows a **Current plan** section that summarizes your organization’s active subscription. It’s one section on the page, not the whole page, and its information is read-only:
* **Plan name**: the subscription’s product name, for example “Promptless Startup”.
* **Price and billing cadence**: a fixed amount and frequency, for example “$500/month”. Some prices can’t be shown as a simple fixed amount (for example, usage-based, tiered, or non-USD subscriptions). For those, the view shows “Custom pricing” with the billing frequency instead of a calculated number.
* **Subscription status**: a status label, for example “Active”, “Trial”, “Payment overdue”, “Unpaid”, “Paused”, or “Setup incomplete”.
* **Next billing event**: a single line, for example “Renews Aug 7, 2026”. Depending on the subscription, this line instead shows a trial’s end date or the scheduled end date when a cancellation is pending. It can also show when the current billing period ends.
Note
Sometimes there’s no current subscription to display, for example before a subscription is in place or after a previous one has ended. In that case, admins see a message that no active subscription was found. The message includes a prompt to email if that looks wrong.
Updating the card on file or changing your plan is covered in the following sections.
### Update your payment method
[Section titled “Update your payment method”](#update-your-payment-method)
Admins can update the card on file themselves through Stripe’s secure hosted billing portal. A button in the dashboard opens the portal directly to the card-update flow. After updating, you’re returned to the Billing page. This self-serve flow covers card updates only. Subscription changes and cancellation are not handled here.
Note
Card details are handled entirely by Stripe’s hosted portal. Promptless never sees or stores your card data.
### Change or cancel a subscription
[Section titled “Change or cancel a subscription”](#change-or-cancel-a-subscription)
Subscription changes, including plan upgrades, seat changes, and cancellation, aren’t self-serve. For any of these, or for other billing questions, email our support team at .
## Need help?
[Section titled “Need help?”](#need-help)
If you have questions about account management or need assistance with team setup, please reach out to our support team at .
# Configuration reference
> Complete reference for the promptless.yaml configuration file
All Promptless configuration lives in a single `promptless.yaml` file in your organization’s Agent Knowledge Base. This file defines your doc collections, triggers, context sources, and publishing policies in one place.
## Configuration editor
[Section titled “Configuration editor”](#configuration-editor)
View and edit your configuration in the dashboard at [app.gopromptless.ai/configuration](https://app.gopromptless.ai/configuration). The page opens in **Form** mode, a structured editor that groups your configuration into four tabs: **Doc collections**, **Triggers**, **Context sources**, and **Policies**. You can manage everything there without hand-editing YAML. Each tab shows how many items it holds and surfaces the fields for that section directly.
You can also ask Promptless to make these changes for you in Slack or Microsoft Teams. See [Ask Promptless to update your configuration](/docs/for-docs/get-the-most-out/ask-promptless-to-update-config).
Form mode saves one item at a time. When you add or change a doc collection, trigger, or context source, you save that item on its own. Promptless commits the change to your Agent Knowledge Base right away. Policies save as a single section. There’s no separate review-and-commit step. Each save is its own commit.
When you need precise control over the file format, switch to **YAML** mode using the toggle at the top of the page. YAML mode is the raw editor with syntax highlighting, schema-driven completions, and inline validation. Use it when you want to copy configurations between environments or edit the file directly.
In Form mode, Promptless fills in fields from your connected integrations. The doc collection platform (GitHub, GitHub OSS, GitHub Enterprise, or GitLab) is not a field you set. It comes from the integration that reaches the repository. The repo, Slack channel, and Jira, Confluence, Linear, and Notion pickers autocomplete from what each integration can see.
Form mode also keeps references consistent for you. Renaming a doc collection updates every trigger and policy rule that points at it in the same save. It also warns you if the new name is already taken. Deleting a doc collection or trigger that a policy rule depends on removes those rules too. You never end up with a rule pointing at something that no longer exists.
### Permissions and conflict detection
[Section titled “Permissions and conflict detection”](#permissions-and-conflict-detection)
Every organization member can view the configuration, but only admins can edit and save changes. Non-admins see a read-only view.
The editor uses compare-and-swap to avoid overwriting concurrent changes. If someone else modifies the configuration while you’re editing, you see a conflict warning and can reload to get the latest version.
Note
Changes saved in the Configuration page take effect immediately for new triggers. Policies resolve at publish time, so mid-session config edits apply when suggestions are finalized.
## Initial configuration from onboarding
[Section titled “Initial configuration from onboarding”](#initial-configuration-from-onboarding)
When you complete the setup wizard, Promptless creates your `promptless.yaml` with sensible defaults based on the integrations you connected:
| Connected Integration | Generated Trigger | Generated Context Source |
| ---------------------------- | -------------------------------------------------------------- | ------------------------------------------- |
| GitHub (docs or trigger app) | `github_pr` (opened, first\_approval, merge) with `repos: all` | None |
| GitLab | `gitlab_mr` (opened, merge) with `repos: all` | None |
| Bitbucket | `bitbucket_pr` (opened, merge) with `repos: all` | None |
| Jira / Confluence | None | Unscoped `jira` and/or `confluence` entries |
| Linear | None | Unscoped `linear` entry |
| Notion | None | Unscoped `notion` entry |
| Google Drive | None | Unscoped `google_drive` entry |
| Slite | None | Unscoped `slite` entry |
Onboarding seeds pull request triggers only; [commit triggers](/docs/for-docs/connect/triggers/github-commits) are opt-in and stay off until you add a `github_commit` trigger yourself. These broad defaults let Promptless start listening for documentation-worthy events immediately. You can edit your configuration anytime to narrow scope, like restricting triggers to specific repositories or limiting context sources to particular projects.
Note
Automatic configuration is additive and idempotent. If you’ve already manually configured a trigger type or context source, onboarding won’t overwrite it.
Connecting Jira, Confluence, Linear, or Notion *after* onboarding works the same way. Promptless adds a broad, unscoped context source for that tool if you don’t already have one. Existing entries and any scoping you’ve set are left untouched.
### Add a commit trigger
[Section titled “Add a commit trigger”](#add-a-commit-trigger)
A commit trigger (`github_commit`) activates when commits are pushed to a branch you monitor, rather than when a pull request opens or merges. Without a `branches` filter, it watches only the repository’s default branch. Add one when you want Promptless to react to commits directly:
```yaml
triggers:
default-branch-commits:
trigger_type: github_commit
match:
- repos:
- acme/backend
branches:
- main # omit to match only the default branch
trigger_directories:
- src/
```
In a typical pull request workflow, this overlaps with your PR triggers. Merging a pull request also pushes a merge commit to the default branch, so the commit trigger activates alongside the `github_pr` merge event. A commit trigger earns its place when changes reach a branch without a pull request. Hotfixes or commits pushed straight to the default branch are examples. With a commit trigger, Promptless still documents those changes. See [GitHub Commits](/docs/for-docs/connect/triggers/github-commits) for the full workflow.
## File structure
[Section titled “File structure”](#file-structure)
The configuration file has four top-level sections:
```yaml
doc_collections: # Where documentation lives (keyed by repo)
context_sources: # Integrations for additional context
triggers: # Events that initiate documentation work
policies: # Publishing and notification rules
```
All sections are optional. Unknown keys are rejected with validation errors.
## Doc collections
[Section titled “Doc collections”](#doc-collections)
Doc collections define the documentation repositories where Promptless publishes updates. GitHub collections are keyed by `owner/repo`; GitLab collections are keyed by the project’s full path, including every namespace segment (for example, `acme/platform/developer-docs`).
```yaml
doc_collections:
acme/docs:
docs_framework: docusaurus
docs_root_url: https://docs.acme.com
filter:
- docs/
- guides/
```
### Fields
[Section titled “Fields”](#fields)
| Field | Description |
| ------------------ | ---------------------------------------------------------------------------------------------------------------------------------------------------------------------------------------------------------------- |
| `platform` | Repository platform: `github` (default), `github_oss`, `github_enterprise`, or `gitlab` |
| `host` | Bare instance hostname (no scheme, no path). **Required** for `github_enterprise`; **optional** for `gitlab` (blank means gitlab.com, a hostname means self-hosted GitLab); **invalid** for every other platform |
| `default_branch` | Branch to target for PRs (defaults to repository’s default branch) |
| `docs_framework` | Documentation framework (docusaurus, mkdocs, starlight, etc.) |
| `docs_root_url` | Published documentation site URL |
| `config_file_path` | Path to framework config file (e.g., `docusaurus.config.js`) |
| `vale_config_path` | Path to Vale config file to enable prose linting |
| `doc_detective` | Doc Detective configuration (presence enables the feature) |
| `filter` | List of directory prefixes or file paths Promptless can modify |
Note
One repository can have at most one doc collection per organization. Collection “names” are the repository names. There’s no separate display name field.
A GitLab-backed collection sets `platform: gitlab` and is keyed by its project path. Leave `host` off for gitlab.com; set it to your instance hostname for self-hosted GitLab. Promptless opens merge requests on these projects the same way it opens pull requests on GitHub.
```yaml
doc_collections:
acme/docs: # gitlab.com project
platform: gitlab
docs_framework: docusaurus
acme/handbook: # self-hosted GitLab project
platform: gitlab
host: gitlab.acme.com
docs_framework: mkdocs
```
### Path scope (filter)
[Section titled “Path scope (filter)”](#path-scope-filter)
The `filter` field controls which files Promptless can modify:
* **Empty or omitted**: Promptless can modify any file in the repository.
* **Directory paths**: Entries ending with `/` allow modifications to any file in that directory tree.
* **File paths**: Exact file paths allow only that specific file.
```yaml
doc_collections:
acme/docs:
filter:
- docs/ # All files under docs/
- CHANGELOG.md # Only this specific file
```
## Context sources
[Section titled “Context sources”](#context-sources)
Context sources give Promptless access to your organization’s tools for additional context. They’re used for narrowing scope when you want to limit which projects, spaces, or databases Promptless can query. Each entry requires a `source_type` field.
Note
An empty entry (or no entry) for a context source means full access to that integration. Only add entries when you need to restrict scope.
```yaml
context_sources:
jira:
source_type: jira
project_keys:
- DOCS
- PLATFORM
confluence:
source_type: confluence
space_keys:
- ENGINEERING
linear:
source_type: linear
team_keys:
- engineering
- product
notion:
source_type: notion
database_ids:
- abc123def456
google_drive:
source_type: google_drive
drive_ids:
- 0AExampleDriveIdUk9PVA
folder_ids:
- 1BExampleFolderIdXyZ
slite:
source_type: slite
```
### Available sources
[Section titled “Available sources”](#available-sources)
| Source Type | Scope Fields | Description |
| -------------- | -------------------------- | ------------------------------------------------------------------------- |
| `jira` | `project_keys` | Restrict to specific Jira project keys |
| `confluence` | `space_keys` | Restrict to specific Confluence space keys |
| `linear` | `team_keys` | Restrict to specific Linear team identifiers |
| `notion` | `database_ids`, `page_ids` | Restrict to specific Notion databases or pages |
| `google_drive` | `drive_ids`, `folder_ids` | Restrict to specific shared drives or folders (omit both for full access) |
| `slite` | None | No scope fields. The whole Slite workspace is available when connected |
## Triggers
[Section titled “Triggers”](#triggers)
Triggers define events that automatically initiate documentation work. Unlike built-in triggers, these require explicit configuration. Each trigger has a `trigger_type` and a `match` list. The trigger activates when any clause in the list matches, and fields within a clause are ANDed together.
```yaml
triggers:
github-prs:
trigger_type: github_pr
match:
- repos:
- acme/backend
- acme/api
trigger_on:
- opened
- first_approval
trigger_directories:
- src/
- lib/
slack-support:
trigger_type: slack_listen
match:
- channels:
- support
- customer-questions
```
### Trigger types
[Section titled “Trigger types”](#trigger-types)
github\_pr
Triggers when pull requests are opened, approved, or merged in specified repositories; it can also re-review an open PR on each new push.
**Match clause fields:**
| Field | Description |
| --------------------- | ---------------------------------------------------------------------------------- |
| `repos` | Required. The literal `all` or a list of repositories (`owner/repo` format) |
| `excluded_repos` | Repositories to exclude from monitoring |
| `trigger_on` | Required. `opened`, `first_approval`, `merge`, or `updated` |
| `trigger_directories` | Only trigger when changes touch these directories |
| `branches` | Only trigger for PRs targeting these branches |
| `repo_topics` | Only trigger for repos with these GitHub topics |
| `repo_owners` | Only trigger for repos owned by these owners (the `owner` segment of `owner/repo`) |
Caution
A match clause that lists `updated` in `trigger_on` must name an explicit `repos` list; it cannot use `repos: all`. Other clauses in the same trigger are unaffected.
github\_commit
Triggers when commits are pushed to specified branches.
**Match clause fields:**
| Field | Description |
| --------------------- | ----------------------------------------------------------- |
| `repos` | Required. The literal `all` or a list of repositories |
| `excluded_repos` | Repositories to exclude |
| `branches` | Branches to monitor (omit to match only the default branch) |
| `trigger_directories` | Only trigger when changes touch these directories |
| `repo_topics` | Only trigger for repos with these GitHub topics |
| `repo_owners` | Only trigger for repos owned by these owners |
gitlab\_mr
Triggers when merge requests are opened or merged in GitLab projects.
**Match clause fields:**
| Field | Description |
| --------------------- | ------------------------------------------------------------- |
| `repos` | Required. The literal `all` or a list of GitLab projects |
| `excluded_repos` | Projects to exclude |
| `trigger_on` | Required. Events that activate the trigger: `opened`, `merge` |
| `trigger_directories` | Only trigger when changes touch these directories |
| `branches` | Only trigger for MRs targeting these branches |
bitbucket\_pr
Triggers when pull requests are opened or merged in Bitbucket repositories.
**Match clause fields:**
| Field | Description |
| --------------------- | --------------------------------------------------------------- |
| `repos` | Required. The literal `all` or a list of Bitbucket repositories |
| `excluded_repos` | Repositories to exclude |
| `trigger_on` | Required. Events that activate the trigger: `opened`, `merge` |
| `trigger_directories` | Only trigger when changes touch these directories |
| `branches` | Only trigger for PRs targeting these branches |
slack\_listen
Passively monitors specified Slack channels for documentation-worthy conversations.
**Match clause fields:**
| Field | Description |
| ---------- | ---------------------------------------------------------- |
| `channels` | Required. List of channel names to monitor (no `#` prefix) |
Tip
Channel names are automatically updated when channels are renamed in Slack.
msteams\_listen
Passively monitors specified Microsoft Teams channels.
**Match clause fields:**
| Field | Description |
| ------------- | ----------------------------------------------------------- |
| `channel_ids` | Required. List of Teams channel conversation IDs to monitor |
clickup
Triggers when ClickUp tasks reach specified statuses.
**Match clause fields:**
| Field | Description |
| ---------- | --------------------------------------------------------------- |
| `statuses` | Required. List of task statuses that trigger documentation work |
jira\_new\_issue
Triggers when an issue is created in a matching project.
**Match clause fields:**
| Field | Description |
| ------------- | ------------------------------------------------------------------ |
| `project_key` | Required. Non-empty list of Jira project keys (for example `DOCS`) |
An optional top-level `instructions` field (a sibling of `match`) gives the trigger standing instructions passed to Promptless on each run. A present-but-blank value is rejected. Like the built-in `jira_mention`, Promptless comments on the ticket and owes an answer there, tracked for follow-up.
jira\_label\_added
Triggers when a label is added to an issue.
**Match clause fields:**
| Field | Description |
| ------------- | --------------------------------------------------------------------------------------------- |
| `new_label` | Required. Labels whose addition activates the trigger; matches when any listed label is added |
| `project_key` | Optional. Restrict to these project keys |
A label whose first token is `promptless` is reserved for the built-in `jira_mention` path and never matches `new_label`; name the label something else.
Takes the same optional `instructions` field and has the same on-ticket behavior as `jira_new_issue`.
jira\_status\_change
Triggers when an issue moves into a new status.
**Match clause fields:**
| Field | Description |
| ------------- | ------------------------------------------------------------------------------------------------------- |
| `new_status` | Status names the issue moved into |
| `is_done` | Only `true` is accepted; matches any status in Jira’s done category, stable across projects and renames |
| `project_key` | Optional. Restrict to these project keys |
At least one of `new_status`, `is_done`, or `project_key` must be set in each clause.
Takes the same optional `instructions` field and has the same on-ticket behavior as `jira_new_issue`.
A Jira trigger activates once per crossing and does not re-fire on later deliveries about an issue that still matches. Creating an issue crosses every edge at once, so a new issue that matches two Jira triggers dispatches once, tagged with both keys. An issue moving between two done statuses activates an `is_done: true` trigger again. See [How a configured trigger activates](/docs/for-docs/connect/triggers/jira#how-a-configured-trigger-activates) for the full explanation.
schedule
Triggers when a scheduled time comes due and dispatches your standing instructions each time.
**Match clause fields:**
| Field | Description |
| ---------- | ----------------------------------------------------------------------------------------------------------------- |
| `cron` | Required. Five-field cron expression (minute, hour, day of month, month, day of week). Runs at most once an hour. |
| `timezone` | Optional. IANA timezone name; defaults to UTC. Keeps its wall-clock time across daylight-saving changes. |
Unlike other trigger types, a schedule trigger also takes a top-level `instructions` field (required, non-empty) as a sibling of `match`. Because no inbound event describes the work, the instructions are the whole job. Each `match` clause is a `{cron, timezone}` pair, and multiple clauses run the same instructions on multiple cadences.
### Built-in triggers
[Section titled “Built-in triggers”](#built-in-triggers)
Some triggers are always active when their integration is connected and don’t appear in the YAML:
* **slack\_mention**: @Promptless mentions in Slack channels
* **msteams\_mention**: @Promptless mentions in Microsoft Teams
* **github\_mention**: @Promptless mentions in GitHub issues and PR comments
* **jira\_mention**: Assigning a Jira issue to the Promptless account, @mentioning it in a comment, or adding a `promptless`-prefixed label
* **web**: Requests submitted through the web dashboard
* **api**: Requests from the HTTP API
Built-in triggers can’t be disabled, but their keys are valid in policy rules.
## Policies
[Section titled “Policies”](#policies)
Policies control publishing behavior and notifications. They consist of a default overlay and ordered rules that apply based on trigger or doc collection.
```yaml
policies:
default:
notification:
slack_channel: docs-notifications
msteams_channel: "19:0a1b2c3d@thread.tacv2"
escalation:
slack_channel: docs-escalations
msteams_channel: "19:4e5f6a7b@thread.tacv2"
email:
- docs-team@example.com
publishing:
auto_create_pr: true
auto_merge: false
suppress_source_pr_comments: false
rules:
- if:
trigger: github-commits
then:
publishing:
auto_merge: true
- if:
doc_collection: acme/internal-docs
then:
notification:
slack_channel: internal-docs-team
```
### Policy fields
[Section titled “Policy fields”](#policy-fields)
**notification**
| Field | Description |
| ----------------- | ------------------------------------------------------------------------------------------------------------------------------------- |
| `slack_channel` | Slack channel name for notifications (no `#` prefix), or `null` to disable an inherited Slack channel |
| `msteams_channel` | Microsoft Teams channel conversation ID (e.g. `19:…@thread.tacv2`) for notifications, or `null` to disable an inherited Teams channel |
`slack_channel` and `msteams_channel` are independent. Set either, both, or neither. The Teams conversation ID is the same value you paste into an `msteams_listen` trigger; copy it from Teams. A Teams channel must have prior Promptless bot activity before notifications can be delivered there.
* **Omitting** the field inherits the channel from `policies.default` or an earlier rule.
* Setting it to **`null`** disables the channel for that scope, overriding any inherited channel so no notification is sent.
* Setting it to a **channel name** (or Teams conversation ID) routes notifications there.
Because resolution depends on field presence, an omitted field and an explicit `null` are not the same: `null` means disable, absent means inherit. The two channels resolve independently, so you can disable one while leaving the other inherited.
```yaml
policies:
default:
notification:
slack_channel: docs-notifications
rules:
- if:
doc_collection: acme/internal-docs
then:
notification:
slack_channel: null # silence Slack for this collection
```
**escalation**
The escalation channel is where Promptless routes operational alerts rather than suggestion announcements. An example is a [proactive notification](/docs/for-docs/reference/integrations#proactive-notifications) when a connected integration develops a problem. This is completely different from notifications about suggestions being created, updated, closed, or merged. For example, a test account is missing the feature flags to screenshot a screen. Or a PR references a Jira issue that Promptless can’t read. Either the Jira integration isn’t connected, or it’s connected but the project isn’t accessible. See [Escalation channel](/docs/for-docs/tune/notifications#escalation-channel) for the full behavior. It’s a sibling of `notification` and, unlike `notification`, also accepts `email`.
```yaml
policies:
default:
escalation:
slack_channel: ops-alerts
msteams_channel: "19:0a1b2c3d@thread.tacv2"
email:
- oncall@acme.com
```
| Field | Description |
| ----------------- | -------------------------------------------------------------------------------------------------------------------------------------------- |
| `slack_channel` | Slack channel name for escalation alerts (no `#` prefix), or `null` to disable an inherited Slack channel |
| `msteams_channel` | Microsoft Teams channel conversation ID (e.g. `19:…@thread.tacv2`), or `null` to disable an inherited Teams channel |
| `email` | List of email addresses for escalation alerts (escalation only; not used for suggestion notifications), or `[]` to disable an inherited list |
Set any combination of the three. The same presence semantics as `notification` apply (omit to inherit; `null` for `slack_channel`/`msteams_channel` or `[]` for `email` to disable). `msteams_channel` carries the same Teams-activity prerequisite as `notification`. Escalations reach the escalation channel(s) even when suggestion notifications are off or no notification channel is set. When a platform’s escalation channel is unset, Promptless raises escalations through your suggestion-notification routing on that platform.
`escalation.email` routes escalations to a list of email addresses. Email is escalation-only. Suggestion notifications never arrive by email. Promptless emails only the addresses you list. Email escalation requires email delivery to be configured for your deployment. It’s on by default on Promptless-hosted deployments. Self-hosted deployments must configure it.
**publishing**
| Field | Description |
| ----------------------------- | ------------------------------------------------------------------------------------------------------------------------------------------------------------------------------------------------------------------------------------------------------------------------------------------ |
| `auto_create_pr` | Automatically open documentation PRs for suggestions, or merge requests on GitLab. Gates only automatic PR creation (see the note below) |
| `auto_merge` | Automatically merge auto-created documentation PRs. On GitLab the merge is immediate and squashes. A merge request that can’t merge right away stays open for you to merge manually ([full detail](/docs/for-docs/connect/doc-locations/gitlab-projects#automatic-merge-request-creation)) |
| `suppress_source_pr_comments` | Skip posting comments on source PRs |
Note
`auto_create_pr` gates only *automatic* PR creation. When it’s off, Promptless leaves suggestions as drafts and doesn’t open a documentation PR on its own. You can still open one on demand. Ask the agent directly, click the **Create PR** button in Slack, or create it from the dashboard. `auto_merge` applies only to PRs that Promptless creates automatically.
**archiving**
Promptless automatically archives suggestions that have gone stale, so your dashboard stays focused on active work. The `archiving` block controls this behavior.
| Field | Description |
| ------------------ | ------------------------------------------------------------------------------------------------- |
| `enabled` | Whether automatic archiving runs for this scope. Defaults to `true`. |
| `stale_after_days` | Days of inactivity before a suggestion is archived. Defaults to `30`; must be a positive integer. |
Unlike `publishing`, archiving is **opt-out**: it runs with a 30-day window unless you disable or adjust it. Set `enabled: false` to keep a scope’s suggestions open indefinitely. This is useful when a team leaves a suggestion open until a linked ticket closes. Lower `stale_after_days` to archive sooner. Staleness is measured from a suggestion’s last activity rather than its creation date. Last activity is the most recent of when it was created, updated, had its diff refreshed, or was reopened. A suggestion viewed within the window is always spared.
```yaml
policies:
default:
archiving:
stale_after_days: 45
rules:
- if:
doc_collection: acme/docs
then:
archiving:
enabled: false # keep this collection's suggestions indefinitely
```
Note
Archiving resolves per doc collection, so a rule can disable it or change the window for one collection while the default covers the rest. Archiving runs on a schedule rather than in response to a trigger, so only `policies.default` and rules scoped by `doc_collection` apply to it. A rule scoped by `trigger` never affects archiving.
### Rule matching
[Section titled “Rule matching”](#rule-matching)
Rules are evaluated in order. When multiple rules match, fields from later rules override earlier ones. The `if` clause supports:
* `trigger`: Match a specific trigger key (including built-in triggers like `slack_mention`)
* `doc_collection`: Match a specific doc collection by repository name
Both conditions must match if both are specified (AND logic).
Caution
Policies resolve at publish time, not when the trigger activates. If you update your configuration while a suggestion is being created, the new policy values apply when that suggestion is published.
## Example configuration
[Section titled “Example configuration”](#example-configuration)
```yaml
doc_collections:
acme/documentation:
docs_framework: docusaurus
docs_root_url: https://docs.acme.com
config_file_path: docusaurus.config.js
filter:
- docs/
context_sources:
jira:
source_type: jira
project_keys:
- DOCS
- ENG
linear:
source_type: linear
team_keys:
- engineering
# Built-in triggers (api, github_mention, jira_mention, msteams_mention, slack_mention, web)
# are always on for connected integrations and are not configured here;
# their keys remain valid in policies rules.
triggers:
main-repos:
trigger_type: github_pr
match:
- repos:
- acme/backend
- acme/frontend
trigger_on:
- opened
- first_approval
trigger_directories:
- src/
support-channel:
trigger_type: slack_listen
match:
- channels:
- customer-support
policies:
default:
notification:
slack_channel: docs-updates
publishing:
auto_create_pr: true
auto_merge: false
rules:
- if:
trigger: slack_mention
then:
publishing:
suppress_source_pr_comments: true
```
## Validation and errors
[Section titled “Validation and errors”](#validation-and-errors)
The configuration editor validates your YAML before saving. Validation errors appear as inline markers at the relevant line, with details including:
* **Path**: Which field has the error
* **Line**: Line number in the YAML
* **Message**: Description of what’s wrong
Common validation errors:
* Unknown keys (typos or unsupported fields)
* Invalid enum values (e.g., wrong trigger type)
* Missing required fields (e.g., `host` for `github_enterprise` platform)
* Duplicate repository keys in `doc_collections`
* Malformed `doc_collections` keys. A GitHub, GitHub OSS, or GitHub Enterprise key must be exactly `owner/repo`, with no extra path segments. A GitLab key is the project’s full path, so nested namespace segments are valid. No key may carry surrounding whitespace.
Tip
If you edit the configuration file directly via git push, invalid YAML keeps the last valid configuration active. The error is surfaced in the Configuration page editor.
## Repository renames
[Section titled “Repository renames”](#repository-renames)
Promptless automatically updates your configuration when repositories or Slack channels are renamed:
* **GitHub repository renames**: The `doc_collections` key and any references in trigger `repos`/`excluded_repos` are updated.
* **Slack channel renames**: Channel names in `slack_listen` triggers and the `slack_channel` of `notification` and `escalation` policies are updated. Teams conversation IDs are not Slack channel names and are left unchanged.
These updates are committed directly to your Agent Knowledge Base.
## Migration from projects
[Section titled “Migration from projects”](#migration-from-projects)
Existing organizations are automatically migrated from the legacy Projects configuration to `promptless.yaml`. The migration preserves:
* All trigger configurations and settings
* Doc collection settings
* Automatic PR creation and notification preferences
* Context source scoping
After migration, the Projects page is replaced by the Configuration page. Your triggers and doc collections continue working without any action required.
# Frequently asked questions
> Answers to common questions about setting up and using Promptless, from supported platforms to how suggestions get created.
Here you’ll find answers to common questions about using Promptless.
## Getting started & onboarding
[Section titled “Getting started & onboarding”](#getting-started--onboarding)
For account creation and team management questions, please see our [Account Management](/docs/for-docs/reference/account-management) page.
## Platform usage
[Section titled “Platform usage”](#platform-usage)
### What platforms does Promptless integrate with?
[Section titled “What platforms does Promptless integrate with?”](#what-platforms-does-promptless-integrate-with)
Promptless integrates with a wide variety of platforms for triggers, context, and publishing:
* **Triggers**: GitHub, Bitbucket, GitLab, Jira, Slack, Microsoft Teams, Intercom (beta)
* **Context Sources**: Linear, Jira, GitHub Issues, Google Drive
* **Publishing**: Git-hosted docs (Fern, Mintlify, Docusaurus, ReadMe, GitBook, MkDocs, and more)
For a complete list, see our [Integrations overview](/docs/for-docs/reference/integrations).
### Does Promptless monitor my Slack channels?
[Section titled “Does Promptless monitor my Slack channels?”](#does-promptless-monitor-my-slack-channels)
By default, no. Promptless only accesses Slack content when you explicitly trigger it by tagging @Promptless or using the “Update Docs” message action.
However, you can optionally enable **passive listening** for specific channels. When enabled, Promptless will monitor only the channels you explicitly select in your project configuration. This is completely opt-in - you choose which channels to monitor and can add or remove channels at any time. If you don’t enable this option, we will not be monitoring any slack channels.
For more details, see our [Slack Integration documentation](/docs/for-docs/reference/integrations/slack) and [Reviewing from Slack and Teams](/docs/for-docs/work-the-queue/reviewing-from-slack-and-teams#4-passive-channel-listening).
### Does Promptless analyze my entire codebase?
[Section titled “Does Promptless analyze my entire codebase?”](#does-promptless-analyze-my-entire-codebase)
No. When triggered by a pull request, Promptless only analyzes the changed files in the PR diff. It doesn’t search across your entire repository. This focused approach helps Promptless understand exactly what changed and generate relevant documentation updates.
### How does Promptless handle my data?
[Section titled “How does Promptless handle my data?”](#how-does-promptless-handle-my-data)
Promptless follows strict data handling practices:
* Documentation copies are stored for processing
* Third-party integration data is processed but not stored
* End-user data is not processed
* All data is encrypted in transit (TLS 1.2+) and at rest (AES-256)
For detailed information, see our [Data Handling documentation](/docs/for-docs/security/data-handling-and-classification).
## Have more questions?
[Section titled “Have more questions?”](#have-more-questions)
If you don’t see your question answered here, please reach out to our support team at .
# Get support
> Reach the Promptless team for troubleshooting, setup help, and steering the agent, and see what they can help with.
Have questions or need assistance? We’re here to help.
Our team actively wants to help you get the most out of Promptless. Whether you’re troubleshooting an issue, fine-tuning your setup, or just have a question, don’t hesitate to reach out. We can help with:
* **Issues with events Promptless has processed**: Let us know if something doesn’t look right with a trigger, suggestion, or any event Promptless handled. That includes a code PR, a Slack message, or anything else. We’ll investigate.
* **Configuring your setup**: Need help with integrations, pipelines, or other configuration? We’re happy to walk through it with you.
* **Steering the Promptless agent**: Want to guide the agent’s behavior, adjust preferences, or customize how it handles your docs? We can help you dial it in.
* **Anything else**: No question is too small. If you’re wondering about something, just ask.
### Contact us
[Section titled “Contact us”](#contact-us)
Email Support
For questions, feedback, or troubleshooting, reach us at .
Slack Connect
During onboarding, we set up a shared Slack channel between your team and ours for direct support.
[Schedule a Call](https://cal.com/team/promptless/30m-all)Book a 30-minute call with our team to discuss your questions or get hands-on help.
# Integrations
> Connect Promptless to GitHub, GitLab, Slack, Atlassian, and other tools for triggers, context sources, and documentation publishing.
Promptless offers several key integrations to help automate and improve your documentation workflow.
Integrations can be used for:
1. Triggers (i.e. to generate events, either automatically or manually, upon which Promptless gets notified)
2. Context (i.e. to allow Promptless to search for relevant information in its research)
3. Publishing (i.e. to push documentation updates to your Git-hosted docs)
Some integrations can be used for multiple purposes. Some integrations are in a beta state and may not be listed here. For the most up to date list of integrations, please contact us at .
Requesting New Integrations
Need an integration that’s not listed here? Contact us at to discuss your requirements.
## Available integrations
[Section titled “Available integrations”](#available-integrations)
* [Bitbucket](/docs/for-docs/reference/integrations/bitbucket): Trigger based on Pull Requests
* [GitHub](/docs/for-docs/reference/integrations/github): Trigger based on Pull Requests, research based on code functionality, and publish documentation to GitHub repos
* [GitHub (read-only)](/docs/for-docs/reference/integrations/github-read-only): Separate read-only GitHub App. Triggers and context on any repository (including private code repos), plus publishing to public repos through a pull request from a fork
* [GitHub Enterprise](/docs/for-docs/reference/integrations/github-enterprise): Custom GitHub App configuration for GitHub Enterprise Server and Enterprise Cloud users
* [GitLab](/docs/for-docs/reference/integrations/gitlab): Trigger based on Merge Requests, read source code for context, and publish documentation to GitLab projects
* [Atlassian](/docs/for-docs/reference/integrations/atlassian): Trigger based on Jira ticket status and look up relevant Jira issues and Confluence spaces for context when creating documentation
* [Linear](/docs/for-docs/reference/integrations/linear): Look up relevant Linear issues and projects within a team when being triggered
* [Microsoft Teams](/docs/for-docs/reference/integrations/microsoft-teams): Trigger based on mentions, message actions, and passive channel listening in Microsoft Teams (Beta)
* [Notion](/docs/for-docs/connect/context-sources/notion): Search Notion pages and databases for product specs and internal documentation
* [Google Drive](/docs/for-docs/connect/context-sources/google-drive): Search Google Drive and read Docs, Sheets, and Slides for context when creating documentation (Beta)
* [Slite](/docs/for-docs/connect/context-sources/slite): Search Slite notes for internal documentation and product context
* [Slack](/docs/for-docs/reference/integrations/slack): Trigger based on DMs or message actions in Slack
* [Intercom](/docs/for-docs/reference/integrations/intercom): Trigger based on resolved support conversations (Beta)
* [LaunchDarkly](/docs/for-docs/reference/integrations/launchdarkly): Trigger based on feature flag changes (Beta)
## Manage integrations
[Section titled “Manage integrations”](#manage-integrations)
Organization administrators can view and manage all connected integrations from the [Integrations page](https://app.gopromptless.ai/integrations) in the Promptless dashboard.
The Integrations page shows:
* All currently connected integrations for your organization
* Connection status and authentication state for each integration
* Options to disconnect or reconfigure integrations
* Links to set up new integrations
To revoke access for any integration, click the integration card and select the disconnect option. This immediately revokes Promptless’s access to that service.
## Connection health
[Section titled “Connection health”](#connection-health)
Once a day, Promptless checks each connected integration to confirm that its credentials are still valid and that the third-party service is reachable. The result appears as a health label on each integration card on the Integrations page.
* **Connected**: The most recent check succeeded. Promptless can reach the service and is authenticated.
* **Needs reconnect**: Promptless’s authorization has expired or been disconnected and needs manual reauthorization. Open the integration card and reconnect to restore access.
* **Temporary outage**: The third-party service was unreachable or could not be verified during the latest check. No action is required. Promptless rechecks automatically and returns the integration to **Connected** once validation succeeds.
When an integration shows **Needs reconnect** or **Temporary outage**, an info icon appears next to the label. Hover over it for more detail, including the time Promptless last confirmed the integration was healthy. For a **Temporary outage**, the tooltip also shows when the current issue was first and last detected.
### Proactive notifications
[Section titled “Proactive notifications”](#proactive-notifications)
* If your organization has an [escalation channel configured](/docs/for-docs/reference/configuration-reference#policies) (Slack, Microsoft Teams, and/or email), Promptless reports connection problems there, naming the affected integration. You learn about a broken integration without checking this page.
* Promptless posts about a given problem only once. It doesn’t re-notify you day after day about the same ongoing issue.
* To stop these notifications, open the [Integrations page](https://app.gopromptless.ai/integrations) and either disconnect or reconnect the affected integration.
## Security & authentication
[Section titled “Security & authentication”](#security--authentication)
All Promptless integrations follow security best practices:
* OAuth 2.0 authentication where applicable
* Encrypted data transmission (TLS 1.2+)
* Encrypted data storage (AES-256)
* Minimal data retention
## Common features
[Section titled “Common features”](#common-features)
Each integration includes:
* Granular permission controls
* Audit logging capabilities
* Configurable notification settings
* Data privacy controls
For detailed security information, visit our [Data Handling and Security documentation](/docs/for-docs/security/data-handling-and-classification).
# Atlassian integration
> Connect Jira and Confluence through a single Atlassian OAuth connection for documentation context and triggers.
**Used for: Context and triggers**
Note
Promptless integrates with both Jira and Confluence through a single OAuth connection. When engineers reference Jira issue keys in GitHub PRs or commit messages (like “PROJ-123”), Promptless automatically retrieves the ticket for context. Promptless also searches your Confluence spaces for existing patterns, terminology, and architectural decisions to keep new documentation consistent.
Note
If you previously connected Jira to Promptless, reconnect to access Confluence spaces. Your existing Jira project configuration is preserved.
## Permissions required
[Section titled “Permissions required”](#permissions-required)
The OAuth consent screen displays the permissions Promptless requests when you connect Atlassian. Promptless requests only the scopes needed to read Jira issues and Confluence pages for documentation context.
### Jira scopes
[Section titled “Jira scopes”](#jira-scopes)
| Scope | Purpose |
| ----------------- | -------------------------------------------------------------------------------------------------------------------------------- |
| `read:jira-work` | Read Jira issues, projects, and work data |
| `write:jira-work` | Reply on a ticket and attach the documentation PR as a remote link when a Jira trigger runs. Also create a Jira issue on request |
| `read:jira-user` | Read user information for issue context |
### Confluence scopes
[Section titled “Confluence scopes”](#confluence-scopes)
| Scope | Purpose |
| --------------------------------- | -------------------------------------------------------------- |
| `read:confluence-space.summary` | Read space names and metadata |
| `read:confluence-content.all` | Read page content for documentation context |
| `read:space:confluence` | Read space information (granular scope) |
| `read:page:confluence` | Read individual pages (granular scope) |
| `read:content:confluence` | Read content body (granular scope) |
| `search:confluence` | Search spaces with CQL to find relevant pages (granular scope) |
| `read:content-details:confluence` | Read content metadata returned by search (granular scope) |
### Additional scopes
[Section titled “Additional scopes”](#additional-scopes)
| Scope | Purpose |
| ---------------- | ------------------------------------------------------------ |
| `offline_access` | Allow Promptless to refresh tokens without re-authentication |
Note
Confluence scopes include both classic and granular variants for compatibility with Atlassian’s API v2. Promptless writes to Jira on two paths. When a [Jira trigger](/docs/for-docs/connect/triggers/jira) runs, it posts the reply and attaches the documentation PR as a remote link. When you ask during a session, it creates a Jira issue (see [Create a Jira issue on request](#create-a-jira-issue-on-request)). Both writes are prompted, one by a trigger and one by your request, so Promptless never writes proactively. It never writes to Confluence at all. Reading Jira and Confluence for context remains read-only. Which identity Promptless posts as, and which paths need an attached service account, are covered under [Atlassian service account](#atlassian-service-account) below. The [Jira trigger](/docs/for-docs/connect/triggers/jira) page also covers them.
Note
If you connected Atlassian before Promptless started requesting the Confluence search scopes, reconnect to grant `search:confluence` and `read:content-details:confluence`. Use the [integrations page](https://app.gopromptless.ai/integrations) to reconnect. Until you do, Confluence searches fail with `401 Unauthorized; scope does not match`. Jira and existing Confluence page reads keep working, so the connection still shows as connected. That search error is your signal to reconnect. Reconnecting preserves your existing Jira and Confluence configuration.
### Permissions for an invited Promptless user account
[Section titled “Permissions for an invited Promptless user account”](#permissions-for-an-invited-promptless-user-account)
These permissions are for a standard Atlassian user you invite by email. They are distinct from the client-credentials [Atlassian service account](#atlassian-service-account) authenticated with a Client ID and secret. When creating a dedicated Atlassian account for Promptless, the account needs:
1. **Jira access**: The “User” role (not “User access admin”) on projects you want Promptless to reference
2. **Confluence access**: “Can view” permission on spaces you want Promptless to search
The account does not need administrative permissions. See [Provision an Atlassian account for Promptless](#provision-an-atlassian-account-for-promptless) for step-by-step instructions.
## Jira Cloud installation
[Section titled “Jira Cloud installation”](#jira-cloud-installation)
For Atlassian Cloud-hosted Jira instances:
1. **Connect Jira Cloud.** Click “Connect Jira Cloud” from the [integrations page](https://app.gopromptless.ai/integrations).
2. **Atlassian Login.** If you’re not already logged in, you’ll see the Atlassian login screen:
3. **OAuth Consent.** Review the permissions Promptless is requesting on the OAuth consent screen:
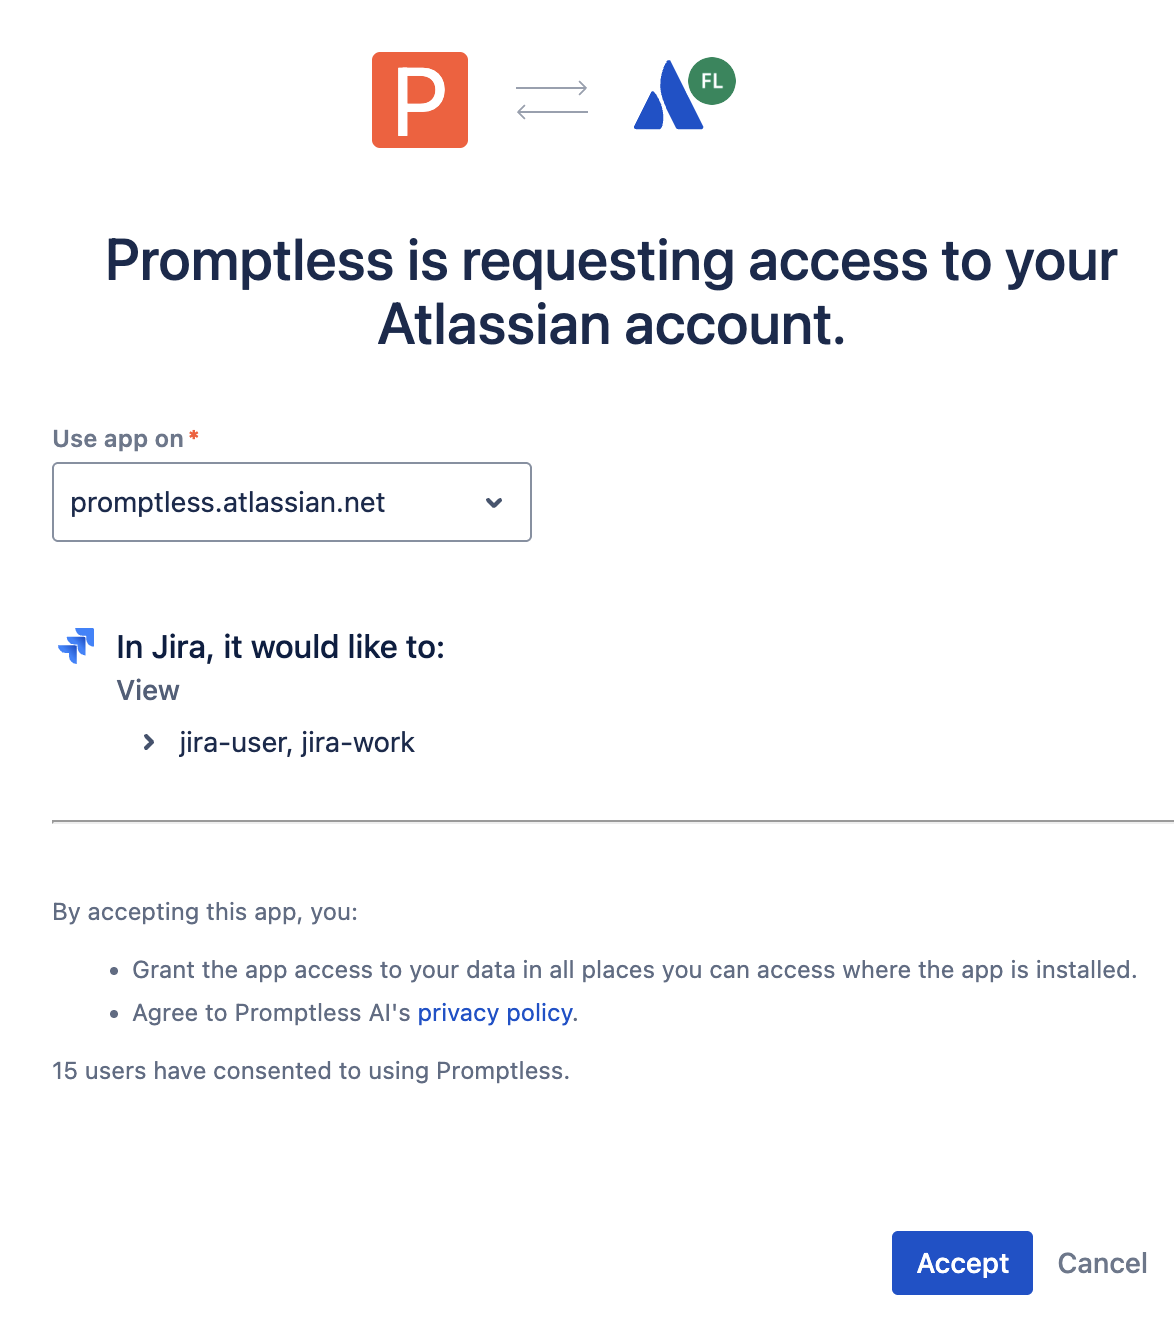
4. **Complete Connection.** Click “Accept” and verify the connection in Promptless. If you don’t see the option to accept, you may not have the required permissions. Contact your Jira administrator or invite them to Promptless. For more information about adding new members, see our [Account Management](/docs/for-docs/reference/account-management) page.
After connecting, manage Promptless access by going to your avatar > Account settings > Connected apps in Atlassian:
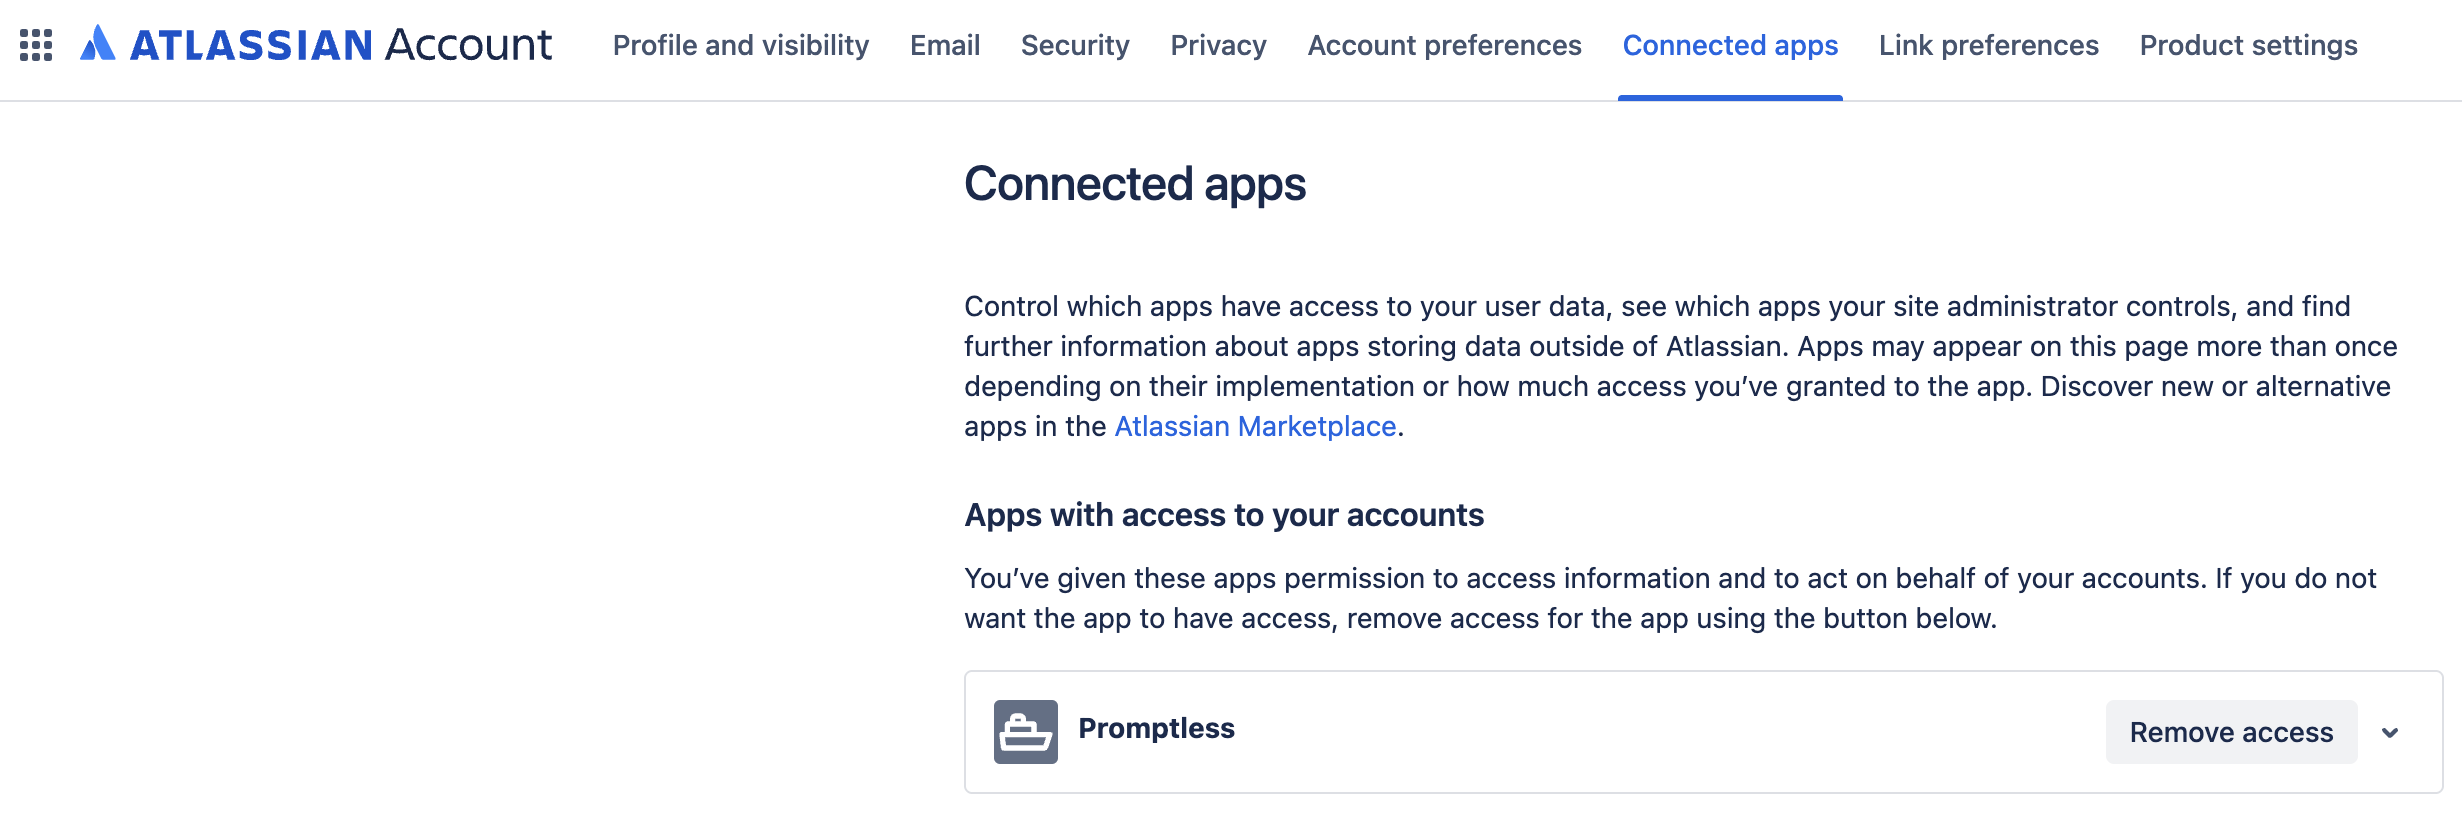
## What you can do with Atlassian
[Section titled “What you can do with Atlassian”](#what-you-can-do-with-atlassian)
Once connected, you can use Jira and Confluence as context sources to enhance documentation suggestions:
* **Jira**: Automatically retrieve ticket information and search for related issues using JQL queries. See the [Jira Context Source](/docs/for-docs/connect/context-sources/jira) page for details.
* **Confluence**: Search your Confluence spaces for existing documentation patterns, terminology, and architectural decisions. See the [Confluence Context Source](/docs/for-docs/connect/context-sources/confluence) page for details.
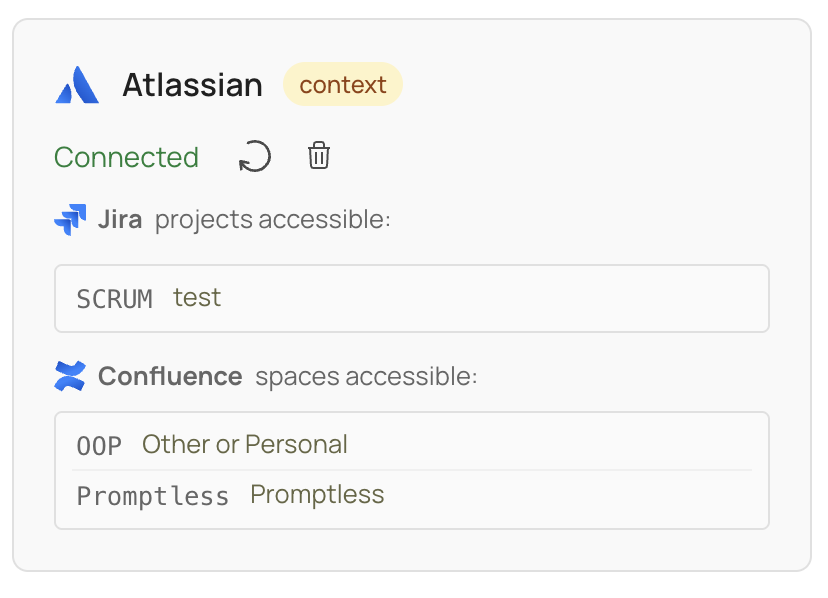
## Atlassian service account
[Section titled “Atlassian service account”](#atlassian-service-account)
Attaching an Atlassian service account gives Promptless its own bot identity and enables the Jira mention and assignment paths to start sessions. The built-in `promptless`-label path and configured Jira triggers already start sessions without a service account. What the service account adds is the mention and assignment paths, plus a dedicated identity to post replies as. See the [Jira trigger](/docs/for-docs/connect/triggers/jira) page for the full path breakdown. This is distinct from the invited-user account described in [Provision an Atlassian account for Promptless](#provision-an-atlassian-account-for-promptless). That account is a standard Atlassian user you invite by email and authenticate through the normal OAuth connect flow. The client-credentials **service account** described here is authenticated directly with a Client ID and secret. It is what gives Promptless a dedicated write identity for Jira triggers.
**How to attach.** An Atlassian organization admin first creates OAuth 2.0 credentials for a service account in Atlassian admin (Directory → Service accounts → create OAuth 2.0 credentials). From the Atlassian integration card, enter the service account’s **Client ID** and **Client secret**, plus an optional **Atlassian Admin address**, then click **Attach**. The admin address isn’t required. Attaching works without it. If Atlassian rejects the credentials, Promptless leaves the account unattached and shows an error notification. The card then shows the attached account’s display name, email, account ID, and client ID.
**Token handling.** The service account uses a client-credentials grant with 60-minute tokens that Promptless re-mints as needed; there is no refresh token.
**Required scopes and role.** The service account needs the following OAuth scopes, plus the Jira **User** application role:
* `read:me`
* `read:jira-user`
* `read:jira-work`
* `write:jira-work`
These scopes are Jira-only (there is no Confluence scope), so the service account is used for Jira trigger writes, not Confluence.
**Identity implications.** Whichever account Promptless acts as is the identity behind mention matching, assignment triggering, and ignoring its own activity. Attaching a service account moves that identity onto a dedicated bot and enables the mention and assignment paths. Without a service account, those two paths start no session at all. A mention or assignment delivery is dropped. The built-in `promptless`-label path and configured Jira triggers still start sessions and post as the connecting account. Self-echo suppression applies either way: Promptless ignores its own ticket activity. The gating exists because the alternative is costly. If the acting identity were a real person, any colleague who @mentioned or assigned them during ordinary Jira work would summon Promptless. That is a noisy experience for that person and their team. A dedicated, non-personal identity avoids that noise. Inviting a standard Atlassian user (see [Provision an Atlassian account for Promptless](#provision-an-atlassian-account-for-promptless)) gives Promptless a separate audit trail. It also gives a distinct read-and-comment identity for the built-in label path and configured triggers. It does not enable the mention or assignment paths. Only an attached service account does that.
The Atlassian integration card shows a connecting-account panel naming the account that authorized the connection, with the connecting account’s display name and email. Promptless always reads Jira and Confluence as this account, whether or not a service account is attached. What changes with a service account is who Jira comments post as:
* No service account attached: the panel reads “Reading Jira and Confluence, and commenting on Jira, as this person.” That commenting covers the built-in `promptless`-label path and configured Jira triggers, which post as this account. Mentioning or assigning this account does not start a session. The connecting-account panel names the connecting account and states that @mentioning or assigning it does nothing.
* Service account attached: comment identity moves to the service account, and the connecting account is scoped to reads. The mention and assignment paths start sessions and post replies as the service account.
The panel’s secondary line shows the account’s email, falling back to the account ID when Atlassian hides the email. When no Atlassian account is recorded and no service account is attached, the panel shows a warning. It warns that mentioning or assigning Promptless on a Jira issue does not start a session until you reconnect Atlassian.
**Service-account health.** The Atlassian integration card’s service-account section expands into a drawer; its collapsed line carries a health badge. It reads **Not working** (red) when Atlassian refuses the credential. Examples include a rotated or revoked secret, or an account that has lost its Jira **User** application role. It reads **Unconfirmed** (amber) when Promptless can’t reach Atlassian to check. Opening the drawer shows a health message alongside **Last worked… · Checked…** timings.
To fix a broken service account, re-attach it: re-enter its Client ID and secret on the [integrations page](https://app.gopromptless.ai/integrations). Reconnecting (re-consenting) the Atlassian OAuth connection does not fix a broken service account, because the OAuth connection and the service-account credential are separate. If you’re troubleshooting from a symptom instead, see [Connection health](/docs/for-docs/connect/connection-health).
Attaching a service account does not change the read-only context-source behavior. Reading Jira for context still works the same way (see the [Jira context source](/docs/for-docs/connect/context-sources/jira) page). The next section covers inviting a standard Atlassian user account instead.
## Provision an Atlassian account for Promptless
[Section titled “Provision an Atlassian account for Promptless”](#provision-an-atlassian-account-for-promptless)
You can also provision a dedicated Atlassian account by inviting a standard user rather than attaching a service account. We recommend creating a dedicated Atlassian account for Promptless to access both Jira and Confluence. A dedicated account gives you complete audit trail visibility and lets you configure fine-grained permissions for both services.
Create the account using an email alias like `your_email+promptless@company.com`, or ask your IT admin to provision a new email account like `promptless@company.com`.
1. **Navigate to User management.** In Atlassian, go to your settings and select **User management** under Atlassian admin settings.
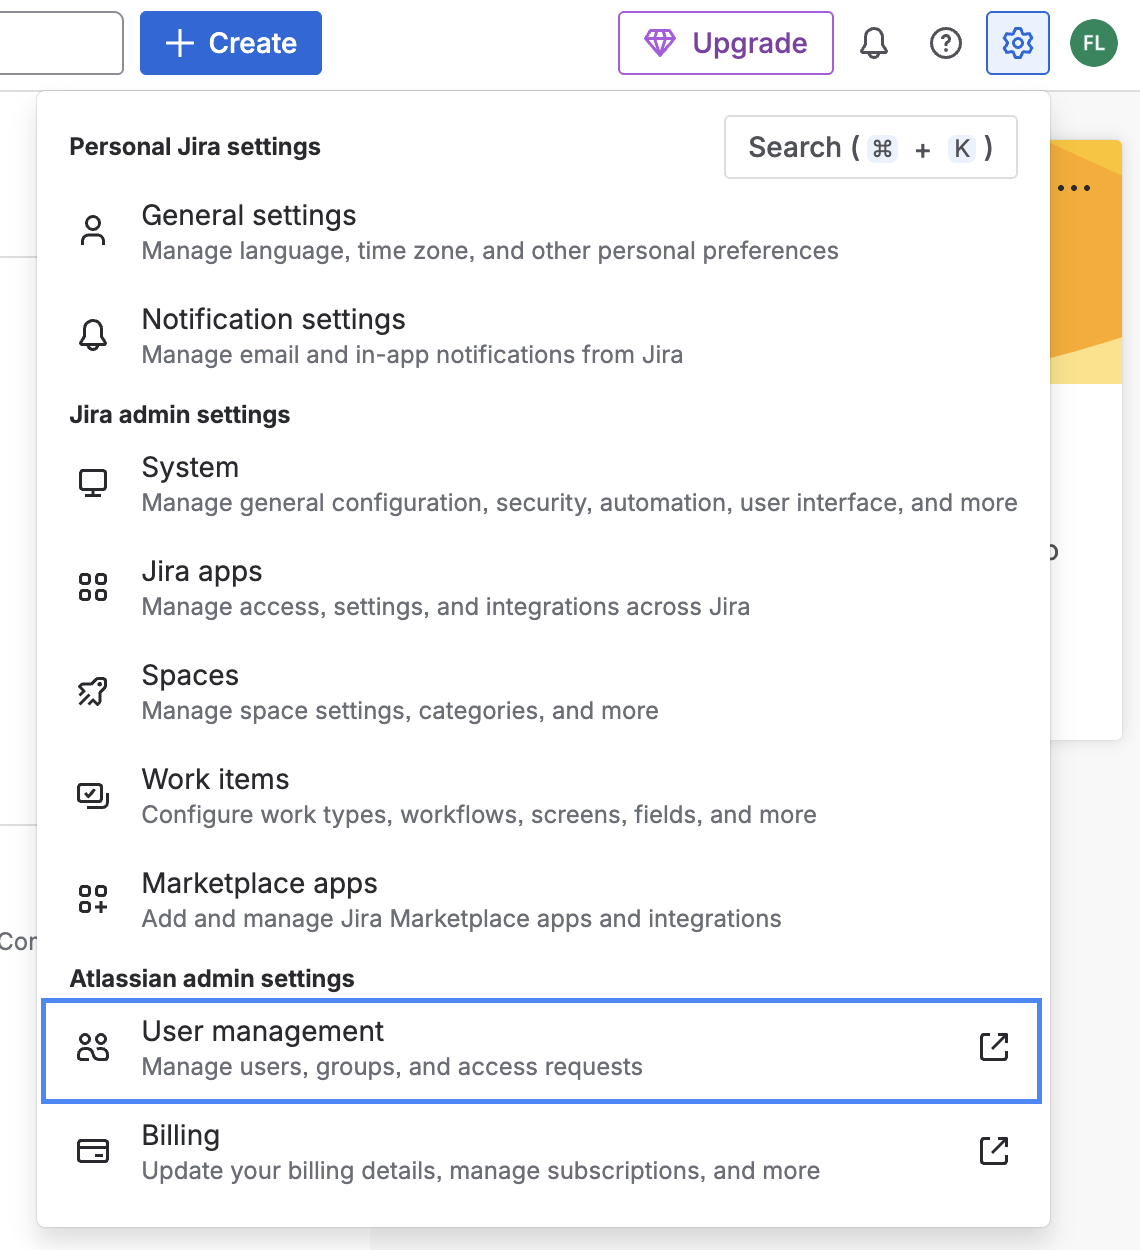
2. **Invite the Promptless account.** Click “Invite people” and enter the email address for your Promptless account. Under the Jira app, select the **User** role (not User access admin).
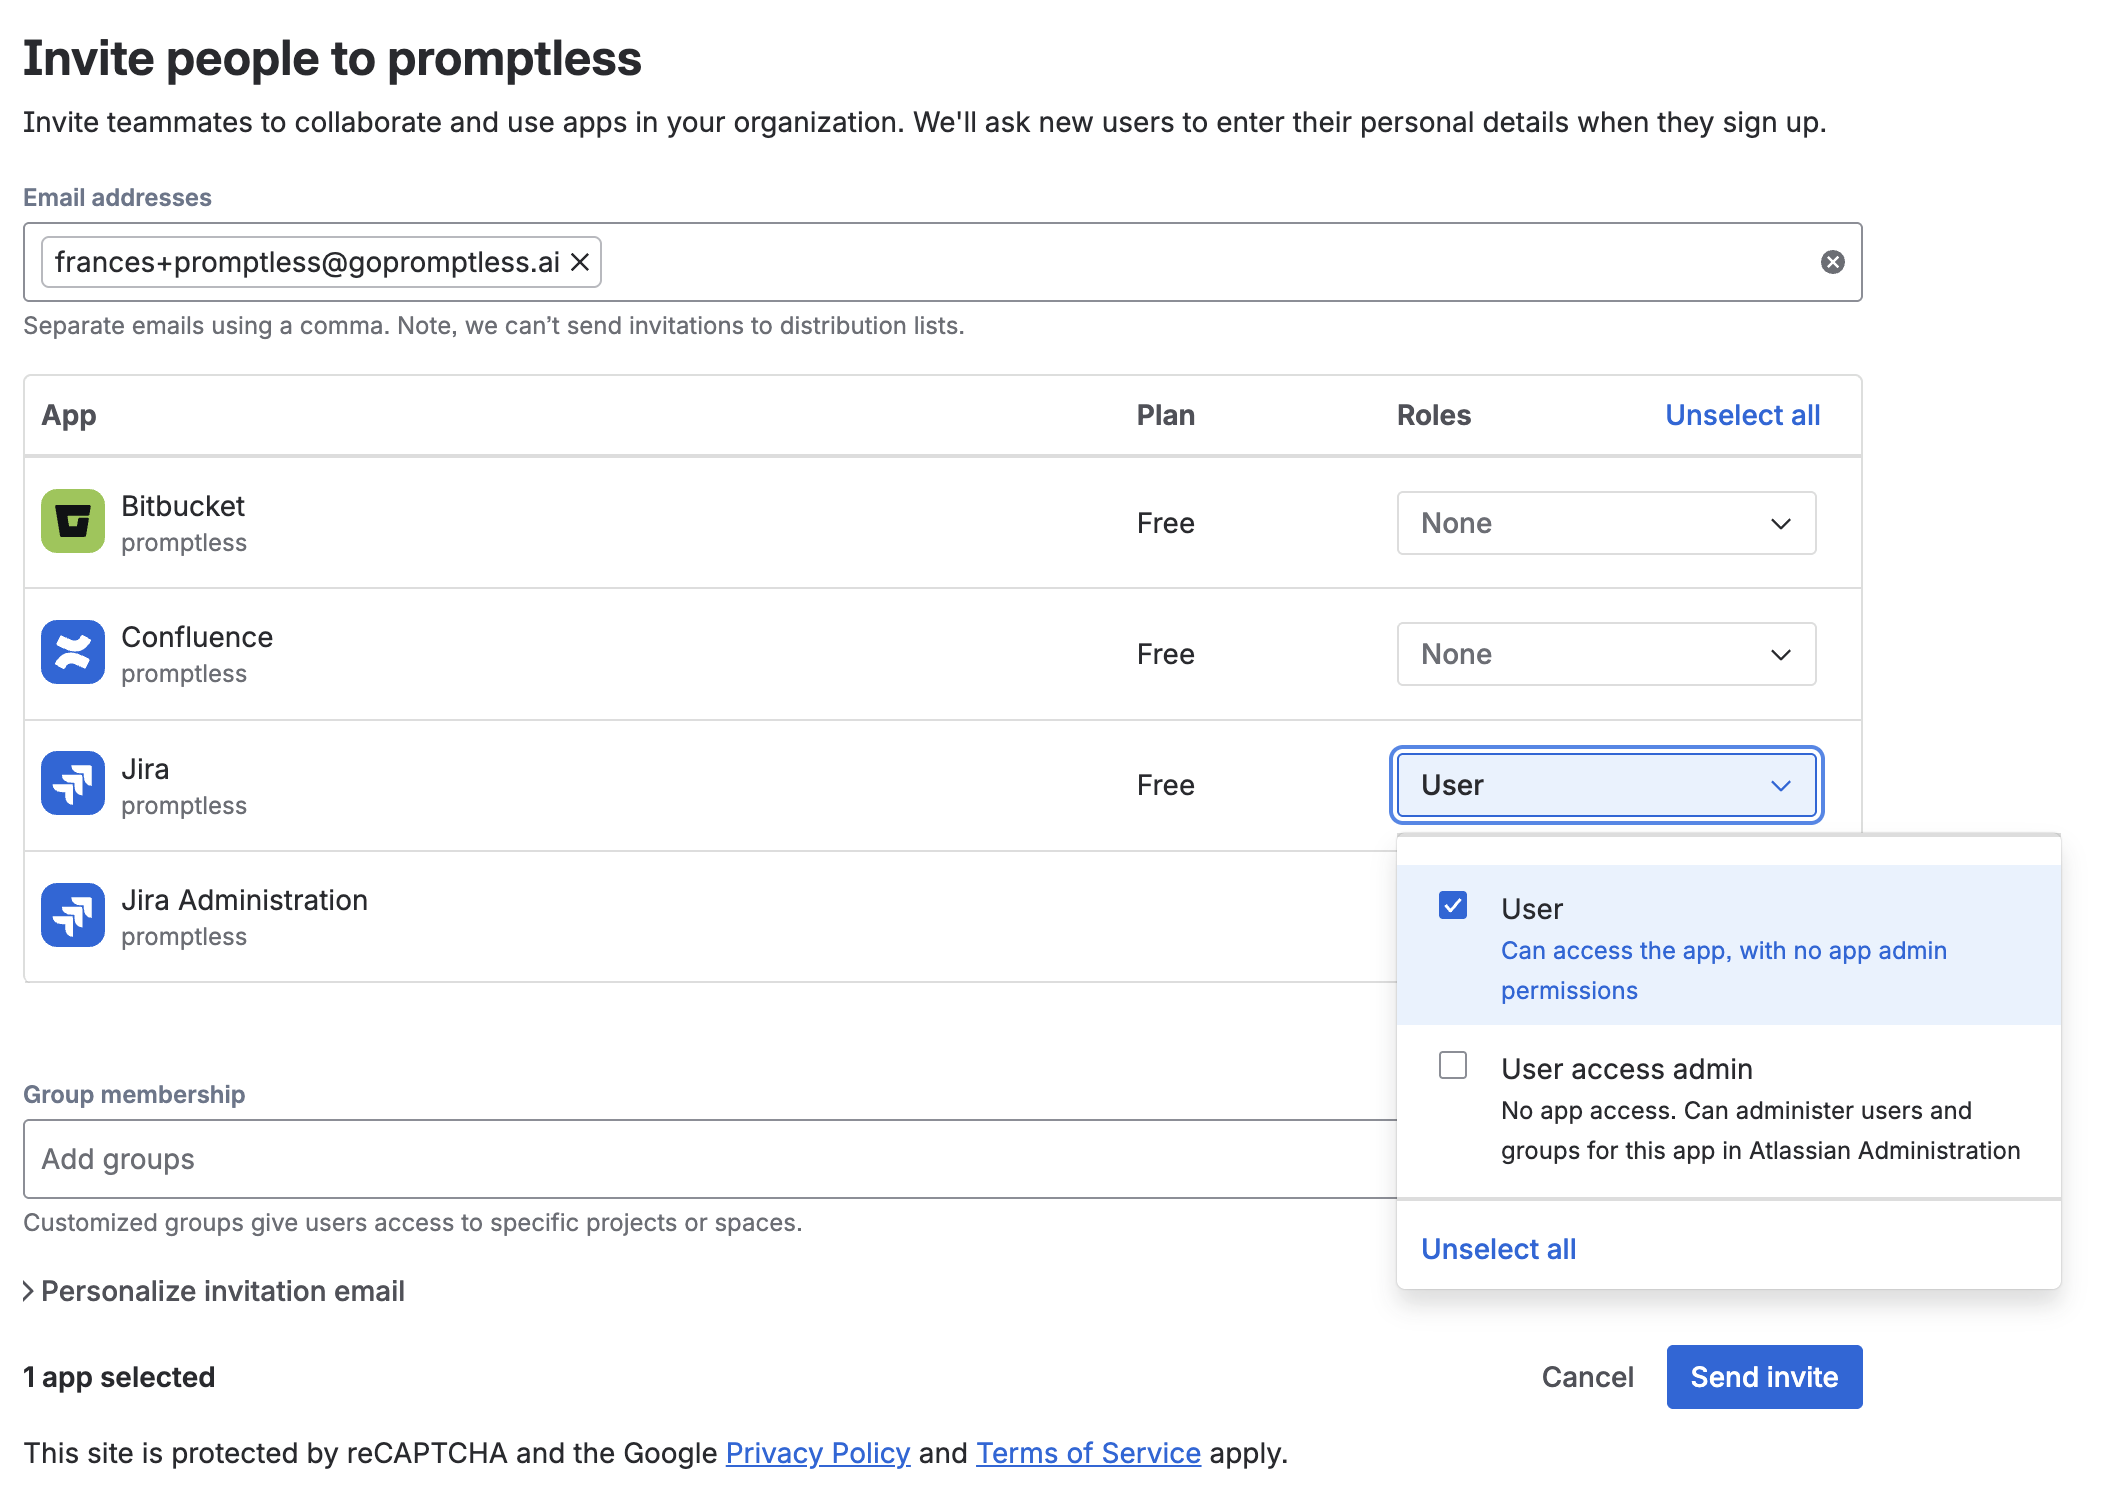
Caution
When accepting the invite, make sure you’re logged out of your personal account and logged into the Jira account you created for Promptless. Otherwise this won’t work.
3. **Accept the invitation.** Check your own email inbox (if you’re using the alias), or Promptless’s email inbox.
When setting up the account, you can use the name “Promptless Bot”.
Once complete, you’ll see the account listed as ACTIVE. It might take up to an hour for the status to update from INVITED to ACTIVE after you accept the invite.

## Create a Jira issue on request
[Section titled “Create a Jira issue on request”](#create-a-jira-issue-on-request)
Promptless can create a Jira issue when you ask it to during a session. A message in Slack or Microsoft Teams that names a target project is enough. This is the only change this path makes to Jira.
Promptless never creates an issue automatically or in response to a trigger. Contrast this with the reply it posts automatically when a [Jira trigger](/docs/for-docs/connect/triggers/jira) runs. Before creating an issue, Promptless checks the target project for one with a matching title. When it finds a match, it reuses that issue rather than creating a new one. Promptless cannot set custom fields on an issue it creates this way. Issue creation uses the `write:jira-work` scope Promptless already holds, so no reconnect is needed.
A created issue’s **Reporter** is always the connecting account, the Jira user who authorized the Atlassian OAuth connection. This stays the connecting account even when an Atlassian service account is attached. Replies do move to the service account once one is attached, but a created issue keeps the connecting account as its reporter. The only comment Promptless posts to Jira is its reply on the issue that started a session (see the [Jira trigger](/docs/for-docs/connect/triggers/jira) page).
You can build on this in a custom workflow. Pair on-request issue creation with your own trigger and written instructions, so Promptless opens issues within a task you define. See [Teach Promptless a custom task](/docs/for-docs/get-the-most-out/teach-promptless-a-custom-task) for how to set that up.
## Data processing and security
[Section titled “Data processing and security”](#data-processing-and-security)
For information about how Promptless processes Jira data, including redaction capabilities and privacy controls, see the [Jira Context Source](/docs/for-docs/connect/context-sources/jira) page.
## Troubleshooting
[Section titled “Troubleshooting”](#troubleshooting)
How do I restrict Promptless from accessing confidential Jira projects or Confluence spaces?
Promptless inherits the permissions of the Atlassian account used during OAuth connection. There are several ways to manage access depending on your security requirements:
**Standard approach:** After connecting Atlassian, configure which Jira projects and Confluence spaces Promptless should search in your [Configuration page](https://app.gopromptless.ai/configuration) using the `context_sources` section. Promptless won’t access projects or spaces you don’t explicitly configure, even if the connected account has permission to see them.
**For highly confidential content:** Create an Atlassian user account that only has access to non-confidential projects and spaces. Then connect Atlassian to Promptless using this limited-access account. This restricts access at the Atlassian permissions level, adding an extra security layer.
**For granular control:** [Provision a dedicated Atlassian account for Promptless](#provision-an-atlassian-account-for-promptless). Configure fine-grained permissions for both Jira projects and Confluence spaces in Atlassian’s user management before connecting it to Promptless.
Promptless doesn’t respond to Jira @mentions or ticket assignments
The mention and assignment paths require an attached Atlassian service account; without one, those deliveries do nothing. Attach a service account (see [Atlassian service account](#atlassian-service-account)) to enable those paths. The built-in `promptless`-label path and configured Jira triggers start sessions without a service account.
Promptless actions are attributed to my personal account
* Disconnect Atlassian from the [integrations page](https://app.gopromptless.ai/integrations)
* Sign out of your personal Atlassian account in your browser
* Sign in to the Promptless bot account you created
* Reconnect Atlassian to Promptless while signed in to the bot account
# Bitbucket integration
> Connect Bitbucket with app password authentication so Promptless monitors your pull requests for documentation updates.
**Used for: Triggers**
Promptless integrates with Bitbucket using app password authentication, monitoring pull requests in your repositories for documentation updates.
## Installation
[Section titled “Installation”](#installation)
To set up the Bitbucket integration:
1. Navigate to the **Integrations** page in your Promptless dashboard
2. Click on **Connect** next to the Bitbucket option
3. Enter your Bitbucket credentials:
* **Username**: Your Bitbucket username
* **App Password**: A Bitbucket app password with appropriate permissions
* **Workspace Name**: The name of your Bitbucket workspace
Creating a Bitbucket App Password
To create an app password with the right permissions:
1. Go to your Bitbucket account settings
2. Navigate to **App passwords** under **Access management**
3. Click **Create app password**
4. Give it a descriptive name like “Promptless Integration”
5. Select the following permissions:
* **Repositories**: Read
* **Pull requests**: Read and Write
* **Webhooks**: Read and Write
## Project setup
[Section titled “Project setup”](#project-setup)
After connecting your Bitbucket account, you can configure how Promptless interacts with your repositories:
### Repository access
[Section titled “Repository access”](#repository-access)
When setting up a project with Bitbucket as a trigger source:
1. Select the repositories you want Promptless to monitor for changes
2. Choose whether Promptless should have read-only access or write access to your documentation repositories
3. Optionally, configure directory-specific triggers to focus on particular parts of your codebase
### Directory-specific triggers
[Section titled “Directory-specific triggers”](#directory-specific-triggers)
Similar to the GitHub integration, you can configure Promptless to only trigger documentation updates when changes are made to specific directories in your Bitbucket repositories. This is useful for:
* Focusing on code that directly impacts user-facing features
* Monitoring API changes that require documentation updates
* Ignoring internal tooling or test changes that don’t affect documentation
To set up directory-specific triggers:
1. In your project configuration, select the Bitbucket repository
2. Under **Advanced Options**, enable **Directory-Specific Triggers**
3. Enter the directories you want to monitor, separated by commas (e.g., `src/api, docs/reference`)
## Authentication model
[Section titled “Authentication model”](#authentication-model)
The Bitbucket integration uses a username and app password authentication model:
* **Username**: Your Bitbucket username for API authentication
* **App Password**: A secure token with specific permissions for the Promptless integration
* **Workspace Access**: Limited to the specific workspace you connect
This authentication model ensures that Promptless only has access to the repositories and actions you explicitly authorize.
## Repository refresh
[Section titled “Repository refresh”](#repository-refresh)
If you add new repositories to your Bitbucket workspace after setting up the integration, you can refresh the repository list:
1. Go to the **Integrations** page in your Promptless dashboard
2. Find the Bitbucket integration
3. Click the **Refresh Repositories** button to update the list of available repositories
## Webhook management
[Section titled “Webhook management”](#webhook-management)
Promptless automatically sets up webhooks in your Bitbucket repositories to monitor for pull request events. These webhooks:
* Trigger Promptless when pull requests are created or updated
* Send only the necessary information about changes to Promptless
* Can be customized to focus on specific events
## Replay recent PRs
[Section titled “Replay recent PRs”](#replay-recent-prs)
When setting up a new Bitbucket PR trigger, you can enable “Replay recent PRs” to process pull requests from the last 30 days. This generates an initial batch of suggestions, which helps you:
* Calibrate Promptless with your documentation style before going live
* Catch up on documentation that may have been missed
* Evaluate how Promptless handles your typical PR content
After enabling this option, your Project card shows the replay progress:
* **Processing last 30 days of PRs** with a spinner while replay is running
* **Processed recent PRs** with a checkmark once replay completes
Note
Replay runs in the background and doesn’t block normal trigger processing. New PRs opened while replay is running are still processed immediately.
## Usage
[Section titled “Usage”](#usage)
Once configured, the Bitbucket integration works similarly to the GitHub integration:
1. When a pull request is opened or updated in your monitored repositories, Promptless is automatically triggered
2. Promptless analyzes the changes to determine if documentation updates are needed
3. If updates are needed, Promptless generates the appropriate documentation changes
4. Promptless adds a comment to your Bitbucket pull request with a link to review the documentation changes
5. You can review and approve the suggested documentation updates in the Promptless dashboard
For more information on how triggers work in general, see the [Triggers](/docs/for-docs/start-here/how-promptless-works) documentation.
# GitHub integration
> Connect the Promptless GitHub App for triggers, context, and publishing across your repositories.
**Used for: Triggers, Context, and Publishing**
Promptless integrates with GitHub through our official GitHub App, providing secure access to your repositories for documentation automation.
Note
**GitHub Enterprise Users**: You may be using GitHub Enterprise Server or GitHub Enterprise Cloud with restricted third-party app access. If so, see our [GitHub Enterprise Setup Guide](/docs/for-docs/reference/integrations/github-enterprise) for custom GitHub App configuration instructions.
## Installation
[Section titled “Installation”](#installation)
1. Click “Connect GitHub” from the [integrations page](https://app.gopromptless.ai/integrations).
2. Select which GitHub organization to install Promptless into.
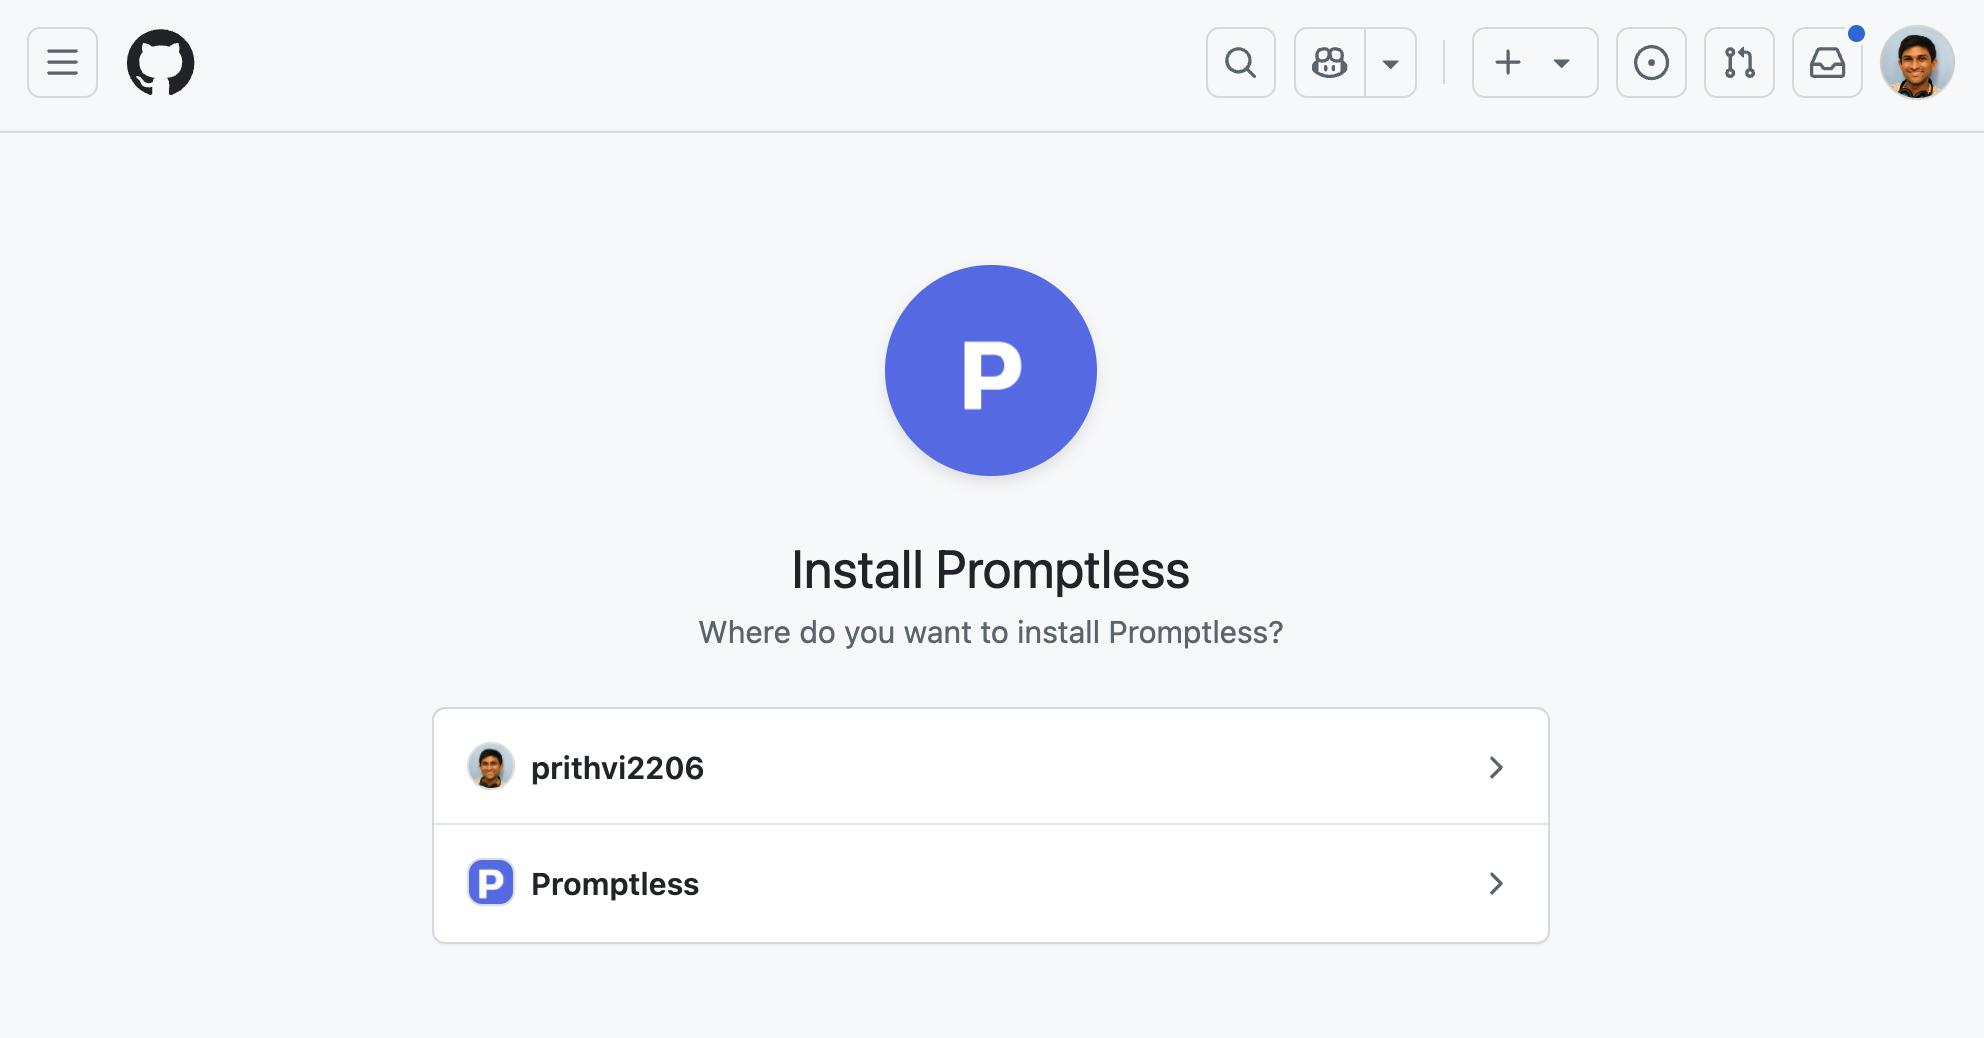
3. Select which repositories you want to give Promptless access to. Typically, this will be your source code and your documentation repo (if your docs are in GitHub).
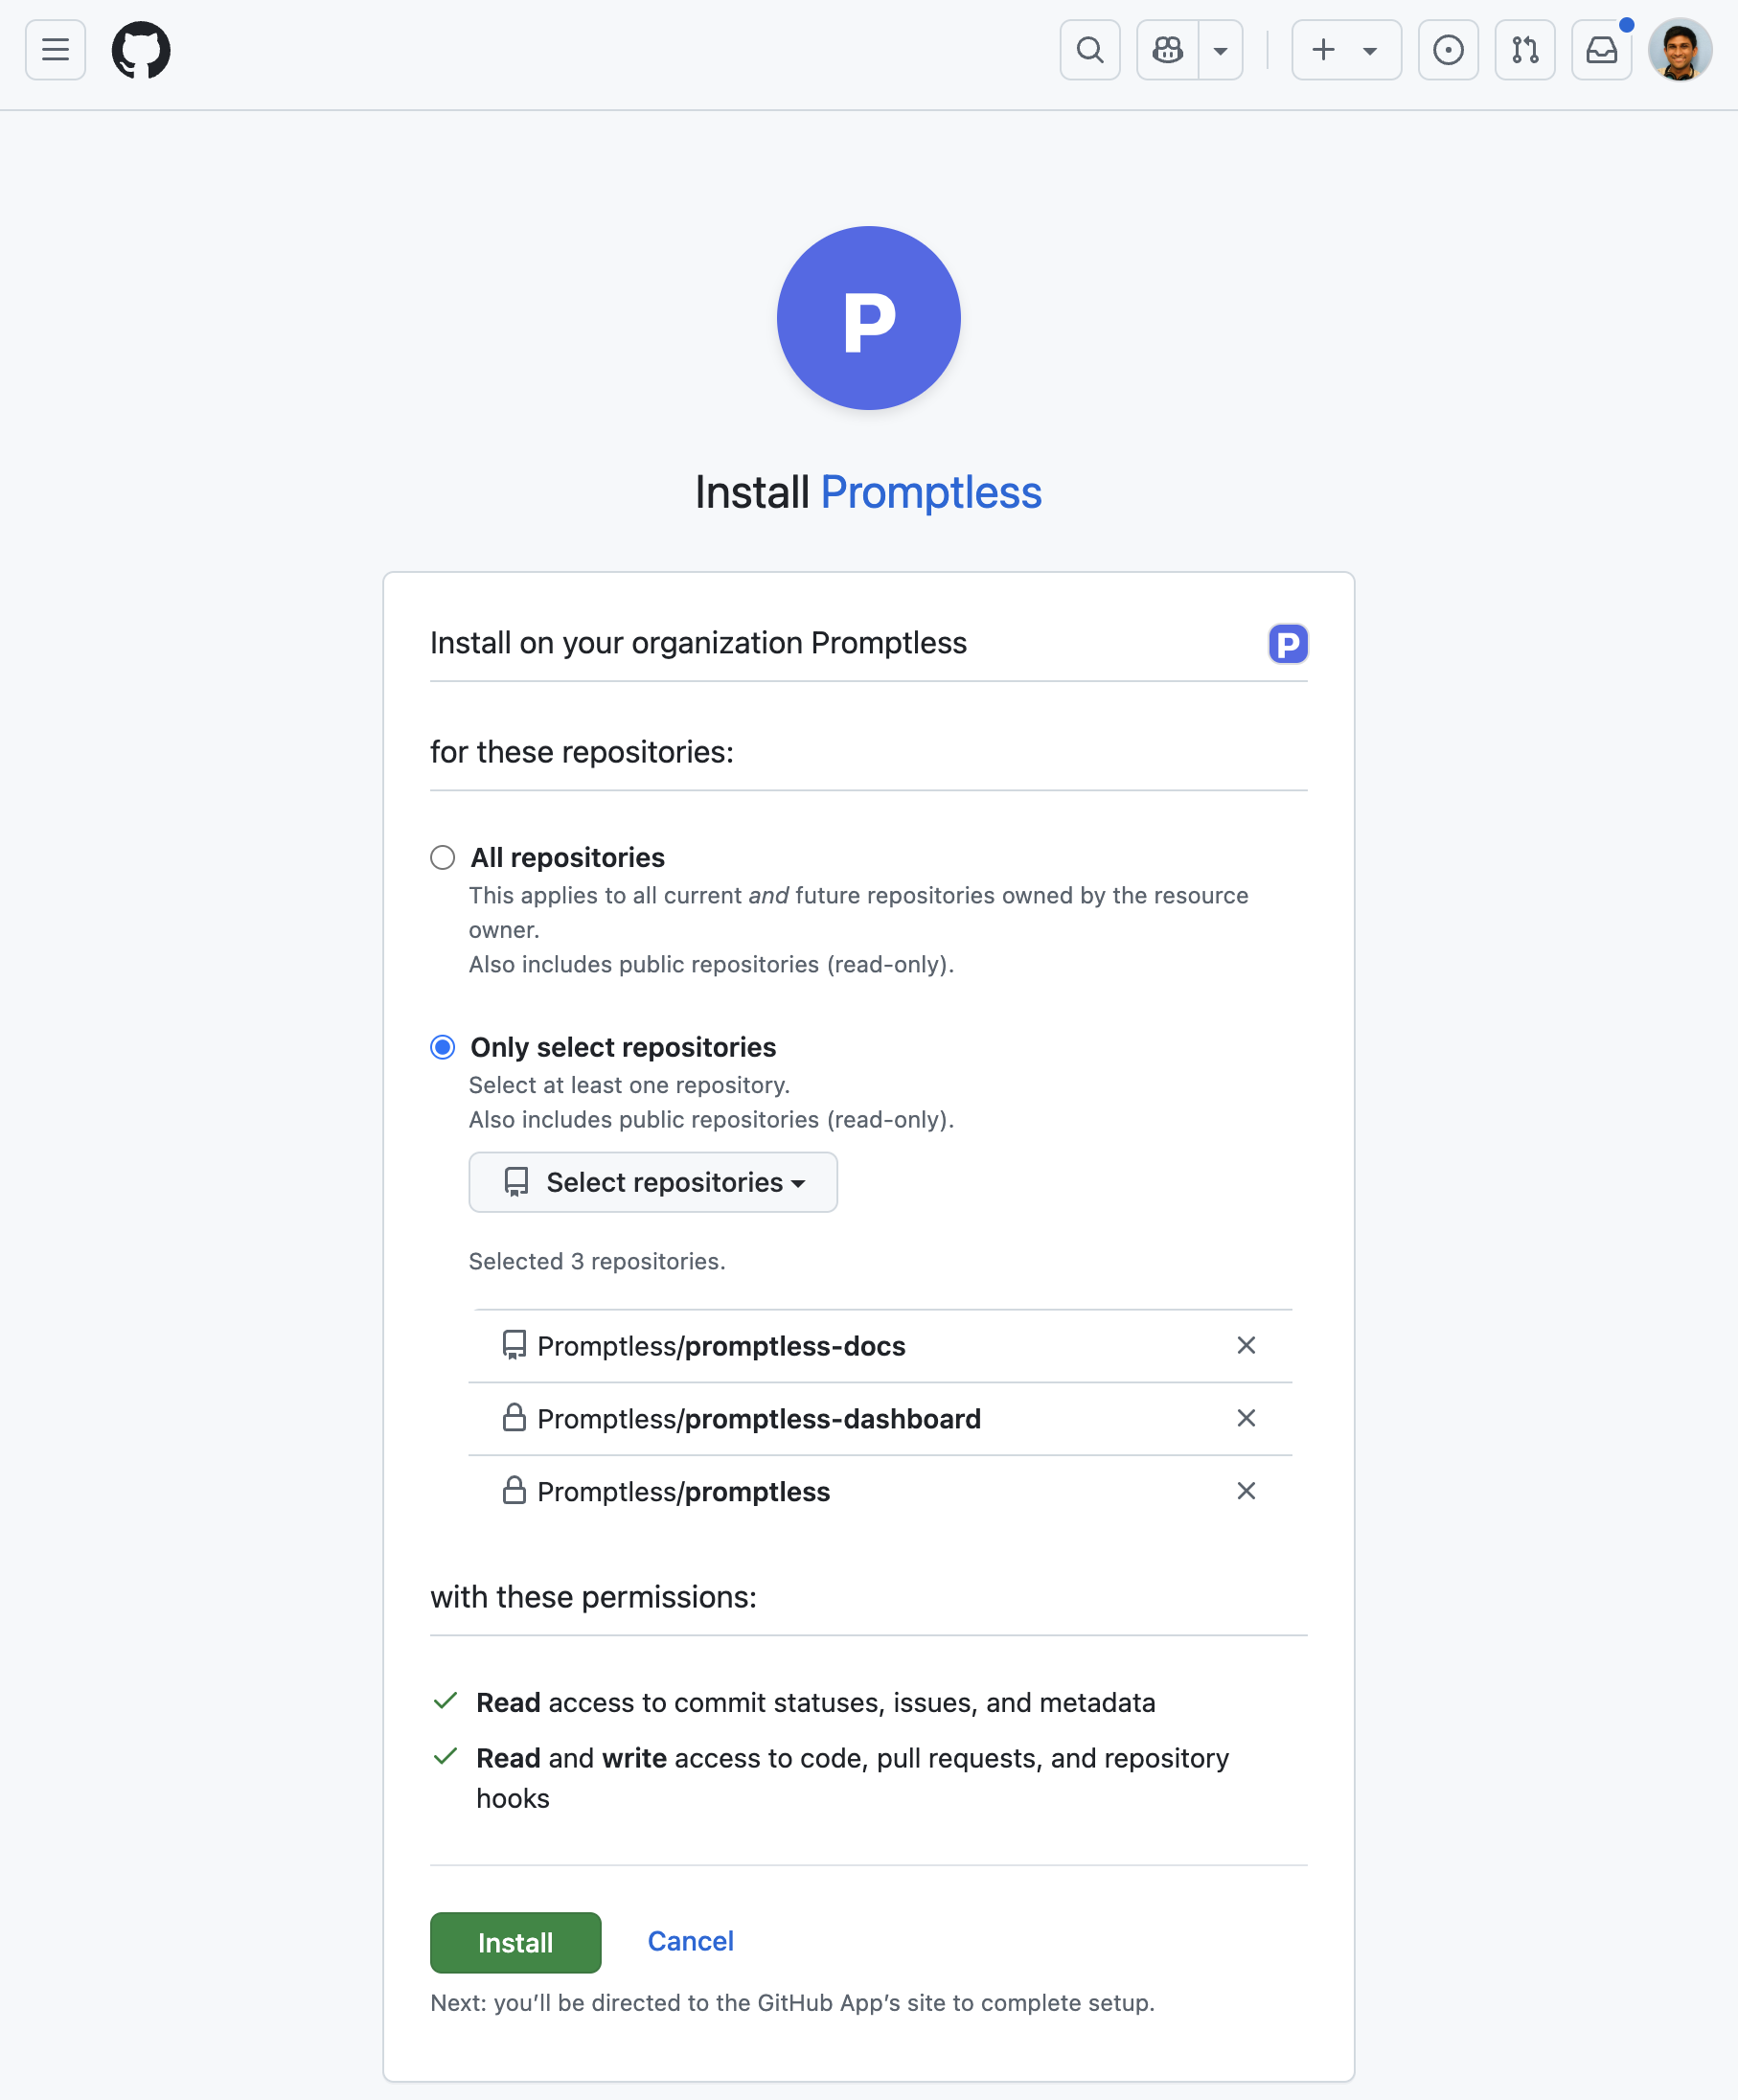
4. Verify that Promptless is connected in the integrations page.
Note
**Before you connect**: only a Promptless organization admin can start a GitHub connection. During installation, GitHub also asks you to authorize the Promptless GitHub App as your GitHub account so it can confirm your identity. The connection completes only if that GitHub account administers the target you’re installing into. That means an organization owner for a GitHub organization, or the account owner for a personal account. The connection link stays valid for one hour; if it expires before you finish, start the connection again from the integrations page.
### When owner approval is required
[Section titled “When owner approval is required”](#when-owner-approval-is-required)
Some GitHub organizations require owner approval before third-party apps can be installed. If you’re not an owner of the GitHub organization, GitHub prompts you to request approval instead of completing the installation.
1. **Submit the request**: Complete the approval request flow in GitHub. Promptless tracks your request automatically.
2. **Ask an owner to approve**: An owner of your GitHub organization approves the Promptless GitHub App from the organization’s “Third-party Access” settings.
3. **Start a fresh connection**: Approval installs the App on GitHub but does not connect it to Promptless. After approval, a Promptless organization admin starts a new connection from the integrations page. Completing the connection requires authorizing as a GitHub organization owner. The admin can share the connection’s one-hour link with an owner to finish. If GitHub can’t reuse the approved installation, uninstall the Promptless App in GitHub and start the connection again.
Tip
If you’re unsure who can approve the request, check your organization’s GitHub settings under “Third-party Access” → “Pending requests”. That page shows who has owner permissions.
## Connect multiple GitHub organizations
[Section titled “Connect multiple GitHub organizations”](#connect-multiple-github-organizations)
You can connect multiple GitHub organizations to your Promptless account. This is useful for managing work and personal repositories, or when working across multiple organizations.
After you connect your first organization, click the “Connect another GitHub Org” button on the integrations page to add more. Each new organization follows the same installation process.
Each connected organization appears as its own card on the integrations page, showing:
* Organization name
* List of accessible repositories
* Individual refresh and disconnect controls
When creating or editing projects, repositories from all connected organizations are available in the dropdown menus, displayed as `organization/repository`.
## Manage repository access
[Section titled “Manage repository access”](#manage-repository-access)
When selecting a docs repository during setup, Promptless displays the connected GitHub organization above the repository picker. Click **Manage repository access** at the bottom of the picker to open GitHub’s installation settings and adjust which repositories Promptless can access.
If Promptless doesn’t have access to any repositories in your organization, you’ll see an error message. It includes the same button to grant initial access.
Each connected GitHub card on the integrations page also has a **Configure in GitHub** button. Click it to open the Promptless GitHub App’s installation page in a new tab, where you can adjust which repositories Promptless can access. This button appears on both the main GitHub card and the GitHub (read-only) card. Repository access is always governed in GitHub’s own App settings, including any organization admin-approval requirements.
After the initial installation, you may need to add new repositories or modify which repositories Promptless can access. You can manage this directly through your GitHub organization settings:
1. Navigate to your GitHub organization settings
2. Go to “Third-party Access” → “GitHub Apps”
3. Find “Promptless” in the list and click “Configure”
4. In the “Repository access” section, you can:
* Switch between “All repositories” and “Only select repositories”
* Add or remove specific repositories using the “Select repositories” dropdown
* Remove repositories by clicking the ”×” next to their names

5. Click “Save” to apply your changes
After updating repository access, the new repositories will be available when creating or editing projects in Promptless. Note that it may take a few minutes for the changes to be reflected in the Promptless dashboard. If you don’t see newly added repositories immediately, click the “refresh repos” icon in the integrations page. This updates the repository list.
## Authentication model
[Section titled “Authentication model”](#authentication-model)
Promptless uses the official [GitHub App specification](https://docs.github.com/en/apps/creating-github-apps/about-creating-github-apps) to authenticate with GitHub. Promptless authenticates securely with JWTs generated by the GitHub App installation.
This ensures that Promptless has read and write access to the repositories that you select. Either you or Promptless can revoke access at any time.
## Organization IP allow lists
[Section titled “Organization IP allow lists”](#organization-ip-allow-lists)
If your GitHub organization enforces an IP allow list, Promptless needs to reach your organization from its own network. Otherwise GitHub blocks its requests. That silently stops Promptless from reading pull requests, opening documentation pull requests, and pushing updates.
To keep Promptless working with an IP allow list enabled, a GitHub organization owner should choose one of the following options. Both live in your organization’s IP allow list settings (**Settings → Authentication security**). If you don’t administer your GitHub organization, hand these options to whoever does.
* **Let installed GitHub Apps bypass the list (recommended)**: Select **Enable IP allow list configuration for installed GitHub Apps**. GitHub then automatically adds the Promptless GitHub App’s addresses. This keeps working even if Promptless’s IP addresses change.
* **Add Promptless’s egress IP address**: Add `3.143.177.103` to your allow list. This is the NAT gateway address that Promptless’s requests originate from. This address can change over time, so prefer the GitHub App bypass option above if you want a setting you don’t have to maintain.
This applies to standard GitHub.com organizations. If you use GitHub Enterprise, see the [GitHub Enterprise Setup Guide](/docs/for-docs/reference/integrations/github-enterprise) for the full list of addresses to allow.
## What you can do with GitHub
[Section titled “What you can do with GitHub”](#what-you-can-do-with-github)
Once connected, you can use GitHub for:
* **[Triggers](/docs/for-docs/connect/triggers)**: Monitor pull requests and commits for documentation updates
* **[Context Sources](/docs/for-docs/connect/context-sources)**: Search code repositories and issues for technical context
* **[Doc Collections](/docs/for-docs/connect/doc-locations/github-repos)**: Publish documentation updates to GitHub-based platforms
## Frequently asked questions
[Section titled “Frequently asked questions”](#frequently-asked-questions)
Promptless shows ‘no repositories accessible’ during setup. What do I do?
This means the Promptless GitHub App is installed but doesn’t have access to any repositories yet. Click **Manage repository access** to open GitHub’s installation settings, where you can grant access to specific repositories or select “All repositories.” After updating access in GitHub, click **Refresh** in Promptless to reload the repository list.
How do I add more repositories after installing the GitHub integration?
Add additional repositories anytime by visiting your GitHub organization settings. In GitHub, head to `Settings -> Third-party Access -> GitHub Apps` then find the Promptless GitHub App and click “Configure.” Add or remove repositories in the “Repository access” section, then click “Save.” You’ll be able to choose from the newly added repositories when creating or editing your Promptless projects.
Can I remove GitHub repository access from Promptless?
You can remove access to specific repositories or even uninstall the integration entirely from the same “Configure” page in your GitHub organization settings. Click the `×` next to a repository name to remove it from the Promptless GitHub App. Or click the `Uninstall` button at the bottom of the page to remove the app entirely.
How long does it take for repository changes to appear in Promptless?
It may take a few minutes for repository updates in the GitHub App to be reflected in your Promptless dashboard. If you don’t see newly added repositories right away when creating or editing projects, click the “refresh repos” icon in the integrations page.
Can I connect multiple GitHub organizations to one Promptless account?
Yes. After connecting your first GitHub organization, you can add more by clicking “Connect another GitHub Org” on the integrations page. Each organization appears as its own card, and repositories from all connected organizations are available when setting up projects.
What happens if my GitHub organization requires owner approval for apps?
If your organization requires owner approval before third-party apps can be installed, GitHub shows you a request flow instead of completing the installation. Submit the request, and Promptless tracks it automatically. Approval installs the App but does not connect it to Promptless. After an owner approves, a Promptless organization admin starts a fresh connection from the integrations page and authorizes it as a GitHub organization owner. The connection link stays valid for one hour.
# GitHub Enterprise integration
> Create a custom GitHub App for GitHub Enterprise Server or Cloud when your organization restricts third-party apps.
**For GitHub Enterprise Server and GitHub Enterprise Cloud users**
Your organization may use GitHub Enterprise Server (self-hosted) or GitHub Enterprise Cloud with specific security requirements. If so, you’ll need to create a custom GitHub App within your enterprise environment to integrate with Promptless.
Caution
This setup is required for GitHub Enterprise Server instances and GitHub Enterprise Cloud organizations that don’t allow third-party GitHub Apps. For standard GitHub.com organizations, use the [standard GitHub integration](/docs/for-docs/reference/integrations/github) instead.
## Prerequisites
[Section titled “Prerequisites”](#prerequisites)
* GitHub Enterprise admin access to create and configure GitHub Apps
* Network access to Promptless endpoints (see [IP whitelisting](#step-6-ip-whitelisting) section)
* Ability to generate and securely store private keys and client secrets
## Step 1: Register new GitHub App
[Section titled “Step 1: Register new GitHub App”](#step-1-register-new-github-app)
1. Navigate to your GitHub Enterprise admin settings
2. Go to “GitHub Apps” and click “New GitHub App”
3. Fill in the basic app information:
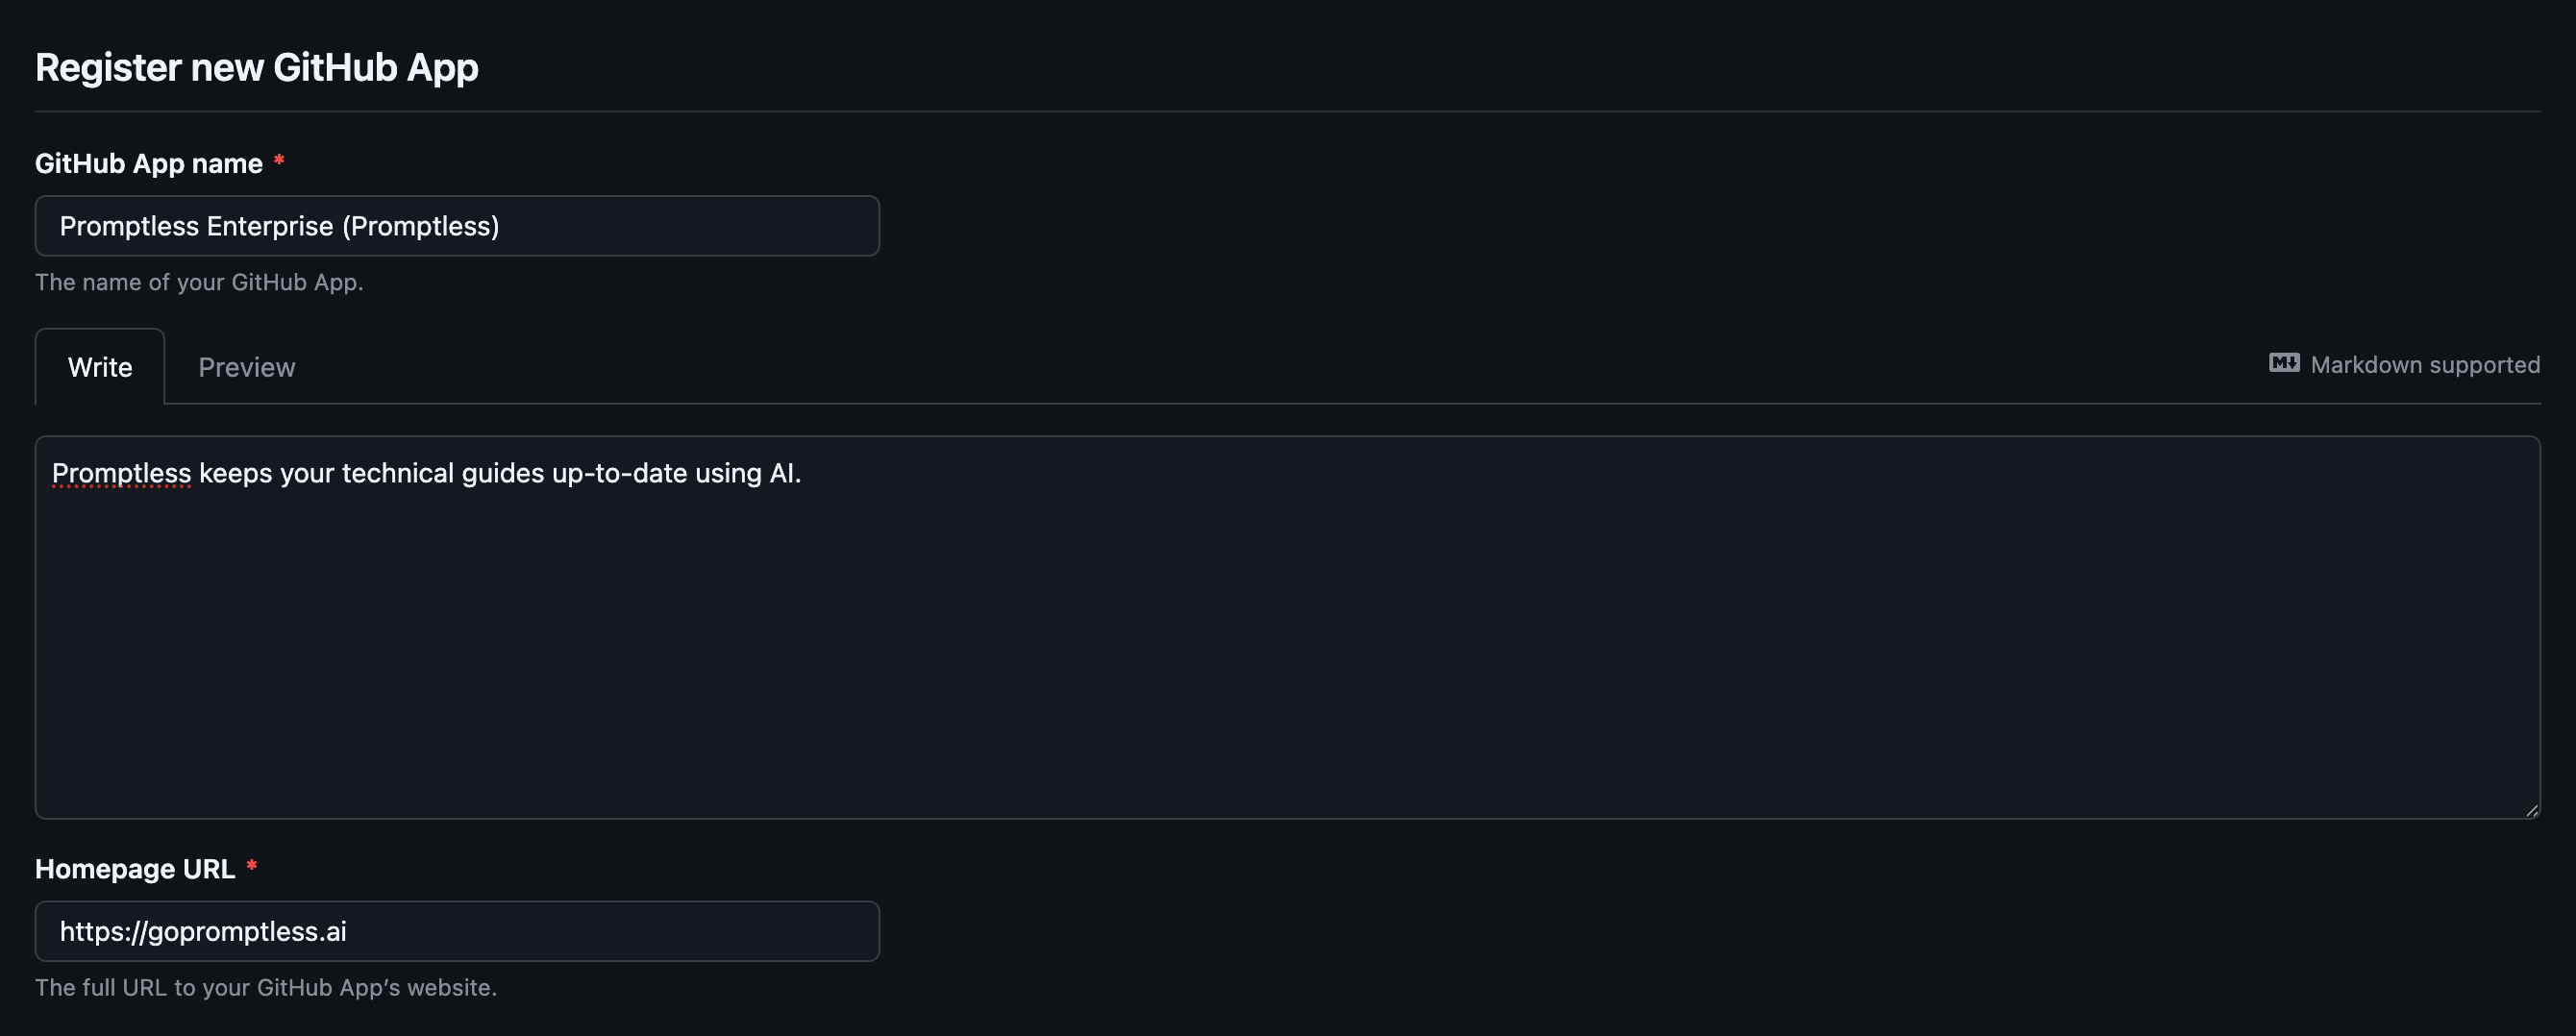
### Required app details
[Section titled “Required app details”](#required-app-details)
Fill in the following fields in your GitHub App configuration:
* **GitHub App name** (required): Enter a descriptive name like “Promptless Enterprise” or “Promptless (Your Company Name)”
* **Description**: Use: “Promptless keeps your technical guides up-to-date using AI.”
* **Homepage URL** (required): `https://gopromptless.ai`
## Step 2: Configure authentication URLs
[Section titled “Step 2: Configure authentication URLs”](#step-2-configure-authentication-urls)
Set up the callback and redirect URLs for proper authentication flow:
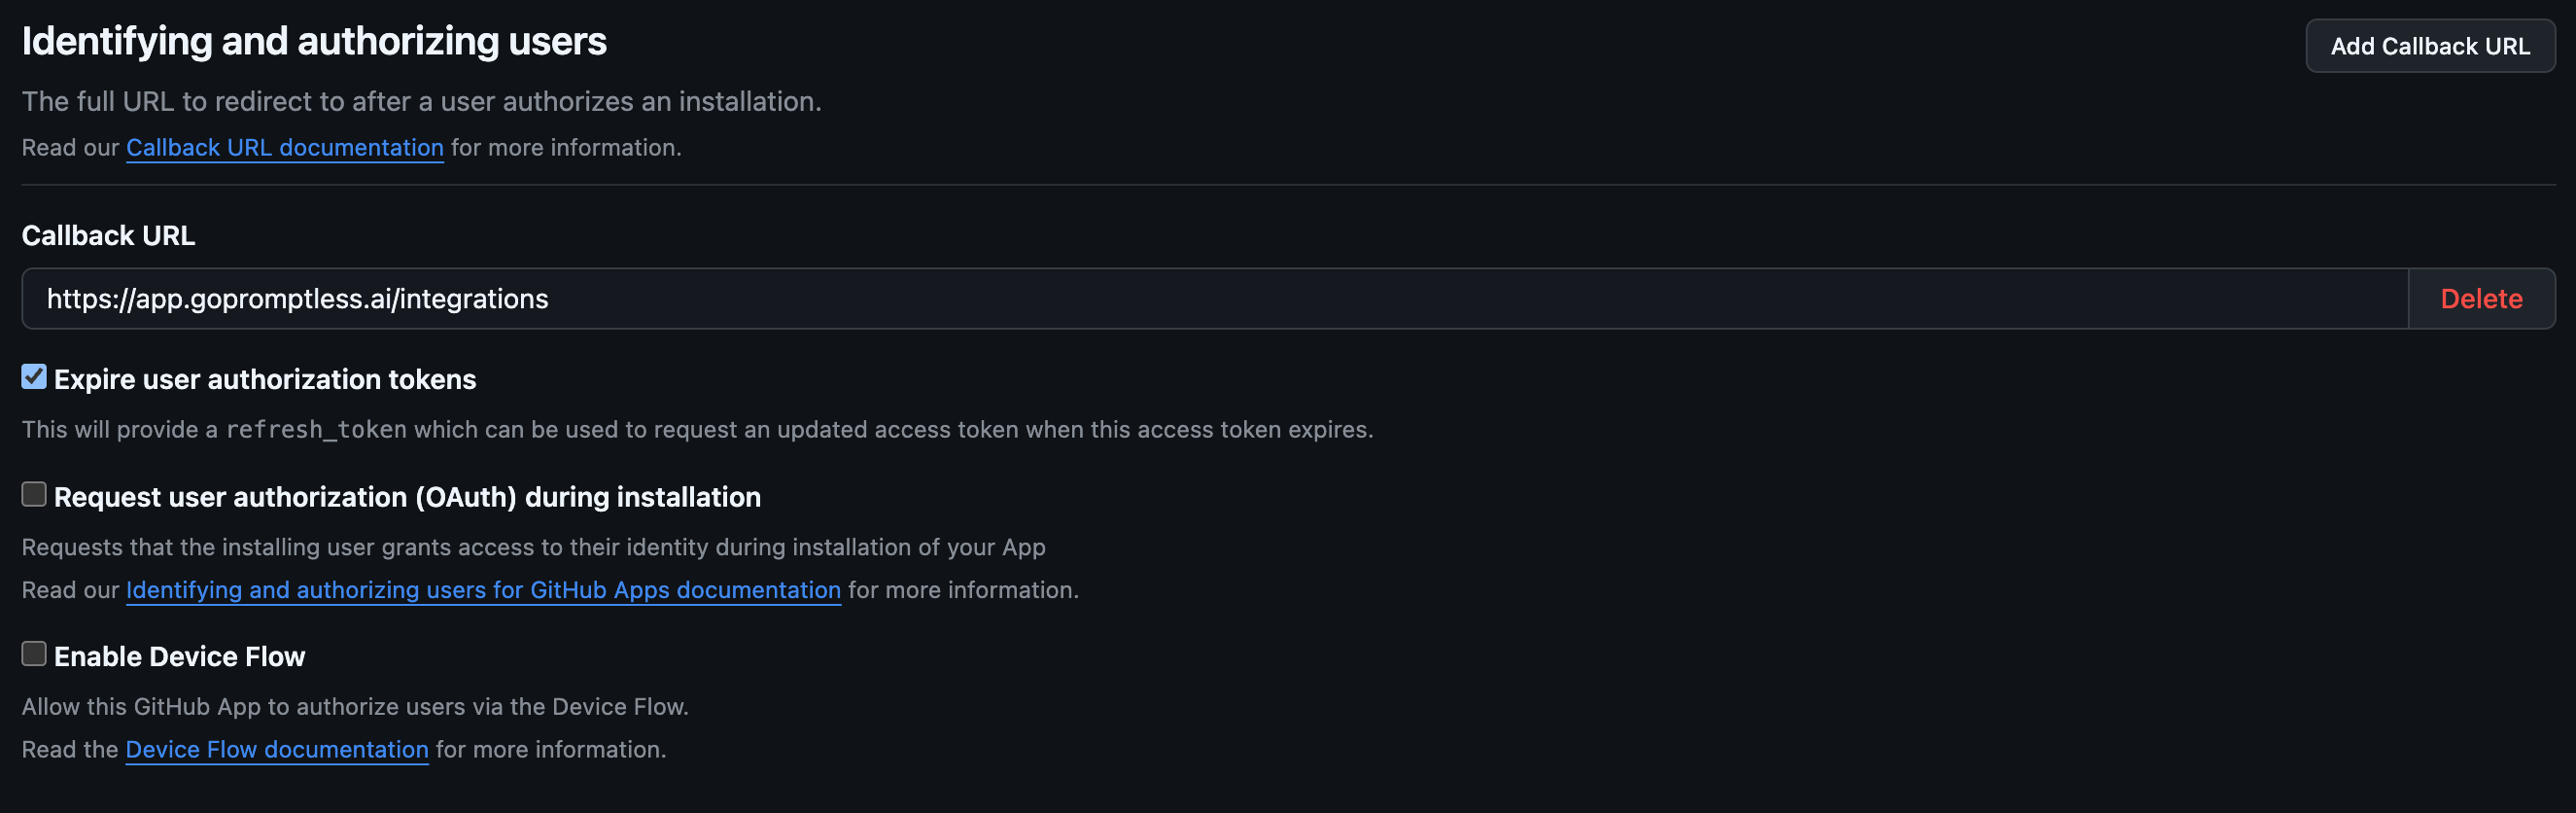
### Authentication configuration
[Section titled “Authentication configuration”](#authentication-configuration)
Configure the following URLs in your GitHub App settings:
* **Callback URL** (required): `https://app.gopromptless.ai/integrations`
* **Setup URL (Post installation)** (required): `https://app.gopromptless.ai/integrations/github-redirect`

Tip
Make sure to check “Redirect on update” to ensure users are redirected to the setup URL after installations are updated (e.g., repositories added/removed).
## Step 3: Configure webhook settings
[Section titled “Step 3: Configure webhook settings”](#step-3-configure-webhook-settings)
Set up webhooks to enable real-time communication between GitHub Enterprise and Promptless:
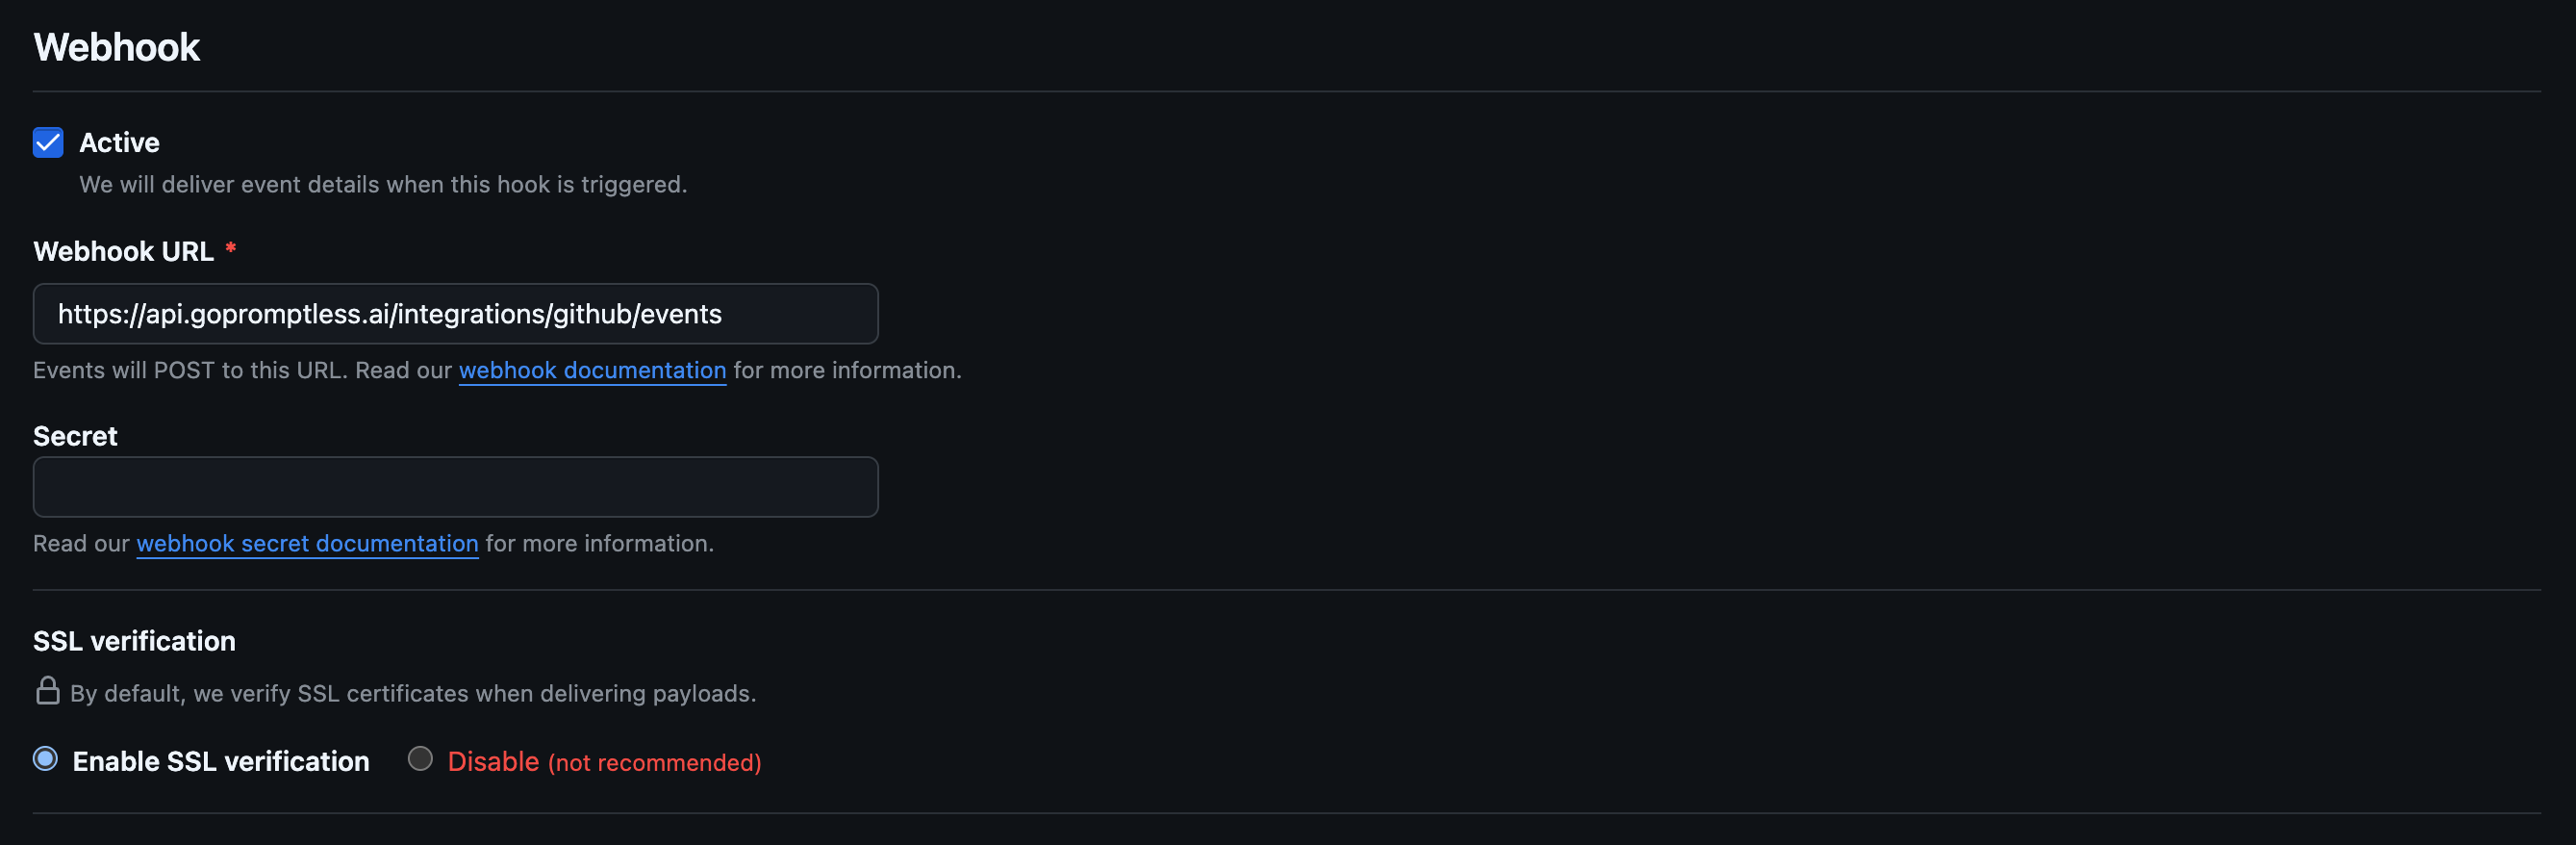
### Webhook configuration
[Section titled “Webhook configuration”](#webhook-configuration)
Configure the following webhook settings in your GitHub App:
* **Webhook URL** (required): `https://api.gopromptless.ai/integrations/github/events`
* **Webhook secret** (optional): Leave this field empty or generate a secure secret if required by your security policies
* **SSL verification** (required): Enable SSL verification (recommended for security)
## Step 4: Configure repository permissions
[Section titled “Step 4: Configure repository permissions”](#step-4-configure-repository-permissions)
Promptless requires specific repository permissions to function properly. Configure these permissions in your GitHub App settings:
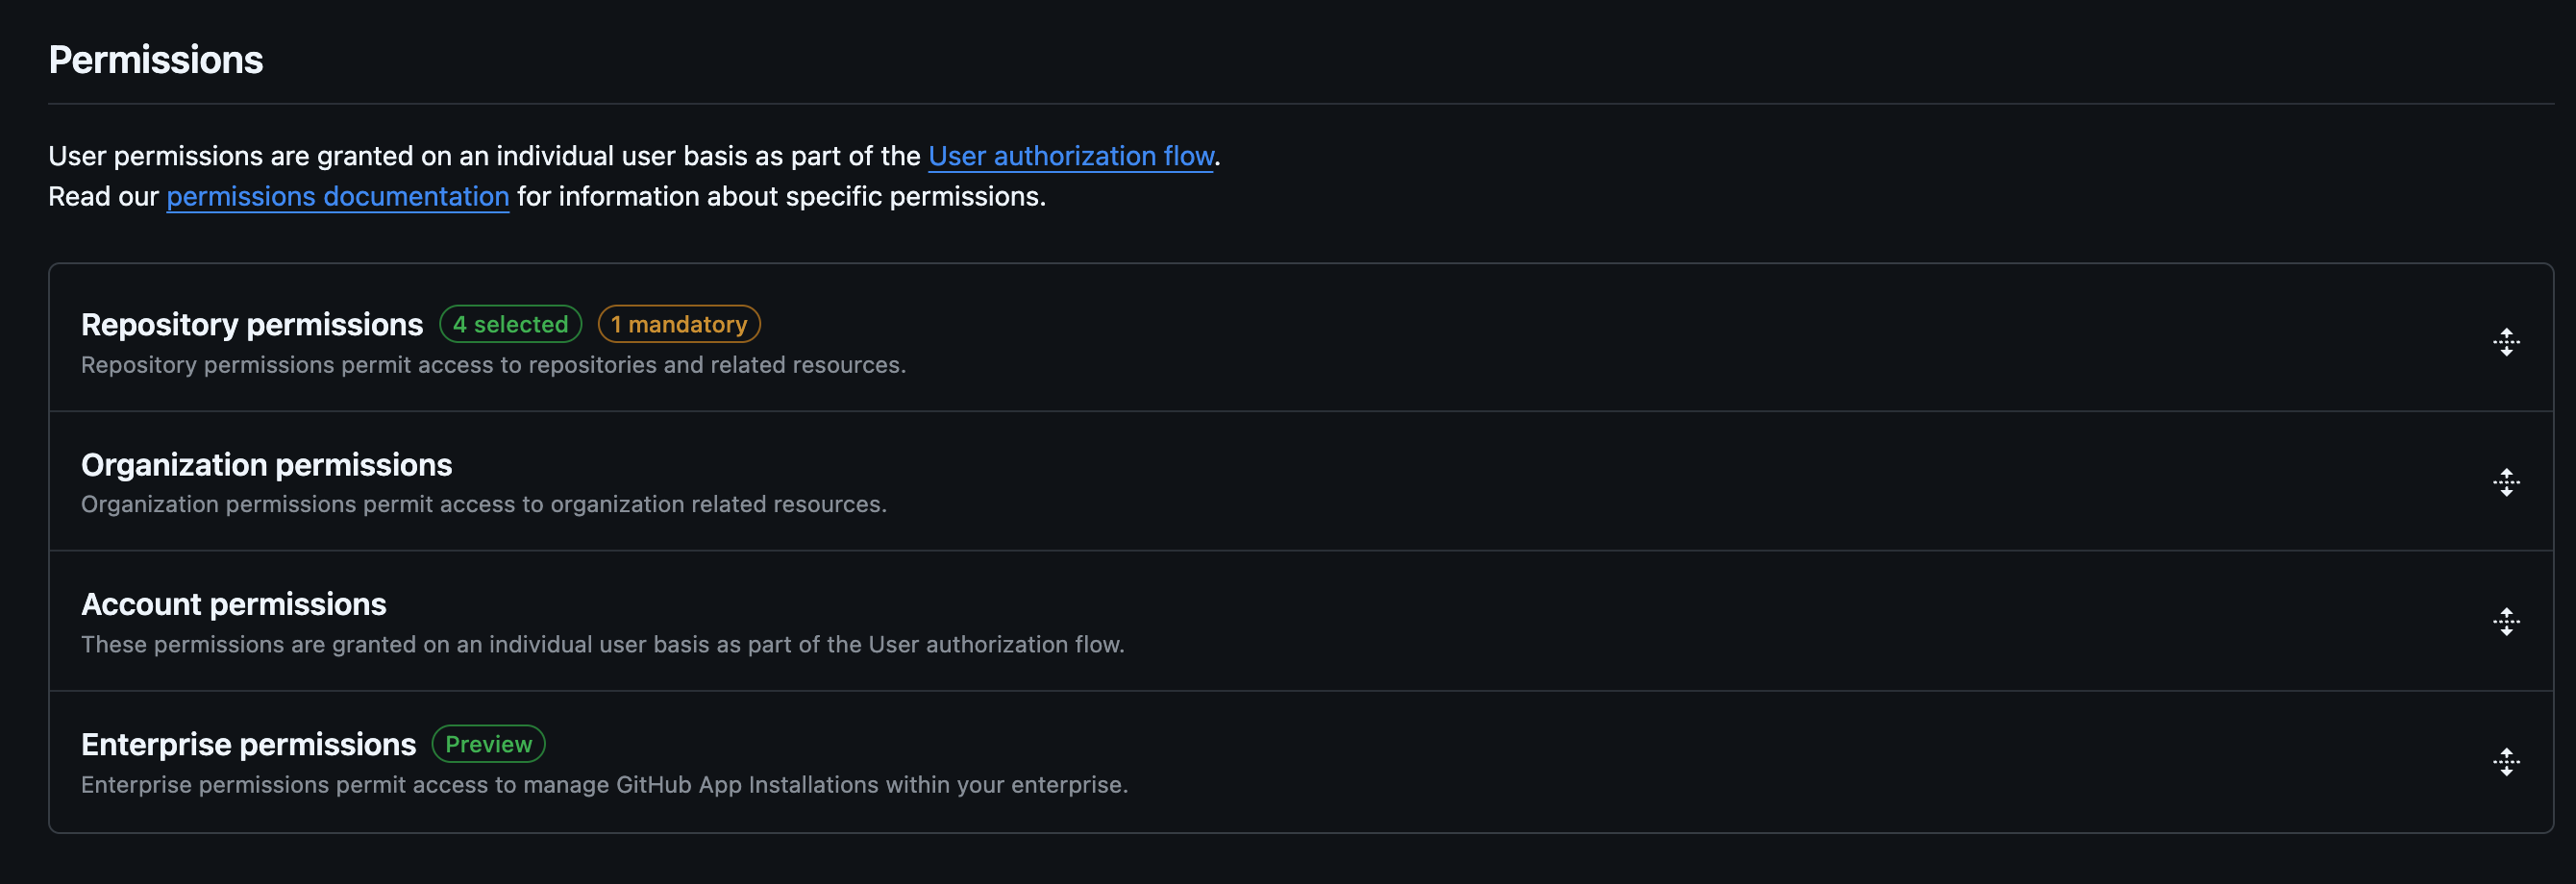
### Required repository permissions
[Section titled “Required repository permissions”](#required-repository-permissions)
Configure the following permissions for your GitHub App:
#### Pull requests - read and write
[Section titled “Pull requests - read and write”](#pull-requests---read-and-write)

This permission allows Promptless to:
* Read pull request content and metadata
* Create documentation update pull requests
* Add comments to pull requests for feedback
#### Contents - read and write
[Section titled “Contents - read and write”](#contents---read-and-write)

This permission allows Promptless to:
* Read repository files and documentation
* Create and update documentation files
* Access repository structure and content
#### Commit statuses - read only
[Section titled “Commit statuses - read only”](#commit-statuses---read-only)

This permission allows Promptless to:
* Read commit status information
* Understand the state of pull requests and commits
#### Webhooks - read and write
[Section titled “Webhooks - read and write”](#webhooks---read-and-write)

This permission allows Promptless to:
* Manage webhook configurations
* Receive real-time notifications of repository events
## Step 5: Configure webhook events
[Section titled “Step 5: Configure webhook events”](#step-5-configure-webhook-events)
Select the specific events that should trigger Promptless documentation updates:
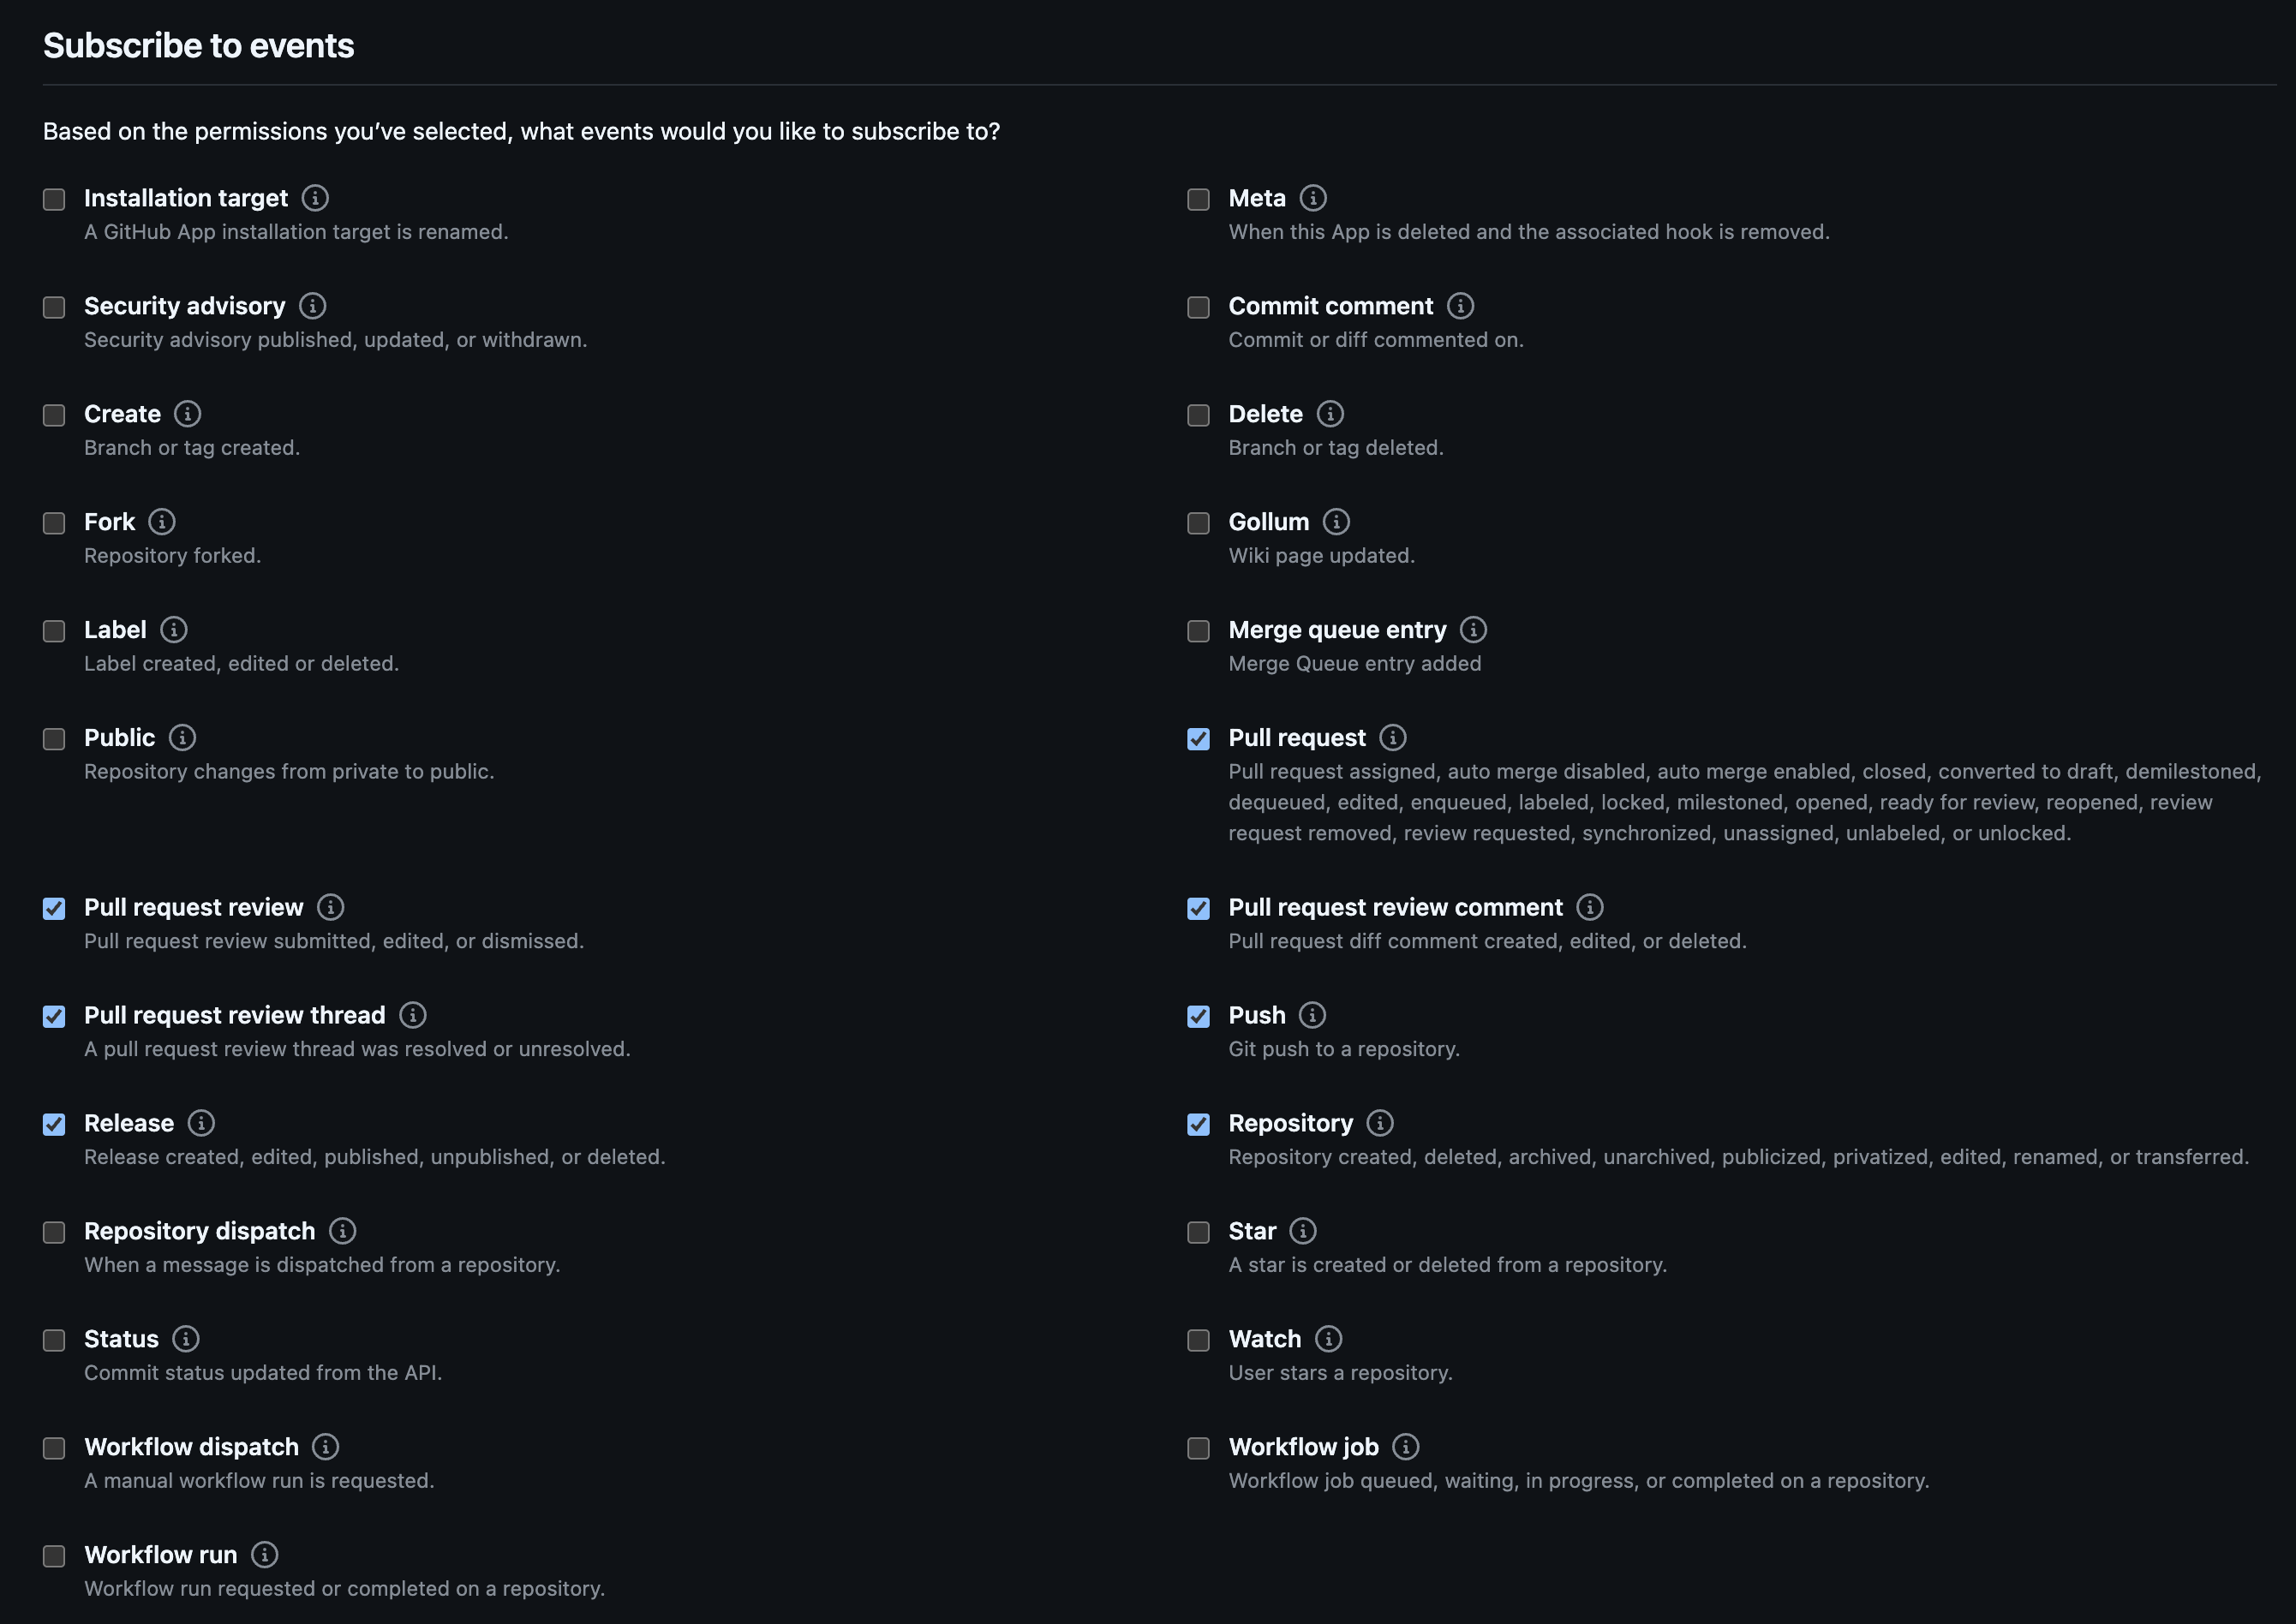
### Required webhook events
[Section titled “Required webhook events”](#required-webhook-events)
Select the following events to ensure Promptless receives all necessary notifications:
* **Pull Request** - Triggers when pull requests are opened, updated, or closed
* **Pull Request Review** - Triggers when pull request reviews are submitted
* **Pull Request Review Thread** - Triggers when review threads are created or updated
* **Pull Request Review Comment** - Triggers when individual review comments are made
* **Push** - Triggers when code is pushed to repositories
* **Release** - Triggers when releases are created or updated
* **Repository** - Triggers when repository settings change
## Step 6: IP whitelisting
[Section titled “Step 6: IP whitelisting”](#step-6-ip-whitelisting)
Add Promptless IP addresses to your network whitelist to ensure proper connectivity:
Note
If your GitHub Enterprise instance is behind a firewall or uses IP restrictions, you must whitelist these IP addresses for Promptless to function properly.
### Promptless IP addresses
[Section titled “Promptless IP addresses”](#promptless-ip-addresses)
Add the following IP addresses to your whitelist:
```plaintext
3.143.177.103
3.131.121.250
3.13.184.175
18.223.104.40
```
Caution
These IP addresses are required for webhook delivery and API communication. Failure to whitelist them will prevent Promptless from receiving GitHub events and accessing your repositories.
Note
The primary egress IP address for Promptless infrastructure is `3.143.177.103` (NAT gateway). This is the IP address that will appear in your GitHub Enterprise logs for API requests.
## Step 7: Generate credentials
[Section titled “Step 7: Generate credentials”](#step-7-generate-credentials)
After configuring all settings, generate the necessary credentials:
1. **Generate Private Key.**
1. Scroll to the bottom of the GitHub App settings page
2. Click “Generate a private key”
3. Download and securely store the `.pem` file
4. This key will be needed for Promptless configuration
2. **Generate Client Secret.**
1. In the “Client secrets” section, click “Generate a new client secret”
2. Copy and securely store the generated secret
3. This secret will be needed for OAuth authentication
3. **Note the App ID.**
1. Find the “App ID” at the top of the settings page
2. Record this ID as it will be needed for configuration
Caution
Store the private key and client secret in a secure location. These credentials provide access to your GitHub Enterprise instance and should be treated as highly sensitive information.
## Step 8: Install the app
[Section titled “Step 8: Install the app”](#step-8-install-the-app)
1. After creating the GitHub App, install it to your organization or specific repositories
2. Choose which repositories Promptless should have access to
3. Complete the installation process
## Step 9: Connect your GitHub Enterprise integration
[Section titled “Step 9: Connect your GitHub Enterprise integration”](#step-9-connect-your-github-enterprise-integration)
After configuring your GitHub Enterprise integration, you’ll need to connect it in your Promptless dashboard.
### Complete the connection
[Section titled “Complete the connection”](#complete-the-connection)
To establish the connection:
1. Log into your Promptless dashboard at [app.gopromptless.ai](https://app.gopromptless.ai)
2. Navigate to the Integrations page
3. Locate the GitHub Enterprise integration tile
4. Click **Connect GitHub Enterprise** to establish the connection
Note
You’ll need to have the following information available during the connection process:
* **GitHub Enterprise URL**: Your GitHub Enterprise instance URL
* **App ID**: The numeric ID of your created GitHub App
* **Client ID**: Found in your GitHub App settings
* **Client Secret**: The secret you generated in Step 7
* **Private Key**: The `.pem` file you downloaded in Step 7
* **Installation ID**: Provided after installing the app to your organization
The connection process will authenticate with your GitHub Enterprise instance using the configuration that was set up by the Promptless team. Once connected, you’ll see confirmation that your GitHub Enterprise integration is active and ready to use.
### Hostname requirements
[Section titled “Hostname requirements”](#hostname-requirements)
The GitHub Enterprise URL you provide must point to a publicly reachable GitHub Enterprise server over HTTPS. Promptless validates the hostname when you connect the integration and again each time the connection refreshes. It rejects the hostname before saving anything if it:
* uses any scheme other than HTTPS.
* embeds a username or password in the URL.
* resolves to a private, internal, loopback, or otherwise non-routable address, whether directly or through DNS.
* does not respond as a genuine GitHub Enterprise server.
Enter the same public host you use to reach your instance in a browser, such as `github.example.com`. Promptless adds the API path for you. If the hostname fails any of these checks, the connection fails with an error and Promptless stores nothing.
Note
GitHub Enterprise Server instances reachable only from inside a private network aren’t supported through this integration. Promptless connects to your instance from its own infrastructure. Your instance must be reachable at a public HTTPS address (you can still restrict access to the [Promptless IP addresses](#step-6-ip-whitelisting) above).
## Troubleshooting
[Section titled “Troubleshooting”](#troubleshooting)
Webhook Delivery Issues
* Verify IP addresses are whitelisted
* Check that the webhook URL is accessible from your GitHub Enterprise instance
* Ensure SSL verification settings match your security requirements
* Review GitHub Enterprise logs for webhook delivery errors
Authentication Problems
* Verify all URLs are correctly configured
* Ensure the private key and client secret are valid
* Check that the App ID matches your created GitHub App
* Confirm the installation was completed successfully
Permission Errors
* Review that all required repository permissions are granted
* Ensure the app is installed to the correct repositories
* Verify that webhook events are properly configured
* Check that users have appropriate access to repositories
## Support
[Section titled “Support”](#support)
For assistance with GitHub Enterprise setup, contact:
* **Email**:
* **Support**:
The Promptless team can provide guidance on configuration, troubleshooting, and best practices for GitHub Enterprise integrations.
# GitHub (read-only) integration
> Install the read-only Promptless GitHub App when you cannot grant write access; Promptless reads any repository and publishes to public ones through a fork.
**Used for: Triggers and Context (any repository), and Publishing (public repositories)**
Promptless offers two ways to install its GitHub App: the standard [GitHub App](/docs/for-docs/reference/integrations/github), which has read and write access, and the read-only app. The read-only app exists for teams that cannot grant a third-party or AI app write access to their repositories.
## When to use the read-only app
[Section titled “When to use the read-only app”](#when-to-use-the-read-only-app)
Some teams, especially open-source maintainer groups, can’t approve a third-party or AI application that has write access to their repositories. The read-only app lets those teams use Promptless without granting write access. Promptless receives webhooks and read access, and publishes documentation through a fork instead of writing to the repository directly. This fork-based publishing works only for [public repositories](#how-publishing-works).
The read-only app is also a good fit whenever you want to keep Promptless’s access scoped to reading. The public-repository story is not the only one. Any repository Promptless only needs to read can be granted through the read-only app, including private, closed-source code repositories. Examples include a source code repository connected for [triggers](/docs/for-docs/connect/triggers) or [context](/docs/for-docs/connect/context-sources). The public-repository limitation applies only to fork-based publishing, not to reading. Promptless can read a private repo through the read-only app, but it can only publish documentation to a public one.
## How it differs from the standard GitHub app
[Section titled “How it differs from the standard GitHub app”](#how-it-differs-from-the-standard-github-app)
For most teams, the [standard GitHub App](/docs/for-docs/reference/integrations/github) is the right choice. The read-only app changes how Promptless is granted access and how it publishes documentation.
| Dimension | Standard GitHub App | GitHub (read-only) app |
| ----------------------------------- | -------------------------------------------------------------------------------- | --------------------------------------------------------------------------------------------- |
| Repository access | Read and write | Read-only, plus webhooks |
| How documentation PRs are published | Promptless creates a branch and opens a pull request directly on your repository | Promptless opens a pull request from its own fork into your repository’s upstream base branch |
| Repository support for publishing | Public and private repositories | Public repositories only |
## How publishing works
[Section titled “How publishing works”](#how-publishing-works)
Because the read-only app has no write permission, Promptless cannot push branches or open pull requests directly on your repository. Instead, Promptless creates its own fork of the repository in a GitHub organization Promptless owns. It makes its documentation branches on that fork, and opens a pull request from the fork into your repository’s upstream base branch. A shared Promptless service account holds the credential that performs every write in this flow. That includes creating the fork, pushing the documentation branch, opening the pull request, and posting the linking comment.
Promptless creates the fork itself as needed. Configuring a doc collection does not create the fork, so don’t expect to see a fork in Promptless’s organization immediately after setup.
Caution
The fork-to-upstream publishing flow works only for public repositories. Promptless can’t fork private repositories.
## Installation
[Section titled “Installation”](#installation)
Install the read-only app from the [integrations page](https://app.gopromptless.ai/integrations), then grant it access to the repositories you want Promptless to work with. For open-source publishing, this includes the public repository whose docs you want to keep current.
Once connected, the read-only integration appears on the integrations page as its own **GitHub (read-only)** card. The **Configure in GitHub** button on that card opens the app’s installation page, where you can adjust which repositories Promptless can access. Repository access is always governed in GitHub’s own App settings.
`platform` is a field you set on each [doc collection](/docs/for-docs/reference/configuration-reference#doc-collections) in `promptless.yaml`. Setting `platform: github_oss` selects the read-only publishing flow and pins that doc collection to the read-only integration. In the dashboard’s Form mode, Promptless prefills `platform` from the connected integration, so most readers never see it.
## What you can do with the read-only app
[Section titled “What you can do with the read-only app”](#what-you-can-do-with-the-read-only-app)
Once connected, you can use the read-only app for:
* **[Triggers](/docs/for-docs/connect/triggers)**: Monitor pull requests and commits for documentation updates
* **[Context Sources](/docs/for-docs/connect/context-sources)**: Search code repositories and issues for technical context
* **[Doc Collections](/docs/for-docs/connect/doc-locations/github-repos)**: Publish documentation updates to public repositories through a pull request from a fork
[Updating Contributor PRs](/docs/for-docs/start-here/open-source-quickstart) (adding a docs commit to a contributor’s existing PR) is not compatible with the read-only app.
## Example
[Section titled “Example”](#example)
Consider a public open-source project whose maintainers will not grant write access to any external app. The project installs the read-only app, connects its source and docs repositories, and configures a doc collection for its docs. When a contributor’s pull request merges, Promptless drafts the doc update and pushes the branch to its fork of the repository. It then opens a pull request from that fork into the project’s upstream base branch. The service account posts the linking comment. Maintainers review and merge the documentation PR like any other community contribution without Promptless ever holding write access to the repository.
## Frequently asked questions
[Section titled “Frequently asked questions”](#frequently-asked-questions)
Can I use the read-only app with a private repository?
Yes. The read-only app can read triggers and context from a private repo, but Promptless cannot publish documentation to one through the read-only app. Doc collections in private repositories must use the [standard GitHub App](/docs/for-docs/reference/integrations/github).
Why not just use the standard GitHub App?
Some teams, especially open-source maintainer groups, cannot approve any application with write access to their repositories. The read-only app is the path for them: Promptless never takes write access and instead publishes from a fork.
Can I use the standard app and the read-only app in the same organization?
Yes. You can install the standard GitHub App on some repositories and the read-only app on others.
# GitLab integration
> Connect GitLab with a group access token so Promptless handles triggers, context, and publishing across gitlab.com and self-hosted projects.
**Used for: Triggers, Context, and Publishing**
Promptless connects to GitLab in two directions. Promptless uses a GitLab **group access token** to pull information from GitLab: merge requests, repository files, and project metadata. GitLab uses **webhooks** to notify Promptless when merge requests change. Promptless requests a group access token (not a project access token), so a single group connection covers all three jobs: triggers, context, and publishing. Promptless supports both gitlab.com and self-hosted GitLab.
## Installation
[Section titled “Installation”](#installation)
Setup has two parts: create a group access token in GitLab, then connect it in Promptless.
1. **Create a GitLab group access token.** You need the **Owner** role for the group, since GitLab restricts group access token creation to group Owners. If you don’t have it, ask a group Owner to create the token. In GitLab, go to your group’s **Settings > Access Tokens** and click **Add new token**, then:
* Name it (for example, “Promptless”).
* Set an expiration date (maximum one year).
* Select the **`api`** scope.
* Choose the **Maintainer** role.
Click **Create group access token** and copy it immediately. GitLab shows it only once. The token starts with `glpat-`. For more details, see [GitLab’s group access token documentation](https://docs.gitlab.com/user/group/settings/group_access_tokens/).
2. **Open the [Integrations](https://app.gopromptless.ai/integrations) page** in the Promptless dashboard.
3. **Start the GitLab connection.** For a gitlab.com group, find the **Connect GitLab** tile and click **Connect**. For a self-hosted instance, use the **Connect self-hosted GitLab** tile instead and enter your **Instance hostname**. Enter just the host, with no `https://` and no path (for example, `gitlab.acme.com`).
4. **Enter the group path and paste the token.** In the **Group path** field, enter the group’s full path (for example, `acme/platform`). Paste the token into the **Access token** field, then click **Connect**.
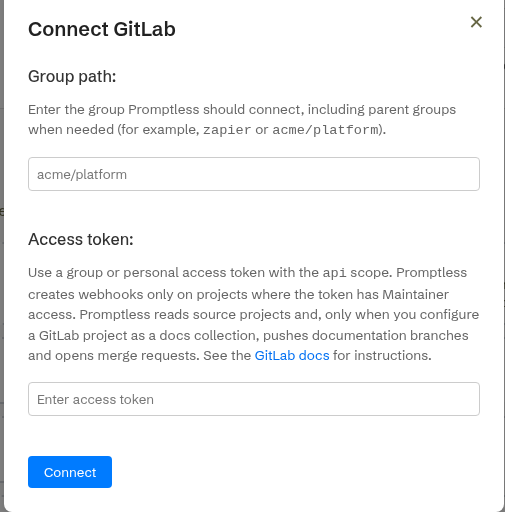
Required Scope
The token must be a **group** access token with the **`api`** scope and the **Maintainer** role. Tokens without the `api` scope don’t work with Promptless, and Maintainer is required because webhook creation is Maintainer-gated. GitLab has no read-only token option. See [Token scope considerations](#token-scope-considerations) for why.
Connect multiple GitLab groups
A GitLab group access token grants access to one group and its subgroups. To cover more than one top-level group, you connect one token per group. Connecting a second group doesn’t replace the first, and every group you connect stays active. You can connect any combination: sibling or nested (subgroup) groups, and groups on different GitLab instances (gitlab.com and self-hosted). To add another group, click **Connect GitLab** (or **Connect self-hosted GitLab**) again on the Integrations page. Then repeat the installation steps with that group’s token.
## Connected groups
[Section titled “Connected groups”](#connected-groups)
Each connected group appears as its own card on the [Integrations](https://app.gopromptless.ai/integrations) page. Each card is titled `GitLab (gitlab.com)` for a gitlab.com connection, or `GitLab · ` for a self-hosted instance. Every card shows a `Host:` line (`gitlab.com` for a gitlab.com connection, or the self-hosted domain) and a `Group:` line with the connected group. The card lists the connected group’s projects by full path (for example, `promptless-engineers/`), sorted alphabetically.
The card’s manual **Refresh** re-syncs the project inventory. Projects added to a group after you connect it appear only after you refresh.
## Project setup
[Section titled “Project setup”](#project-setup)
After connecting your GitLab account, you can configure how Promptless interacts with your projects:
### Repository access
[Section titled “Repository access”](#repository-access)
When setting up a project with GitLab as a trigger source:
1. Select the GitLab projects you want Promptless to monitor for changes.
2. Optionally, configure directory-specific triggers to focus on particular parts of your codebase.
### Directory-specific triggers
[Section titled “Directory-specific triggers”](#directory-specific-triggers)
You can configure Promptless to only trigger documentation updates when changes are made to specific directories in your GitLab projects. This is useful for:
* Focusing on code that directly impacts user-facing features
* Monitoring API changes that require documentation updates
* Ignoring internal tooling or test changes that don’t affect documentation
To set up directory-specific triggers:
1. In your project configuration, select the GitLab project.
2. Under **Advanced Options**, enable **Directory-Specific Triggers**.
3. Enter the directories you want to monitor, separated by commas (for example, `src/api, docs/reference`).
## Merge request link resolution
[Section titled “Merge request link resolution”](#merge-request-link-resolution)
When you share a GitLab.com merge request link in a Slack message or other trigger, Promptless automatically fetches the MR content. This includes:
* MR metadata (title, state, source/target branches, author)
* Discussion comments with file positions and resolved state
* The full diff for analysis
This allows Promptless to gather context from linked merge requests.
Note
Merge request link resolution currently works only for gitlab.com. Self-hosted GitLab instances are supported for webhook-based triggers but not for link resolution.
## Source code reading
[Section titled “Source code reading”](#source-code-reading)
Promptless can read source files directly from your GitLab projects when processing merge requests or researching documentation updates. This provides context from implementation details that aren’t visible in merge request diffs alone.
Promptless uses the GitLab CLI (`glab`) to fetch file contents from your repositories. This is useful when:
* A merge request references code in files that weren’t changed
* A new feature needs to be understood in the context of existing code
* Documentation requires accurate details about implementation behavior
Note
Source code reading works with gitlab.com projects. Self-hosted GitLab instances support webhook-based triggers but not source code reading.
## Publishing documentation to GitLab
[Section titled “Publishing documentation to GitLab”](#publishing-documentation-to-gitlab)
Beyond triggers and context, a GitLab project can also be a doc collection: a place where your documentation lives and where Promptless publishes updates. When documentation needs to change, Promptless clones the project, edits files on a new branch, and pushes that branch. It then opens a merge request for you to review, the same way it opens pull requests on GitHub.
To publish to GitLab, your connected group access token needs the write-capable `api` scope, the same scope the integration already uses for triggers. Promptless writes only to the projects you set up as doc collections.
GitLab doc collections work on both gitlab.com and self-hosted GitLab, and both are set up the same way. The project picker lists your connected GitLab projects across every connected instance. A **GitLab host** field on the same form takes your self-hosted hostname; leave it blank for gitlab.com. See [GitLab projects](/docs/for-docs/connect/doc-locations/gitlab-projects) for setup details. See [the configuration reference](/docs/for-docs/reference/configuration-reference#doc-collections) for the `platform: gitlab` and `host` fields.
Promptless tracks merge request status the same way it tracks GitHub pull request status. Because GitLab has no draft flag at creation time, Promptless marks a draft merge request with a `Draft:` title prefix.
Auto-merge differs from the GitHub path. On GitLab, Promptless attempts the merge immediately instead of waiting for a pipeline. See [Automatic merge request creation](/docs/for-docs/connect/doc-locations/gitlab-projects#automatic-merge-request-creation) before you enable it.
## Authentication model
[Section titled “Authentication model”](#authentication-model)
The GitLab integration authenticates with a group access token:
* **Group Access Token**: A token with the `api` scope for full API access.
* **Webhook Triggers**: Work with both gitlab.com and self-hosted GitLab instances.
* **Publishing (doc collections)**: Works with both gitlab.com and self-hosted GitLab instances.
* **Link Resolution**: Works with gitlab.com only.
* **Source Code Reading**: Works with gitlab.com only.
The token’s scope and role limit what Promptless can do. See [Token scope considerations](#token-scope-considerations) for which projects it can reach and why Promptless enforces the per-project boundary rather than the token.
### Token scope considerations
[Section titled “Token scope considerations”](#token-scope-considerations)
**GitLab has no read-only option.** Connecting a GitLab group always performs writes with the group access token. It creates the merge-request webhooks across the group’s projects, and it also sets the Promptless bot avatar as an incidental additional write. Webhook creation is the hard blocker. A read-only (`read_api`) token cannot create those webhooks, so the integration delivers no merge-request triggers and is connected but inert. Unlike the [GitHub (read-only) app](/docs/for-docs/reference/integrations/github-read-only), GitLab has no read-only equivalent, so even a triggers-and-context-only setup needs a write-capable token.
**The group access token needs the `api` scope and the Maintainer role.** This is what the connect flow recommends and what a working connection requires. Maintainer is required because connecting a group always sets up the merge-request webhooks across the group’s projects. Creating those webhooks requires the Maintainer role. Publishing on its own (pushing a branch and opening a merge request) needs only lower privilege: at least the Developer role for those write operations. But because every connection sets up webhooks, Maintainer is the effective requirement for any GitLab connection. That holds whether you use it as a trigger and context source, a docs destination, or both. A Developer-role token completes the initial connect but receives no webhooks (the failure is swallowed silently). It then hard-fails on the next refresh, so it is not a viable option. The clean, safe recommendation is `api` scope with the Maintainer role.
Promptless writes only to the projects you configure as doc collections. That’s an application-level restriction Promptless enforces. The token itself doesn’t impose it.
Two layers limit what Promptless can reach. The first is a hard, token-level limit. Suppose you scope the group access token to a group or subgroup that contains only your documentation projects. The token then can’t reach anything outside it. Scoping the token to a documentation-only subgroup is safe only in one case. Your trigger and context source projects and your docs-destination projects must all live within that same group or subgroup. Otherwise the token can’t reach source projects outside it. The second is an application-level path scope on the doc collection, which limits which files Promptless can change.
## Webhook management
[Section titled “Webhook management”](#webhook-management)
Promptless automatically sets up webhooks in your GitLab projects to monitor for merge request events. These webhooks:
* Trigger Promptless when merge requests are created or updated
* Send only the necessary information about changes to Promptless
* Can be customized to focus on specific events
## Usage
[Section titled “Usage”](#usage)
Once configured, the GitLab integration works similarly to other code hosting integrations:
1. When a merge request is opened or updated in your monitored projects, Promptless is automatically triggered.
2. Promptless analyzes the changes to determine if documentation updates are needed.
3. If updates are needed, Promptless generates the appropriate documentation changes.
4. Promptless adds a comment to your GitLab merge request with a link to review the documentation changes.
5. You can review and approve the suggested documentation updates in the Promptless dashboard.
For more information on how triggers work in general, see the [Triggers](/docs/for-docs/connect/triggers) documentation.
## Frequently asked questions
[Section titled “Frequently asked questions”](#frequently-asked-questions)
I connected a GitLab group but no merge request triggers arrive. What’s wrong?
A read-only `read_api` token can’t create the merge-request webhooks a GitLab connection needs, so the group connects but stays inert. Recreate the token with the `api` scope and the Maintainer role, then reconnect. See [Token scope considerations](#token-scope-considerations) for why GitLab has no read-only option.
My token has the `api` scope but I still get no merge request triggers. Why?
A Developer-role token can’t create the merge-request webhooks a GitLab connection sets up, because only the Maintainer role can. Recreate the token with the Maintainer role and reconnect. See [Token scope considerations](#token-scope-considerations).
A project I added to my group doesn’t appear under the connected group. How do I fix it?
Promptless syncs the project inventory when you connect a group, so projects added later don’t appear automatically. Open the group’s card on the [Integrations](https://app.gopromptless.ai/integrations) page and click **Refresh** to re-sync the inventory.
# Intercom integration (beta)
> Connect Intercom so Promptless turns support conversations and repeated questions into documentation updates.
**Used for: Triggers**
Promptless integrates with Intercom to enable automated documentation updates based on support conversations and repeated customer questions.
## Installation
[Section titled “Installation”](#installation)
1. Click “Connect Intercom” from the [integrations page](https://app.gopromptless.ai/integrations).
2. Review and approve the requested permissions.
3. Verify that Intercom is connected in the integrations page.
## Authentication model
[Section titled “Authentication model”](#authentication-model)
Promptless uses OAuth-based authentication for Intercom integrations, which provides:
* Secure token-based authentication
* Granular API access scopes
* Ability to revoke access at any time
* Regular token rotation for enhanced security
## What you can do with Intercom
[Section titled “What you can do with Intercom”](#what-you-can-do-with-intercom)
Once connected, you can use Intercom as a [trigger source](/docs/for-docs/connect/triggers/intercom-tickets) to monitor support conversations for documentation gaps (Beta).
Note
Contact if you need help enabling Intercom triggers for your organization.
# LaunchDarkly integration (beta)
> Connect LaunchDarkly with a service token so Promptless drafts documentation when your feature flags change.
**Used for: Triggers**
Promptless integrates with LaunchDarkly to enable automated documentation updates when feature flags change. When you connect, Promptless creates a webhook that monitors flag changes across your projects.
## Installation
[Section titled “Installation”](#installation)
1. In your LaunchDarkly account, [create an Access Token](https://app.launchdarkly.com/settings/authorization). Mark it as a **service token** and select **Inline policy** for its role. Use this policy:
```json
[
{
"effect": "allow",
"actions": ["createWebhook", "deleteWebhook"],
"resources": ["webhook/*"]
},
{
"effect": "allow",
"actions": ["viewProject"],
"resources": ["proj/*"]
}
]
```
This grants Promptless the minimum permissions needed:
* **createWebhook** and **deleteWebhook** on `webhook/*` let Promptless manage its subscription to flag-change events
* **viewProject** on `proj/*` lets Promptless view projects and flag state
We recommend service tokens over personal access tokens because they are not tied to individual users. The integration keeps working when team members leave. See the [LaunchDarkly docs](https://launchdarkly.com/docs/home/account/api-create) for more on API access tokens.
2. Click “Connect LaunchDarkly” from the [integrations page](https://app.gopromptless.ai/integrations).
3. Paste your service token in the modal and click Connect.
4. Verify that LaunchDarkly shows as connected in the integrations page.
## Authentication model
[Section titled “Authentication model”](#authentication-model)
Promptless uses API token authentication for LaunchDarkly integrations. When you connect, Promptless validates your service token and automatically creates a webhook in your LaunchDarkly account. This ensures:
* Secure webhook delivery with HMAC-SHA256 signature verification
* A unique signing secret for each integration
* Ability to revoke access at any time
To disconnect, click the LaunchDarkly card on the integrations page and select Disconnect. This removes the webhook from your LaunchDarkly account.
# Linear integration
> Connect Linear through OAuth so Promptless reads your project management data for documentation context.
**Used for: Context**
Promptless integrates with Linear through OAuth 2.0, providing secure access to your project management data for documentation automation.
## Installation
[Section titled “Installation”](#installation)
1. Click “Connect Linear” from the [integrations page](https://app.gopromptless.ai/integrations).
2. You’ll be redirected to Linear to sign in to the right organization, if you are not already signed into the web app.
3. Once you’re signed in, you’ll be redirected back to Promptless, and you can verify that Linear is connected.
## Authentication model
[Section titled “Authentication model”](#authentication-model)
Promptless uses OAuth 2.0 to authenticate with Linear, following their [official Linear OAuth 2.0 specification](https://developers.linear.app/docs/oauth/authentication). This ensures:
* Secure token-based authentication
* Ability to revoke access at any time
* Granular permission control at the team level
* Regular token rotation for enhanced security
## Reconnect Linear
[Section titled “Reconnect Linear”](#reconnect-linear)
If you see a “Reconnect required” warning on the [integrations page](https://app.gopromptless.ai/integrations), your Linear connection needs to be re-authenticated. This can happen when:
* Your Linear OAuth tokens have expired and cannot be automatically refreshed
* Linear rejected or revoked Promptless’s access, which can happen when someone removes the Promptless authorization in Linear
To reconnect, click **Reconnect Linear** and reauthorize Promptless to access your Linear workspace. After reconnecting, Promptless can access your Linear issues again.
## What you can do with Linear
[Section titled “What you can do with Linear”](#what-you-can-do-with-linear)
Once connected, you can use Linear as a [context source](/docs/for-docs/connect/context-sources/linear) to search for related issues and project management data that enhances documentation accuracy.
# Microsoft Teams integration (beta)
> Connect the Promptless Microsoft Teams app to trigger documentation updates from your team's conversations.
**Used for: Triggers**
Note
The Microsoft Teams integration is in beta. Contact for more information about enabling this feature for your organization.
Promptless integrates with Microsoft Teams through our official Teams app, enabling automated documentation updates based on team communication and collaboration within your Teams environment.
Promptless does not archive or store your Teams messages.
Disclaimer: Promptless uses LLMs from OpenAI and Anthropic that have the potential to generate inaccurate results.
## Prerequisites
[Section titled “Prerequisites”](#prerequisites)
To install Promptless in Microsoft Teams, you’ll need:
* Microsoft Teams admin center access
* Permissions to manage app setup policies in your organization
* Ability to install and configure third-party apps
## Installation
[Section titled “Installation”](#installation)
Installing Promptless in Teams has two stages. First, install the Promptless app into your Teams tenant (Steps 1–3). Then link that tenant to your Promptless organization (Step 4). The two stages are independent, and you can link before you install. Installing first, as numbered below, is the simplest path.
### Step 1: Download Promptless Teams app package
[Section titled “Step 1: Download Promptless Teams app package”](#step-1-download-promptless-teams-app-package)
First, download the Promptless Teams app package from the [Promptless integrations page](https://app.gopromptless.ai/integrations):
### Step 2: Upload Promptless Teams app
[Section titled “Step 2: Upload Promptless Teams app”](#step-2-upload-promptless-teams-app)
1. Navigate to the [Microsoft Teams admin center](https://admin.teams.microsoft.com)
2. In the left navigation, under **Teams apps**, select **Manage apps**. This section allows you to control which apps are available to install for users in your organization
3. Click the **Actions** > **Upload new app** button to upload the Promptless Teams app package
4. Click **Upload** to proceed with the app installation
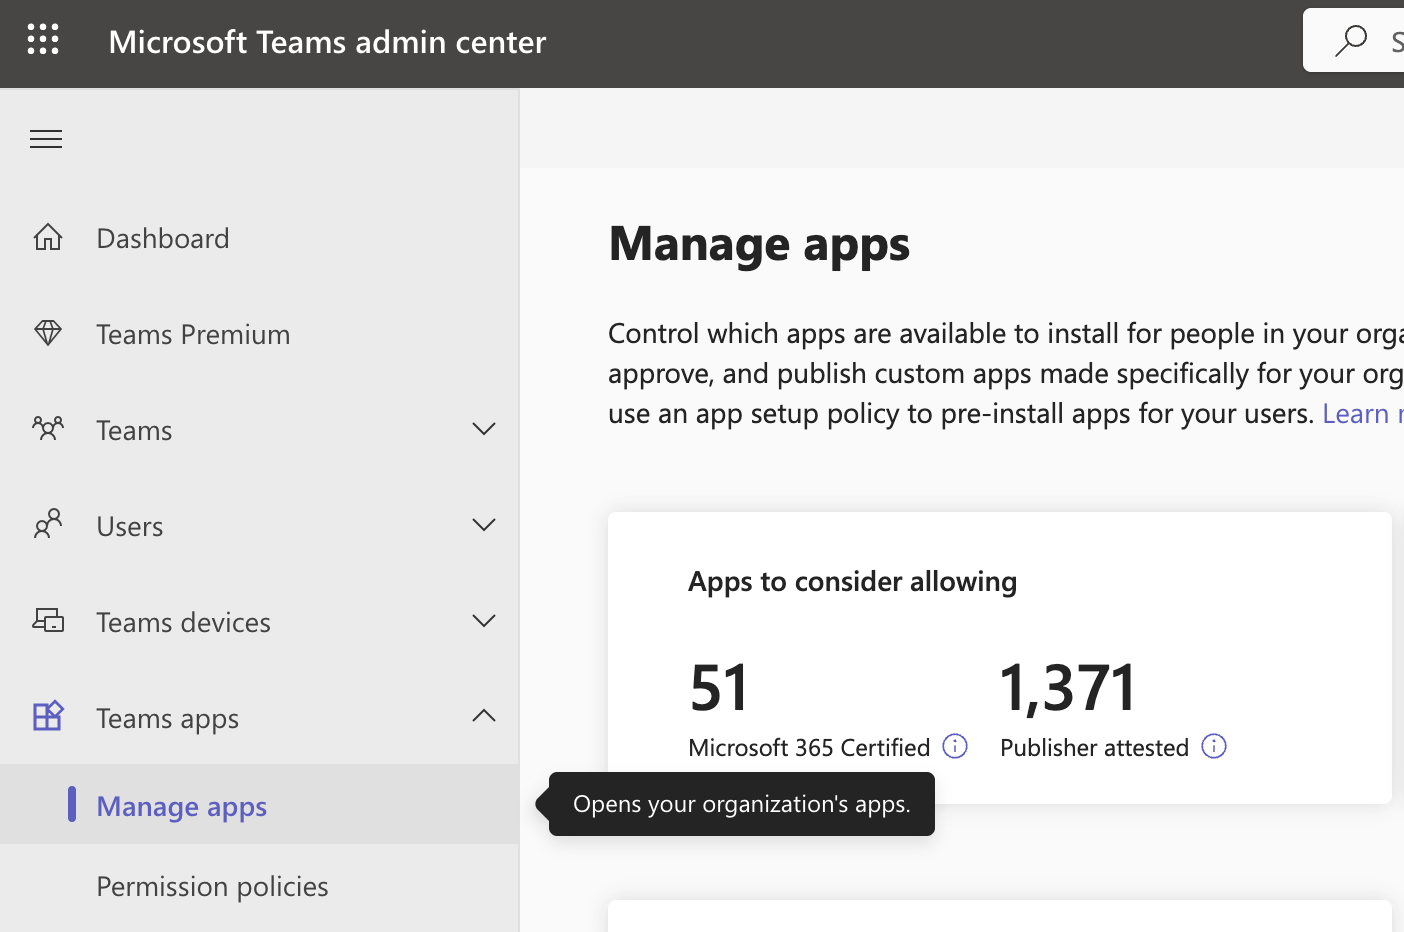  
### Step 3: Grant access to users
[Section titled “Step 3: Grant access to users”](#step-3-grant-access-to-users)
1. In the left navigation, select **Setup policies**
2. Select the **Global (Org-wide default)** policy
3. Ensure that **Upload custom apps** and **User pinning** are enabled. These settings allow users to install and pin custom apps like Promptless.
4. Under **Installed apps**, click on **Add apps**
5. Search for “Promptless” and add it to the policy
6. Click **Save** to apply the changes
### Step 4: Link your Teams tenant to Promptless
[Section titled “Step 4: Link your Teams tenant to Promptless”](#step-4-link-your-teams-tenant-to-promptless)
This stage happens back on the Promptless side, not in the Microsoft Teams admin center:
1. Go to the [Promptless integrations page](https://app.gopromptless.ai/integrations) and find the **Microsoft Teams** integration.
2. Click the **Link App & Grant Read Channels** button. This starts a Microsoft admin-consent sign-in that only a Microsoft admin can approve. If you’re not an admin, ask your Microsoft admin to complete this step.
3. Approve the sign-in. This links your tenant to your Promptless organization.
Until your tenant is linked, the Promptless bot can’t map incoming Teams messages back to your organization. It replies that no workspace is connected.
If the button reads **Contact Promptless** instead of **Link App & Grant Read Channels**, OAuth isn’t configured for your organization yet. Email to finish connecting.
## First-time experience
[Section titled “First-time experience”](#first-time-experience)
When you install Promptless personally (adding it to your 1:1 chat), you’ll receive a welcome message that covers:
* Asking your admin to connect your docs workspace to your Microsoft tenant
* Mentioning `@Promptless` in channels, threads, and group chats
* Using the **Update docs with Promptless** message action
If you use Promptless before your organization’s workspace is connected, Promptless will direct you to the [integrations settings](https://app.gopromptless.ai/integrations). There, an admin can complete the connection.
## Reading files you share
[Section titled “Reading files you share”](#reading-files-you-share)
When you message @Promptless in a personal (1:1) chat, Promptless reads the files and images you attach. It uses them as context for the documentation it drafts, just as it does in Slack. It also reads inline images you paste into a message, in personal chats and in channels.
Promptless reads files attached in Teams **channels** too, but only from the SharePoint sites a Microsoft tenant administrator has granted it access to. After an admin approves the Teams connection, they choose which SharePoint sites Promptless may read from on the [Promptless integrations page](https://app.gopromptless.ai/integrations). Promptless reads channel files only from those granted sites; a file that lives on any other site is surfaced as unavailable rather than read. If your organization connected Teams before this, an admin needs to reconnect and pick sites before channel files become available. Promptless does not read anything you attach in a **group chat**, including inline images.
## What you can do with Microsoft Teams
[Section titled “What you can do with Microsoft Teams”](#what-you-can-do-with-microsoft-teams)
Once connected, you can use Microsoft Teams for:
* **[Triggers](/docs/for-docs/connect/triggers/microsoft-teams-messages)**: Tag @Promptless in channels or DMs, use message actions, or enable passive listening to trigger documentation updates
* **[Configuration](/docs/for-docs/get-the-most-out/ask-promptless-to-update-config)**: Ask Promptless to update your triggers, doc collections, and other configuration directly
For more details about trigger configuration, see [Microsoft Teams Triggers](/docs/for-docs/connect/triggers/microsoft-teams-messages).
## Key permissions
[Section titled “Key permissions”](#key-permissions)
Promptless requests permissions through Teams Resource-Specific Consent (RSC):
* **ChannelMessage.Read.Group**: Receive channel messages for passive listening in teams where the app is installed
* Standard bot permissions: Send messages and notifications, read user information for mentions
Understanding Teams Permissions
By default, Promptless only accesses Teams content when you explicitly trigger it by @mentioning @Promptless or using a message action. If you enable passive listening, Promptless monitors only the specific channels you select.
## Privacy and channel access
[Section titled “Privacy and channel access”](#privacy-and-channel-access)
By default, Promptless only accesses Teams content when you explicitly trigger it by @mentioning @Promptless or using a message action. If you enable passive listening, Promptless monitors only the specific channels you select.
### Adding Promptless to channels
[Section titled “Adding Promptless to channels”](#adding-promptless-to-channels)
Promptless receives messages only from channels within teams where the app is installed. To monitor a specific channel, ensure:
1. The Promptless Teams app is installed in the team containing that channel
2. The channel is added to your passive listening configuration (if using passive listening)
# Slack integration
> Connect the Promptless Slack app for documentation triggers and context from your team's conversations.
**Used for: Triggers and Context**
Promptless integrates with Slack through our official Slack App, enabling automated documentation updates based on team communication and support conversations.
Promptless does not archive or store your Slack messages.
Disclaimer: Promptless uses large language models (LLMs), which can generate inaccurate results.
## Installation
[Section titled “Installation”](#installation)
1. Click “Connect Slack” from the [integrations page](https://app.gopromptless.ai/integrations).
2. You’ll be redirected to Slack to install the Promptless app. **Be sure to select the right workspace to install Promptless.**
3. Review and approve the requested permissions for the Promptless Slack app. Promptless requires these permissions to be able to be triggered from the right events in Slack and to notify your team when updates are available.
Understanding Slack Permissions
By default, Promptless only accesses Slack content when you explicitly trigger it by tagging @Promptless or using the “Update Docs” message action. If you enable passive listening, Promptless monitors only the specific channels you select.
### Key permissions
[Section titled “Key permissions”](#key-permissions)
Promptless requests these Slack permissions:
* **channels:read** and **groups:read**: List available channels and groups
* **chat:write**: Send messages and notifications to channels where Promptless is invited
* **files:write**: Attach diff files to Slack threads when notifying about documentation changes
* **links:read** and **links:write**: Render preview cards when a Promptless suggestion link is shared in Slack
* **users:read**: Look up user information for mentions and notifications
* **users:read.email**: Match a documentation task’s submitter to their Slack account by email to send a direct-message notification
The `groups:read` permission lets Promptless list the private channels in your workspace, so you can choose one as a notification channel or trigger source. If your workspace is missing this or any other permission Promptless requests, the Slack card shows a **Grant additional Slack permissions** callout. The callout names each missing permission along with a short description of what it’s used for. See [Update Slack permissions](#update-slack-permissions) to add it.
The `files:write` permission lets Promptless attach diff files directly in Slack threads, so you can review proposed changes without leaving Slack. If this permission isn’t granted, Promptless links to the dashboard instead.
The `links:read` and `links:write` permissions let Promptless render a preview card when someone shares a suggestion link in Slack. If `links:write` isn’t granted, the link posts as plain text with no preview card.
The `users:read.email` permission lets Promptless send a direct message to the person who submitted a documentation task through an MCP editor. The message goes out when their suggestion is ready for review. Without it, Promptless notifies the configured notification channel instead. If you connected Slack before this permission was added, see [Update Slack permissions](#update-slack-permissions) to add it.
4. Verify that Slack is connected in the integrations page.
### When admin approval is required
[Section titled “When admin approval is required”](#when-admin-approval-is-required)
Some Slack workspaces require an admin to approve apps before they can be installed. If you’re not a workspace admin, Slack sends your request to an admin instead of connecting Promptless right away.
1. **Submit the request**: Complete the Slack approval flow. Slackbot notifies you once an admin approves Promptless.
2. **Track your pending request**: Until approval comes through, Promptless shows a pending card with the time you made the request. Promptless can’t read the admin’s decision from your Slack workspace. Use **Check the status of your request** on the card to open Slack’s app-management page. There, confirm whether it’s been approved.
3. **Finish connecting**: Once an admin approves, return to Promptless and complete the connection.
## Update Slack permissions
[Section titled “Update Slack permissions”](#update-slack-permissions)
As Promptless adds Slack features, the app sometimes needs new permissions. A workspace you connected before a permission was introduced lacks that permission until you grant it.
Whenever your workspace is missing any bot permission Promptless currently requests, the Slack card on the [integrations page](https://app.gopromptless.ai/integrations) shows a **Grant additional Slack permissions** callout. The callout names each missing permission along with a short description of what it’s used for, and includes an **Update connection** button. Click **Update connection** to re-run Slack authorization, then approve the request in Slack. Your existing connection stays intact: Promptless swaps the stored token in place, so your channel memberships and configuration stay exactly as they were.
This callout is informational, since the connection already works and granting the permission only adds capability. A genuinely lapsed or rejected authorization is a different case: the card flags it as **Needs reconnect** instead. See [Connection health](/docs/for-docs/connect/connection-health) for that flow.
## What you can do with Slack
[Section titled “What you can do with Slack”](#what-you-can-do-with-slack)
Once connected, you can use Slack for:
* **[Triggers](/docs/for-docs/connect/triggers/slack-messages)**: Tag @Promptless or use message actions to trigger documentation updates
* **[Context Sources](/docs/for-docs/connect/context-sources)**: Search Slack conversations for team discussions and decisions
* **[Configuration](/docs/for-docs/get-the-most-out/ask-promptless-to-update-config)**: Ask Promptless to update your triggers, doc collections, and other configuration directly
## Privacy and channel access
[Section titled “Privacy and channel access”](#privacy-and-channel-access)
By default, Promptless only reads Slack content when you explicitly trigger it by tagging @Promptless or using the “Update Docs” message action. If you enable passive listening in your [configuration](/docs/for-docs/reference/configuration-reference#triggers), Promptless monitors only the specific channels you configure.
### Add Promptless to private channels
[Section titled “Add Promptless to private channels”](#add-promptless-to-private-channels)
Promptless cannot access private channels unless it has been specifically invited. To add Promptless to a private channel, tag `@Promptless` in that channel. Slack prompts you to invite the app. Inviting Promptless this way is also how the channel becomes available in dashboard channel pickers, such as when you choose a notification channel. You don’t need to refresh the Slack integration separately.
This is required if you want to:
* Use a private channel as your notification channel for suggestions
* Trigger Promptless from messages in a private channel
* Enable passive listening on a private channel
## Troubleshooting
[Section titled “Troubleshooting”](#troubleshooting)
### Private channels not listing
[Section titled “Private channels not listing”](#private-channels-not-listing)
A private channel may not appear when you’re choosing a notification channel or trigger source. If so, your Slack integration is likely missing the `groups:read` permission, which lets Promptless list private channels. This can happen if your workspace connected before Promptless requested `groups:read`, or is otherwise missing it. The Slack card shows a **Grant additional Slack permissions** callout naming `groups:read`.
To fix this, re-authorize the Slack integration:
1. Go to the [integrations page](https://app.gopromptless.ai/integrations).
2. On the Slack card, click **Update connection** in the **Grant additional Slack permissions** callout, which names the missing permission.
3. Approve the added permission in Slack.
Reconnecting keeps your workspace connected and preserves public-channel access throughout. After re-authorizing, Promptless can list private channels again. If issues persist, contact .
### Diff files not appearing in Slack threads
[Section titled “Diff files not appearing in Slack threads”](#diff-files-not-appearing-in-slack-threads)
If Promptless notifications appear in Slack but diff files aren’t attached, your Slack integration may be missing the `files:write` permission. This can happen if you connected Slack before this permission was added to the Promptless app.
To fix this, re-authorize the Slack integration:
1. Go to the [integrations page](https://app.gopromptless.ai/integrations).
2. On the Slack card, click **Update connection** in the **Grant additional Slack permissions** callout, which names the missing permission.
3. Approve the added permissions in Slack.
Reconnecting keeps your workspace connected while granting the missing permission. After re-authorizing, diff files appear as thread attachments. If issues persist, contact .
### Suggestion link previews not rendering in Slack
[Section titled “Suggestion link previews not rendering in Slack”](#suggestion-link-previews-not-rendering-in-slack)
If sharing a Promptless suggestion link in Slack posts as plain text instead of a preview card, your Slack integration may be missing the `links:write` permission. This can happen if you connected Slack before this permission was added to the Promptless app. The integrations page shows a **Grant additional Slack permissions** callout on the Slack card, naming the missing permission.
To fix this, re-authorize the Slack integration:
1. Go to the [integrations page](https://app.gopromptless.ai/integrations).
2. On the Slack card, click **Update connection** in the **Grant additional Slack permissions** callout, which names the missing permission.
3. Approve the added permissions in Slack.
Reconnecting keeps your workspace connected while granting the missing permission. After re-authorizing, shared suggestion links render as preview cards. If issues persist, contact .
### Direct-message notifications not arriving for MCP submitters
[Section titled “Direct-message notifications not arriving for MCP submitters”](#direct-message-notifications-not-arriving-for-mcp-submitters)
People who submit documentation tasks through an MCP editor might not receive a direct message when their suggestion is ready. One of two causes is usually behind it.
Your Slack integration may be missing the `users:read.email` permission. This can happen if you connected Slack before this permission was added to the Promptless app. To fix it, re-authorize the Slack integration:
1. Go to the [integrations page](https://app.gopromptless.ai/integrations).
2. On the Slack card, click **Update connection** in the **Grant additional Slack permissions** callout, which names the missing permission.
3. Approve the added permissions in Slack.
Reconnecting keeps your workspace connected while granting the missing permission. After re-authorizing, submitters receive direct-message notifications again when the missing permission was the cause.
Otherwise, the submitter’s Slack account email may not match their Promptless account email. That is the address shown as “Authorize as {email}” when they authorized the MCP connection. When the two differ, Promptless can’t identify the submitter’s Slack account and falls back to the configured notification channel. Reconnecting doesn’t resolve this: the submitter’s Slack account email and their Promptless account email must be the same address. If issues persist, contact .
For more details about using Slack with Promptless, see [Reviewing from Slack and Teams](/docs/for-docs/work-the-queue/reviewing-from-slack-and-teams).
# Manage environment variables
> Store credentials, API keys, and configuration values that Promptless uses when interacting with your systems, and mark sensitive values as secrets
Environment variables store credentials, API keys, and configuration values that Promptless uses when interacting with your systems. The most common use case is storing login credentials for [Promptless Capture](/docs/for-docs/get-the-most-out/screenshots) to capture product screenshots.
## Add environment variables
[Section titled “Add environment variables”](#add-environment-variables)
1. **Open Settings.** Navigate to the [Settings page](https://app.gopromptless.ai/settings) in your Promptless dashboard and select **Agent Env Vars**.
2. **Enter a key and value.** The **Add Variable** form sits on the page below your existing variables. Type a **Key Name** and a **Value**. Use clear, descriptive names that indicate the variable’s purpose.
3. **Mark sensitive values as secret.** For passwords, API keys, and other sensitive values, turn on the **Secret** toggle, which masks the **Value** field as you type.
4. **Submit the variable.** Click **Add Variable**. The new variable appears in the variables table above the form.
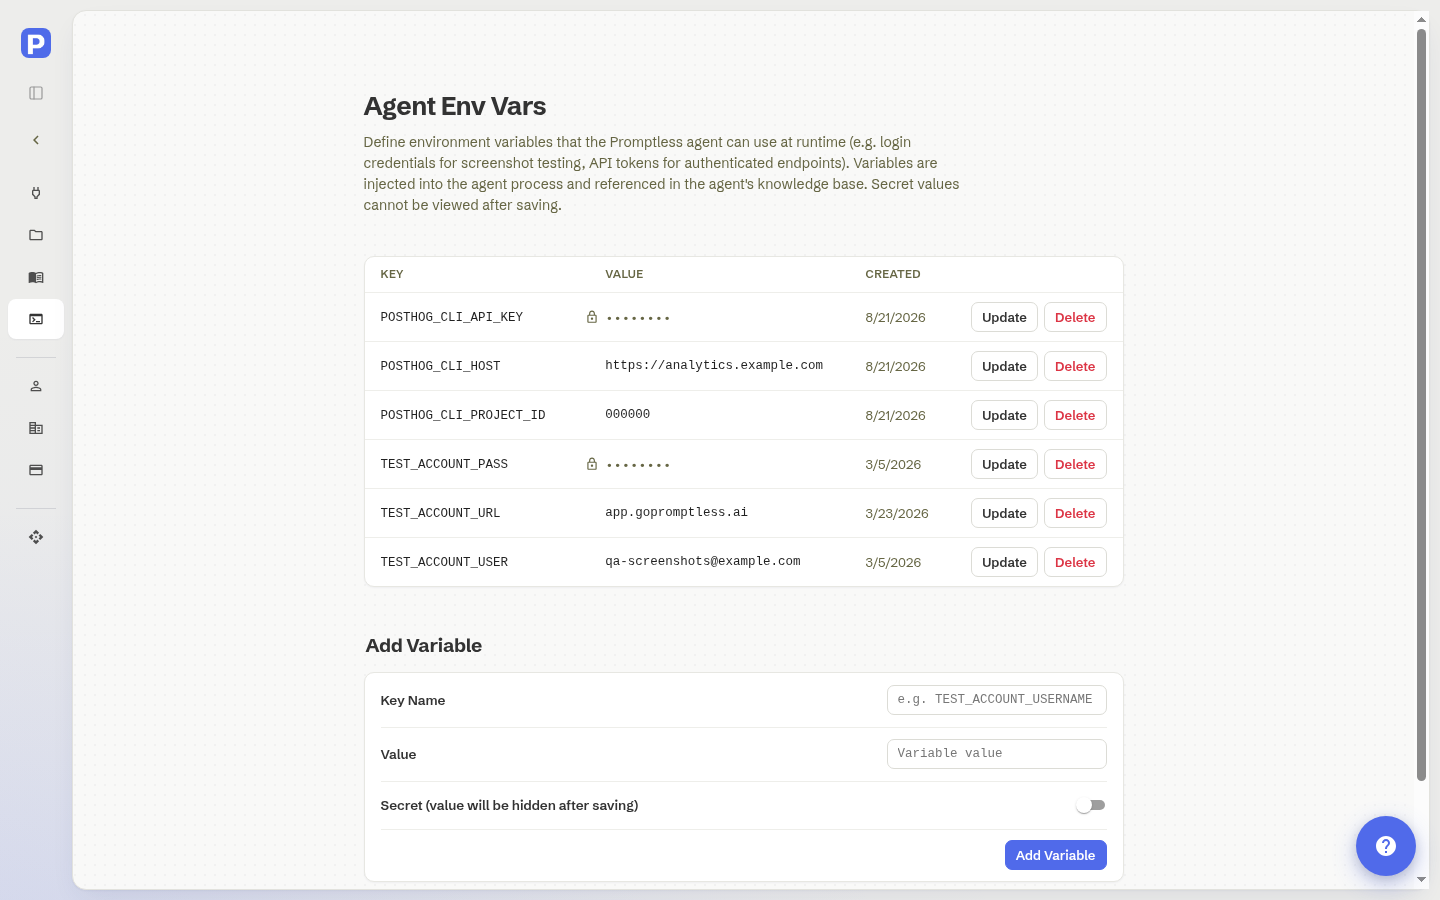
Agent Env Vars settings page
Note
Variable names are flexible. Use whatever naming convention fits your organization: `TEST_ACCOUNT_USER`, `QA_USERNAME`, `STAGING_LOGIN_EMAIL`, or any descriptive name that makes sense to your team.
## Keep secrets secure
[Section titled “Keep secrets secure”](#keep-secrets-secure)
Caution
Use dedicated test or service accounts for credentials rather than personal accounts. This ensures screenshots don’t contain personal data and provides consistent results.
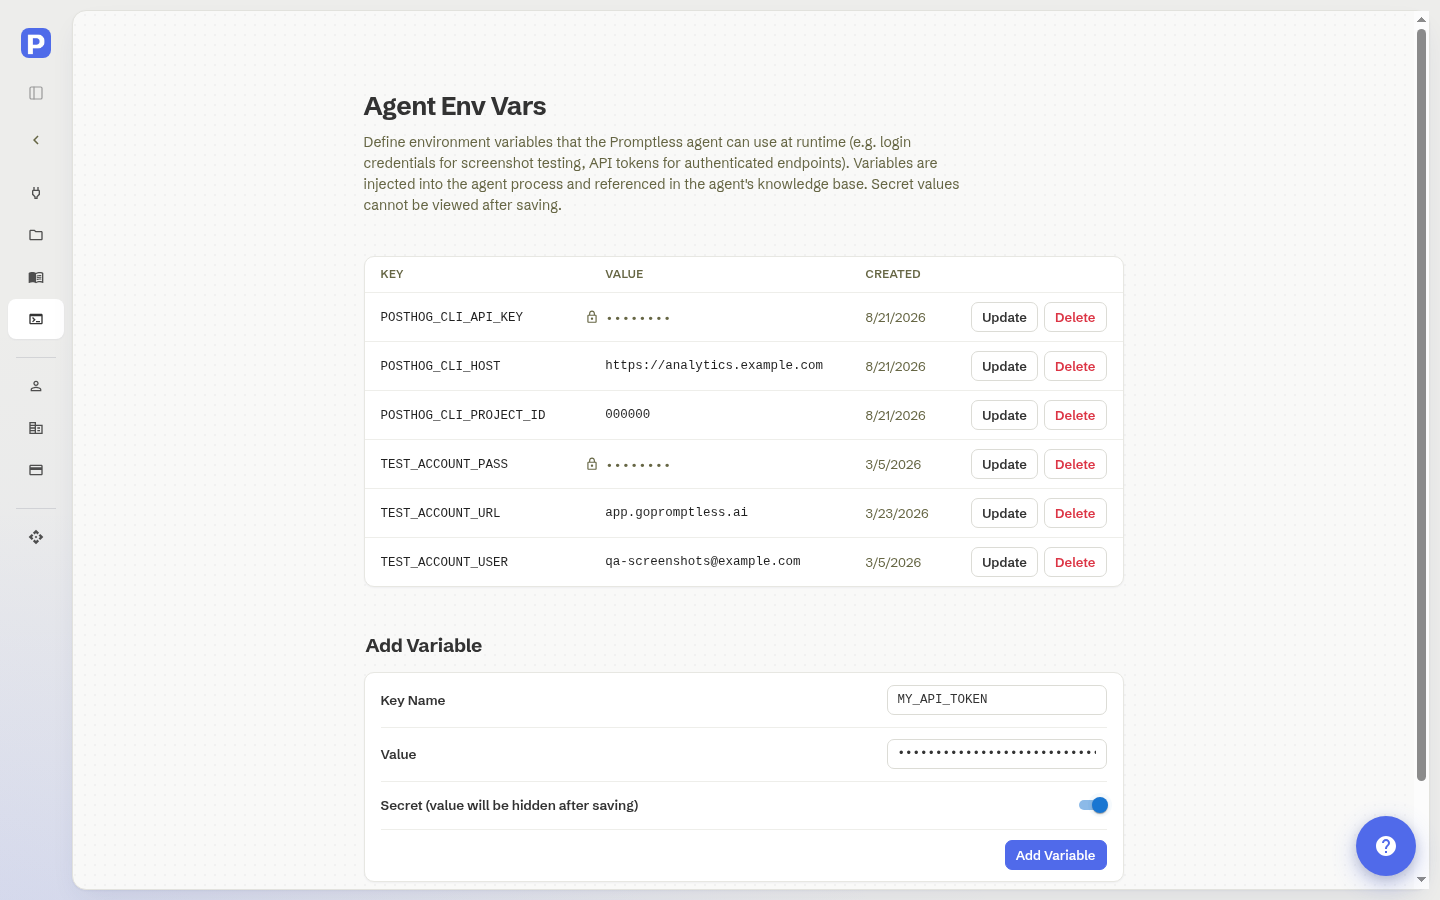
Adding a secret environment variable
Variables marked as secrets are encrypted and hidden in the dashboard after saving. Use this option for passwords, API keys, and other sensitive values.
## Example: Screenshot capture credentials
[Section titled “Example: Screenshot capture credentials”](#example-screenshot-capture-credentials)
For [Promptless Capture](/docs/for-docs/get-the-most-out/screenshots), add these variables to let Promptless log into your application:
| Variable | Example Value | Secret? |
| ------------------- | ----------------------------------- | ------- |
| `TEST_ACCOUNT_URL` | `https://app.yourcompany.com/login` | No |
| `TEST_ACCOUNT_USER` | `qa-screenshots@yourcompany.com` | No |
| `TEST_ACCOUNT_PASS` | `(your password)` | Yes |
Tip
Create a test account with access to all the features you want documented. If certain features require specific permissions or plan tiers, ensure your test account has the appropriate access level.
## Update and delete variables
[Section titled “Update and delete variables”](#update-and-delete-variables)
To update an existing variable, locate it in the variables table, click the **Update** button in the **Actions** column, edit the value, and click **Save**. For secret variables, re-enter the entire value, because Promptless doesn’t display the original.
To delete a variable, click the **Delete** button in its row of the **Actions** column. Deleted variables are immediately removed and are no longer available to the Promptless agent.
Need help? Contact us at .
# Route changes across multiple repos
> Structure doc collections and triggers so changes across many code repositories and organizations reach the right documentation, without cross-wiring your teams.
Tip
You can set this up by hand as this page describes, or ask Promptless in Slack or Microsoft Teams to do it for you. For example, “@Promptless route suggestions from my acme/api repo to the #api-docs channel.” See [Ask Promptless to update your configuration](/docs/for-docs/get-the-most-out/ask-promptless-to-update-config).
When organizations juggle a multitude of docs and code repositories, a few questions commonly come up. Which code repositories feed which doc sites? How do you keep one team’s changes out of another team’s docs? How do you work across several GitHub organizations at once? The answer to these questions is to scope each trigger to activate only on the changes that matter. You also give Promptless the context it can’t research, like your team preferences. This page shows how those pieces fit together across many repositories.
## One repository per doc collection
[Section titled “One repository per doc collection”](#one-repository-per-doc-collection)
Each doc collection is tied to a specific documentation repository. Each collection carries its own settings. These include where the repo lives, the docs framework it uses, its default branch, and where the docs are published. They also include any path scopes that limit which files Promptless can modify.
Promptless can publish to multiple doc collections at once, reusing the same trigger events and context sources across different doc sites. When a trigger is relevant to more than one doc collection, Promptless automatically identifies and suggests changes for all applicable docs across suggestions. Related docs stay in sync.
## Scope which triggers activate
[Section titled “Scope which triggers activate”](#scope-which-triggers-activate)
Routing across many repos comes down to activating the right triggers on the right changes. When you set up a trigger on the **Triggers** tab of the **Configuration** page, its filters scope what it watches. A change in one repo starts documentation work only where you’ve told it to:
* **Which repositories?** Choose **All repositories**, or pick **Specific repos**. This is the primary control over which repositories a trigger watches.
* **Skip these repositories**: repositories to leave out, useful when you watch **All repositories** but want to exclude a few.
* **Only repos owned by these accounts**: restrict a trigger to repositories owned by specific accounts (the `owner` segment of `owner/repo`).
* **Only repos tagged with these GitHub topics**: restrict a trigger to repositories carrying specific GitHub topics. You can opt repos in by topic rather than listing each one.
* **Only when files in these folders change**: activate only when a change touches specific folders. Unrelated changes in the same repo don’t start documentation work.
* **Only pull requests targeting these branches**: activate only for changes targeting specific branches.
Scoping a trigger limits which *code changes* start documentation work. No setting binds a trigger to a specific collection. Collection targeting is relevance-based, not a configured route. Team separation comes from configuring these levers yourself. Scope each team’s triggers to the repositories it owns. Use each collection’s **Only watch these folders** path scope to limit which files Promptless can modify. See the [Configuration Reference](/docs/for-docs/reference/configuration-reference) for the full trigger and doc-collection schema.
## Work across multiple GitHub organizations
[Section titled “Work across multiple GitHub organizations”](#work-across-multiple-github-organizations)
Connect multiple GitHub organizations to one Promptless account when your repositories span more than one org. After connecting the first organization, click **Connect another GitHub Org** on the [Integrations page](https://app.gopromptless.ai/integrations). Each organization appears as its own card with its own repository list and refresh and disconnect controls. When you create or edit projects, repositories from every connected organization appear in the dropdowns, shown as `organization/repository`. See the [GitHub integration](/docs/for-docs/reference/integrations/github) guide for details.
## See which collection a suggestion targeted
[Section titled “See which collection a suggestion targeted”](#see-which-collection-a-suggestion-targeted)
When suggestions span several collections, the suggestions list makes the target explicit. Each suggestion shows a **Docs target** chip with a document icon marking which doc collection it targets. Hover over the chip to see the full repository path, or click it to filter the list to suggestions targeting that collection. This is especially useful when your organization has multiple doc collections. See [Use the web interface](/docs/for-docs/work-the-queue/web-interface) for the rest of the suggestions list.
## Apply rules per collection
[Section titled “Apply rules per collection”](#apply-rules-per-collection)
Publishing and notification behavior can differ by collection. On the **Policies** tab, add a rule and set its **Doc collection** condition so the rule applies only to that collection. For example, route one collection’s announcements to a different **Slack channel for new suggestion announcements**. Or change **Open a pull request automatically** for its suggestions. When more than one rule matches, the later one wins, field by field. See the [Configuration Reference](/docs/for-docs/reference/configuration-reference#policies) for the policy schema.
## Set per-collection preferences in your Knowledge Base
[Section titled “Set per-collection preferences in your Knowledge Base”](#set-per-collection-preferences-in-your-knowledge-base)
A [policy rule](#apply-rules-per-collection) applies based only on a trigger and a doc collection, and it sets only notification, publishing, and archiving fields. Preferences that don’t fit those fields belong in `PROMPTLESS.md` and other files in your [Agent Knowledge Base](/docs/for-docs/get-the-most-out/agent-knowledge-base), which Promptless reads when performing documentation tasks. That’s where each team’s own conventions and exceptions live. It holds the judgment a policy rule has no field for.
In the left sidebar, open **Settings** and select **Agent Knowledge Base**. Open `PROMPTLESS.md` in the editor and click **Save**. The change commits directly to the repository. Organization admins edit these files, while other members have read-only access. If you’re not an admin, ask Promptless to make the change for you. It edits `PROMPTLESS.md` and commits the change.
The Knowledge Base is shared across your whole organization. Name the doc collection in each instruction to keep it scoped to that team’s docs. For example:
* “Customer-facing guides belong in `acme/docs`. Keep internal runbooks in `acme/internal-docs`.”
* “Treat `reference/` in `acme/docs` as generated. Its source of truth lives elsewhere, so leave those pages alone.”
* “Never revise a released changelog entry in `acme/docs`. Add a new entry instead.”
* “When `acme/api-docs` changes, check the authentication overview in `acme/docs` for staleness.”
Note
Knowledge Base instructions shape what the agent does and writes. Policy rules shape how the finished result is published and announced. A policy rule can’t stop a suggestion from being created. To prevent the work entirely, narrow the trigger scope instead.
# Route changes to the right doc version
> Route each change to the correct documentation version, whether your versions live on separate branches or in separate directories within one branch.
Tip
You can set this up by hand as this page describes, or ask Promptless in Slack or Microsoft Teams to do it for you. For example, “@Promptless set my acme/docs collection default branch to v2 and only trigger on PRs targeting v2.” See [Ask Promptless to update your configuration](/docs/for-docs/get-the-most-out/ask-promptless-to-update-config).
Teams that run more than one live version of their documentation need each change to reach the version it belongs to. Teams commonly version docs in two ways: each version on its own branch, or all versions in one branch in separate directories. Promptless works with both. This page shows how to route changes under each model, and how to steer directory-based routing with your Knowledge Base.
## Versions on separate branches
[Section titled “Versions on separate branches”](#versions-on-separate-branches)
When each version lives on its own branch, point a doc collection at the branch a version lives on. Scope your triggers to the branches you care about. Promptless then targets the right base branch automatically.
On the **Doc collections** tab, select the doc collection and expand **More filters (optional)**. The **Default branch** setting controls which branch Promptless targets for its pull requests. It defaults to the repository’s default branch, so set it to the branch where a version’s documentation lives. (In your promptless.yaml this is the `default_branch` field. See the [Configuration Reference](/docs/for-docs/reference/configuration-reference) for the full doc-collection schema.)
On the **Triggers** tab, open a GitHub pull requests trigger and expand **More filters (optional)**. Add the **Only pull requests targeting these branches** rule and list the version branches you want. That way, a change to one version doesn’t start documentation work for another. A GitHub commits trigger offers the same choice through its **Which branches?** field. Leave it empty to watch just the default branch. (These map to the per-trigger `branches` field in promptless.yaml, documented in the [Configuration Reference](/docs/for-docs/reference/configuration-reference#triggers).)
Base branch targeting is automatic. When a change comes from a non-default branch, Promptless opens the suggestion against that branch rather than the default. That’s exactly what you want when a change lands on a version branch. Open suggestion branches stay synced with their base branch while open, so a suggestion always builds on the latest documentation state.
## Versions in separate directories
[Section titled “Versions in separate directories”](#versions-in-separate-directories)
Some frameworks, like Docusaurus and Starlight, keep every version in one branch and split them into directories. Under this model, routing is about which *directory* a change lands in, not which branch.
Use the collection’s path scope to limit where Promptless works. On the **Doc collections** tab, expand **More filters (optional)** and set **Only watch these folders** (`filter` in promptless.yaml). It limits which files and folders Promptless may modify and accepts any directory prefix. You can scope Promptless to a single version directory like `versioned_docs/version-2.0/`, or to several. Note that it is include-only. There is no exclude or deny list, so “pointing away from” a directory means listing the directories you *do* want. See the [Configuration Reference](/docs/for-docs/reference/configuration-reference) for the doc-collection schema.
On the source side, the **Only when files in these folders change** trigger filter (`trigger_directories`) controls which directories must change to start documentation work. It filters where the change happened, not where Promptless writes. It does not choose the destination version directory.
There is no configuration field that maps a source change to a specific target version directory. Within one collection, which version directory Promptless edits is relevance-based. It reasons from the change and its context. You steer it with path scope (above) and Knowledge Base instructions (see the next section). Version-directory targeting isn’t automatic the way branch base-targeting is. Each suggestion is a proposed change you review before merging. You can confirm it landed in the right version directory from the suggestion’s file changes before approving it.
Each repository can have at most one doc collection, so you can’t create a separate collection per version directory. All of a repo’s version directories share one collection. (That’s why steering it matters.) If your versions are spread across repositories instead, see [Route changes across multiple repos](/docs/for-docs/scale/multi-repo-routing).
## Steer version routing in your Knowledge Base
[Section titled “Steer version routing in your Knowledge Base”](#steer-version-routing-in-your-knowledge-base)
Because directory targeting is relevance-based, your lever is `PROMPTLESS.md` in your [Agent Knowledge Base](/docs/for-docs/get-the-most-out/agent-knowledge-base). Tell it which directory holds the current version and which directories hold frozen releases so it edits the right one. For example:
* “In `acme/docs`, the current version lives in `docs/`. Older versions in `versioned_docs/` are frozen. Leave them alone unless I say otherwise.”
* “Apply changes to the latest version directory, `versioned_docs/version-3.0/`. Don’t touch released version directories.”
* “When both the current and a supported LTS version are affected, update `docs/` and `versioned_docs/version-2.0/` and note the LTS edit in the suggestion.”
Note
Promptless has no dedicated “version” concept and models versions as the branches or directories your docs already live in. For separate branches, base-branch routing is automatic. For separate directories, targeting is relevance-based, so limit it with path scope and steer it with Knowledge Base instructions.
# Access and permissions
> How Promptless keeps access least-privilege: what it reads versus writes, how to scope each connection, the read-only options available, and how to revoke access.
Promptless connects to the tools your team already uses, so a security review asks what it can reach and how far that access goes. Promptless follows the principle of least privilege: every connection grants only the access the job needs. Most of it is read-only, and you can scope or revoke it at any time. This page describes that posture and links to the detailed security and integration pages.
## What Promptless reads versus writes
[Section titled “What Promptless reads versus writes”](#what-promptless-reads-versus-writes)
Promptless reads almost everything it touches. The one place it writes is your documentation repository, and even there its reach is limited.
* **Context sources are read-only.** Integrations like Jira, Linear, Confluence, Notion, Google Drive, and Slite give Promptless read-only access to inform suggestions. The connection is one-way: Promptless reads to gather context but never writes back, so your tickets, issues, and pages stay unchanged.
* **Source code is read-only.** Where Promptless reads source for context (for example, GitLab merge requests), it performs only read operations. It never pushes code or modifies those projects. The one exception is a repository you configure as a documentation destination, covered in the next point.
* **Documentation repositories need write access.** To publish, Promptless opens pull requests against a GitHub docs repository or merge requests against a GitLab docs project, which requires write access there. A GitLab project configured as a documentation destination is written to the same way a GitHub docs repo is. Promptless pushes a branch and opens a merge request. Path scope limits that write access (see below). By default you review every pull or merge request before it merges. The exception is [`auto_merge`](/docs/for-docs/reference/configuration-reference#policies): when you enable it in a publishing policy, Promptless merges its own changes without review.
Promptless also stores very little. It keeps the feedback you give it and integration auth tokens, but not the content behind those tokens. It processes source code, support conversations, and context-source data in real time without retaining a copy. It does not use customer data to train or fine-tune models. See [Data handling and classification](/docs/for-docs/security/data-handling-and-classification) for the full breakdown.
## Scope each connection
[Section titled “Scope each connection”](#scope-each-connection)
Every integration is limited to what you authorize, and each one gives you a way to keep that scope tight.
* **Repositories:** During GitHub installation, grant only the repositories Promptless needs by choosing **Only select repositories** rather than **All repositories**. For per-provider access detail, see the [GitHub](/docs/for-docs/reference/integrations/github), [GitHub Enterprise](/docs/for-docs/reference/integrations/github-enterprise), [Bitbucket](/docs/for-docs/reference/integrations/bitbucket), and [GitLab](/docs/for-docs/reference/integrations/gitlab) integration pages.
* **Context sources:** Because these connect through OAuth, Promptless inherits the permissions of the account that authorized the connection. It searches only the projects, spaces, or drives you configure. The most prescriptive approach is a dedicated service account that you share only the specific drives and folders with. Connecting through that account rather than a broadly privileged individual limits Promptless to exactly what you share.
## Read-only options
[Section titled “Read-only options”](#read-only-options)
Where you don’t need Promptless to publish, you can keep the connection read-only:
* **Read-only GitHub app.** For public repositories, the read-only GitHub app opens documentation pull requests from a fork instead of taking write access to your repo. See the [GitHub (read-only) integration](/docs/for-docs/reference/integrations/github-read-only).
* **Read-only vs. write choice.** When setting up a Bitbucket project, you choose whether Promptless has read-only or write access to your documentation repositories.
* **GitLab has no read-only option.** The same `api`-scoped group access token serves reads and writes. Limit its reach by scoping it to a group or subgroup containing only documentation projects. See [Token scope considerations](/docs/for-docs/reference/integrations/gitlab#token-scope-considerations).
## Limit where Promptless can write
[Section titled “Limit where Promptless can write”](#limit-where-promptless-can-write)
Even with write access to a docs repository, path scope limits which files Promptless can change. When you specify directories during doc collection setup, Promptless modifies only files that match one of those paths or are nested inside them. It rejects any suggestion that reaches outside that scope with an error listing the out-of-scope files. This confines writes to your documentation area, which is useful for monorepos where docs live beside source code. See [GitHub repos (docs as code)](/docs/for-docs/connect/doc-locations/github-repos) and [GitLab projects (docs as code)](/docs/for-docs/connect/doc-locations/gitlab-projects) for details.
## Revoke or rotate access
[Section titled “Revoke or rotate access”](#revoke-or-rotate-access)
Access is never permanent. Either you or Promptless can revoke the GitHub App connection at any time. You can also rotate or remove provider tokens, such as a Bitbucket app password or a GitLab group access token, on the provider side.
## Roles inside Promptless
[Section titled “Roles inside Promptless”](#roles-inside-promptless)
Role-based access control governs access to Promptless itself. Promptless supports three roles with different levels of access:
* **Admin**: full access to organization settings, team management, integrations, projects, and all suggestions, including the Agent Knowledge Base.
* **Editor**: can edit suggestions and create tasks, but cannot manage organization settings, integrations, or team members.
* **Collaborator**: can view suggestions and leave feedback comments, but cannot edit or modify them.
For sign-in and identity controls, see [Single sign-on (SSO) setup](/docs/for-docs/security/single-sign-on) and [Data handling and classification](/docs/for-docs/security/data-handling-and-classification). Multi-tenant isolation, encryption, and the broader security model are covered in [Network architecture](/docs/for-docs/security/network-architecture) and [Compliance and certifications](/docs/for-docs/security/compliance-and-certifications).
# Compliance and certifications
> Review Promptless's SOC 2 Type II certification, security practices, and incident response for your security review.
This page covers Promptless’s compliance certifications, security practices, and incident response procedures.
## SOC 2 compliance
[Section titled “SOC 2 compliance”](#soc-2-compliance)
Promptless maintains SOC 2 Type II certification. Our SOC 2 report covers:
* Security controls and access management
* Data encryption practices
* Incident response procedures
* Change management processes
* Monitoring and logging capabilities
To request a copy of our SOC 2 report, contact us at .
## Penetration testing
[Section titled “Penetration testing”](#penetration-testing)
Promptless conducts annual third-party penetration tests performed by independent security firms. These assessments evaluate our infrastructure, application security, and data protection controls.
Penetration test summary reports are available to enterprise customers upon request. Contact for more information.
## Security incident notification
[Section titled “Security incident notification”](#security-incident-notification)
If a security incident affects customer data, Promptless follows this notification process:
* **Notification timing**: Customers are notified within 72 hours of confirming an incident affects their data
* **Notification recipients**: Security notifications are sent to organization administrators and any designated security contacts on file
* **Notification content**: Includes a description of the incident, affected data, remediation steps taken, and recommended actions
To add additional security contacts (such as a security team email address) for incident notifications, contact .
## Audit logging
[Section titled “Audit logging”](#audit-logging)
Promptless provides audit logging for enterprise customers. Audit logs capture security-relevant events including:
* User authentication events
* Administrative actions (team member changes, role modifications)
* Integration configuration changes
* API key creation and revocation
Enterprise customers can request audit log exports by contacting . Logs are available in standard formats for integration with SIEM tools.
## Session management
[Section titled “Session management”](#session-management)
Session management varies based on your authentication method:
* **Enterprise SSO (SAML/OIDC)**: Session duration and timeout policies are controlled by your identity provider. Configure session expiry, idle timeouts, and re-authentication requirements in your IdP settings.
* **Standard authentication (Google/GitHub SSO)**: Session management is handled by the authentication provider. Contact for details on session timeout behavior.
For organizations requiring specific session timeout policies (such as 24-hour expiry), configure these settings in your identity provider when using enterprise SSO.
## Questions about compliance?
[Section titled “Questions about compliance?”](#questions-about-compliance)
For questions about our compliance practices, contact our team at . Use the same address to request compliance documentation. For specific security requirements, contact .
# Data handling and classification
> See what data Promptless stores, what it only processes, and how data minimization keeps sensitive end-user data out of scope.
Promptless is designed with data minimization in mind. We only store what’s necessary to provide our documentation automation service, which keeps Promptless’s risk level at a minimum. This page explains how we handle your data when you use Promptless.
## Data classification
[Section titled “Data classification”](#data-classification)
| Data Category | Promptless Handling | Description |
| ---------------------------- | --------------------- | -------------------------------------------------------------------------------------------------------------------------------------------------------------------------------- |
| Documentation Copies | Stored by Promptless | Public documentation copies for automation and change tracking |
| Third-party Integration Data | Processed, not stored | Promptless can be triggered by third-party tools, and processes data to provide services. It does not store any data beyond the duration needed to provide documentation updates |
| End-user Data | Not Processed | Sensitive end-user data is not processed or stored |
### Data that Promptless stores
[Section titled “Data that Promptless stores”](#data-that-promptless-stores)
Promptless stores minimal data, and otherwise operates in a stateless manner to avoid storing any data that is not necessary to provide the service.
* **Documentation Copies**: Promptless stores copies of your documentation to enable our automation features and track changes. This documentation is typically public, and so is generally not considered sensitive data.
* **Feedback for Promptless**: Promptless stores feedback that you provide to it about the quality of documentation updates. This can take the form of edits that you’ve made to Promptless suggestions, or direct feedback you’ve made on the Promptless dashboard.
* **Integration Auth Data**: When you link Promptless to a third party tool, we store the data necessary to integrate with that tool. This typically includes an authentication token, not the actual content of the data from the third party tool.
### Data that Promptless processes, but does not store
[Section titled “Data that Promptless processes, but does not store”](#data-that-promptless-processes-but-does-not-store)
Promptless users can integrate Promptless’s services with a number of third party tools. These integrations automatically trigger documentation updates or provide additional context for documentation updates. This data is used to provide the Promptless service, and is not stored by Promptless. **Promptless does not retain a copy of customer source code, support conversations, or any other data from third party integrations.**
For example:
* When a GitHub PR triggers a documentation check, we analyze the changes in real-time without storing the PR content
* When using Slack integration, we process conversations to identify documentation needs but don’t maintain copies of the conversations
* When accessing context from tools like Linear or Jira, we only use the information to inform documentation updates at the time of generation. We don’t store a copy of issues or projects
**Note:** Promptless does not use customer data for pre-training or fine-tuning language models.
### Data that Promptless does not process
[Section titled “Data that Promptless does not process”](#data-that-promptless-does-not-process)
* **End-user data**: Promptless is not configurable to process or store sensitive end-user data for your organization.
## User authentication and access controls
[Section titled “User authentication and access controls”](#user-authentication-and-access-controls)
### Standard authentication features
[Section titled “Standard authentication features”](#standard-authentication-features)
Our platform provides strong authentication mechanisms for all users:
* SSO with Google or GitHub supported for all users
* Strong password policies enforcing complexity requirements
* Two-factor authentication (2FA) support using industry-standard TOTP
* Password reset workflows with secure verification
### Enterprise authentication features
[Section titled “Enterprise authentication features”](#enterprise-authentication-features)
Enterprise plan customers receive access to advanced authentication capabilities:
* Single Sign-On (SSO) integration supporting major identity providers
* SAML 2.0 support with:
* Just-in-time user provisioning
* Role mapping
* Certificate-based authentication
* OpenID Connect (OIDC) compatibility for modern authentication workflows
* Custom MFA policies and enforcement
## Data security
[Section titled “Data security”](#data-security)
### Encryption standards
[Section titled “Encryption standards”](#encryption-standards)
* All data in transit is encrypted using TLS 1.2 or higher, ensuring secure communication between all system components
* Data at rest (both in primary data stores and secondary backups) is protected using AES-256 encryption. Keys are managed through a secure key management system
* Backup data is encrypted using independent encryption keys for additional security
## Enterprise security support
[Section titled “Enterprise security support”](#enterprise-security-support)
Enterprise customers may request additional security features and support, such as custom data retention policies.
## Questions about data handling?
[Section titled “Questions about data handling?”](#questions-about-data-handling)
If you have specific questions about how we handle data or need more information, please contact us at .
Promptless implements comprehensive security measures to protect customer data and ensure secure access to our platform. Our multi-layered approach to security encompasses data encryption, access controls, and strong authentication mechanisms.
# How Promptless uses AI
> How Promptless uses AI to generate documentation, including its default and enterprise model options, no training on customer data, real-time processing without retention, and self-hosting.
Note
This page describes how Promptless uses AI in its cloud offering. For self-hosted deployments, AI usage is configured to fit your environment, often using your own AI setups or customer-managed model deployments. The specifics are established together with the Promptless team. See [self-hosting](/docs/for-docs/security/self-hosting) for details.
Promptless uses AI language models to generate documentation suggestions for your team. This page explains how Promptless uses AI and how it protects customer data throughout that process. Each point links to the security page where it is documented in full.
## Which AI models Promptless uses
[Section titled “Which AI models Promptless uses”](#which-ai-models-promptless-uses)
The default configuration for cloud-hosted customers uses AWS Bedrock. Promptless is built on a model-agnostic architecture that works with a variety of models. The final choice of model will be determined by you and the Promptless team during onboarding. For the full list of AI infrastructure providers, see [subprocessors](/docs/for-docs/security/subprocessors).
## Promptless does not train models on your data
[Section titled “Promptless does not train models on your data”](#promptless-does-not-train-models-on-your-data)
Regardless of model choice, Promptless does not use customer data for pre-training or fine-tuning language models. Your content is used solely to generate your documentation suggestions. On the default AWS Bedrock path, model providers do not have access to your prompts or completions. Your content is not available to them to train their models. For more detail, see [privacy policy](/docs/for-docs/security/privacy-policy) and [subprocessors](/docs/for-docs/security/subprocessors).
## Promptless processes trigger and integration data in real time and doesn’t store it
[Section titled “Promptless processes trigger and integration data in real time and doesn’t store it”](#promptless-processes-trigger-and-integration-data-in-real-time-and-doesnt-store-it)
A GitHub PR trigger, a Slack thread, or a context source such as Linear or Jira can drive a documentation update. Promptless processes that content in real time to generate suggestions and then discards it. Promptless does not retain a copy of source code, support conversations, or other integration data. For more detail, see [data handling and classification](/docs/for-docs/security/data-handling-and-classification) and [privacy policy](/docs/for-docs/security/privacy-policy).
## What Promptless stores
[Section titled “What Promptless stores”](#what-promptless-stores)
Promptless stores minimal data and otherwise operates in a stateless manner:
* Copies of your documentation, which is typically public.
* Feedback you provide about the quality of documentation updates.
* Integration auth tokens, not the content behind them.
For more detail, see [data handling and classification](/docs/for-docs/security/data-handling-and-classification).
## Promptless does not process end-user data
[Section titled “Promptless does not process end-user data”](#promptless-does-not-process-end-user-data)
Promptless is not configurable to process or store sensitive end-user data for your organization. For more detail, see [data handling and classification](/docs/for-docs/security/data-handling-and-classification).
## Least-privilege access to your tools
[Section titled “Least-privilege access to your tools”](#least-privilege-access-to-your-tools)
Promptless follows the principle of least privilege:
* Context sources are read-only, and you control the integration scope, so Promptless accesses only the repositories, channels, or projects that you configure.
* For especially security-conscious setups, you can connect context sources through a dedicated service account rather than a broadly privileged individual’s. Share only the specific projects, drives, or folders it needs, limiting Promptless to exactly what you share.
* The one exception is your documentation repository, where Promptless opens pull requests, limited to the documentation paths you configure.
* If you prefer not to grant write access at all, read-only options are available. One is a read-only GitHub app that opens pull requests from a fork. The other is a read-only GitLab token.
* Access can be revoked or rotated at any time.
* Your data is isolated per organization. Every record is tagged with an organization ID and queries are scoped to that organization, so there are no shared data contexts between customers. See [network architecture](/docs/for-docs/security/network-architecture) for the multi-tenant security model.
* Inside Promptless, role-based access control enforces three roles: Admin, Editor, and Collaborator.
For more detail, see [access and permissions](/docs/for-docs/security/access-and-permissions).
## Encryption
[Section titled “Encryption”](#encryption)
Data in transit is encrypted using TLS 1.2 or higher, and data at rest is protected using AES-256 encryption. For more detail, see [network architecture](/docs/for-docs/security/network-architecture).
## Enterprise and self-hosting options
[Section titled “Enterprise and self-hosting options”](#enterprise-and-self-hosting-options)
Enterprise customers can self-host Promptless or use customer-managed model deployments so external AI providers never process your content. Self-hosting keeps all data within your own environment. For more detail, see [self-hosting](/docs/for-docs/security/self-hosting) and [subprocessors](/docs/for-docs/security/subprocessors).
# Network architecture
> Review the cloud network architecture, security controls, and redundancy behind Promptless.
Promptless uses a secure, modern cloud-based network architecture designed for reliability, security, and scalability. Our infrastructure is built on industry-leading cloud platforms with multiple layers of security controls and redundancy.
## Infrastructure overview
[Section titled “Infrastructure overview”](#infrastructure-overview)
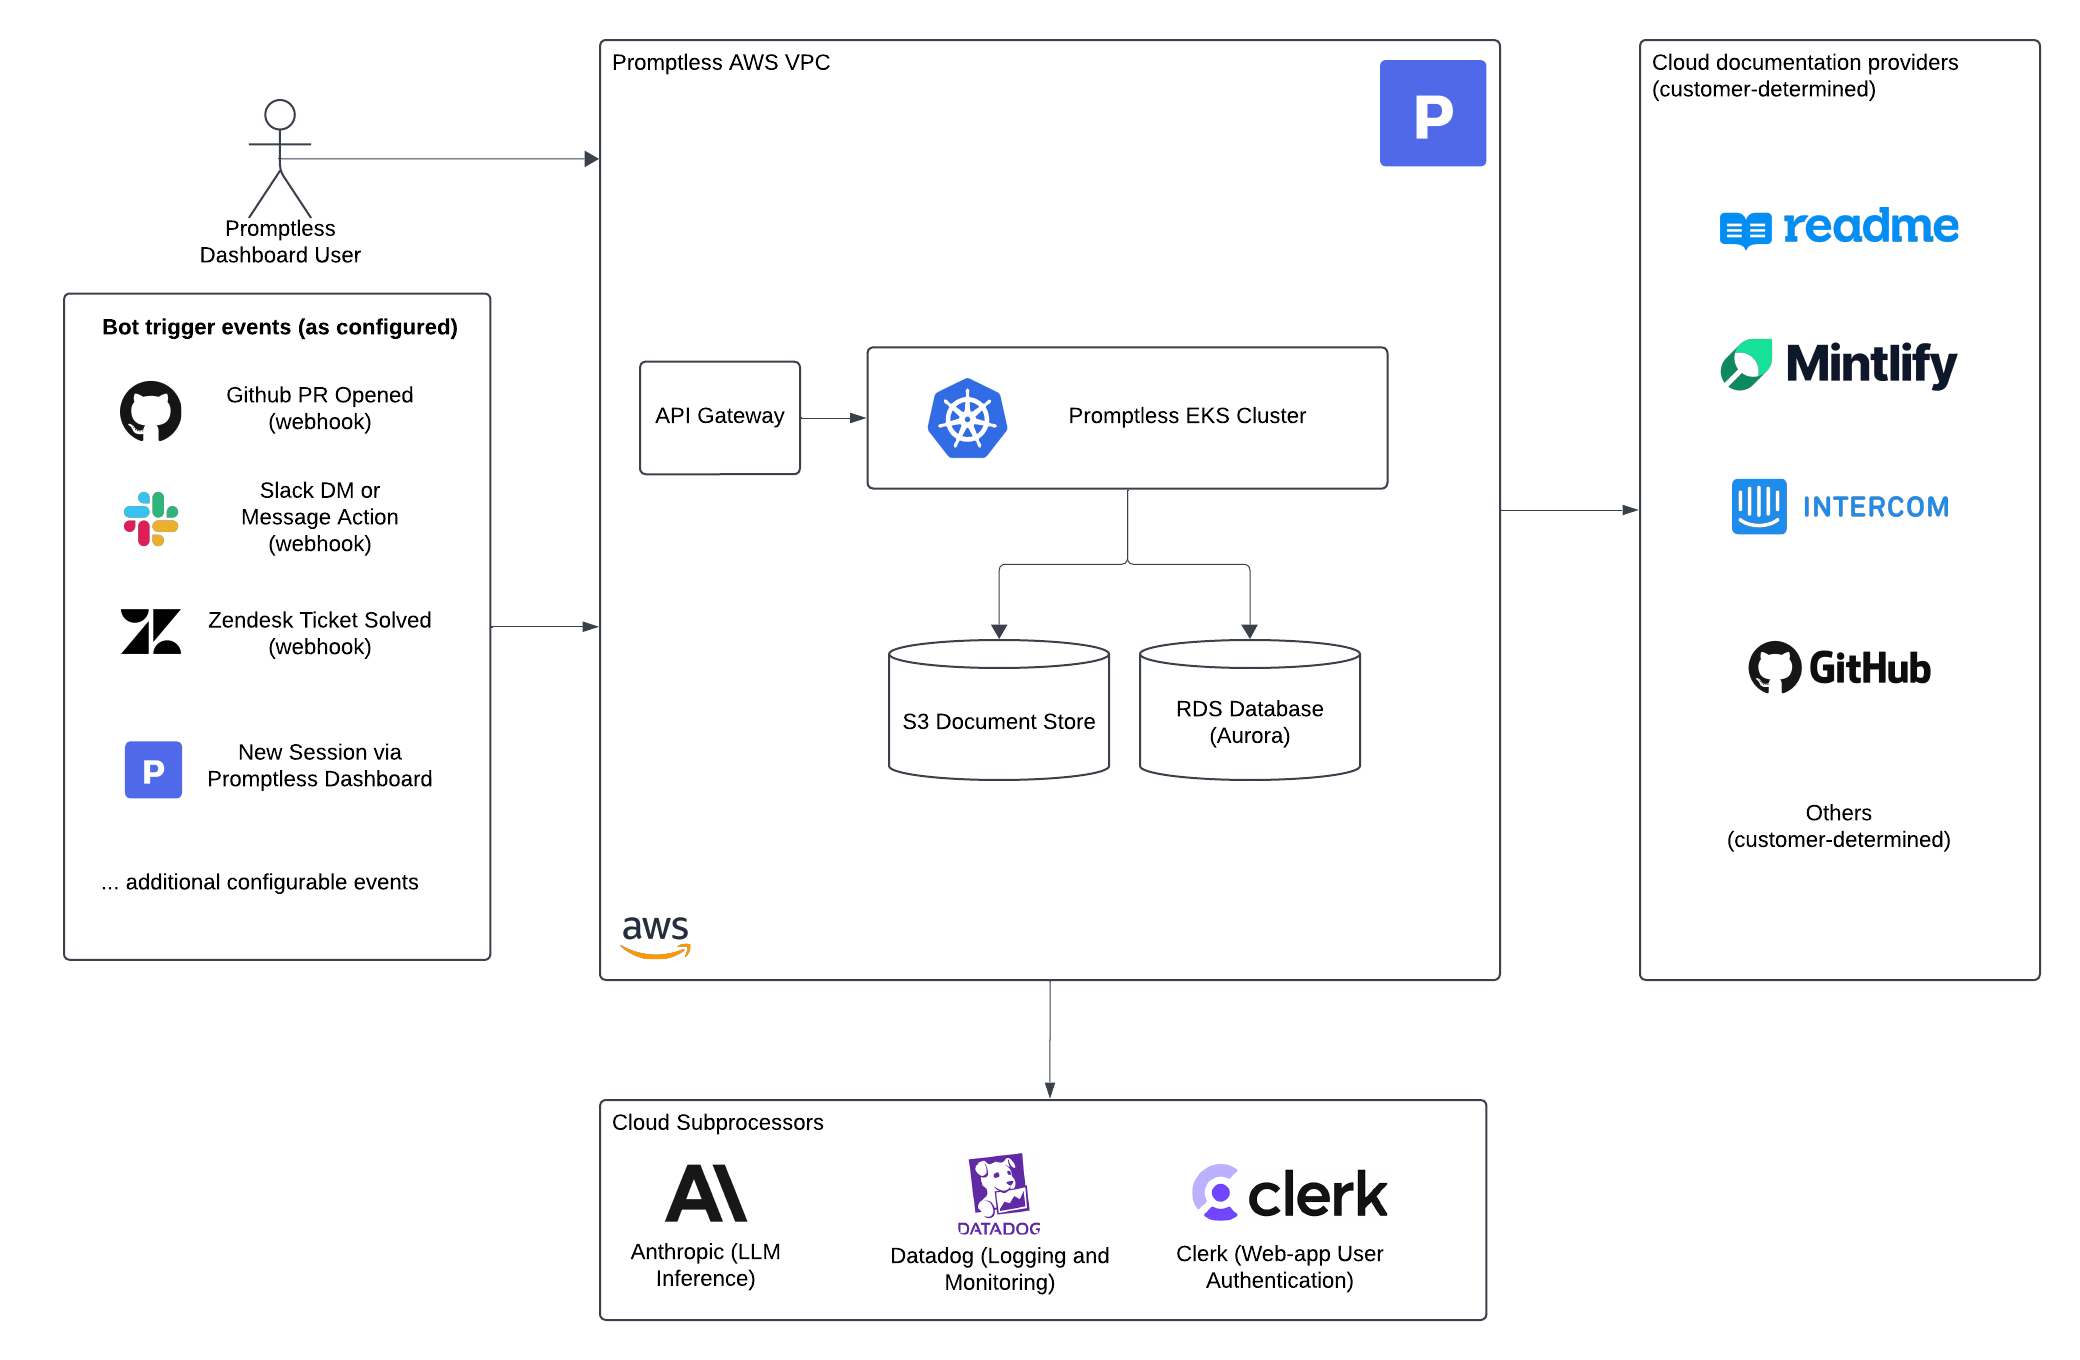
Promptless Network Architecture
Our infrastructure is designed with the following key principles:
* Security by design at every layer
* High availability and fault tolerance
* Scalability and performance optimization
* Comprehensive monitoring and observability
## Multi-tenant security model
[Section titled “Multi-tenant security model”](#multi-tenant-security-model)
Promptless uses a strong logical separation model for multi-tenant data security:
### Organization-level isolation
[Section titled “Organization-level isolation”](#organization-level-isolation)
* Every piece of data (users, suggestions, trigger events, etc.) is tagged with a specific organization ID
* All database queries are automatically scoped to the requesting organization
* Authorization mechanisms prevent cross-organization data access
* No shared data contexts between different customer organizations
Promptless’s shared infrastructure provides increased scalability and security. It reduces the number of infrastructure assets that need to be tracked and maintained. It also decreases the number of data access points across the system.
## Key security measures
[Section titled “Key security measures”](#key-security-measures)
While we can’t highlight all of Promptless’s security measures here, we’ve highlighted some of the key ones below:
* Data encryption in transit: All data at rest is encrypted using TLS 1.2 or later.
* Data encryption at rest: Data stored in Promptless’s database is encrypted with AES-256.
* Data access controls: We use a combination of access controls, including role-based access control (RBAC). These ensure that only authorized users have access to sensitive data.
* Principle of least privilege: We only give users the minimum permissions they need for their role.
* Logical separation of data: All data is tagged with customer identifiers, to ensure multiple layers of logical separation between Promptless users
For more detailed information about our network architecture or to discuss specific security requirements, please contact our security team at .
# Privacy policy
> How Promptless handles your data, why it does not store your source code or conversations, and why it does not train models on your content.
Promptless is designed with data minimization in mind. We access only what we need, when we need it, and we don’t store what we don’t need. This page explains our approach to privacy and how we handle your data.
## Our privacy principles
[Section titled “Our privacy principles”](#our-privacy-principles)
### We don’t store your source code or conversations
[Section titled “We don’t store your source code or conversations”](#we-dont-store-your-source-code-or-conversations)
When Promptless analyzes a GitHub PR or Slack thread, we process that content in real-time to generate documentation suggestions, then discard it. We don’t retain copies of your source code, support conversations, Jira tickets, or other integration data.
### We don’t train models on your data
[Section titled “We don’t train models on your data”](#we-dont-train-models-on-your-data)
Promptless does not use your content for pre-training or fine-tuning language models. Your code, documentation, and conversations are used solely to generate your documentation suggestions.
### We store only what’s necessary
[Section titled “We store only what’s necessary”](#we-store-only-whats-necessary)
The data we store is limited to what’s required to operate the service:
* **Documentation copies** for tracking changes and generating updates
* **Feedback you provide** to improve suggestion quality
* **Integration credentials** to connect with your tools
### Your data is encrypted
[Section titled “Your data is encrypted”](#your-data-is-encrypted)
All data in transit is encrypted using TLS 1.2 or higher. Data at rest is protected using AES-256 encryption.
### You control the integration scope
[Section titled “You control the integration scope”](#you-control-the-integration-scope)
Promptless only accesses the specific repositories, channels, or projects you configure. We don’t request broad organizational access. You choose exactly which resources Promptless can see.
## Enterprise privacy options
[Section titled “Enterprise privacy options”](#enterprise-privacy-options)
Organizations with stricter requirements can deploy Promptless on their own infrastructure. Self-hosting provides complete data control with no data leaving your environment.
Enterprise customers can also use customer-managed model deployments, ensuring your content is never processed by external AI providers.
## Complete privacy policy
[Section titled “Complete privacy policy”](#complete-privacy-policy)
For the full legal privacy policy covering data collection, retention, cookies, and your rights, see the [Promptless Privacy Policy](https://promptless.ai/privacy).
## Questions about privacy?
[Section titled “Questions about privacy?”](#questions-about-privacy)
For questions about our privacy practices or to exercise your data rights, contact us at .
# Self-hosting overview
> Deploy Promptless on your own infrastructure for enhanced security, compliance, and control
Caution
**Enterprise Only**: Self-hosting is only available for Enterprise customers. [Contact us](mailto:hello@gopromptless.ai) to discuss your self-hosting requirements and get access.
# Self-hosting overview
[Section titled “Self-hosting overview”](#self-hosting-overview)
Self-hosting Promptless allows you to deploy the platform on your own infrastructure, giving you complete control over your data, security, and compliance requirements. This is ideal for organizations with strict data governance policies or regulatory compliance needs. It also suits those who prefer to maintain full control over their documentation automation infrastructure.
## Why self-host Promptless?
[Section titled “Why self-host Promptless?”](#why-self-host-promptless)
Self-hosting Promptless provides several key benefits for enterprise organizations:
### Data sovereignty & security
[Section titled “Data sovereignty & security”](#data-sovereignty--security)
* **Complete Data Control**: Your documentation, code analysis, and generated content never leaves your infrastructure
* **Enhanced Security**: Deploy within your existing security perimeter with your own authentication systems
* **Compliance Ready**: Meet strict regulatory requirements like HIPAA, SOC 2, GDPR, or FedRAMP
* **Air-Gapped Deployments**: Support for completely isolated environments without external access
### Customization & integration
[Section titled “Customization & integration”](#customization--integration)
* **Custom Authentication**: Integrate with your existing SAML, OIDC, or Active Directory systems
* **Network Integration**: Deploy within your VPC with custom networking and security groups
* **Resource Control**: Scale compute and storage resources based on your specific needs
* **Custom LLM Models**: Use your own fine-tuned models or private LLM deployments
### Operational control
[Section titled “Operational control”](#operational-control)
* **Deployment Flexibility**: Choose your preferred cloud provider or on-premises infrastructure
* **Maintenance Windows**: Control when updates and maintenance occur
* **Monitoring Integration**: Use your existing observability and alerting systems
* **Backup Strategies**: Implement your organization’s backup and disaster recovery policies
## Current self-hosting options
[Section titled “Current self-hosting options”](#current-self-hosting-options)
### Kubernetes + Helm (recommended)
[Section titled “Kubernetes + Helm (recommended)”](#kubernetes--helm-recommended)
Our primary self-hosting solution uses Kubernetes and Helm charts, providing:
* **Production-Ready**: Battle-tested deployment patterns with comprehensive configuration options
* **Scalable Architecture**: Microservices design that scales with your organization’s needs
* **Infrastructure as Code**: Everything parameterized through `values.yaml` with no chart modifications needed
* **Enterprise Features**: Built-in support for high availability, monitoring, and security best practices
**Supported Platforms:**
* AWS EKS (primary support with detailed guides)
* Google GKE (community supported)
* Azure AKS (community supported)
* On-premises Kubernetes (community supported)
[Kubernetes Deployment Guide](/docs/for-docs/security/self-hosting/kubernetes-helm)Complete installation guide for deploying Promptless on Kubernetes using Helm charts
### Alternative deployment options
[Section titled “Alternative deployment options”](#alternative-deployment-options)
While Kubernetes + Helm is our recommended and fully supported option, we understand that different organizations have different infrastructure preferences and requirements.
**Need Something Different?**
If Kubernetes doesn’t fit your infrastructure requirements, we can work with you to explore alternative deployment options:
* **Docker Compose**: For simpler deployments or development environments
* **VM-based Deployments**: Traditional server deployments with systemd services
* **Container Platforms**: OpenShift, Rancher, or other container orchestration platforms
* **Cloud-Native Services**: Serverless or managed service deployments
* **Hybrid Deployments**: Combining cloud and on-premises components
Note
Alternative deployment options require custom engineering work and are available as part of our Enterprise support packages. [Contact our team](mailto:hello@gopromptless.ai) to discuss your specific requirements and timeline.
## Getting started
[Section titled “Getting started”](#getting-started)
### Prerequisites for self-hosting
[Section titled “Prerequisites for self-hosting”](#prerequisites-for-self-hosting)
Before beginning a self-hosted deployment, ensure you have:
1. **Enterprise License**: Self-hosting is available exclusively for Enterprise customers
2. **Infrastructure Access**: Administrative access to your target deployment environment
3. **Technical Expertise**: Kubernetes/infrastructure experience or dedicated DevOps resources
4. **Security Review**: Completed security and compliance review of the deployment architecture
[Contact Sales](mailto:hello@gopromptless.ai)Discuss your self-hosting requirements and enterprise licensing
[Technical Support](mailto:help@gopromptless.ai)Get technical assistance with deployment and configuration
## Support & maintenance
[Section titled “Support & maintenance”](#support--maintenance)
### What’s included
[Section titled “What’s included”](#whats-included)
With Enterprise self-hosting, you receive:
* **Deployment Support**: Guidance through initial setup and configuration
* **Regular Updates**: Access to new features and security patches via Helm chart updates
* **Technical Support**: Direct access to our engineering team for troubleshooting
* **Documentation**: Comprehensive guides, runbooks, and best practices
* **Monitoring**: Health checks and recommended alerting configurations
### Ongoing maintenance
[Section titled “Ongoing maintenance”](#ongoing-maintenance)
* **Updates**: Regular Helm chart releases with new features and bug fixes
* **Security Patches**: Timely security updates and vulnerability notifications
* **Backup Guidance**: Recommendations for backup and disaster recovery strategies
* **Performance Tuning**: Optimization guidance as your usage scales
Ready to get started with self-hosting? [Contact our team](mailto:hello@gopromptless.ai) to begin the conversation about your deployment requirements.
# Kubernetes + Helm deployment
> Complete guide for deploying Promptless on Kubernetes using Helm charts
Caution
**Enterprise Only**: This deployment guide is exclusively for Enterprise customers. Self-hosting requires an Enterprise license and access to our private Helm chart repository. [Contact us](mailto:hello@gopromptless.ai) to discuss your self-hosting requirements and get access.
# Kubernetes + Helm deployment guide
[Section titled “Kubernetes + Helm deployment guide”](#kubernetes--helm-deployment-guide)
This guide is part of the [Self-Hosting Overview](/docs/for-docs/security/self-hosting). If you’re still evaluating whether to self-host, start there.
This guide provides the complete installation checklist for deploying Promptless on Kubernetes using Helm charts. Everything is parameterized through `values.yaml`, so you should never need to edit the Helm chart itself.
## Quick start checklist
[Section titled “Quick start checklist”](#quick-start-checklist)
This is the happy-path installation checklist for prospects:
1. **Prerequisites.**
* AWS account with EKS cluster version 1.27+, IRSA enabled
* `kubectl`, `helm`, and `aws-cli` installed locally
* Route 53 hosted zone for `promptless..com`
2. **Provision Infrastructure.**
* EKS cluster & node groups
* RDS PostgreSQL
* S3-compatible document store (e.g. a bucket named `promptless-doc-store`)
* VPC Endpoints for RDS, S3, Bedrock (if using language models restricted within your AWS VPC)
* IAM roles with scoped policies
3. **Configure Container Images.** Choose Option A (direct pull) or Option B (private registry)
4. **Create Kubernetes Secrets.** Set up database credentials and authentication secrets
5. **Configure values.yaml.** Customize deployment settings for your environment
6. **Install Dependencies.** Install cert-manager if not already present
7. **Deploy Promptless.** Install via Helm chart
8. **Post-Installation.** Verify deployment and configure user access
## Architecture
[Section titled “Architecture”](#architecture)
The self-hosted deployment uses a microservices architecture running on Kubernetes:
API Server
Handles REST API requests, authentication, and core business logic
Worker Processes
Processes documentation generation jobs and integrations
Web Dashboard
User interface for project management and configuration
## Prerequisites
[Section titled “Prerequisites”](#prerequisites)
Before installing Promptless, ensure you have the following:
### Infrastructure requirements
[Section titled “Infrastructure requirements”](#infrastructure-requirements)
AWS Account & EKS Cluster
* AWS account with EKS cluster version 1.27 or higher
* IRSA (IAM Roles for Service Accounts) enabled
* Node groups configured (including GPU nodes if using local LLMs)
Database Services
* RDS PostgreSQL instance (recommended: Aurora PostgreSQL)
Storage & Networking
* S3 bucket for document storage (e.g., `promptless-doc-store`)
* Route 53 hosted zone for your domain (e.g., `promptless.corp.com`)
* VPC Endpoints for AWS services: STS, Bedrock, S3, Secrets Manager (plus GitHub Enterprise if applicable)
### IAM roles
[Section titled “IAM roles”](#iam-roles)
Create the following IAM roles with scoped policies:
* `promptless-api`: Access to Bedrock, S3, and Secrets Manager
* `promptless-worker`: Background job processing permissions
* `promptless-dashboard`: Web interface permissions
Tip
We can provide Terraform modules to provision the baseline infrastructure. Contact our support team at for infrastructure templates and IAM policy examples.
## Installation guide
[Section titled “Installation guide”](#installation-guide)
Follow these steps to install Promptless on your Kubernetes cluster:
1. **Provision Infrastructure.** Set up the baseline AWS infrastructure. You can use the Terraform modules we provide or create resources manually.
**Required Resources:**
* EKS cluster with node groups (including GPU nodes if using local LLMs)
* RDS PostgreSQL
* S3 bucket `promptless-doc-store`
* VPC Endpoints for: STS, Bedrock, S3, Secrets Manager (plus GitHub Enterprise if applicable)
* IAM roles: `promptless-api`, `promptless-worker`, `promptless-dashboard` with scoped policies for Bedrock, S3, RDS
Tip
Contact our support team for Terraform modules and infrastructure templates.
2. **Configure Container Images.** Choose your container image strategy:
**Option A: Direct Pull (Recommended)**
```bash
# Allow EKS to pull directly from our public registry
# No additional configuration needed - images pulled from:
# public.ecr.aws/promptless/*
```
**Option B: Private Registry**
```bash
# Import images to your private ECR and configure values.yaml:
image:
registry: .dkr.ecr..amazonaws.com
```
3. **Create Kubernetes Secrets.** Create a secret containing your database credentials and other sensitive configuration:
```bash
kubectl create secret generic promptless-secrets \
--from-literal=POSTGRES_URL="postgresql://user:password@host:5432/promptless" \
--from-literal=JWT_SECRET="your-jwt-secret-key" \
--from-literal=OIDC_CLIENT_SECRET="your-oidc-client-secret"
```
4. **Configure values.yaml.** Create a `values.yaml` file with your deployment configuration:
values.yaml
```yaml
global:
domain: promptless.corp.acme.com
auth:
provider: oidc
oidcIssuerURL: https://sso.acme.com
llm:
provider: bedrock
model: anthropic.claude-3-sonnet-20240229-v1:0
observability:
mode: cloudwatch
integrations:
github:
enabled: true
apiBaseURL: https://github.acme.com/api/v3
# Resource configuration
api:
replicas: 2
resources:
requests:
memory: "512Mi"
cpu: "250m"
limits:
memory: "1Gi"
cpu: "500m"
```
Configuration Options
**Authentication Providers:**
* `oidc`: OpenID Connect (recommended for enterprise)
* `saml`: SAML 2.0
* `oauth`: OAuth 2.0 with various providers
**LLM Providers:**
* `bedrock`: AWS Bedrock (recommended)
* `openai`: OpenAI API
* `anthropic`: Anthropic Claude API
* `local`: Self-hosted models
**Observability:**
* `cloudwatch`: AWS CloudWatch
* `datadog`: DataDog
* `prometheus`: Prometheus + Grafana
5. **Install cert-manager.** If you don’t already have cert-manager installed:
```bash
helm repo add jetstack https://charts.jetstack.io
helm install cert-manager jetstack/cert-manager \
--namespace cert-manager \
--create-namespace \
--set installCRDs=true
```
6. **Install Promptless.** Add the Promptless Helm repository and install:
```bash
# Add Helm repository
helm repo add promptless https://charts.promptless.com
helm repo update
# Install Promptless
helm upgrade --install promptless promptless/server \
--namespace promptless \
--create-namespace \
-f values.yaml
```
Note
The installation typically takes 3-5 minutes. Monitor the deployment with:
```bash
kubectl get pods -n promptless -w
```
7. **Post-Installation Verification.** After installation, verify your deployment:
```bash
# Check pod status
kubectl get pods -n promptless
# Verify database migrations succeeded
kubectl logs -l app=promptless-api -n promptless
# Check service endpoints
kubectl get services -n promptless
```
**Verification Checklist:**
* [ ] All pods are running and ready
* [ ] Database migrations completed successfully
* [ ] Services are accessible
* [ ] SSL certificates are issued
8. **Configure User Access.** Set up user access through your identity provider:
1. **Invite Users**: Use your IdP group mapping to grant access
2. **Verify Authentication**: Test that users can log in successfully
Example IdP Configuration
```yaml
auth:
provider: oidc
oidcIssuerURL: https://sso.acme.com
groupMappings:
- idpGroup: "promptless-admins"
role: "admin"
- idpGroup: "promptless-users"
role: "user"
```
9. **Test Documentation Generation.** Verify the system is working by:
1. **Access Dashboard**: Navigate to your Promptless domain
2. **Create Project**: Set up a test project with integrations
3. **Trigger Test Ingestion**: Test documentation generation via UI
4. **Validate S3 Objects**: Check S3 bucket for generated assets
5. **Validate Bedrock Calls**: Ensure LLM integration is working
6. **Monitor Logs**: Check CloudWatch logs for any errors
Tip
If documentation generation completes successfully, your installation is ready for production use!
## Configuration reference
[Section titled “Configuration reference”](#configuration-reference)
### Environment variables
[Section titled “Environment variables”](#environment-variables)
Key environment variables for customizing your deployment:
**`POSTGRES_URL`** (*string, required*)
PostgreSQL connection string for the application database
**`JWT_SECRET`** (*string, required*)
Secret key for JWT token signing and verification
**`S3_BUCKET`** (*string, required*)
S3 bucket name for document and asset storage
**`AWS_REGION`** (*string, required*)
AWS region for Bedrock and other AWS services
### Helm chart values
[Section titled “Helm chart values”](#helm-chart-values)
The Promptless Helm chart supports extensive customization through values.yaml:
Global Configuration
```yaml
global:
domain: promptless.example.com
environment: production
imageRegistry: public.ecr.aws/promptless
```
Authentication Settings
```yaml
auth:
provider: oidc
oidcIssuerURL: https://auth.example.com
sessionTimeout: 24h
mfaRequired: true
```
Resource Limits
```yaml
api:
replicas: 2
resources:
requests:
memory: "512Mi"
cpu: "250m"
limits:
memory: "1Gi"
cpu: "500m"
```
Integration Configuration
```yaml
integrations:
github:
enabled: true
apiBaseURL: https://api.github.com
slack:
enabled: true
linear:
enabled: true
```
## Maintenance & operations
[Section titled “Maintenance & operations”](#maintenance--operations)
### Upgrades
[Section titled “Upgrades”](#upgrades)
Keep your Promptless installation up to date:
```bash
# Update Helm repository
helm repo update
# Upgrade to latest version
helm upgrade promptless promptless/server \
--namespace promptless \
-f values.yaml
```
Caution
Always review the changelog before upgrading and test in a staging environment first.
## Troubleshooting
[Section titled “Troubleshooting”](#troubleshooting)
### Common issues
[Section titled “Common issues”](#common-issues)
Pods Not Starting
**Symptoms:** Pods stuck in `Pending` or `CrashLoopBackOff` state
**Solutions:**
1. Check resource availability: `kubectl describe nodes`
2. Verify secrets exist: `kubectl get secrets -n promptless`
3. Check pod logs: `kubectl logs -n promptless`
4. Validate values.yaml configuration
Database Connection Issues
**Symptoms:** API server logs show database connection errors
**Solutions:**
1. Verify PostgreSQL URL in secrets
2. Check RDS security groups and network connectivity
3. Ensure database exists and migrations can run
4. Test connection from a debug pod
Authentication Problems
**Symptoms:** Users cannot log in or receive authentication errors
**Solutions:**
1. Verify OIDC/SAML configuration in values.yaml
2. Check IdP connectivity and certificate validity
3. Review authentication provider logs
4. Validate redirect URLs and client secrets
Documentation Generation Failures
**Symptoms:** Jobs fail or documents are not generated
**Solutions:**
1. Check worker pod logs for errors
2. Verify Bedrock/LLM provider connectivity
3. Ensure S3 bucket permissions are correct
### Get help
[Section titled “Get help”](#get-help)
If you encounter issues not covered in this guide:
1. **Check Logs**: Review CloudWatch logs for error messages
2. **Contact Support**: Email with:
* Deployment configuration (sanitized)
* Error logs and symptoms
* Steps to reproduce the issue
Note
Our support team typically responds within 1 business hour for self-hosted deployments.
## Security considerations
[Section titled “Security considerations”](#security-considerations)
### Network security
[Section titled “Network security”](#network-security)
* Use private subnets for database instances
* Configure security groups to restrict access to necessary ports only
* Enable VPC Flow Logs for network monitoring
* Use AWS PrivateLink/VPC Endpoints for AWS service access
### Data protection
[Section titled “Data protection”](#data-protection)
* Enable encryption at rest for RDS and S3
* Use TLS 1.2+ for all communications
* Implement proper IAM roles with least privilege access
* Regular security updates and vulnerability scanning
### Compliance
[Section titled “Compliance”](#compliance)
Self-hosted Promptless supports various compliance requirements:
* **SOC 2**: Audit logging and access controls
* **GDPR**: Data residency and privacy controls
* **HIPAA**: Enhanced encryption and access logging
* **FedRAMP**: Government cloud deployment options
Contact our team to discuss specific compliance requirements for your deployment.
## Example architecture diagram
[Section titled “Example architecture diagram”](#example-architecture-diagram)
The following diagram illustrates a typical EKS + Bedrock deployment architecture with self-hosted GitHub Enterprise and Slack integrations:

### Architecture components
[Section titled “Architecture components”](#architecture-components)
Kubernetes Deployments
* **Backend API**: Handles REST requests and core business logic
* **Frontend Dashboard**: Web interface served at `promptless.corp.com`
* **Worker Processes**: Background jobs for documentation generation
AWS Services
* **RDS PostgreSQL**: Application database with VPC endpoint
* **S3 Bucket**: Document and asset storage with VPC endpoint
* **Bedrock**: LLM service for AI-powered documentation generation
External Integrations
* **GitHub Enterprise**: Self-hosted Git platform integration
* **Slack**: Corporate messaging platform integration
* **VPC Connectivity**: Secure connections via VPC endpoints
Security Features
* **VPC Endpoints**: Private connectivity to AWS services
* **Security Groups**: Network-level access controls
* **IAM Roles**: Service-specific permissions with IRSA
### Key architectural benefits
[Section titled “Key architectural benefits”](#key-architectural-benefits)
* **Data Sovereignty**: All data remains within your AWS VPC
* **Secure Connectivity**: VPC endpoints eliminate internet traffic for AWS services
* **Scalable Design**: Kubernetes deployments can scale based on demand
* **Enterprise Integration**: Direct connectivity to self-hosted GitHub and Slack
* **Compliance Ready**: Architecture supports SOC 2, GDPR, HIPAA, and FedRAMP requirements
# Single sign-on (SSO) setup
> Set up single sign-on so enterprise users authenticate through your existing identity provider.
Single Sign-On (SSO) integration enables enterprise organizations to authenticate users through their existing identity provider. It simplifies access management and enhances security across your documentation workflow.
Note
SSO integration is available exclusively for enterprise customers. Contact our team at to learn more about enterprise plans and pricing.
## Supported authentication methods
[Section titled “Supported authentication methods”](#supported-authentication-methods)
Promptless supports enterprise authentication through industry-standard protocols:
* **SAML 2.0**: Compatible with enterprise identity providers including Active Directory Federation Services, Okta, OneLogin, and Azure AD
* **OpenID Connect (OIDC)**: Modern authentication protocol supporting Google Workspace, Azure AD, and other OIDC-compliant providers
* **Direct integrations**: Native support for Google Workspace and GitHub Enterprise authentication
## Prerequisites
[Section titled “Prerequisites”](#prerequisites)
Before requesting SSO setup, ensure your organization has:
* An active Promptless enterprise subscription
* Administrative access to your identity provider
* The ability to configure SAML assertions or OIDC claims for user attributes
* A verified domain configured in your Promptless organization settings
## Request SSO configuration
[Section titled “Request SSO configuration”](#request-sso-configuration)
SSO setup requires coordination between your IT team and Promptless. The process involves providing specific configuration details to our team.
1
### Collect identity provider information
Gather the required configuration details from your identity provider:
**For SAML 2.0 Integration:**
* Identity Provider (IdP) Entity ID or Issuer URL
* Single Sign-On Service URL
* X.509 Certificate (public key for signature verification)
* Attribute mappings for email, first name, and last name fields
**For OpenID Connect (OIDC):**
* Issuer URL (discovery endpoint)
* Client ID and Client Secret
* Authorization endpoint and Token endpoint URLs
* Supported scopes and user attribute claims
2
### Submit Configuration Request
Contact our support team (either via your dedicated account manager or by [emailing support](mailto:help@gopromptless.ai)) and send the following info:
* Your organization name and verified domain
* Preferred authentication method (SAML 2.0 or OIDC)
* The configuration information collected in Step 1
3
### Configuration and Validation
Our team will configure the SSO integration and provide:
* Service Provider (SP) metadata for your identity provider configuration
* User attribute mapping and role assignment configuration
## Post-configuration user experience
[Section titled “Post-configuration user experience”](#post-configuration-user-experience)
Once SSO is active, team members will experience seamless authentication:
* **Automatic Identity Provider Redirect**: Users accessing Promptless are redirected to your organization’s login portal
* **Single Authentication**: After successful IdP authentication, users gain immediate access to Promptless
* **Just-in-Time User Provisioning**: New users are automatically created based on their identity provider profile
* **Role and Permission Mapping**: User access levels can be synchronized from your identity management system
## Security and compliance benefits
[Section titled “Security and compliance benefits”](#security-and-compliance-benefits)
SSO integration provides enhanced security controls:
* **Centralized Access Management**: Control Promptless access through existing identity management workflows
* **Multi-Factor Authentication Enforcement**: Use your identity provider’s MFA requirements
* **Unified Session Management**: Consistent session handling across organizational applications
* **Comprehensive Audit Trails**: Complete authentication and access logging for compliance requirements
## Support and implementation
[Section titled “Support and implementation”](#support-and-implementation)
For questions about SSO setup or to discuss your organization’s specific authentication requirements, contact our enterprise support team at .
Our team will work directly with your IT department to ensure smooth implementation and integration with your existing security infrastructure.
# Promptless subprocessors
> The third-party subprocessors behind Promptless's documentation automation, including its model-agnostic AI providers.
Promptless uses a number of third party services to deliver our services. This page provides high-level information about the subprocessors that Promptless uses to deliver our core docs automation service. For more detailed information about our security practices, data handling procedures, and privacy commitments, please schedule a call with our team. Contact us at .
## Language models and AI infrastructure providers
[Section titled “Language models and AI infrastructure providers”](#language-models-and-ai-infrastructure-providers)
Promptless is designed with a model-agnostic architecture, providing flexibility and choice in AI language models used for documentation generation. This approach offers several key advantages:
Model Selection
* Support for multiple leading language models
* Ability to switch between different model providers
* Custom model integration capabilities
* Performance optimization across different model types
Enterprise customers have additional flexibility:
* Use of cloud-provider-hosted model deployments
* Use of customer-managed model deployments
* Custom model fine-tuning options
* Model performance monitoring and optimization
* Dedicated model resources
**Note:** We may recommend certain models for different parts of the documentation process, based on what produces the best output for each use case. You make the final choice of architecture. Currently, the default configuration for cloud-hosted customers accesses models through AWS Bedrock. The platform remains model-agnostic and supports a variety of models, including open-source and custom models.
**Note:** Regardless of model choice, Promptless does not use customer data for pre-training or fine-tuning language models.
## Current subprocessors
[Section titled “Current subprocessors”](#current-subprocessors)
### Infrastructure and hosting
[Section titled “Infrastructure and hosting”](#infrastructure-and-hosting)
* **Amazon Web Services (AWS)**
* Primary cloud infrastructure provider
* Data center locations: Primary is us-east-2, with secondary locations in other US regions
* Services used: EKS, EC2, S3, RDS (Aurora), Lambda
### Authentication and security
[Section titled “Authentication and security”](#authentication-and-security)
* **Clerk**: User authentication, SSO, identity management, and security token services
### Monitoring and analytics
[Section titled “Monitoring and analytics”](#monitoring-and-analytics)
* **DataDog**: Infrastructure monitoring, application performance monitoring, log management, and security monitoring
* **Sentry**: Error tracking and monitoring
### Third-party integrations
[Section titled “Third-party integrations”](#third-party-integrations)
Promptless supports a number of third-party integrations that customers can choose to use in their projects, such as GitHub, Slack, Linear, Jira, and more.
For the most current information about our subprocessors, please contact us at . For specific security requirements, contact .
# Starport overview
> Starport is a managed docs-as-code framework, built on open-source Astro Starlight, that Promptless sets up and keeps current, on hosting you own.
Starport is a managed docs-as-code framework, built on the open-source Astro Starlight. Promptless stands up your documentation site, sets up its build and deploy pipeline, and keeps its content current as your product changes. Your site runs on a hosting provider you choose, such as Vercel, on an account you own. You keep control of your infrastructure instead of depending on a single vendor. Starport suits teams who want docs-as-code run as a service, with hosting they control.
Migration is included, and optional
You don’t need Starport to use Promptless. Promptless keeps your docs current on your existing setup. When you do want to move, migration to Starport is included at no cost in every annual Promptless plan.
Note
The documentation you are reading runs on Starport. Promptless migrated promptless.ai onto the Starport template and keeps it current.
## What Starport gives you
[Section titled “What Starport gives you”](#what-starport-gives-you)
Build pipeline set up for you, hosting you own
Promptless sets up your build and deploy pipeline, which then runs in CI, so your team spends its time on content, not operations. Your site runs on a provider you choose, such as Vercel, on an account you own.
Agent-ready by default
Every Starport site ships llms.txt, a read-only docs Model Context Protocol (MCP) server, and page actions. These make your docs consumable by AI agents.
Self-service configuration
Set site metadata, branding, search, redirects, and deploy options yourself after onboarding, in plain configuration files.
Kept current by Promptless
Promptless detects when your product changes and opens documentation pull requests against the Git repository you own.
## Explore Starport
[Section titled “Explore Starport”](#explore-starport)
[How Starport works](/docs/for-docs/starport/how-it-works)The managed model end to end, and what your team owns.
[What's included in Starport](/docs/for-docs/starport/whats-included)A capability reference covering what a Starport site ships.
[Agent-ready docs](/docs/for-docs/starport/agent-ready)How Starport makes your docs consumable by AI agents.
[Starport analytics](/docs/for-docs/starport/analytics)What you can measure on a Starport site and how to set it up.
[Monitor a Starport site](/docs/for-docs/starport/connections)Read-only connections that let Promptless read your deploy status and reader analytics.
[Configure your Starport site](/docs/for-docs/starport/configuring-starport)Self-service configuration you set after onboarding.
[Migrate to Starport](/docs/for-docs/starport/migration)The managed migration to Starport, and what you keep.
[Keep your Starport docs current](/docs/for-docs/starport/keep-docs-current)How Promptless maintains your site after migration.
# Agent-ready docs on Starport
> How Starport makes docs consumable by AI agents through llms.txt, a read-only docs MCP server, page actions, afdocs scoring, and an optional Ask AI assistant.
Agent-ready docs are documentation an AI agent can read, search, and cite on its own, without a person pasting pages into a prompt. A Starport site ships llms.txt and llms-full.txt files, a docs Model Context Protocol (MCP) server, and page actions. It adds agent-friendly-docs (afdocs) scoring and an optional Ask AI assistant. Together these surfaces let any AI agent answer questions about your product from your content. For the full capability list, see [What’s included in Starport](/docs/for-docs/starport/whats-included).
## The llms.txt and llms-full.txt files
[Section titled “The llms.txt and llms-full.txt files”](#the-llmstxt-and-llms-fulltxt-files)
Starport generates two files at build, following the [llms.txt standard](https://llmstxt.org/), so an agent can load your docs as plain text. `llms.txt` lists your pages with short summaries and links. `llms-full.txt` carries the full text of every page in one file.
An agent reads them at their published paths:
```text
https://docs.example.com/llms.txt
https://docs.example.com/llms-full.txt
```
Point an agent at `llms-full.txt` when it needs the whole corpus, and at `llms.txt` when it selects pages to fetch.
## Read-only docs MCP server
[Section titled “Read-only docs MCP server”](#read-only-docs-mcp-server)
Starport serves a read-only [Model Context Protocol (MCP)](https://modelcontextprotocol.io/) server at `/mcp`. An MCP client connects to it and calls two tools: `search`, which finds pages by query, and `get_page`, which returns one page’s content. Both are read-only, so an agent reads your docs and never writes to them.
```text
https://docs.example.com/mcp
```
The endpoint requires no authentication. Restrict access with your hosting provider’s access control, for example Cloudflare Access or Vercel Deployment Protection.
Note
The docs MCP server is enabled by default and can be turned off through `MCP_ENABLED`. See [Configure your Starport site](/docs/for-docs/starport/configuring-starport) for the deploy settings it needs.
## Page actions
[Section titled “Page actions”](#page-actions)
Every page carries controls that hand its content to an agent in one step. Select `Copy Markdown` to copy the page as Markdown for pasting into any tool. Select `Open in ChatGPT` or `Open in Claude` to open the page’s content in that assistant with your question ready.
## Afdocs scoring
[Section titled “Afdocs scoring”](#afdocs-scoring)
Starport scores how ready your docs are for agents with its own afdocs check. The check grades your deployed site against the external [Agent-Friendly Documentation Spec](https://agentdocsspec.com/) and compares its score to a minimum, 100 by default. It runs on a daily schedule and can also be run manually. A regression then surfaces on the next scheduled or manual run against your live site.
## The optional Ask AI assistant
[Section titled “The optional Ask AI assistant”](#the-optional-ask-ai-assistant)
Set an Anthropic API key and Starport turns on the Ask AI assistant in search. A reader asks a question and the assistant answers from your indexed content, with links to the pages it drew from. For where it fits among the search capabilities, see [What’s included in Starport](/docs/for-docs/starport/whats-included). For the key and the model setting, see [Configure your Starport site](/docs/for-docs/starport/configuring-starport).
# Starport analytics
> What you can measure on a Starport site through the analytics event hook, third-party analytics integrations, and search-query analytics.
A Starport site measures reader activity through the analytics tools you already run. The template gives you an event hook to connect those tools, and Promptless configures search-query analytics for you on request. For the full capability list, see [What’s included in Starport](/docs/for-docs/starport/whats-included).
## The analytics event hook
[Section titled “The analytics event hook”](#the-analytics-event-hook)
A Starport site emits a browser custom event named `starport:analytics` for search and Ask AI assistant interactions. Those interactions include a search query, a result click, and an assistant question. You attach a listener that forwards each event to the analytics tool of your choice. Each event’s `detail` carries the interaction, for example the action name and the page path. The hook keeps your analytics provider a setting you own, so you swap providers by changing the listener.
```js
// Illustrative: your provider's browser SDK is loaded as `myAnalytics`.
window.addEventListener('starport:analytics', (event) => {
// event.detail carries the payload for the tracked action.
myAnalytics.track(event.detail);
});
```
## Connect a third-party analytics provider
[Section titled “Connect a third-party analytics provider”](#connect-a-third-party-analytics-provider)
Connecting a third-party analytics provider is the concrete path for getting your data into a tool you already use. Load your provider’s browser SDK on your Starport site, then forward the `starport:analytics` event to it with a listener like the one above. From then on, your provider records the traffic and you read it in that provider’s own dashboards. For how documentation impact rolls up across Promptless, see [Reporting and ROI](/docs/for-docs/measure/reporting-and-roi).
## Search-query analytics through managed setup
[Section titled “Search-query analytics through managed setup”](#search-query-analytics-through-managed-setup)
Your Starport site currently reports page views and search queries to PostHog. During onboarding, Promptless sets and manages a public PostHog key, `PUBLIC_POSTHOG_KEY`, derived from your setup form. It is not a self-service setting you change afterward. Your Starport site then emits its own documentation analytics events to PostHog, and you read that traffic in PostHog.
Separately, you can connect PostHog read-only on the integrations page. Promptless then reads those page views and search queries back to find the pages that need work. See [Connections](/docs/for-docs/starport/connections) for that connection, and [Data handling and classification](/docs/for-docs/security/data-handling-and-classification) for what Promptless processes and retains.
# Configure your Starport site
> Self-service configuration options in the Starport template you set after onboarding, covering site metadata, branding, search, redirects, and deploy settings.
After Promptless completes your onboarding, you maintain the site yourself through its configuration files. Two files hold most of the settings you own: `astro.config.mjs` for the site’s structure and appearance, and `.env` for values that change per environment. For the managed setup that comes first, see [How Starport works](/docs/for-docs/starport/how-it-works) and [Migrate to Starport](/docs/for-docs/starport/migration).
None of this configuration is required to go live. Promptless sets sensible defaults during onboarding, and the options below are the ones you can adjust yourself afterward.
## Set site metadata
[Section titled “Set site metadata”](#set-site-metadata)
Your site’s identity lives in `astro.config.mjs`, keyed off environment variables you set in `.env`:
* `site` reads from `SITE_URL`. It sets the canonical URL, the sitemap, and OpenGraph links.
* The Starlight `title` reads from `SITE_TITLE`, and `description` from `SITE_DESCRIPTION`.
* `editLink.baseUrl` reads from `EDIT_LINK_BASE_URL`. It points each page’s edit link at your repository.
.env
```bash
SITE_URL=https://docs.your-company.com
SITE_TITLE=Your Docs
SITE_DESCRIPTION=Product documentation for your product.
EDIT_LINK_BASE_URL=https://github.com/your-org/your-repo/edit/main/
```
## Set branding
[Section titled “Set branding”](#set-branding)
Branding lives in two places. In `astro.config.mjs`, set `logo` to `./public/logo.svg` and `favicon` to `/favicon.svg`, and replace those two files with your own.
Colors and fonts live in `./src/styles/custom.css`, loaded through the `customCss` option. Set your brand accent with the `--sl-color-accent` token family, and your typeface with the `--sl-font` token. Put dark-mode overrides under the `:root[data-theme='dark']` selector.
## Configure search and the Ask AI assistant
[Section titled “Configure search and the Ask AI assistant”](#configure-search-and-the-ask-ai-assistant)
Site search is on by default. Two settings tune it, both in `astro.config.mjs`:
* Ranking field weights control how much each field counts toward a match. The fields are `title`, `description`, `heading`, and `body`, weighted `4`, `3`, `2`, and `1` by default.
* Up to four starter links seed the empty search box with suggested destinations.
To turn on the optional Ask AI assistant, set `ANTHROPIC_API_KEY` in `.env` and enable the assistant in the search options. The key comes from your Anthropic account. `STARPORT_ASSISTANT_MODEL` selects the model, and defaults to `claude-sonnet-5`.
.env
```bash
ANTHROPIC_API_KEY=your-anthropic-api-key
STARPORT_ASSISTANT_MODEL=claude-sonnet-5
```
Note
Without an Anthropic API key, site search runs and the assistant entry points stay hidden. See [Agent-ready docs](/docs/for-docs/starport/agent-ready) for what the assistant does.
The OpenAPI reference reads one entry per API, each with a `base`, a `label`, and a `schema` field. Add an entry to publish another API, and remove one to drop it. Page actions take a position setting and a list of which actions to display.
## Author redirects
[Section titled “Author redirects”](#author-redirects)
Author redirects in `redirects.json`. The file holds a top-level `redirects` key whose value is an array of `source` and `destination` pairs. The build emits them as 301 redirects into `vercel.json`.
```json
{
"redirects": [
{ "source": "/old-guide", "destination": "/docs/new-guide" }
]
}
```
## Configure deploy settings
[Section titled “Configure deploy settings”](#configure-deploy-settings)
Starport deploys to Vercel. This guide also documents how to deploy to GitHub Pages and Cloudflare Pages. The docs MCP server is enabled by default through `MCP_ENABLED`, and you can turn it off. It needs an on-demand runtime, so set `MCP_RUNTIME` in `.env`, which defaults to `vercel`.
.env
```bash
MCP_ENABLED=true
MCP_RUNTIME=vercel
```
You supply the deploy credentials for your hosting account. A Vercel deploy reads `VERCEL_TOKEN`, `VERCEL_ORG_ID`, and `VERCEL_PROJECT_ID` from your deploy environment. Each value comes from your Vercel account and project settings. Your custom domain and its TLS certificate are handled by your hosting provider, so no in-repo setting configures them.
Separately, you can connect Vercel or Cloudflare Pages on the integrations page so Promptless reads your deploy status. That connection is read-only: it never deploys your site. The `VERCEL_TOKEN`, `VERCEL_ORG_ID`, and `VERCEL_PROJECT_ID` credentials above are what your CI uses to publish; the connection only lets Promptless read whether the deploy succeeded. See [Connections](/docs/for-docs/starport/connections).
## Edit other configuration files
[Section titled “Edit other configuration files”](#edit-other-configuration-files)
Beyond `astro.config.mjs` and `.env`, these files control the build and its checks:
* `package.json` holds the scripts you run.
* `pdf-exports.json` defines named export sets, each with a name and its entry points.
* `docmeta.config.yaml` validates frontmatter, `.vale.ini` lints prose, and `.remarkrc.mjs` lints Markdown structure.
The `package.json` scripts you run:
* `dev`
* `build`
* `preview`
* `build:redirects`
* `build:pdf`
* `typecheck`
* `lint:md`
* `lint:frontmatter`
* `test`
* `check`
`lint:frontmatter` needs Node 24 or newer; `lint:md` runs on Node 22.
# Monitor a Starport site through read-only connections
> The read-only connections that let Promptless read a Starport site's deployment status from Vercel or Cloudflare Pages, and its reader analytics from PostHog.
Promptless can monitor a Starport site through read-only connections you set up on the [integrations page](https://app.gopromptless.ai/integrations). Each connection lets Promptless read status or analytics. Promptless polls them and never writes to them. Connecting Vercel or Cloudflare Pages lets Promptless read whether your docs site built and published. Connecting PostHog lets Promptless read page views and search queries to find the pages that need work. For the full capability list, see [What’s included in Starport](/docs/for-docs/starport/whats-included).
Note
These connections are set up once for your organization, not per site.
## Connect Vercel
[Section titled “Connect Vercel”](#connect-vercel)
Vercel connects through OAuth. On the integrations page, select `Connect Vercel` and complete the authorization. Promptless then reads your deployment status, so it can tell whether your docs site built and published. It never deploys, and it never changes your projects, domains, or environment variables.
## Connect Cloudflare Pages
[Section titled “Connect Cloudflare Pages”](#connect-cloudflare-pages)
Cloudflare Pages connects with an API token. In Cloudflare, under `My Profile` → `API Tokens`, create a token with read access to Cloudflare Pages and Account Settings. On the integrations page, select `Connect Cloudflare` to open the `Connect Cloudflare Pages` modal, then paste the token into `API Token`. Promptless then reads your Pages project and deployment status, so it can tell whether your docs site built. It never triggers a build, and it never changes anything in your account.
## Connect PostHog
[Section titled “Connect PostHog”](#connect-posthog)
PostHog connects with a Personal API key. In PostHog, create a key with read access to Query and Project. On the integrations page, select `Connect PostHog`. Then enter the key in `Personal API key`, your project’s ID in `Project ID`, and your region in `Region` (US Cloud, EU Cloud, or Self-hosted). Promptless then queries page views on your docs and search queries, so it can tell which pages need work. It never sends events, and it never changes anything in PostHog.
This read-only connection is separate from the analytics your Starport site reports on its own. For how that reporting works, see [Starport analytics](/docs/for-docs/starport/analytics).
## Manage a connection
[Section titled “Manage a connection”](#manage-a-connection)
Because each connection is read-only, you can remove it at any time on the [integrations page](https://app.gopromptless.ai/integrations). Removing it stops Promptless from reading any further. To confirm whether a connection is active, see [Connection health](/docs/for-docs/connect/connection-health).
# How Starport works
> Understand the managed model: Promptless stands up the site, sets up your build and deploy pipeline, and keeps content current, while your content and hosting stay yours in a Git repository and a hosting account you own.
Starport’s managed model decides who runs what and what your team owns. For the configuration you set yourself, see [Configure your Starport site](/docs/for-docs/starport/configuring-starport). For the migration to Starport, see [Migrate to Starport](/docs/for-docs/starport/migration).
Starport is a docs-as-code framework Promptless sets up and maintains on your behalf. In the docs-as-code model, your pages live as source files in a Git repository your team owns, versioned and reviewed like code. Promptless sets up the docs-as-code tooling around it: the site framework, the build and deploy pipeline, and the maintenance that keeps content current. Promptless also helps you set up hosting with a provider you choose.
## The managed model end to end
[Section titled “The managed model end to end”](#the-managed-model-end-to-end)
Promptless sets up the build and deploy pipeline, which then runs in CI, and keeps your content current, so your team writes and reviews content. You keep ownership of your hosting account.
1. Promptless stands up your site on the Starport template, built on Astro Starlight.
2. Your builds and deploys run in CI, which Promptless sets up, so a merged change publishes through the hosting provider without manual steps.
3. Your site deploys to a hosting provider you choose, such as Vercel, on an account you own. Promptless helps you set that up and keeps the site’s supporting features current, including search, redirects, and the agent-ready surfaces.
4. Promptless detects when your product changes and opens documentation pull requests against your repository for your team to review.
Note
Promptless proposes every content change as a reviewable pull request. Your team approves and merges each one, so you stay in control of what publishes.
## What you own
[Section titled “What you own”](#what-you-own)
Your content lives in a Git repository your team owns and controls. Starport follows the docs-as-code model: your pages are source files in that repository. Promptless proposes edits the way a teammate would, by branching, changing files, and opening a pull request you review.
Because the repository is yours, you keep full history, access control, and the ability to edit content directly at any time. For the fundamentals of the docs-as-code model and why Promptless builds on it, see [Understand docs-as-code](/docs/for-docs/migrate/why-docs-as-code).
After onboarding, you tune the site yourself through its configuration files. See [Configure your Starport site](/docs/for-docs/starport/configuring-starport) for the options you control, and [Keep your Starport docs current](/docs/for-docs/starport/keep-docs-current) for how Promptless maintains content over time.
## Prerequisites
[Section titled “Prerequisites”](#prerequisites)
To run on Starport, your documentation needs a docs-as-code footing:
* A Git repository your team owns, which holds your content as source files.
* Content in a format Starport builds from, authored in Markdown or MDX.
If your docs still live in a hosted editor that stores content in a proprietary database, the move to docs-as-code comes first. [Migrate to Starport](/docs/for-docs/starport/migration) covers the managed migration, and Promptless handles that move for you.
# Keep your Starport docs current
> How Promptless keeps a Starport site current after migration, tying Starport back to the core Promptless product.
After you migrate to Starport, Promptless keeps your content current as your product changes. Your docs live in a repository Promptless watches, so the same loop that keeps your docs current elsewhere runs on your site. A product change triggers Promptless, which drafts the documentation update and opens a pull request for your team to review.
## How Promptless keeps your content current
[Section titled “How Promptless keeps your content current”](#how-promptless-keeps-your-content-current)
Promptless watches the sources your team already uses, such as merged pull requests and support conversations. When one of them signals a product change, Promptless drafts the documentation update. It opens the update as a pull request against your repository for your team to review and merge.
Because your Starport content is Markdown and MDX in a Git repository, Promptless edits it the way a teammate would. It branches, changes files, and opens a reviewable change. You stay in control of what publishes.
You review each suggestion before it publishes: approve it, request edits, or decline it. A wrong or unneeded draft is caught in that review. When something needs attention, ask Promptless directly in Slack or Microsoft Teams.
Note
Every update arrives as a reviewable pull request. Your team approves and merges each one, so nothing publishes without your review.
## How this ties to the core Promptless product
[Section titled “How this ties to the core Promptless product”](#how-this-ties-to-the-core-promptless-product)
The loop on your Starport site is the same one Promptless runs across every collection. A trigger activates on an event, Promptless gathers context, produces a suggestion, and opens a pull request for review.
For the full model, see [How Promptless works](/docs/for-docs/start-here/how-promptless-works). For the events that start the loop, see [Triggers](/docs/for-docs/connect/triggers).
# Migrate to Starport
> The fully managed migration to Starport, covering what Promptless does, what you keep, and how you configure and maintain the site afterward.
Moving your docs onto Starport is a fully managed migration. Promptless does the work: it stands up the site and moves your content and configuration. You review the result and cut over to the new site when you are ready, then maintain the site yourself after onboarding. For the fundamentals of docs-as-code and platform choice, see [Understand docs-as-code](/docs/for-docs/migrate/why-docs-as-code) and [Choose a platform](/docs/for-docs/migrate/choose-a-platform).
## What Promptless handles
[Section titled “What Promptless handles”](#what-promptless-handles)
Promptless handles the migration end to end, so your team keeps writing while it happens around you.
1. Promptless bootstraps your site on the Starport template.
2. Promptless migrates your content, components, screenshots, and configuration onto it.
3. Promptless optimizes your docs for agent accessibility, so the agent-ready surfaces work from day one.
4. Promptless readies the site for launch, so your team can cut over when you are ready.
Note
The migration is low-risk. Your content moves as source files, you review the result before you cut over, and Promptless keeps the migrated site feature-complete.
## What Promptless needs from you
[Section titled “What Promptless needs from you”](#what-promptless-needs-from-you)
The managed migration needs a few things from you:
* Access to your existing documentation content.
* Your Git repository, or Promptless sets one up with you.
* Control of your domain’s DNS. You point it at the new site when you cut over; Promptless does not change your DNS records.
## What you keep
[Section titled “What you keep”](#what-you-keep)
Your content stays yours. It lives in a Git repository your team owns, as Markdown and MDX source files you can edit at any time. You keep the full history, the access control, and the ability to publish directly. Promptless sets up the build, deploy, and content-maintenance tooling around that repository.
Because your content lives in your own Git repository on the open-source Astro Starlight framework, you keep it if you stop using Promptless. The site keeps building and serving on its own, and nothing about it depends on Promptless-proprietary technology.
## URLs and redirects
[Section titled “URLs and redirects”](#urls-and-redirects)
When URLs change during the move, Promptless sets up redirects so existing links keep working. For the fundamentals, see [Preserve URLs and redirects](/docs/for-docs/migrate/preserve-urls-and-redirects).
## After onboarding
[Section titled “After onboarding”](#after-onboarding)
Once you are live, the site is yours to run. You tune it yourself through its configuration files; see [Configure your Starport site](/docs/for-docs/starport/configuring-starport) for the options you own. Promptless keeps your content current as your product changes; see [Keep your Starport docs current](/docs/for-docs/starport/keep-docs-current) for how that works.
## Cost
[Section titled “Cost”](#cost)
Every annual Promptless plan includes migration to Starport at no cost. Your content moves onto the Starport stack as part of your plan.
Note
To start a migration, talk to your Promptless contact, or the Promptless team if you are evaluating.
# What's included in Starport
> The capabilities a Starport site ships, with what each one gives you.
A Starport site ships the capabilities below. Two capabilities have their own pages: [agent-ready surfaces](/docs/for-docs/starport/agent-ready) and [analytics](/docs/for-docs/starport/analytics). To set any of these up after onboarding, see [Configure your Starport site](/docs/for-docs/starport/configuring-starport).
## Capabilities
[Section titled “Capabilities”](#capabilities)
| Capability | What you get |
| -------------------------------------------------- | --------------------------------------------------------------------------------------------------------------------------------------------------------------------- |
| Astro and Starlight core | Starport builds on the open-source Astro Starlight framework. |
| Internationalization | English ships with a Spanish sample locale, through native Starlight i18n. |
| Multi-section sidebar navigation | Group your pages into topic sections in the sidebar. |
| OpenAPI API reference | Generate a reference from an OpenAPI schema. |
| llms.txt and llms-full.txt | Starport generates both files at build for AI agents. |
| Broken-link validation | The build checks your internal links and fails on a broken one. |
| Redirects | Author redirects that the build emits as 301s. |
| Sitemap | The build generates a sitemap for search engines. |
| Site search with the optional Ask AI assistant | Set an Anthropic API key to turn the assistant on. |
| Read-only docs Model Context Protocol (MCP) server | Agents read your docs through a read-only MCP server. |
| PDF export | Export a single page, and export named page sets on a schedule. |
| Content linting | Frontmatter, prose, and Markdown linting run over your content. |
| Doc Detective testing | Validates that documented procedures still work against the running product and flags failures. The template runs it on a schedule and files an issue when one fails. |
| Vercel deploy | Deploy to Vercel. GitHub Pages and Cloudflare Pages deployment is documented too. |
Note
The Ask AI assistant answers reader questions from your indexed content when you supply an Anthropic API key.
## Monitor a Starport site
[Section titled “Monitor a Starport site”](#monitor-a-starport-site)
Promptless can also monitor a Starport site through read-only connections you set up on the integrations page. Connect Vercel or Cloudflare Pages and Promptless reads your deployment status. Connect PostHog and Promptless reads your reader analytics. Each connection is read-only. For how to set them up, see [Connections](/docs/for-docs/starport/connections).
## Security and compliance
[Section titled “Security and compliance”](#security-and-compliance)
For an enterprise security review of Promptless itself, see [Compliance and certifications](/docs/for-docs/security/compliance-and-certifications), [Data handling and classification](/docs/for-docs/security/data-handling-and-classification), and [Subprocessors](/docs/for-docs/security/subprocessors).
# How Promptless works
> How Promptless turns triggers, context sources, and doc collections into reviewed documentation updates.
Promptless keeps your documentation current by connecting three pieces. **Triggers** signal when something changed, and **context sources** help Promptless understand the change. **Doc collections** define where your documentation lives and where updates are published. This page explains how those pieces fit together.
Keeping documentation current is hard work. Context gets lost in handoffs, updates fall behind releases, and support teams keep answering the same questions because the docs trail the product. Promptless supports that work rather than replacing it: it drafts content in the voice of your existing docs, keeps screenshots in sync as your UI changes, and shows the citations and reasoning behind every suggestion so you can review and approve it quickly.
## Overview
[Section titled “Overview”](#overview)
The diagram below shows how triggers, context sources, and doc collections connect to turn a change into a reviewed documentation update:

## How the components work together
[Section titled “How the components work together”](#how-the-components-work-together)
1
### Triggers Initiate the Process
**Triggers** are the starting point for all documentation updates. They monitor various sources for events that might require documentation changes:
* **Code Changes**: Pull requests in GitHub, Bitbucket, or GitLab automatically trigger analysis when new features or fixes are introduced
* **Team Communication**: Slack messages and Microsoft Teams mentions can trigger documentation updates
Learn more in [Configuring Promptless → Triggers](/docs/for-docs/connect/triggers).
2
### Context Sources Enrich Promptless’s Understanding
**Context sources** are read-only integrations that give Promptless real-time access to the business context behind a change:
* **Project management**: Linear issues and Jira tickets explain the requirements and rationale behind a feature
* **Knowledge bases**: Confluence and Notion pages carry specs, decisions, and existing product context
Context sources are optional, but they help Promptless draft suggestions that reflect why a change was made, not just what changed. Learn more in [Configuring Promptless → Context Sources](/docs/for-docs/connect/context-sources).
3
### Doc Collections Receive the Update
**Doc collections** define where your documentation lives and where Promptless publishes updates:
* **Docs as code**: Your docs live in a Git repository and sync to a hosting provider like Fern, Mintlify, Docusaurus, and more
* **Multiple collections**: A single change can update more than one doc collection at once, so related docs stay in sync
Learn more in [Configuring Promptless → GitHub Repos (Docs as Code)](/docs/for-docs/connect/doc-locations/github-repos).
Note
Context sources are queried in real time. Promptless processes your source code and conversations to generate suggestions and then discards them—it doesn’t retain that content. See [Privacy Policy](/docs/for-docs/security/privacy-policy) for exactly what Promptless does and doesn’t store.
## How teams use Promptless
[Section titled “How teams use Promptless”](#how-teams-use-promptless)
Promptless removes the manual overhead of keeping docs current while preserving the quality and accuracy your team needs. Teams use it to turn customer conversations into documentation updates, help technical writers keep pace with feature releases, and maintain documentation for fast-moving open-source projects.
* **Vellum** (YC W23) has Slack Connect channels with key customers. They use Promptless to automatically turn customer support conversations into documentation updates. Today, over 50% of Vellum’s docs PRs originate from Promptless, and 60% of their product and engineering team interacts with Promptless monthly to draft updates for features they own.
* **Amplitude** uses Promptless to help their tech writers keep up with documentation demands. Their technical writers were drowning in work, so they integrated Promptless to draft documentation for every feature release. Now engineers review the first draft of docs before sending them to customers, making the entire process faster and more collaborative.
* **Basis**, an AI agents platform for accounting ([ofbasis.com](https://ofbasis.com/)), uses Promptless for their entire knowledge base. Promptless processes all their meeting recordings and automatically updates customer pages, internal guides for their fast-growing team, and customer-facing documentation all at once.
* **Fortune 500 companies** use Promptless to make technical writers more productive. Context is spread across Linear, Confluence, and Slack—Promptless automatically assembles the relevant information and drafts doc updates for every PR.
* **Vitess**, a CNCF graduated project, proves Promptless works in the open-source world. Since installing Promptless, 94% of their documentation updates have been drafted with Promptless—the tool has become essential to keeping their docs current as the project evolves.
See Promptless in Action
Vitess is a CNCF graduated project powering YouTube, Slack, and Square. Browse their [docs commit history](https://github.com/vitessio/website/commits/prod/content) to see Promptless drafting documentation updates in real-time.
## Core capabilities
[Section titled “Core capabilities”](#core-capabilities)
Beyond the trigger-to-publish flow, Promptless includes capabilities that keep suggestions accurate and easy to trust:
* **Voice Match:** Fine-tunes a custom model based on your existing documentation style, so AI-generated content sounds natural and matches your established tone.
* **Promptless Capture:** Keeps product screenshots automatically in sync with your UI. When code changes impact a screenshot, Promptless detects which images need updating and regenerates them with your current interface.
* **Screenshot Editor:** Edit screenshots directly in the dashboard—crop, annotate, highlight UI elements, or add shapes and text. Changes are immediately available in your docs.
* **Slack Listen:** Passively monitors Slack channels you choose and automatically creates documentation suggestions when conversations become inactive. Perfect for Slack Connect customer channels or internal discussion threads.
* **Promptless Citations:** See exactly where each documentation change came from. Every update includes references to the specific GitHub files, Slack threads, or support conversations that informed it.
Tip
Ready to tune how triggers, context sources, and doc collections behave for your team? See [Configuring Promptless](/docs/for-docs/connect/triggers), or contact us at for setup guidance.
## Next steps
[Section titled “Next steps”](#next-steps)
* **[Quickstart](/docs/for-docs/start-here/quickstart)** — connect your repositories, docs, communication tools, and context sources.
* **[Reviewing & editing Promptless PRs](/docs/for-docs/work-the-queue/reviewing-prs)** — see what happens when a suggestion lands and how to approve, edit, or dismiss it.
* **[Open-source quickstart](/docs/for-docs/start-here/open-source-quickstart)** — set Promptless up on a public repository through the free open-source program.
# Promptless ❤️ Open Source
> Set up Promptless on a free open-source project to keep developer docs, changelogs, and translations in sync with a fast-moving codebase.
Promptless helps open source projects keep documentation in sync with fast-moving codebases. Use it to automatically update developer docs, generate changelogs for new releases, or draft translations.
Open Source Program
Promptless is free for CNCF, Linux Foundation, and other eligible non-commercial open-source projects. Contact us at to get started.
Open source workflows sometimes differ from commercial software. We’ve built features and setup guides tailored specifically for open source maintainers.
## Quick start
[Section titled “Quick start”](#quick-start)
The basic setup for your open source project involves three steps:
1
### Install the GitHub App
Connect GitHub from the [Integrations page](https://app.gopromptless.ai/integrations). You’ll choose which repositories Promptless can access.
**Which GitHub app should you install?**
* **Standard GitHub app**: If you can install apps with write permissions, Promptless creates branches and PRs directly on your repo. Works with both public and private repositories.
* **GitHub (read-only) app**: If you can only install read-only apps, Promptless creates PRs from a fork. Fork-based publishing works for public repositories only. To publish to a private repo, use the standard GitHub app instead. (The read-only app can still read any repository, public or private, for triggers and context.) See the [GitHub (read-only) integration](/docs/for-docs/reference/integrations/github-read-only) for details.
2
### Set Up Doc Collections
[Doc Collections](/docs/for-docs/connect/doc-locations/github-repos) tell Promptless where your documentation lives.
You can create multiple doc collections if needed, for example, if your changelog is in a different location from your main docs. You can also specify a particular directory if your docs live in a monorepo alongside your code.
See [GitHub Repos (Docs as Code)](/docs/for-docs/connect/doc-locations/github-repos) for setup instructions.
3
### Configure Triggers
Configure triggers in the [Configuration page](https://app.gopromptless.ai/configuration) to connect your source repos and doc collections.
In the `triggers` section of your `promptless.yaml`, specify which repos Promptless listens to for PRs.
Tip
Enable **Replay recent PRs** (for PR triggers) or **Process last 30 days of commits** (for commit triggers) to generate an initial batch of suggestions from your recent history. This helps you calibrate before going live.
Many open source projects prefer to centralize operations in GitHub so anyone can benefit from Promptless without needing an account. If this applies to you, enable **Auto-create PR** so suggestions automatically become pull requests. We recommend turning this on after your initial calibration is complete, so that you’re able to refine Promptless’s configuration before rolling it out to all contributors.
## Recommended trigger configuration
[Section titled “Recommended trigger configuration”](#recommended-trigger-configuration)
Most projects trigger Promptless on opened PRs. For popular open source projects, where many contributor PRs get closed without merging, consider using [GitHub Commit triggers](/docs/for-docs/connect/triggers/github-commits) instead. This way, Promptless only runs when PRs are actually merged to your default branch. We recommend changing this setting after your initial calibration.
## Additional use cases
[Section titled “Additional use cases”](#additional-use-cases)
Translation workflows
For translation workflows, you might want the trigger to be the English directory of your docs. Promptless then drafts updates that translate content to the rest of your documentation. AI-drafted translations still need review from someone fluent in the target language before they publish. See [Keep translated docs current](/docs/for-docs/get-the-most-out/localization) for how to set that up.
GitHub Issues integration
If GitHub Issues are part of your workflow, create a GitHub Issues trigger so contributors can tag Promptless in issues to generate doc updates.
Updating Contributor PRs (coming soon)
For some monorepo use cases, you might want Promptless to add a docs commit to your contributors’ existing PRs rather than create separate docs PRs. If you’re interested in this feature, contact us at .
Note: this is not compatible with the [GitHub (read-only) app](/docs/for-docs/reference/integrations/github-read-only).
# Quickstart
> Set up Promptless and connect your first integrations so it starts drafting documentation updates for your team.
Promptless automatically updates your docs, saving your team time and improving your customer experience.
## Before you start
[Section titled “Before you start”](#before-you-start)
Sign up for a free account at [accounts.gopromptless.ai](https://accounts.gopromptless.ai)
### What permissions are needed?
[Section titled “What permissions are needed?”](#what-permissions-are-needed)
Connecting integrations may require admin-level access depending on your organization’s settings:
* **Slack**: Workspace admin permissions to install the Promptless app
* **GitHub**: Organization admin or sufficient repository access to install the GitHub App
* **Jira/Confluence**: Atlassian admin permissions to authorize the OAuth connection
* **Linear**: Workspace admin permissions to connect the integration
Don’t have the required permissions? No problem. You can invite teammates during setup.
Tip
If you don’t have admin access to connect a particular integration, you can invite someone from your IT or Engineering team. You do this directly from the onboarding wizard. The invited person receives an email that brings them to the same onboarding page you’re on. They can pick up exactly where you left off.
## Guided setup wizard
[Section titled “Guided setup wizard”](#guided-setup-wizard)
When you first sign in, a five-step wizard guides you through connecting your integrations:
1
### Connect chat
Connect Slack or Microsoft Teams. Used for notifications and conversation-based triggers. Skippable.
2
### Connect docs
Install the Promptless GitHub App and pick the repos where your documentation lives. This is the only required step. Selecting a repo creates your first doc collection automatically. You can add more doc collections at any time.
3
### Connect triggers
Connect source code providers (GitHub, GitLab, Bitbucket). Changes there should trigger documentation updates. Skippable.
4
### Connect context
Connect Atlassian (Jira/Confluence), Notion, Linear, or Slite for additional context. Skippable.
5
### Review set-up
Optionally book a setup call with our team to ensure your configuration is optimized.
After completing the wizard, Promptless generates a `promptless.yaml` configuration from the integrations you connected. You can review and edit it anytime on the [Configuration page](/docs/for-docs/reference/configuration-reference).
Your progress saves automatically. If you leave and come back later, you’ll pick up where you left off. Setup doesn’t need to be completed by a single person. Any teammate you invite can continue from the current step. That makes it easy to hand off to someone with the right permissions for a specific integration.
## What gets connected
[Section titled “What gets connected”](#what-gets-connected)
The setup wizard connects your integrations. You configure them afterward in the app.
**Chat** - Slack or Microsoft Teams for notifications and @mentions.
**Documentation Platform** - The GitHub repository where your docs live. Supports docs-as-code platforms like ReadMe, Mintlify, Fern, Docusaurus, Starlight, and more.
**Triggers** - Git providers (GitHub, GitLab, Bitbucket) as sources for pull request triggers.
**Context Sources** - Atlassian (Jira/Confluence), Notion, Linear, or Slite to give Promptless additional context for better suggestions.
## What happens at completion
[Section titled “What happens at completion”](#what-happens-at-completion)
When you finish the setup wizard, Promptless does two things:
1. **Indexes your documentation.** Promptless ingests your docs repository and learns its structure and content. This takes 5–30 minutes depending on size.
2. **Configures triggers and context sources.** Promptless generates `promptless.yaml` entries from the integrations you connected. Code-change integrations like GitHub, GitLab, or Bitbucket get a broad pull request trigger with `repos: all`, so Promptless listens for pull requests across all your repositories. Promptless doesn’t seed commit triggers automatically. You can add one anytime from the [Configuration page](https://app.gopromptless.ai/configuration). Context integrations like Jira, Confluence, Linear, Notion, and Google Drive get unscoped entries, giving the agent access to all connected data.
Once setup is complete, Promptless:
* Listens for trigger events from your configured sources
* Analyzes changes and gathers relevant context
* Generates documentation suggestions for your review
Your configuration is stored in a `promptless.yaml` file that you can view and edit anytime in the [Configuration page](https://app.gopromptless.ai/configuration). See the [Configuration Reference](/docs/for-docs/reference/configuration-reference) for the complete schema and how to narrow triggers to specific repositories.
Tip
You’re all set! Promptless is now ready to help automate your documentation updates.
Need help with integrations? Contact us at - we add new integrations every week.
# Run a pilot
> Plan a 14-day Promptless pilot, set success criteria, and measure suggestion volume and quality against your own docs and workflows.
Promptless offers 14-day pilot periods for growth and enterprise customers. You can see how Promptless works with your own documentation, team workflows, and trigger events.
The 14-day pilot lets you:
* See Promptless handle different types of documentation updates
* Evaluate suggestion quality across different scenarios
* See how well Promptless can integrate into your team’s workflow
Note
Your pilot starts when Promptless creates your first suggestion, not when you sign up. Any time that’s spent getting approvals for data source connections doesn’t count against your pilot.
## Before your pilot begins
[Section titled “Before your pilot begins”](#before-your-pilot-begins)
Before the pilot begins, you’ll need to connect Promptless to your relevant workspaces and share resources with the Promptless team. That lets the Promptless agent draft an initial batch of suggestions.
### Set up Promptless connectors
[Section titled “Set up Promptless connectors”](#set-up-promptless-connectors)
1. **Connect source code repositories.** Connect GitHub, GitHub Enterprise, GitLab, or Bitbucket
2. **Connect documentation repositories.** Connect your docs repository on GitHub, GitLab, or Bitbucket (e.g. if you use Mintlify, Fern, ReadMe, Docusaurus, etc.)
3. **Connect communication platforms.** Connect Slack or Microsoft Teams to get notified about new suggestions and to tag Promptless in threads or messages to request doc updates directly
4. **Connect project management tools (optional).** Connect Jira or Linear. This is optional, but recommended to give Promptless better context about the customer-facing impact of new features
See the [Quickstart](/docs/for-docs/start-here/quickstart) for integration instructions.
### Share your documentation context
[Section titled “Share your documentation context”](#share-your-documentation-context)
Promptless works best when it has the same sort of information that you’d give to a new technical writer joining your team.
This can include:
* Your style guide
* Vale configuration (if you use it)
* Documentation standards or templates
## In-person onboarding workshop
[Section titled “In-person onboarding workshop”](#in-person-onboarding-workshop)
We always recommend kicking off customer pilots with an in-person workshop.
### What to expect
[Section titled “What to expect”](#what-to-expect)
Duration
90-minute session. For larger teams, we may do multiple workshops over a few days.
Preparation
Before your session, we run Promptless on historical events (like the last 30 days of PRs) so you can review real suggestions during the workshop.
What We'll Cover
How Promptless works, your configuration, and hands-on review of suggestions, with the goal of publishing your first doc updates together.
### Workshop goals
[Section titled “Workshop goals”](#workshop-goals)
1. **Understand your Promptless setup.** Review your configuration. Learn how [triggers, context sources, and documentation platforms](/docs/for-docs/start-here/how-promptless-works) work for your team
2. **Publish your first updates.** Review suggestions together and publish documentation updates during the session
3. **Define success criteria.** Agree on what a successful pilot with Promptless would look like for your team
## Measure success for your pilot
[Section titled “Measure success for your pilot”](#measure-success-for-your-pilot)
During the workshop, we define the success criteria for your pilot. These vary based on each team’s needs. Across dozens of onboardings, though, *suggestion volume* and *suggestion quality* are the most reliable indicators that your team gets lasting value from Promptless.
### Suggestion volume
[Section titled “Suggestion volume”](#suggestion-volume)
Track how many suggestions you’re getting from Promptless. More suggestions isn’t necessarily better, since too many suggestions can sometimes feel noisy or overwhelming. But a healthy stream of documentation suggestions is a strong indicator that Promptless is plugged into the right parts of your workflow.
Typical volume benchmarks
**Teams with 0-1 people working full-time on docs:** 20-40 suggestions per month
**Teams with 2-5 technical writers:** 30-100 suggestions per month
For larger teams, target volume depends heavily on how your team is organized. It might be more useful to set target volumes for each product or product vertical your team supports.
Note
If Promptless isn’t able to generate 20 suggestions a month, your team may be too early to see enough value from Promptless.
### Suggestion quality
[Section titled “Suggestion quality”](#suggestion-quality)
Everyone has different expectations for Promptless. Suggestion quality is simply measured by your rating of Promptless’s suggestions, on a scale from 0 to 10.
**Quality target:** Promptless should consistently rate at least 8/10 for your team’s needs.
Tip
During your workshop, we’ll discuss what “quality” means for your team, whether that’s technical accuracy, style guide compliance, or catching edge cases. Understanding your quality criteria helps us make Promptless better for you.
#### Understand quality ratings
[Section titled “Understand quality ratings”](#understand-quality-ratings)
To help you calibrate what different quality levels mean for your team:
* **“9-10”:** Most suggestions from Promptless are relevant, and typically can be accepted with little to no edits.
* **“7-8”:** Most suggestions are accurate and relevant, requiring only moderate editing. You’re refining style, adding specific details, or adjusting tone rather than rewriting entire sections. Promptless meaningfully reduces your documentation workload.
* **“4-6”:** Suggestions occasionally catch relevant changes and can serve as a starting point, but require significant editing. You’re rewriting content, fixing inaccuracies, or filling in missing context. Promptless saves some time, but doesn’t dramatically change your workflow.
* **“0-3”:** Promptless is creating negative value. Most/all suggestions are not good enough to be a useful starting point for doc updates. Even if it’s occasionally bringing up things that are relevant, I’d rather start from scratch myself.
## Documentation improvement projects
[Section titled “Documentation improvement projects”](#documentation-improvement-projects)
Sometimes teams need foundational work before piloting, like documenting major missing features, completing a large refactor, or creating documentation from scratch.
Subject to availability, the Promptless team may be able to help with these projects before your pilot begins.
## Weekly check-ins
[Section titled “Weekly check-ins”](#weekly-check-ins)
After your onboarding workshop, we schedule 15-30 minute check-ins to track progress and address issues.
**What we review:**
* How many suggestions did Promptless create?
* How would you rate suggestion quality this week (0-10)?
* What’s the gap between current suggestions and 10/10 quality?
* How is Promptless fitting into your workflows? Is it triggering at the right times?
These check-ins help us identify and fix issues, adjust your configuration, and make sure you’re getting value from Promptless.
## Questions?
[Section titled “Questions?”](#questions)
Contact us at to discuss your pilot.
# Promptless overview
> Learn what Promptless does, how it works, and where to start.
Note
All content in our docs is written with the help of Promptless, with oversight and governance from thoughtful humans. See how in our [public docs repo](https://github.com/Promptless/promptless.ai).
Promptless is an AI agent built to support technical writers. It detects when docs need to change, gathers context from code and team tools, drafts updates, and opens reviewable suggestions or pull requests.
Use Promptless to keep product docs, internal docs, agent instructions, screenshots, changelogs, and support-driven documentation current as your team ships.
Watch a short walkthrough of Promptless turning a product change into a documentation pull request. The demo shows Promptless finding the relevant docs, using code and project context, and drafting an update with citations. It then hands the change back to a technical writer for review.
## What you can do
[Section titled “What you can do”](#what-you-can-do)
Update docs from code changes
Detect when pull requests, commits, or releases change behavior that customers need to understand.
Create new docs from context
Draft new pages, guides, API references, changelog entries, and release notes from the context your team already has.
Update docs from tickets and conversations
Turn repeated customer questions, support tickets, Slack threads, and project tickets into documentation updates.
Create and maintain screenshots
Ask Promptless to capture new product screenshots or regenerate stale images when your UI changes.
Review and improve suggestions
Check the sources Promptless used, request edits, and teach Promptless your preferred structure and style.
Publish through your docs workflow
Open documentation pull requests for docs-as-code platforms like Mintlify, Fern, ReadMe, Docusaurus, and more.
## How Promptless works
[Section titled “How Promptless works”](#how-promptless-works)
Promptless fits into the tools your team already uses. A typical documentation update follows this flow:

1. **A trigger starts the workflow.** A pull request, commit, Slack message, Teams message, Intercom ticket, or API event tells Promptless to investigate whether docs need to change.
2. **Promptless gathers context.** Promptless reads the relevant code, existing docs, tickets, conversations, and configured context sources.
3. **Promptless drafts a suggestion.** Promptless decides which pages are affected, writes the proposed update, and explains the sources behind the change.
4. **Your team reviews the update.** Review the suggestion in Promptless, comment in GitHub, or ask for follow-up edits in Slack or Microsoft Teams.
5. **Promptless publishes through your docs workflow.** When the update is ready, Promptless opens or updates a documentation pull request for your normal review and merge process.
## Common starting points
[Section titled “Common starting points”](#common-starting-points)
[For development teams](/docs/for-docs/connect/triggers/github-prs)Start with GitHub pull request or commit triggers so docs updates are proposed as code changes land.
[For technical writers](/docs/for-docs/tune/teaching-conventions)Review suggestions, provide feedback, and use Promptless to handle routine maintenance while you focus on structure and strategy.
[For support and success teams](/docs/for-docs/connect/triggers/intercom-tickets)Turn repeated customer questions and support conversations into documentation updates.
[For open-source maintainers](/docs/for-docs/start-here/open-source-quickstart)Use Promptless to keep fast-moving developer docs, changelogs, and contributor-facing content current.
## Next steps
[Section titled “Next steps”](#next-steps)
[Quick Setup](/docs/for-docs/start-here/quickstart)Connect your repositories, docs, communication tools, and context sources.
[How Promptless Works](/docs/for-docs/start-here/how-promptless-works)Learn the terms Promptless uses for triggers, context sources, doc collections, and publishing.
[Integrations](/docs/for-docs/reference/integrations)Explore all available integrations and configure them for your specific needs.
**Want to see Promptless in action?** [Book a demo](/demo).
# Filter noise and tune relevance
> Reduce low-value documentation suggestions by scoping what triggers Promptless and teaching it which changes to skip
Tip
You can tune this by hand as this page describes, or ask Promptless in Slack or Microsoft Teams to do it for you. For example, “@Promptless only trigger on the docs/ and src/ directories in my acme/api repo.” See [Ask Promptless to update your configuration](/docs/for-docs/get-the-most-out/ask-promptless-to-update-config).
The first few days of use decide whether you keep trusting Promptless. If you get suggestions for every internal refactor and config bump, you tune it out. If Promptless stays quiet on the changes that matter, you stop relying on it. Tuning for relevance means narrowing what reaches Promptless in the first place and teaching it, over time, which changes are worth documenting.
Promptless filters at three points, from earliest to latest:
1. **What triggers analysis.** Scope your triggers so only documentation-worthy events reach Promptless.
2. **What Promptless skips automatically.** Built-in filters drop changes that are never documentation-worthy.
3. **What you teach it to skip.** Feedback on suggestions changes what Promptless proposes next time.
Start with trigger scope; it removes the most noise for the least effort.
## Scope what triggers analysis
[Section titled “Scope what triggers analysis”](#scope-what-triggers-analysis)
You configure triggers on the [Configuration page](https://app.gopromptless.ai/configuration), where each project defines the events Promptless watches. Narrowing what a project matches is the most direct way to cut noise: a change that never matches a trigger never becomes a suggestion. The settings that matter most for relevance are below, and the [Configuration reference](/docs/for-docs/reference/configuration-reference#triggers) documents the full set.
### Watch only the directories that change docs
[Section titled “Watch only the directories that change docs”](#watch-only-the-directories-that-change-docs)
Point a project at the parts of a repository that actually affect documentation. When you create or edit a GitHub project, turn on **Choose specific directories to trigger this project** and enter the paths you want to watch. Promptless then considers only pull requests that touch those directories and ignores changes elsewhere. A pull request that touches only `tests/` or `infra/` no longer produces a suggestion. See [GitHub PRs → Directory-specific triggers](/docs/for-docs/connect/triggers/github-prs#directory-specific-triggers) for the full setup.
### Watch only the repositories that matter
[Section titled “Watch only the repositories that matter”](#watch-only-the-repositories-that-matter)
If your organization has dozens or hundreds of repositories, most of them never need documentation. Two settings keep a project focused:
* **Trigger on repos with certain topics.** When editing a GitHub project, turn on this option and enter one or more GitHub topics, such as `docs-watch`. Promptless triggers on any repository carrying at least one of those topics. You add or remove a repository by changing its topics in GitHub rather than editing your configuration.
* **Exclude noisy repositories.** Watch a broad set of repositories while carving out the ones that generate noise. Those repositories never trigger a suggestion even when everything else does.
See [GitHub PRs → Repository topics](/docs/for-docs/connect/triggers/github-prs#repository-topics) for how topic matching works, and the [Configuration reference](/docs/for-docs/reference/configuration-reference#triggers) for the exclusion setting.
### Trigger later in the release cycle
[Section titled “Trigger later in the release cycle”](#trigger-later-in-the-release-cycle)
The event a project triggers on decides how often Promptless runs and how finished a change is when it does. Triggering when a pull request **opens** runs on every new pull request. Waiting for its **first approval** holds until a reviewer has vetted the change, and waiting for **merge** holds until it ships. Triggering later means fewer, higher-signal runs. [Tune what Promptless suggests → Release timing](/docs/for-docs/tune/release-timing) covers how to match the trigger event to your release stage.
Note
Publishing policies change how a suggestion is published: where it notifies, whether it opens a PR. They can’t stop a suggestion from being created. To keep a change from becoming a suggestion at all, scope the project that would trigger on it.
## What Promptless skips automatically
[Section titled “What Promptless skips automatically”](#what-promptless-skips-automatically)
Some changes are never documentation-worthy, so Promptless drops them before it creates a suggestion. You don’t configure these filters because they always apply.
* **Draft pull requests.** Promptless waits until a pull request is marked ready for review, so work in progress doesn’t generate premature suggestions.
* **Tooling-only changes.** When a pull request touches only dot-directories (like `.github/` or `.circleci/`) or root-level dot-files (like `.gitignore`), Promptless skips it. These are CI and tooling changes, not product changes. If the same pull request also touches regular source files, Promptless processes it normally and ignores only the tooling files.
* **Changes with no documentation impact.** For every triggered event, Promptless assesses whether the change actually needs documentation before it creates a suggestion. A change that touches no documented behavior produces no suggestion.
Note
When Promptless evaluates a change and decides no documentation is needed, that decision appears on the Triggers page in your dashboard. A missing suggestion reads as a considered “no” rather than a silent miss. See [The web interface](/docs/for-docs/work-the-queue/web-interface) for where to find it.
## Teach Promptless what to skip
[Section titled “Teach Promptless what to skip”](#teach-promptless-what-to-skip)
Trigger scope handles the coarse cuts. For the judgment calls (a class of change that technically touches docs but that your team never documents), teach Promptless directly. Set standing guidelines up front, and refine them through feedback as suggestions come in.
### Write standing guidelines in your Knowledge Base
[Section titled “Write standing guidelines in your Knowledge Base”](#write-standing-guidelines-in-your-knowledge-base)
Some sources mix documentation-worthy signal with noise no filter can catch. When Promptless passively listens to a Slack channel, for example, the same channel carries questions worth capturing and chatter that isn’t. Rather than closing the same kinds of suggestions one by one, tell Promptless what to act on up front. Add guidelines to the `PROMPTLESS.md` file in your [Agent Knowledge Base](/docs/for-docs/get-the-most-out/agent-knowledge-base), which admins edit under **Settings**. Spell out what to act on, what to ignore, and how to handle the edge cases or team processes that recur:
* “In #support, document answers to how-to questions; ignore status updates and incident chatter.”
* “When a thread resolves a bug, capture the workaround, not the back-and-forth.”
* “Treat any message prefixed with `aside` as out of scope.”
Promptless reads these guidelines whenever it processes a message in that channel. It applies your judgment before drafting anything rather than learning it one rejected suggestion at a time.
### Close a suggestion with a reason
[Section titled “Close a suggestion with a reason”](#close-a-suggestion-with-a-reason)
When a suggestion isn’t worth keeping, close it and pick the reason that fits. The options include several that map directly to noise:
* This change is too insignificant
* This change is self-explanatory and doesn’t need docs
* This change was covered in another Promptless suggestion
* This is already in my docs
Check **Remember this feedback for future suggestions** so the reason shapes what Promptless proposes next time, not just this once.
### Remember a durable preference
[Section titled “Remember a durable preference”](#remember-a-durable-preference)
Any feedback you give (like closing a suggestion, requesting changes, or leaving a comment) can be saved for the future. Phrase it as a standing rule so Promptless generalizes it:
* “Don’t create suggestions for dependency bumps.”
* “Internal-only tooling changes don’t need docs.”
Promptless records what it learns in your [Agent Knowledge Base](/docs/for-docs/get-the-most-out/agent-knowledge-base), so the preference persists across every future suggestion. The full set of feedback channels is documented in [Teach conventions with feedback](/docs/for-docs/tune/teaching-conventions).
Tip
Filtering compounds. Trigger scope removes whole categories of change up front, while feedback refines the judgment calls that slip through. Revisit both after your first week. The suggestions you keep closing point to the next trigger or convention to add.
## Quiet the notifications, not the suggestions
[Section titled “Quiet the notifications, not the suggestions”](#quiet-the-notifications-not-the-suggestions)
Sometimes the suggestions are right but the alerts are too loud. That’s a notification concern, not a relevance one, and you tune it separately. You can turn off the comments Promptless posts on source pull requests and shape when and where it notifies your team in [Customize notifications](/docs/for-docs/tune/notifications). Those levers change who hears about a suggestion; they don’t change which suggestions Promptless creates.
# Customize notifications
> Configure how Promptless notifies your team about documentation suggestions
Tip
You can set up notifications by hand as this page describes, or ask Promptless in Slack or Microsoft Teams to do it for you. For example, “@Promptless send suggestion notifications to my #docs-review channel.” See [Ask Promptless to update your configuration](/docs/for-docs/get-the-most-out/ask-promptless-to-update-config).
Promptless sends notifications to your team when documentation suggestions are ready for review. You can configure notification channels in your organization’s `promptless.yaml` file using the policies section.
## Notification channel configuration
[Section titled “Notification channel configuration”](#notification-channel-configuration)
Set the default notification channel and create trigger-specific overrides in your [Configuration page](https://app.gopromptless.ai/configuration):
```yaml
policies:
default:
notification:
slack_channel: docs-updates
msteams_channel: "19:0a1b2c3d@thread.tacv2"
rules:
- if:
doc_collection: acme/internal-docs
then:
notification:
slack_channel: internal-docs-team
```
Slack channel names don’t need the `#` prefix. When Slack channels are renamed, Promptless automatically updates your configuration. `slack_channel` and `msteams_channel` are independent. Set either, both, or neither.
Note
You can route notifications to any Slack channel by name, including a channel created after you connected Slack. Promptless resolves it automatically when you save the config that routes to it, with no reconnect or manual channel-list refresh. Mentioning `@Promptless` in a channel also makes that channel available in the dashboard channel pickers, independent of saving your routing config. Delivery to a private channel still requires that Promptless be manually invited to the channel, so run `/invite @Promptless`.
### Disable an inherited channel
[Section titled “Disable an inherited channel”](#disable-an-inherited-channel)
A rule can turn off a channel that it would otherwise inherit from `policies.default` or an earlier rule by setting the field to `null`:
```yaml
policies:
default:
notification:
slack_channel: docs-updates
rules:
- if:
doc_collection: acme/internal-docs
then:
notification:
slack_channel: null
```
Here, suggestions for `acme/internal-docs` send no Slack notification, while every other collection still notifies `docs-updates`. Channels resolve by field presence: `slack_channel: null` disables the inherited channel, and omitting the field entirely inherits it. `msteams_channel` works the same way, and the two channels are disabled independently.
See the [Configuration Reference](/docs/for-docs/reference/configuration-reference#policies) for the complete policies schema.
## Notification preferences file
[Section titled “Notification preferences file”](#notification-preferences-file)
Notification preferences are stored in the `doc_workflow/notification_preferences.md` file within your Agent Knowledge Base. This file is a lightweight scaffold where you add overrides and customizations. Promptless handles the underlying templates and message formatting automatically.
Note
If your organization previously used a `notification_skill.md` file, Promptless automatically migrates it to the new `notification_preferences.md` format. Your customizations are preserved during migration.
### What you can customize
[Section titled “What you can customize”](#what-you-can-customize)
The preferences file lets you override:
* **When to notify**: Control which events trigger notifications and when to skip them
* **Delivery channels**: Set preferences for Slack vs. GitHub notifications
* **Message style**: Adjust the tone and context included in notification messages
### Example customizations
[Section titled “Example customizations”](#example-customizations)
Here are some common ways teams customize their notifications:
**Change notification timing:**
```plaintext
Only send notifications for suggestions that modify more than one file.
Skip notifications for automated triggers that don't yield documentation updates.
```
**Adjust delivery preferences:**
```plaintext
Always reply in the originating Slack thread when the trigger came from Slack.
Use GitHub comments when reviewers are already engaged with the source PR.
```
**Customize message style:**
```plaintext
Use a casual, friendly tone in all notification messages.
Include enough context that someone new to the thread can understand why Promptless is posting.
```
## Slack notification features
[Section titled “Slack notification features”](#slack-notification-features)
With the [Slack integration](/docs/for-docs/reference/integrations/slack) connected, Promptless sends rich notifications that include:
* **Clickable preview cards**: Suggestion notifications appear as preview cards showing the title, status, description excerpt, trigger source, and file change stats. Click anywhere on the card to open the suggestion in Promptless.
* **Interactive buttons**: Publish suggestions or open PRs for review directly from Slack. These actions appear within the preview card.
* **Diff file attachments**: View the full diff of documentation changes in a thread reply
* **Channel support**: Receive notifications in channels by name, not just by ID
### Suggestion preview cards
[Section titled “Suggestion preview cards”](#suggestion-preview-cards)
Slack suggestion notifications include a preview card with:
* **Title**: The suggestion title
* **Status badge**: Shows “New suggestion” for first notifications or “Updated suggestion” for follow-ups
* **Description**: A short excerpt of the suggestion description
* **Triggered by**: A descriptive label linking to the source that triggered the suggestion. Examples include “Merged GitHub PR #123 in acme/docs” or “Slack direct @mention”
* **Files**: The number of files changed
* **Status**: The current suggestion lifecycle status (Open, Pull Request, Published, or Rejected)
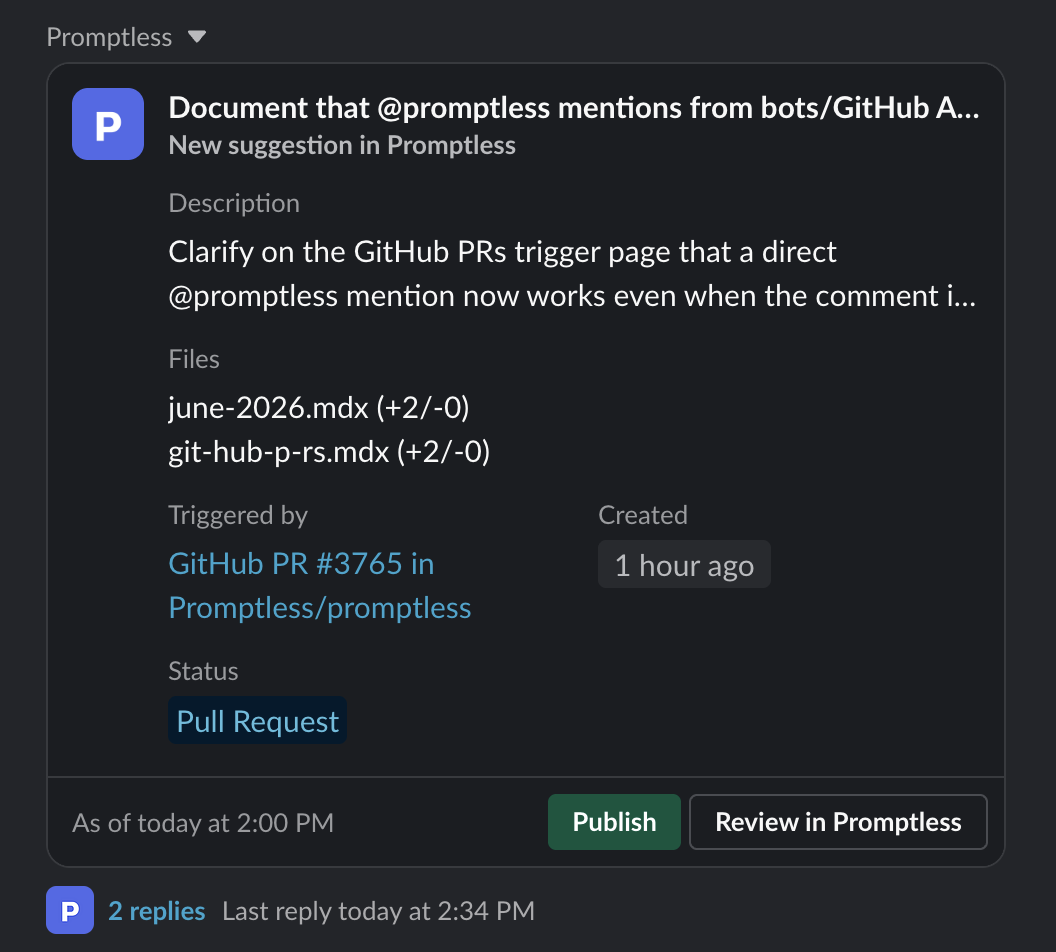
Tip
Promptless automatically detects protected branches in your documentation repository. When detected, Slack notifications show “Create PR” or “View PR” buttons instead of “Publish” to prevent merge errors.
### Direct messages to MCP submitters
[Section titled “Direct messages to MCP submitters”](#direct-messages-to-mcp-submitters)
Someone may submit a documentation task through an [MCP editor](/docs/for-docs/connect/triggers/mcp) (Claude Code, Cursor, and similar). Promptless sends that submitter a Slack direct message when the resulting suggestion is ready for review. This direct-message behavior applies to Slack today; Microsoft Teams doesn’t send submitter direct messages. If Promptless can’t reach them by direct message, it posts to the configured notification channel instead. This happens when Slack isn’t connected, the `users:read.email` permission is missing, or no Slack account matches the submitter’s email. When the direct message succeeds, Promptless doesn’t also post that suggestion to the channel.
Note
Direct messages require the [Slack integration](/docs/for-docs/reference/integrations/slack) to be connected with the `users:read.email` permission. The submitter’s Slack account email must also match their Promptless account email. That is the address shown as “Authorize as {email}” at MCP authorization.
## Microsoft Teams notifications
[Section titled “Microsoft Teams notifications”](#microsoft-teams-notifications)
When the [Microsoft Teams integration](/docs/for-docs/reference/integrations/microsoft-teams) is connected, you can have Promptless announce documentation suggestions in a Teams channel by setting `msteams_channel` in your policies. Unlike Slack channels, which use a name, Teams channels are addressed by their conversation ID. That is a value that looks like `19:…@thread.tacv2`. Copy it from Teams; it’s the same ID you use for an `msteams_listen` trigger.
`slack_channel` and `msteams_channel` are independent, so a single policy can notify Slack, Teams, or both.
Note
The Promptless bot needs prior activity in a Teams channel before it can deliver notifications there. If Promptless can’t reach the configured channel, it replies in the originating thread instead.
## Escalation channel
[Section titled “Escalation channel”](#escalation-channel)
Escalation channels notify you of configuration and operational problems. This is completely different from notifications about suggestions being created, updated, closed, or merged. For example, the test account lacks the feature flags to reach a screen Promptless needs to screenshot. Or a PR references a Jira issue that Promptless can’t read. Either the Jira integration isn’t connected, or it’s connected but the project isn’t accessible.
The `escalation` section is a sibling to `notification`. It has the same shape. Route these messages to a dedicated channel on Slack, Teams, or both:
```yaml
policies:
default:
notification:
slack_channel: docs-updates
msteams_channel: "19:0a1b2c3d@thread.tacv2"
escalation:
slack_channel: docs-escalations
msteams_channel: "19:4e5f6a7b@thread.tacv2"
email:
- docs-team@example.com
```
Escalations reach these channels even when suggestion notifications are off or no notification channel is set. `slack_channel` routes escalations to Slack; `msteams_channel` routes them to Teams. The two are independent, like in `notification`. When a platform’s escalation channel is unset, Promptless raises escalations through your suggestion-notification routing on that platform.
List one or more addresses under `escalation.email`. Email is escalation-only. Suggestion notifications never arrive by email. Promptless emails only the addresses you list. Email escalation requires email delivery to be configured for your deployment. It’s on by default on Promptless-hosted deployments. Self-hosted deployments must configure it.
Blockers flagged here include a test or staging account that can’t reach a needed screen, or an unreachable or unconfigured integration. They also include an expired or rejected credential, a missing permission, or a configuration mismatch. Each escalation names the resource, quotes what Promptless saw, notes the workaround it applied, and ends with the one action that clears the blocker.
## Suggestion status updates
[Section titled “Suggestion status updates”](#suggestion-status-updates)
When enabled, Promptless posts a follow-up reply in each suggestion’s original Slack thread when the suggestion resolves. This closes the loop for anyone who requested documentation updates via Slack.
Promptless posts a follow-up when a suggestion reaches one of these final states:
* **Merged**: The documentation PR was merged
* **Closed**: The documentation PR was closed without merging
* **Rejected**: The suggestion was rejected from the dashboard
* **Archived**: The suggestion was auto-archived for staleness
Delivery is best-effort. The lifecycle transition always completes, even if the Slack post fails.
### Enable status updates
[Section titled “Enable status updates”](#enable-status-updates)
1. In the [Promptless dashboard](https://app.gopromptless.ai/), open **Settings** and select **Organization**
2. Find the **Suggestion Status Updates** section
3. Check **Post Slack follow-ups when suggestions are resolved**
4. Save your changes
Once enabled, follow-ups appear in the Slack thread where Promptless originally announced each suggestion.
## Get help
[Section titled “Get help”](#get-help)
Need help configuring your notification preferences? Contact us at and we’ll help you set up the customizations that work best for your team.
# Time suggestions to your release cycle
> Match when Promptless drafts and publishes documentation to how your product ships, from pull request to feature-flag rollout
Tip
You can adjust release timing by hand as this page describes, or ask Promptless in Slack or Microsoft Teams to do it for you. For example, “@Promptless switch my acme/api PR trigger to run on first approval.” See [Ask Promptless to update your configuration](/docs/for-docs/get-the-most-out/ask-promptless-to-update-config).
A documentation suggestion is only useful when it arrives at the right moment. Draft it too early and you document work your reviewers haven’t finished. Draft it too late and the docs trail the release. To get the timing right, align the event that triggers Promptless with the point in your release cycle when the change becomes real. Align the moment docs publish with that same point.
There’s no separate “timing” setting to configure. You control timing by choosing which event triggers Promptless and how eagerly it publishes, using the trigger and policy fields you already have.
## Match the trigger event to your release stage
[Section titled “Match the trigger event to your release stage”](#match-the-trigger-event-to-your-release-stage)
On the [Configuration page](https://app.gopromptless.ai/configuration), open the **Triggers** tab and expand your GitHub pull request trigger. Under **When should Promptless run?**, pick at least one moment in a pull request’s life. That choice decides how finished a change is when Promptless analyzes it, since each option maps to a stage in the change’s life:
| Option | Activates when | Choose it when |
| ------------------------------ | -------------------------------------- | ----------------------------------------------------------------------------------------------------------------------------- |
| **When it’s opened** (default) | A pull request opens | You want documentation drafted alongside the code, so reviewers evaluate both together. |
| **When it’s first approved** | A pull request gets its first approval | You want to wait until a reviewer has vetted the change, so Promptless analyzes reviewed work rather than a work in progress. |
| **When it’s merged** | A pull request merges | You only want documentation for changes that have actually made it into the code base. |
If suggestions keep arriving before a change has settled, move to a later stage. Switch from **When it’s opened** to **When it’s first approved**, or from **When it’s first approved** to **When it’s merged**. Turn on more than one when you want both early feedback and a post-merge refresh. See [GitHub PRs → Trigger modes](/docs/for-docs/connect/triggers/github-prs#trigger-modes) for the full behavior of each mode, and the [Configuration Reference](/docs/for-docs/reference/configuration-reference#triggers) for the underlying `trigger_on` field.
Note
**When it’s first approved** activates once per pull request, on the first approval only. Later approvals or re-approvals after requested changes don’t trigger another run. If you merge your own pull requests without a separate reviewer, it never activates. Use **When it’s merged** or a commit trigger instead.
To keep a docs PR’s suggestions current as it evolves, set `trigger_on: [updated]` on a `github_pr` trigger in `promptless.yaml`. This is a `promptless.yaml` option rather than one of the dashboard toggles above. Promptless then re-reviews an open PR each time new commits are pushed to it. This is a review-bot cadence that fires on every push. It produces more activity than the single-shot options in the table above. Scope it to specific repositories and `trigger_directories`.
## Document only what has shipped
[Section titled “Document only what has shipped”](#document-only-what-has-shipped)
To track shipped changes rather than proposed ones, add a [commit trigger](/docs/for-docs/connect/triggers/github-commits), which activates when commits land on a monitored branch. On the **Triggers** tab, add a rule for a GitHub commit trigger and point it at the branch you want to watch. Pair it with your PR trigger to get both timings. Promptless comments on pull requests while they’re open. It then refreshes the suggestion with the final content once the change merges to your default branch.
Using commits on their own, without a PR trigger, is the quietest option. Promptless runs only after changes reach your default branch, so it activates less often.
## Control when a suggestion publishes
[Section titled “Control when a suggestion publishes”](#control-when-a-suggestion-publishes)
Trigger timing decides when Promptless *drafts*; publishing policies decide when it *ships*. By default, a suggestion waits for a human to review and publish it. You change that on the **Policies** tab of the [Configuration page](https://app.gopromptless.ai/configuration). The defaults there apply to every suggestion, and a rule can override them for a specific trigger or doc collection.
When a class of change should publish without waiting for review, add a rule scoped to a trigger you trust. In that rule, turn on **Open a pull request automatically** and **Merge the pull request automatically**. With both on, the documentation PR merges the moment it’s created, so no one intercepts it first. That is why auto-merge depends on automatic PR creation. This fits high-confidence workflows, like internal documentation or changelog updates you want live as soon as the change lands. Scoping the rule to a single trigger keeps full automation where you trust it and leaves everything else waiting for review. For the full list of policy fields and defaults, see the [Configuration Reference](/docs/for-docs/reference/configuration-reference#policies).
Note
Publishing policies resolve at publish time, not when the trigger activates. If you change a policy while a suggestion is being drafted, the new values apply when that suggestion is published.
## Trigger from a feature-flag rollout
[Section titled “Trigger from a feature-flag rollout”](#trigger-from-a-feature-flag-rollout)
When a feature ships behind a flag, the pull request can merge weeks before users see the change. PR- and commit-based timing may then draft the docs long before they’re relevant. The [LaunchDarkly integration](/docs/for-docs/reference/integrations/launchdarkly) closes that gap. Once connected, Promptless watches for feature-flag changes in your LaunchDarkly projects. It starts documentation work when a flag changes, rather than when the code merged.
That makes the flag rollout, not the merge, the moment documentation updates, matching how flagged features actually reach users.
Note
The LaunchDarkly integration is in beta. Connect it from the [integrations page](https://app.gopromptless.ai/integrations) in the Promptless dashboard. See the [LaunchDarkly integration guide](/docs/for-docs/reference/integrations/launchdarkly) for the setup and permissions it needs.
## Trigger from a deploy or release pipeline
[Section titled “Trigger from a deploy or release pipeline”](#trigger-from-a-deploy-or-release-pipeline)
Your release stage might live in a CI/CD pipeline rather than a pull request or a flag. In that case, the [API trigger](/docs/for-docs/connect/triggers/api) lets any system request documentation work over HTTP. A deploy step can call Promptless after a release completes and pass release context with the request. The docs then update on the same event that ships the product.
```bash
curl -X POST "https://api.gopromptless.ai/triggers" \
-H "Authorization: Bearer sk-pl-your-api-key" \
-H "Content-Type: application/json" \
-d '{
"instructions": "Document the rate limiting feature released in v2.5.",
"context": { "release": "v2.5.0" }
}'
```
The `context` object is optional metadata that appears in the trigger’s history for reference. See [API triggers](/docs/for-docs/connect/triggers/api) for the full request format.
Tip
These inputs combine. Most teams start by matching `trigger_on` to their review stage. They then add a flag-based or pipeline-based trigger for the features whose release moment isn’t the merge. The goal stays the same throughout: documentation that lands when the change is real to your users.
# Teach conventions with feedback
> Learn all the ways to give feedback on Promptless suggestions and teach it your team's durable documentation conventions
Feedback on a Promptless suggestion does two things at once. It fixes the suggestion in front of you. When you save it, it also teaches Promptless a durable convention that it applies to every future suggestion. You can give feedback from the Promptless dashboard in four ways: request changes, inline feedback, overall comments, and close feedback. You can also give it directly in a GitHub PR comment. Every method lets you request changes on the suggestion you’re reviewing. Some also let you save that preference so Promptless applies it to future suggestions.
## 1. Request changes
[Section titled “1. Request changes”](#1-request-changes)
Use the **Request Changes** button at the top of any suggestion to request updates. Provide multiple pieces of feedback at once, and Promptless will address them all together.
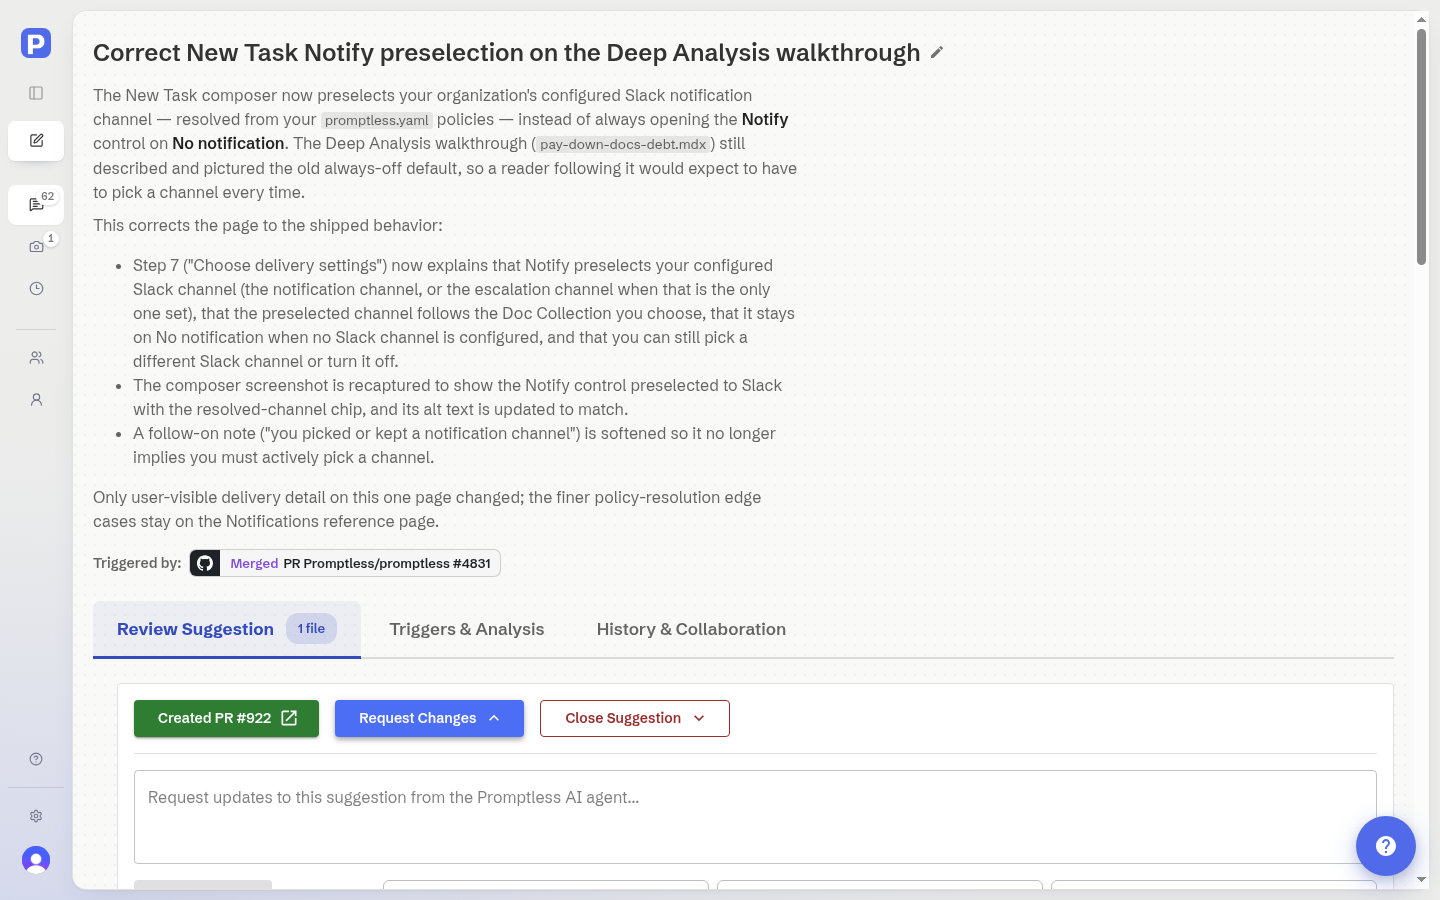
The interface includes common examples to get you started:
* “Put X file’s content as a section in Y file instead of making it its own file”
* “Make the tone more conversational, and do that for all future suggestions too”
* “I always want changelog entries in their own suggestion. Please move”
Click **Submit Request** to process all your feedback.
## 2. Dashboard inline feedback
[Section titled “2. Dashboard inline feedback”](#2-dashboard-inline-feedback)
Add feedback to specific files or sections within a suggestion. Highlight text in any file or click a line number to select the entire line, then click **Add Comment** to provide context-specific input.
Dashboard inline feedback is separate from GitHub’s inline comments and appears only in the Promptless web interface.
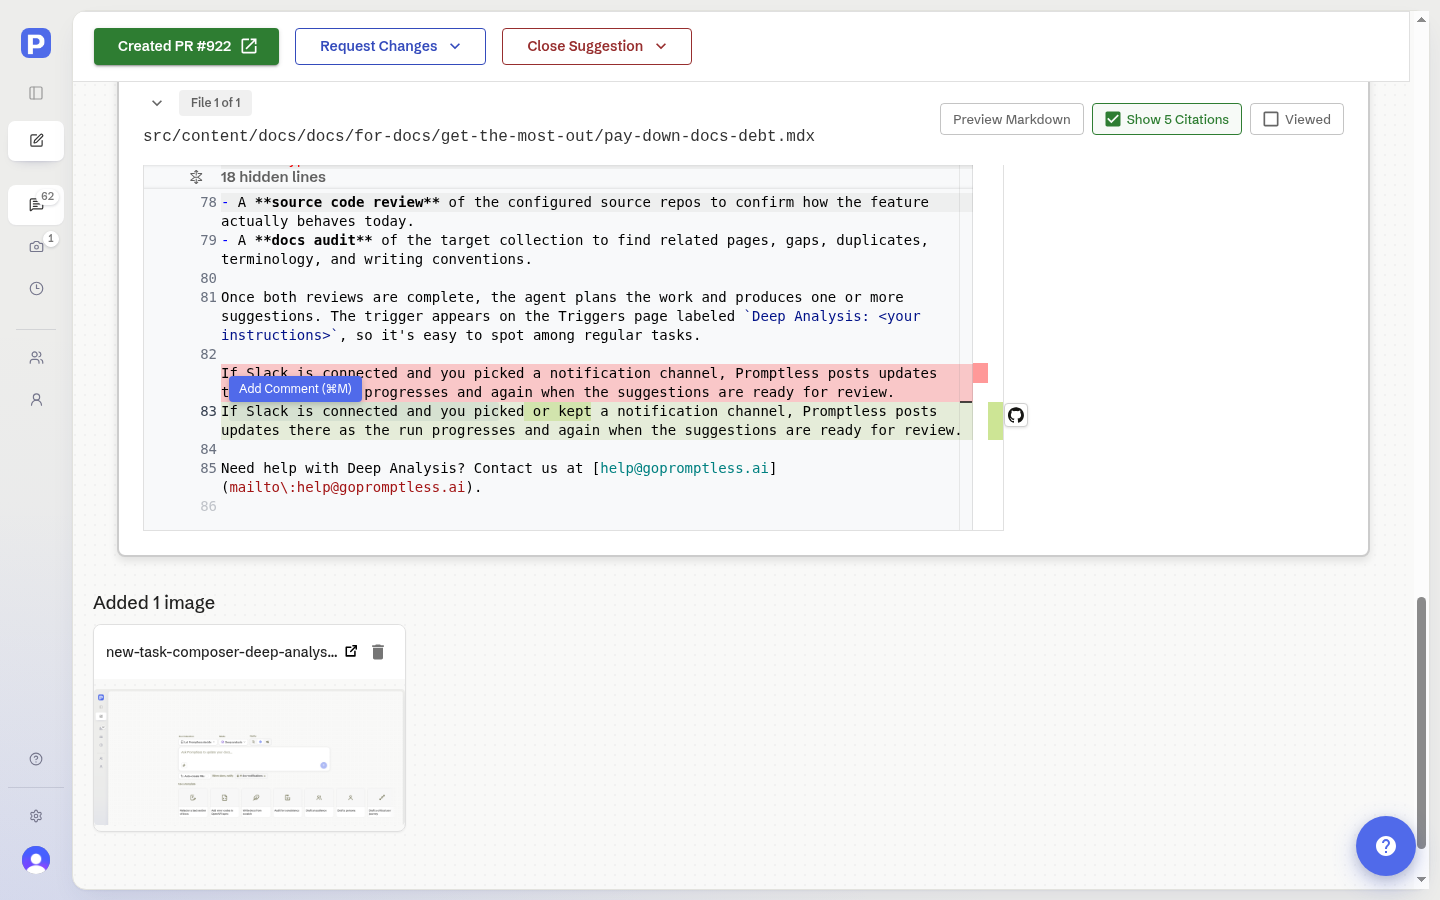
When you add a comment, check **Send to Promptless** to queue your feedback. You can add multiple comments across different files, and they persist across page refreshes until you’re ready to submit them all together.
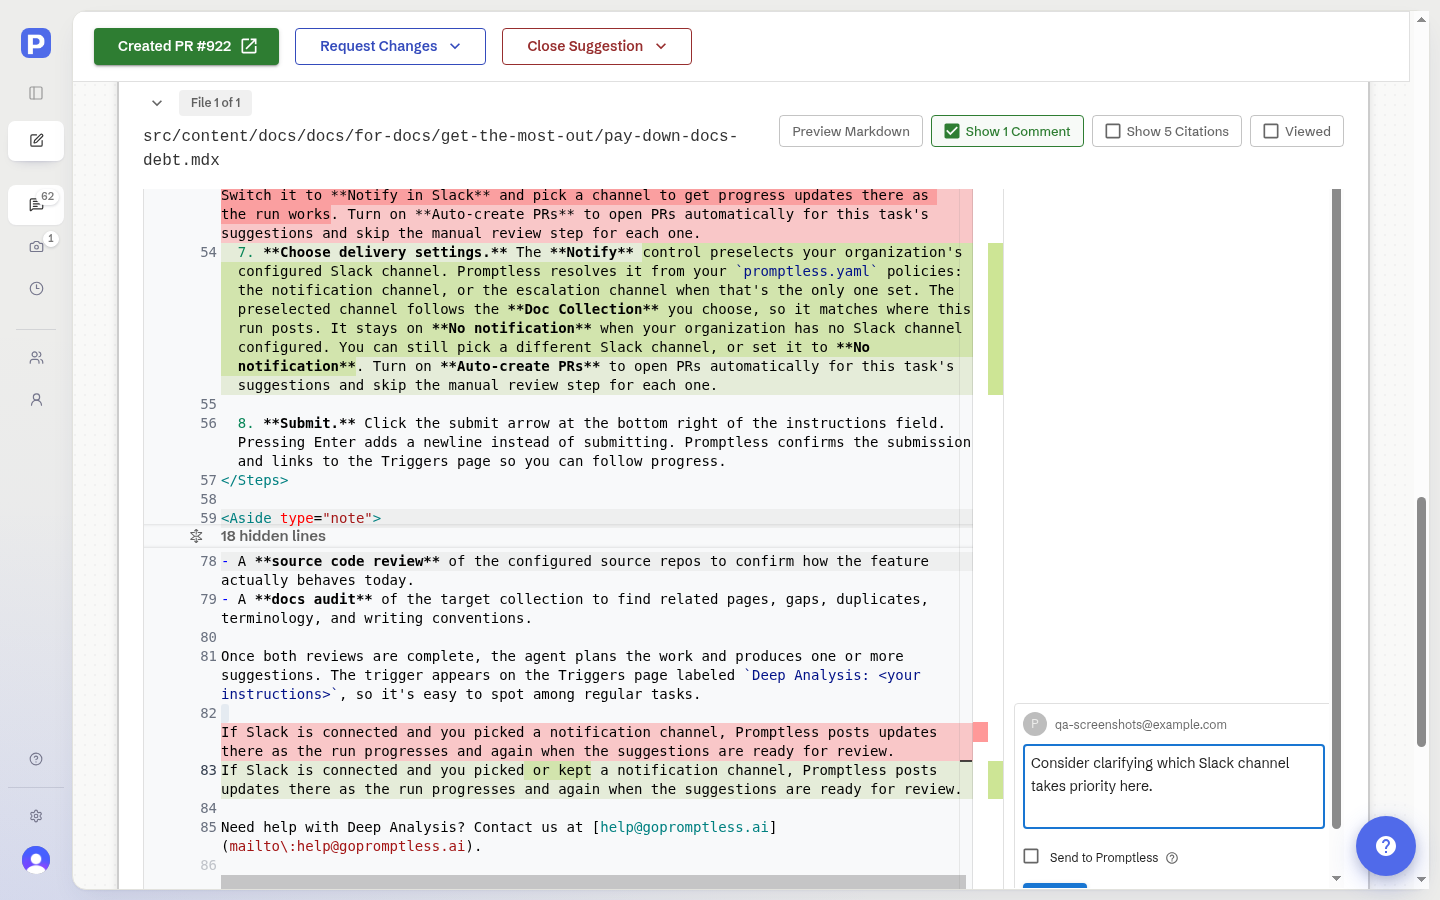
Once you’ve added your request-change comments, a banner appears at the bottom showing how many comments are saved. Click **Submit Feedback** when you’re finished reviewing. Editing and publishing actions are temporarily disabled while Promptless processes your feedback.
## 3. Overall comments
[Section titled “3. Overall comments”](#3-overall-comments)
Leave general feedback about a suggestion without targeting a specific file. This is useful for high-level guidance or when your feedback applies to the entire suggestion.
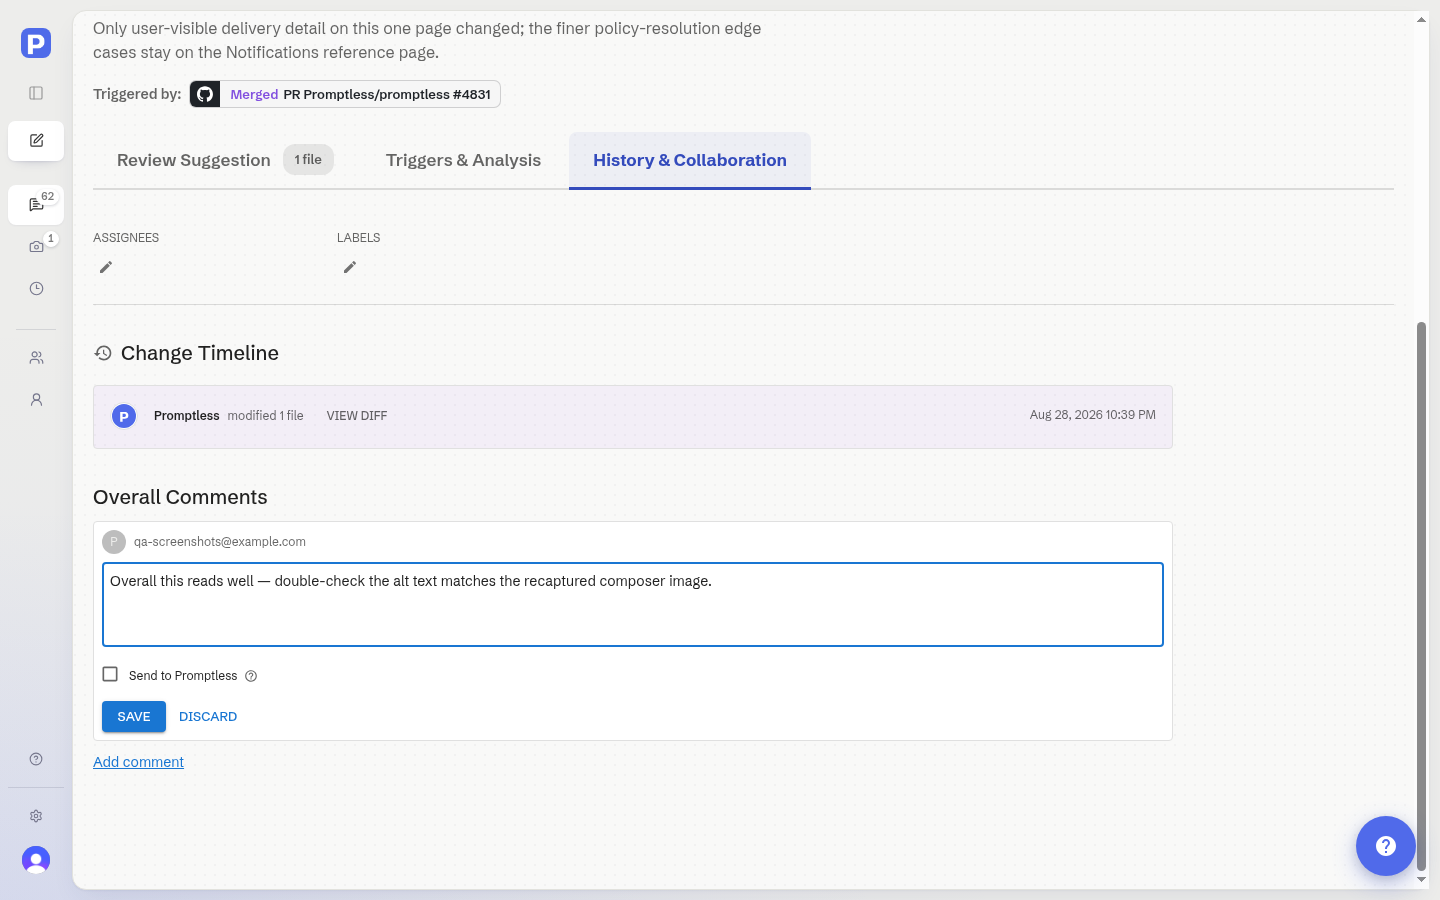
Like dashboard inline feedback, you can check **Send to Promptless** to queue the feedback.
## 4. Close suggestion feedback
[Section titled “4. Close suggestion feedback”](#4-close-suggestion-feedback)
When closing a suggestion, provide feedback about why you’re rejecting it. This helps Promptless improve future suggestions.
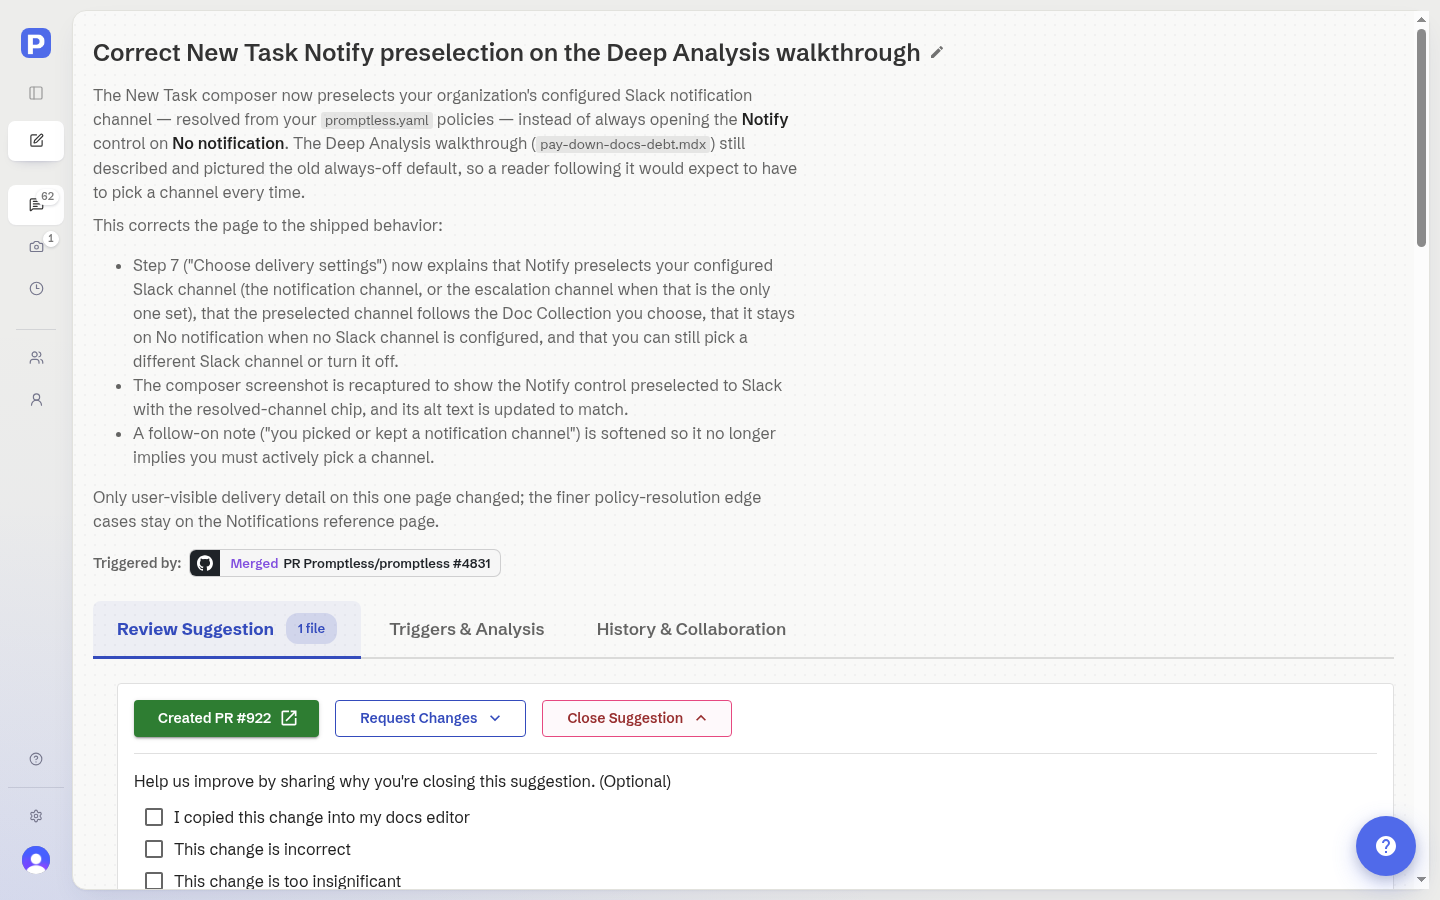
Select one or more reasons:
* “I copied this change into my docs editor”
* “This change is incorrect”
* “This change is too insignificant”
* “This change was covered in another Promptless suggestion”
* “This is already in my docs”
* “This change is self-explanatory and doesn’t need docs”
You can also provide additional context in the feedback field. Check “Remember this feedback for future suggestions” to save your preferences.
## 5. GitHub PR comments
[Section titled “5. GitHub PR comments”](#5-github-pr-comments)
After Promptless opens a documentation PR, you can leave feedback directly in GitHub. GitHub comments are separate from dashboard feedback. They won’t appear in the Promptless web interface, but Promptless will still process them. Tag @Promptless in any line comment to request changes.
Note
You can also @mention Promptless in comments on source code PRs to request documentation updates. See [Request documentation via PR comments](/docs/for-docs/connect/triggers/github-prs#request-documentation-via-pr-comments) for details.
Promptless reads all previous comments in the thread to understand context. You can give brief instructions like “same change here” or “apply this to the other sections too.”
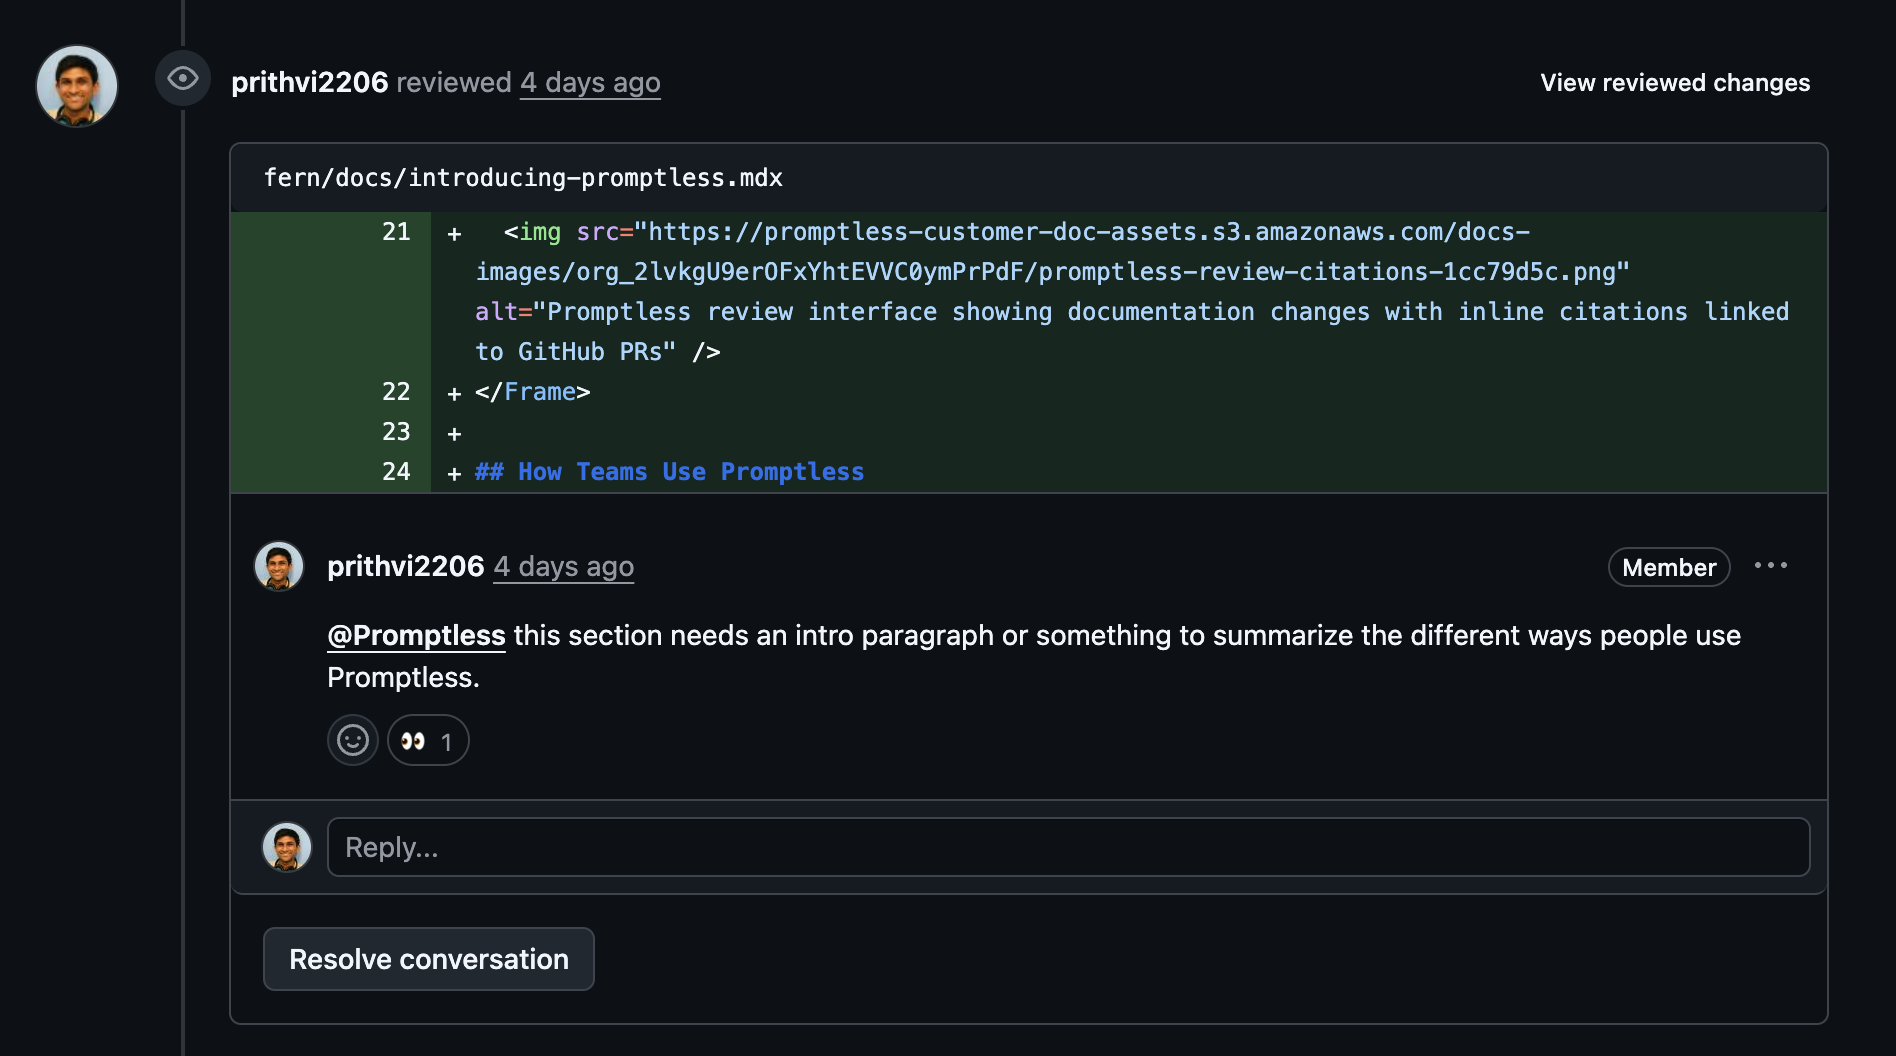
## How feedback improves future suggestions
[Section titled “How feedback improves future suggestions”](#how-feedback-improves-future-suggestions)
Every piece of feedback you submit helps Promptless learn your preferences. When you request changes, reject suggestions with explanations, or edit proposed content, Promptless updates its understanding of your documentation standards, writing style, and content preferences.
Need help? Contact us at .
# Route and assign suggestions to the right people
> Learn how Promptless routes notifications, assigns documentation PRs, and credits requesters so the right person picks up each suggestion
A suggestion only helps if it reaches someone who can review it. Promptless routes each suggestion, or the pull request it opens, to the people closest to the change. It notifies whoever requested the work, assigns the documentation PR, and credits the original requester in the PR. You shape that routing through your [Agent Knowledge Base](/docs/for-docs/get-the-most-out/agent-knowledge-base). It then follows your team’s ownership and review conventions rather than a one-size-fits-all default.
Note
This page covers how work is routed to people, including notifications, assignees, and requesters. To choose the Slack or Microsoft Teams channel a notification lands in, see [Customize notifications](/docs/for-docs/tune/notifications).
## Notify the person who requested the change
[Section titled “Notify the person who requested the change”](#notify-the-person-who-requested-the-change)
When Promptless announces a suggestion, it notifies the person the work came from. That might be the author of the merged pull request, the teammate who tagged Promptless in Slack, or whoever started the thread. The requester sees the suggestion in the channel and knows it’s waiting on them, so the notification never lands without an owner.
Because Promptless ties each notification back to its source, it can also reply where the conversation already lives. When a suggestion comes from a Slack thread, Promptless can post the update as a reply in that thread. Everyone already discussing the change sees it in context. A source PR in GitHub might get a comment about a new related docs PR.
## Assign the documentation PR
[Section titled “Assign the documentation PR”](#assign-the-documentation-pr)
When Promptless opens a documentation PR, it sets an assignee so the PR lands in that person’s review queue. By default, it assigns the person the change came from: the source PR’s author, or the teammate who requested the update in Slack. Promptless matches their account across GitHub and Slack. Who owns each PR is governed by your Agent Knowledge Base, so you can point PRs at an area owner or a specific teammate instead.
Assigning the PR to the requester keeps ownership continuous. Whoever changed the code or asked for the update is the same person GitHub prompts to review the docs that follow.
Usernames rarely line up across platforms. The same person might be `@jdoe` in Slack and `jane-doe` on GitHub. Promptless matches accounts on a best-effort basis, so it usually connects a requester’s identities on its own. When it can’t, or when you want to be sure, add a username map to your [Agent Knowledge Base](/docs/for-docs/get-the-most-out/agent-knowledge-base). The map pairs each teammate’s Slack and GitHub handles. Promptless then uses that map to assign and credit the right person even when their names differ.
Note
Assigned a Promptless docs PR and want to know what to do with it? See [Review and edit Promptless PRs](/docs/for-docs/work-the-queue/reviewing-prs). It covers reviewing the diff, requesting changes, and steering the PR from a GitHub comment.
## Credit the requester in the PR description
[Section titled “Credit the requester in the PR description”](#credit-the-requester-in-the-pr-description)
For a suggestion that starts from a Slack request, Promptless names the requester on a dedicated line near the top of the PR description. The line is formatted as `Requested by: `. This shows at a glance who asked for the change, so a reviewer picking up the PR later knows who to follow up with.
## Route approvals to a reviewer
[Section titled “Route approvals to a reviewer”](#route-approvals-to-a-reviewer)
Routing doesn’t stop when the PR opens. You can have Promptless hand an approved PR to a designated writer or reviewer. When a documentation PR receives an approval and that writer or reviewer hasn’t approved it themselves, Promptless sets them as an assignee. It also notifies them that the PR is ready for writer review. You set this handoff up in your Agent Knowledge Base, so it follows the writer or reviewer you name rather than running by default. That writer or reviewer gets a clear signal that a PR has cleared an approval and now needs their eyes. No one has to reassign it by hand.
Note
If you want to support this workflow, make sure your GitHub PR triggers are set to activate when a PR gets its first approval.
## Customize routing in your Knowledge Base
[Section titled “Customize routing in your Knowledge Base”](#customize-routing-in-your-knowledge-base)
Your [Agent Knowledge Base](https://app.gopromptless.ai/settings/knowledge) governs routing and assignment, so you can adapt it to how your team divides ownership. Organization admins can edit these preferences directly. Other members have read-only access.
You write these preferences in plain language, not a config schema, and Promptless applies them. Common adjustments include:
* **Who gets notified**: @mention the original requester, or route suggestions to an area owner based on which docs or product surface the change touches.
* **Who owns the PR**: choose which teammate is assigned a documentation PR.
* **How approvals hand off**: name the writer or reviewer a PR should route to once it’s approved, and how they’re notified.
* **Who’s who across platforms**: map a teammate’s Slack and GitHub handles so Promptless assigns and credits the right person when their usernames differ.
For example, you might add lines like:
```plaintext
When a PR is approved but our lead writer (Jane) hasn't approved it, assign them and notify them for a final review.
Route suggestions that touch the billing docs to the billing team's owner (Juan).
| Person | Slack | GitHub |
| --- | --- | --- |
| Jane | @jdoe | jane-doe |
| Bill | @Bill | billhandler |
```
Notification and routing preferences live in the `doc_workflow/notification_preferences.md` file within your Knowledge Base. It’s a lightweight scaffold for your overrides, while Promptless handles the underlying templates and delivery. For the full range of notification customizations and channel configuration, see [Customize notifications](/docs/for-docs/tune/notifications). To teach Promptless durable conventions from your review feedback, see [Teach conventions with feedback](/docs/for-docs/tune/teaching-conventions).
# Review from Slack and Teams
> Learn how to use Promptless directly in Slack and Microsoft Teams through message actions, DMs, channel mentions, and passive listening
Note
This page covers both Slack and Microsoft Teams. The sections below describe the Slack workflow; jump to [Microsoft Teams](#microsoft-teams) for the Teams equivalent. Make sure you have the [Slack integration](/docs/for-docs/reference/integrations/slack) set up before using these Slack features.
## Four ways to interact in Slack
[Section titled “Four ways to interact in Slack”](#four-ways-to-interact-in-slack)
### 1. Message actions
[Section titled “1. Message actions”](#1-message-actions)
Use Slack’s message actions to quickly trigger documentation updates from any message or thread. This is best used when you don’t want to interrupt the flow of the conversation.
1. **Access Message Actions.** Click the three dots (⋯) menu on any Slack message to open the message actions menu.
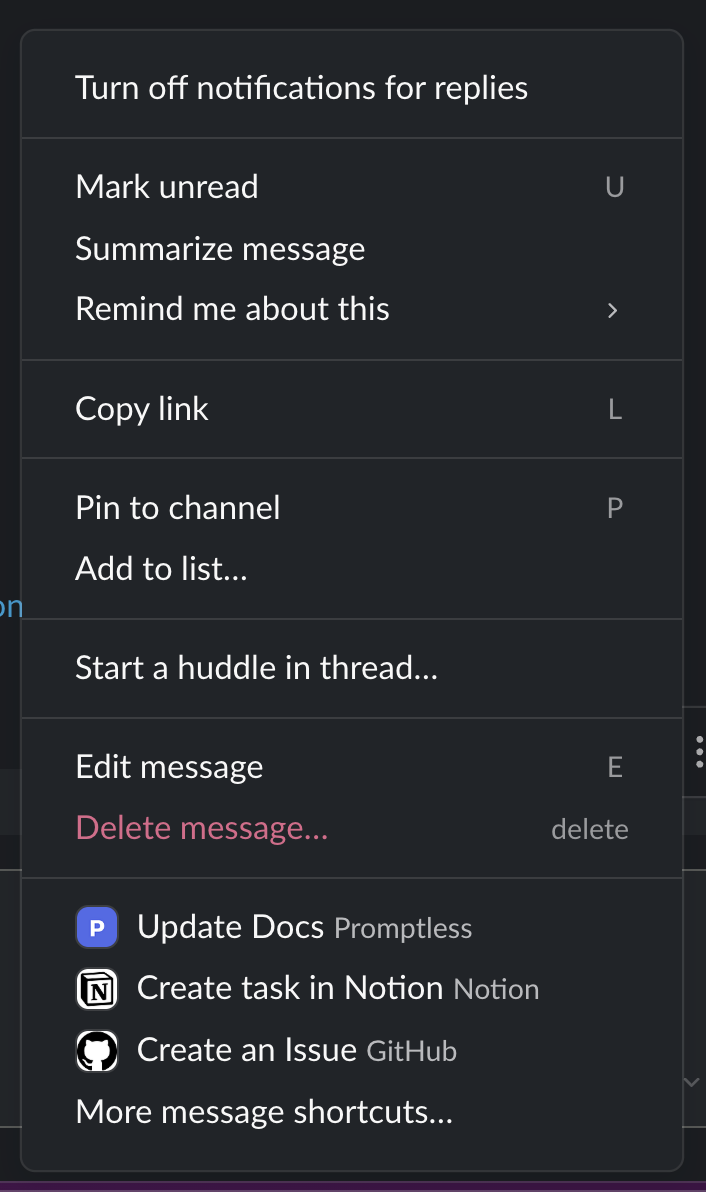
Slack message actions menu showing Promptless integrations
2. **Select Update Docs.** Choose “Update Docs” from the message actions menu to trigger Promptless. If you don’t see the option, click on “More message shortcuts” and search for Promptless.
3. **Review Generated Content.** Promptless analyzes the full thread to generate relevant documentation updates, and DMs you once it’s done.
### 2. Channel mentions
[Section titled “2. Channel mentions”](#2-channel-mentions)
Tag Promptless directly in any channel to trigger documentation updates from ongoing discussions.
1. **Mention Promptless.** Tag Promptless bot in a new message or in a thread reply in a channel. Include instructions about how to update the docs. You can add internal and external links, slack links, as well as images. Don’t forget to add Promptless bot to the channel if you’re tagging it for the first time!
2. **Thread Context Analysis.** Promptless analyzes the entire thread context to understand the discussion and generate relevant documentation. You can point Promptless to specific pages, or Promptless can infer based on the context.
Editing Suggestions in Slack
Promptless replies in the thread once it’s done drafting updates. From there, you can add follow-on instructions in the same thread to refine the suggestion. See [Thread Auto-Reply](#thread-auto-reply) for how follow-up replies are handled and how to configure this behavior.
### Example instructions
[Section titled “Example instructions”](#example-instructions)
```txt
@Promptless please also add a troubleshooting section covering the error cases we discussed earlier in this thread
```
```txt
@Promptless make sure to mention that this feature is only available in the Enterprise plan
```
```txt
@Promptless create a mermaid chart for the system architecture discussed in this thread
```
```txt
@Promptless capture a screenshot of the new export dialog from our staging environment and add it to the export feature docs
```
### Inline citations in research replies
[Section titled “Inline citations in research replies”](#inline-citations-in-research-replies)
When you ask Promptless a research question that requires fetching external URLs (documentation sites, articles, or video transcripts), the reply includes inline links. Those links cite each fact back to its source. The linked phrase is the specific claim or number, not the full sentence.
For example, if you ask about API rate limits and Promptless fetches your docs and source code, the reply might look like:
> The hard rate limit on `/v1/embed` is **60 requests per minute per API key**, enforced by the gateway’s `rate_limiter.py` config.
Each bolded term links directly to its source. The rate limit number links to your API reference, and the file name links to the repository.
If a fetch fails, Promptless acknowledges the gap and still links to the URL it tried:
> **Live status:** unverified. Your status page returned 503 when I checked, so I can’t confirm whether you’re currently throttled.
Only sources that shaped the answer appear as citations. Background reads, dead ends, and unused fetches are omitted.
### 3. Direct messages (DMs)
[Section titled “3. Direct messages (DMs)”](#3-direct-messages-dms)
Send direct messages to Promptless for private documentation requests or when you have very specific instructions.
1. **Start a DM.** Go to the Apps section in Slack, click on the Promptless bot.
2. **Describe Your Request.** Type your documentation request or paste content you’d like to turn into documentation. You can post internal or external links, slack links, images, etc. You don’t have to tag Promptless here.
3. **Wait for Promptless DM.** Promptless DMs you with the doc updates.
## Use images and file attachments
[Section titled “Use images and file attachments”](#use-images-and-file-attachments)
You can attach images and files when you trigger Promptless in Slack to provide additional context. Include screenshots, diagrams, design mockups, API responses, or configuration files in the same thread where you tag @Promptless or use the “Update Docs” action.
When you trigger Promptless, it reviews all text and attached files in the thread. If an image or file content is valuable for the documentation, Promptless incorporates it into the suggested updates.
### Examples
[Section titled “Examples”](#examples)
**Adding a screenshot to explain a feature**
```txt
@Promptless please document this new export feature. I've attached a screenshot showing the new export dialog.
```
**Including an architecture diagram**
```txt
@Promptless update the technical architecture page with this new system diagram (attached)
```
**Documenting an error message**
```txt
@Promptless we need to add troubleshooting docs for this error. See the screenshot above for the exact error message users are seeing.
```
**Using design specs**
```txt
@Promptless here's the design spec for the new onboarding flow (PDF attached). Please create documentation that matches this flow.
```
For technical details about how images are processed and managed, see the [Slack Integration page](/docs/for-docs/reference/integrations/slack).
## Request screenshot captures
[Section titled “Request screenshot captures”](#request-screenshot-captures)
If your organization has screenshot capture enabled, you can ask Promptless to capture fresh screenshots from your staging or production environment. Promptless navigates to your web application, captures the UI, and includes the screenshot in your documentation.
### Examples
[Section titled “Examples”](#examples-1)
**Capturing a specific feature**
```txt
@Promptless capture a screenshot of the user settings page from staging and add it to the account management docs
```
**Updating existing screenshots**
```txt
@Promptless the dashboard screenshot in our getting started guide is outdated—can you capture a fresh one from production?
```
**Capturing multiple screens**
```txt
@Promptless we need screenshots of the new onboarding flow. Please capture the welcome screen, the team setup page, and the final confirmation from staging.
```
Note
Screenshot capture requires your organization to have the feature enabled and your environment configured. Contact your Promptless admin or if you need to set this up.
### 4. Passive channel listening
[Section titled “4. Passive channel listening”](#4-passive-channel-listening)
Have Promptless automatically monitor specific Slack channels and create documentation updates without requiring @mentions or message actions. This is ideal for documentation-focused or support channels where discussions frequently reveal documentation needs.
When passive listening is enabled, Promptless monitors all messages in your selected channels and creates documentation suggestions immediately as messages are posted.
Add a `slack_listen` trigger to your [Configuration page](https://app.gopromptless.ai/configuration):
```yaml
triggers:
support-channels:
trigger_type: slack_listen
match:
- channels:
- customer-support
- docs-feedback
```
Channel names don’t need the `#` prefix. See the [Configuration Reference](/docs/for-docs/reference/configuration-reference#triggers) for details.
Will Promptless create a new suggestion for every new message in the thread?
No. When passive listening is enabled, Promptless triggers immediately on each message but consolidates related updates.
If new messages are added to a thread that Promptless has already processed, Promptless updates its existing suggestion rather than creating a duplicate. This means even if there are multiple triggers for the same thread, you see updates to a single suggestion. You don’t get a flood of separate suggestions.
**Tip**: If you @mention Promptless in a thread that’s being passively monitored, it triggers immediately rather than waiting for the thread to go quiet.
Note
Passive listening is completely opt-in. Promptless only monitors channels you explicitly select in your project configuration. You can add or remove channels at any time.
## Thread auto-reply
[Section titled “Thread auto-reply”](#thread-auto-reply)
Once Promptless has been triggered in a Slack thread, it keeps listening for new replies in that thread without needing another @mention. The trigger can be a message action, channel mention, DM, or passive listening. This makes it easy to refine a suggestion, add context, or share images and files as the conversation continues. You don’t have to remember to tag `@Promptless` every time.
Promptless reasons about each new reply to decide whether it’s actionable, so not every message produces a documentation update. To explicitly tell Promptless to ignore a message, start it with `aside` or `/aside`:
```txt
aside @InlinePizza are these the ones your thing found or were there more?
```
### Configure thread replies
[Section titled “Configure thread replies”](#configure-thread-replies)
Thread auto-reply is configured per organization. Open **Settings** and select **Organization**, then choose between:
* **Listen to all replies** (default): Promptless evaluates every reply in threads where it’s participating.
* **Require @promptless**: Promptless only processes replies that explicitly @mention it.
For setup instructions, see [Thread Reply Trigger Mode](/docs/for-docs/connect/triggers/slack-messages#thread-reply-trigger-mode) in the Configuring Promptless guide.
## Microsoft Teams
[Section titled “Microsoft Teams”](#microsoft-teams)
Note
The Microsoft Teams integration is in beta. Contact to enable it for your organization. To connect it, see the [Microsoft Teams integration](/docs/for-docs/reference/integrations/microsoft-teams) setup guide.
Promptless works the same way in Microsoft Teams as it does in Slack. You trigger it from a conversation, and it drafts documentation updates for you to review and approve.
* **Tag @Promptless in a channel**: Mention @Promptless in a Teams channel with your instructions, and it analyzes the conversation to draft relevant updates.
* **Send a direct message**: DM @Promptless for private documentation requests.
* **Passive channel listening**: Add an `msteams_listen` trigger to monitor selected channels and draft suggestions automatically, without an @mention. Like Slack listening, this is opt-in. Promptless only monitors the channels you explicitly select.
Once the Teams integration is connected, @Promptless mentions are always active, with no YAML configuration required. For the trigger types, passive-listening setup, and publishing behavior, see [Microsoft Teams messages](/docs/for-docs/connect/triggers/microsoft-teams-messages).
Need help with Slack or Teams interactions? Contact us at .
# Review and edit Promptless PRs
> Learn how to provide follow-up instructions through GitHub PR comments and reviews after your documentation PR is opened
After Promptless opens a docs PR, you can provide follow-on instructions directly through GitHub comments. Promptless automatically handles quality issues (like linter failures, Vale warnings, or broken links) that arise in documentation PRs. Manual feedback can focus on content improvements rather than technical fixes.
Note
You can also @mention Promptless in comments on source code PRs to request documentation updates. See [Request documentation via PR comments](/docs/for-docs/connect/triggers/github-prs#request-documentation-via-pr-comments) for details.
## Comment trigger modes
[Section titled “Comment trigger modes”](#comment-trigger-modes)
Configure how Promptless responds to comments on documentation PRs:
**Listen to all comments** (default for new organizations): Promptless processes human comments on documentation PRs automatically. To have Promptless ignore a specific comment, start it with `aside` or `/aside`.
**Require @promptless mentions** (default for existing organizations): Promptless only responds when you tag @promptless in a comment.
In **Listen to all comments** mode, Promptless also looks at who a comment addresses. If a comment’s question or request goes only to someone else, Promptless leaves it alone. A comment that doesn’t clearly address someone else still gets a reply.
Note
Change this setting anytime in [Settings → **Organization**](https://app.gopromptless.ai/settings/org).
## Mentions from automated accounts
[Section titled “Mentions from automated accounts”](#mentions-from-automated-accounts)
A direct `@Promptless` mention works even when the comment comes from an automated account rather than a person. For example, a CI or review GitHub Action may post a comment that tags `@Promptless` on a documentation PR after a check runs. Promptless treats it as a follow-on request and acts on it, just as it does with a comment from a teammate. Bot comments that don’t mention Promptless are ignored.
## Review in the dashboard
[Section titled “Review in the dashboard”](#review-in-the-dashboard)
Every PR that Promptless opens includes a dashboard link at the top of the description for additional context.
When you click the dashboard link, you can:
* **View citations**: See the exact GitHub files, PRs, and commits Promptless referenced
* **Read the reasoning process**: Understand why Promptless made specific updates
* **Review full context**: Access all source material Promptless analyzed, including Slack threads, issue tickets, and related conversations
Use the dashboard to verify updates or understand the background behind changes.
## Two ways of providing feedback
[Section titled “Two ways of providing feedback”](#two-ways-of-providing-feedback)
### 1. Individual comments
[Section titled “1. Individual comments”](#1-individual-comments)
Leave individual comments on specific lines or sections of the documentation PR for targeted feedback.
If your organization uses **Listen to all comments** mode, just leave your comment. Promptless will process it automatically. In **Require @promptless mentions** mode, tag @promptless in the comment (it won’t show up in auto-complete, but Promptless will still see it).
Promptless automatically reads all previous comments in the PR to understand the full context. This means your instructions can be as simple as “Same here” or “Apply this change to the other section too.”
### 2. PR reviews
[Section titled “2. PR reviews”](#2-pr-reviews)
Start a review to provide multiple pieces of feedback that Promptless can handle all at once.
1. **Start a Review.** Click “Review changes” to begin a formal review process, or select “Start a review” when adding an in-line comment.
2. **Add Multiple Comments.** Continue adding comments as part of the review.
3. **Submit Your Review.** Click “Finish your review” and submit. In **Listen to all comments** mode, Promptless processes the review automatically. In **Require @promptless mentions** mode, tag @promptless in the review summary.
## Examples of feedback you can give to Promptless
[Section titled “Examples of feedback you can give to Promptless”](#examples-of-feedback-you-can-give-to-promptless)
### Content updates
[Section titled “Content updates”](#content-updates)
Request specific changes to the documentation content:
```txt
Please add a section about error handling for this API endpoint
```
```txt
This example should use TypeScript instead of JavaScript
```
```txt
Add a note that this feature requires admin permissions
```
### Structural changes
[Section titled “Structural changes”](#structural-changes)
Suggest improvements to the documentation structure:
```txt
Move this section to the beginning of the page for better flow
```
```txt
Split this into two separate sections: "Basic Usage" and "Advanced Configuration"
```
```txt
Add a table of contents at the top of this page
```
### Technical corrections
[Section titled “Technical corrections”](#technical-corrections)
Point out technical inaccuracies or missing details:
```txt
The API endpoint should be /v2/users, not /v1/users
```
```txt
Add the required headers for authentication
```
```txt
Include the response status codes for each endpoint
```
### Style and formatting
[Section titled “Style and formatting”](#style-and-formatting)
Request improvements to presentation and readability:
```txt
Format this as a code block instead of inline code
```
```txt
Add syntax highlighting for the JSON examples
```
```txt
Use a callout box to highlight this important warning
```
Need help with GitHub PR interactions? Contact us at .
# Use the web interface
> Learn how to use Promptless's web interface to highlight text, provide feedback, and guide documentation improvements
## Suggestions list
[Section titled “Suggestions list”](#suggestions-list)
The suggestions list shows all documentation suggestions awaiting your review. Each suggestion card includes chips that help you identify key details at a glance:
* **Docs target**: A chip with a document icon shows which doc collection the suggestion targets. Hover over the chip to see the full repository path, or click it to filter the list to suggestions targeting that collection. This is especially useful if your organization has multiple doc collections.
* **Archiving soon**: Suggestions approaching auto-archive display an orange chip. Hover over it for details about auto-archive behavior. Viewing or editing a suggestion resets the timer.
By default, suggestions are automatically archived after 30 days of inactivity. Viewing or editing a suggestion resets the timer, so anything you’re actively reviewing stays in the queue. If your team wants a different window, or wants to keep suggestions open indefinitely, an admin can change or disable archiving per doc collection. Use the `archiving` policy to do this. See the [Configuration reference](/docs/for-docs/reference/configuration-reference#policies) for the `enabled` and `stale_after_days` fields. If a suggestion is auto-archived before you can review it, we can restore it for you.
## Suggestion detail tabs
[Section titled “Suggestion detail tabs”](#suggestion-detail-tabs)
Opening a suggestion from the list shows its detail view, organized into three tabs.
* **Review Suggestion** (opens by default): shows the suggested file changes. Edit the suggestion, publish it (open a PR or MR), request changes, or close it.
* **Triggers & Analysis**: shows the trigger events that produced the suggestion and the research Promptless did before drafting it, described in [Research breakdown](#research-breakdown).
* **History & Collaboration**: shows assignees, labels, the change timeline, and overall comments.
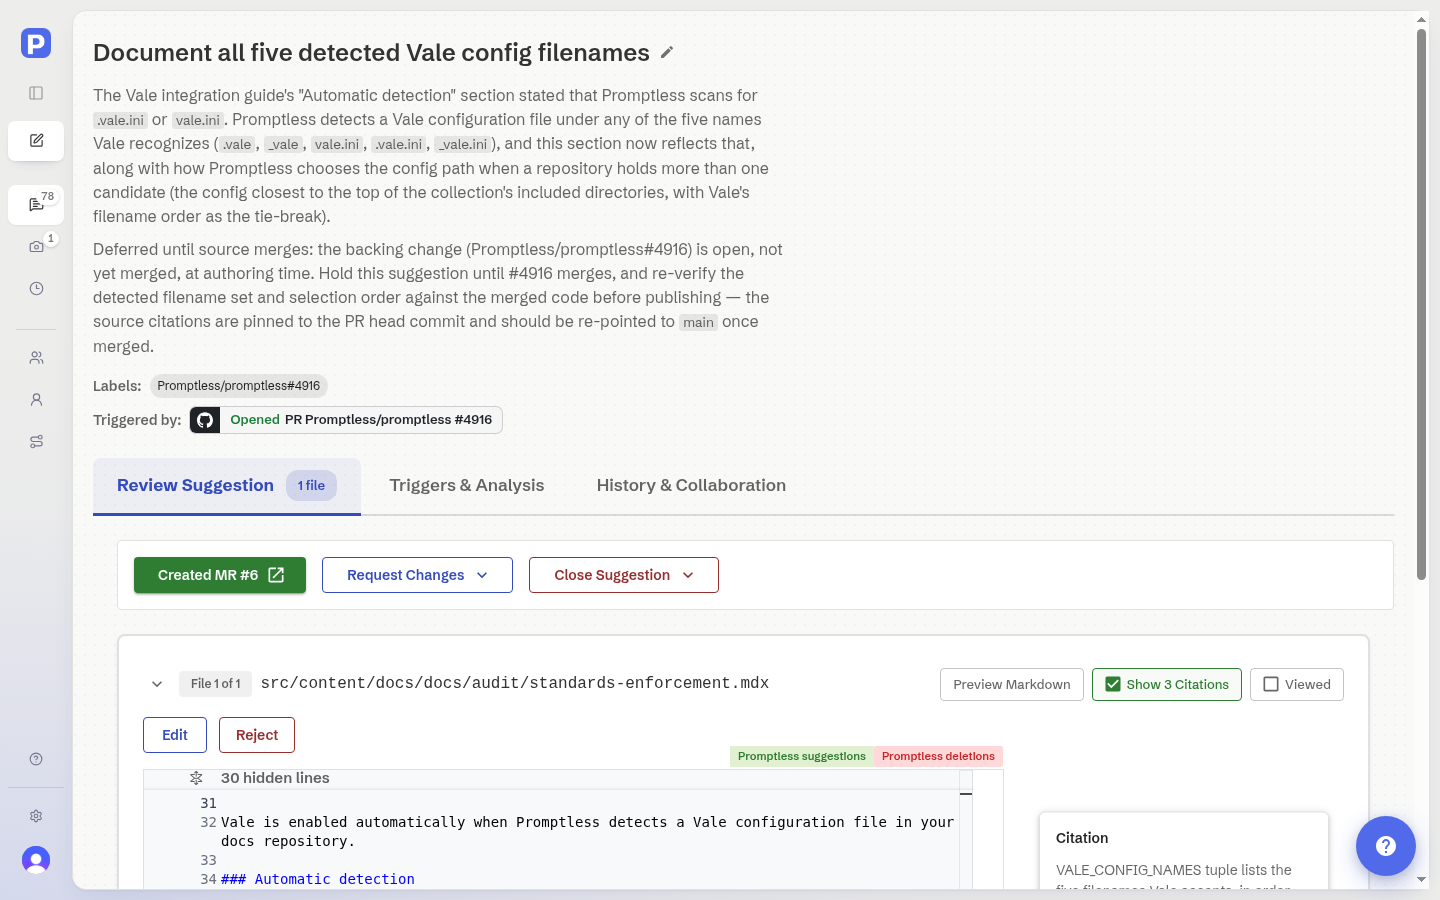
## Suggestion overview
[Section titled “Suggestion overview”](#suggestion-overview)
Each suggestion includes a title and description that explains what changes are being made and why.
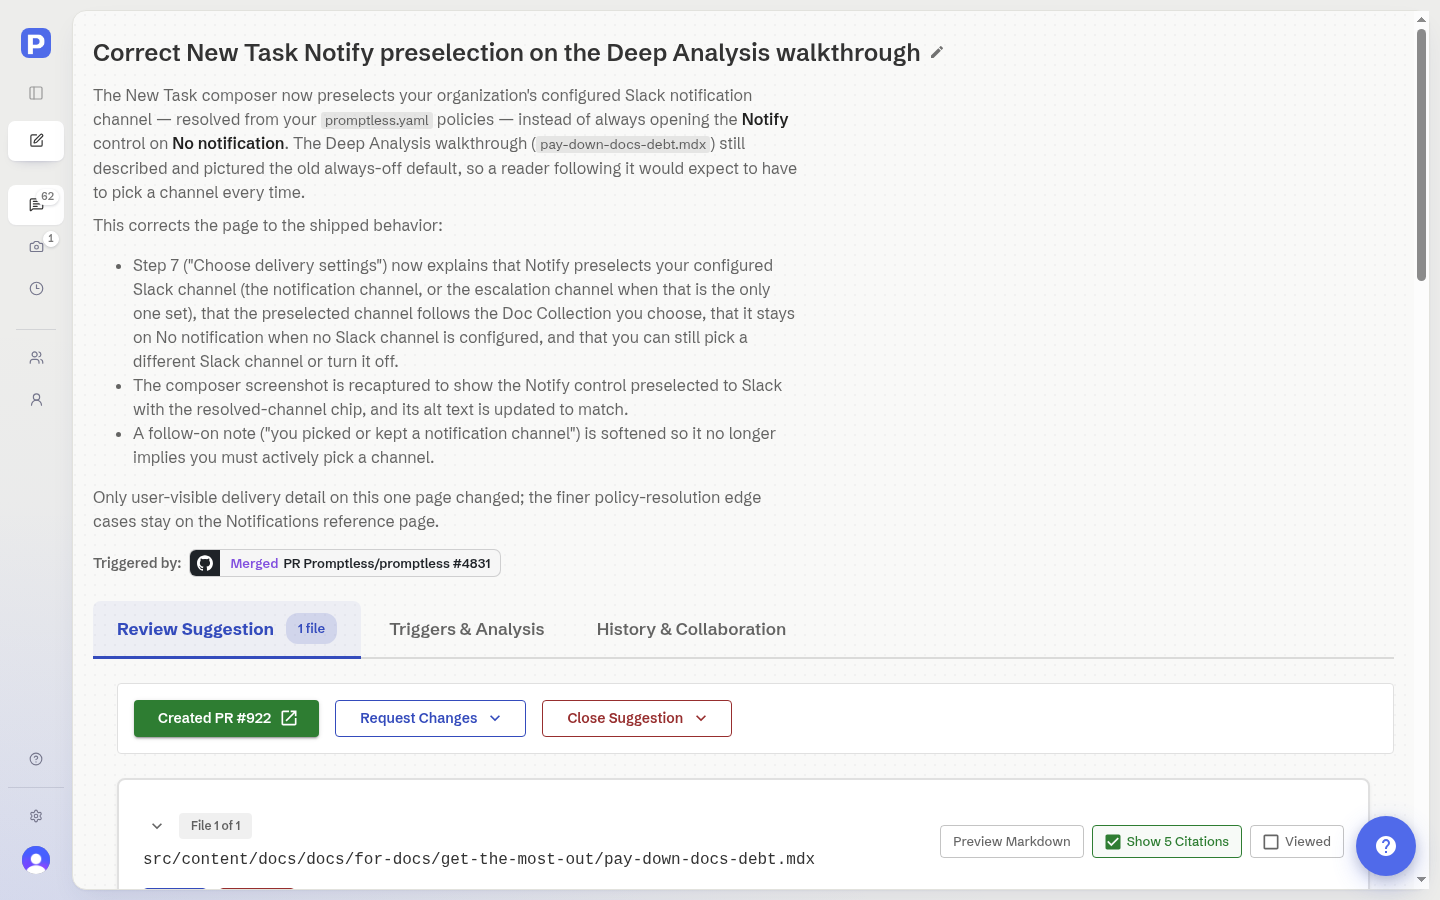
### Edit the title
[Section titled “Edit the title”](#edit-the-title)
You can rename a suggestion from its detail page. Click the pencil next to the title, type a new name, and press Enter or click the checkmark to save. Press Escape or click the X to cancel. Titles can’t be empty.
When a suggestion already has an open or draft documentation PR, GitHub is the source of truth for the title. Saving pushes the rename to the GitHub PR title first. Promptless keeps the new title only once GitHub accepts it, so your dashboard and the PR stay in sync. Only the PR title changes. Your branch and commits are untouched. If the GitHub update fails, Promptless leaves the title unchanged and shows a retryable error. If you rename the PR on GitHub instead, opening the suggestion in the dashboard pulls the current PR title back in.
For a suggestion with no open PR, Promptless saves the edit locally.
## Markdown preview
[Section titled “Markdown preview”](#markdown-preview)
Preview how Markdown and MDX files will render before publishing. Click **Preview Markdown** on any `.md`, `.mdx`, or `.markdown` file to open a preview modal with diff highlighting. Added content appears with a green background and left rail, and removed content shows red. This helps you review formatting, headings, lists, tables, and code blocks in context without switching between raw diff and published views.
## Image preview
[Section titled “Image preview”](#image-preview)
When a suggestion changes an image or screenshot, the suggestion viewer shows a side-by-side before-and-after preview. You can compare the old and new versions directly. Both images render together for visual comparison. There’s no overlay, slider, or automated pixel-diff.
* Added images show only the new version; deleted images show only the previous version.
* You can open an image at full size to inspect it more closely.
* Previews render for common image formats: PNG, JPEG, GIF, BMP, WebP, and AVIF. Other files, including SVGs, fall back to the standard diff, and unsupported or very large files show a message instead of an inline preview.
* Image-only suggestions get the same status as any other suggestion, so you can apply and publish them the same way.
* Rejecting an individual image restores the previous version rather than deleting the file.
## The commit timeline
[Section titled “The commit timeline”](#the-commit-timeline)
The commit timeline lists the commits on a suggestion’s branch, so you can see the work behind it. It also includes the automatic **sync/merge** commits Promptless creates when it merges the base branch into the suggestion branch. A **sync/merge** row can report a large file count. It reflects content pulled in from the base branch, not changes the suggestion itself proposes.
### When there’s nothing to review
[Section titled “When there’s nothing to review”](#when-theres-nothing-to-review)
When a suggestion’s branch matches its base branch, the viewer shows an explanatory panel that reads “No changes against” plus the base branch name.
This normally means the changes already landed on the base branch, or a sync merge replaced them. If the branch has no commits at all, the panel instead says the branch has no content that differs from the base.
From here you can select **Request Changes** to ask Promptless for a different approach, or **Close Suggestion** to end the suggestion with [feedback](/docs/for-docs/tune/teaching-conventions). If you think the empty result is an error, contact support. The panel also shows the branch name with a **View branch** link to the branch on GitHub or GitLab when available. It renders the commit timeline inline below it.
## Provide feedback
[Section titled “Provide feedback”](#provide-feedback)
Promptless offers several ways to provide feedback on suggestions. Learn about all available feedback methods in the [Teaching conventions with feedback](/docs/for-docs/tune/teaching-conventions) guide.
## Bulk opening pull requests
[Section titled “Bulk opening pull requests”](#bulk-opening-pull-requests)
When you have multiple suggestions ready to publish, you can open PRs for all of them at once.
1. Click **Select** in the suggestions list toolbar to enter select mode.
2. Check the suggestions you want to include. Use **Select all matching** to select all suggestions that match your current filters.
3. Click **Open N PRs** in the floating action bar at the bottom of the screen.
4. Review the confirmation dialog. It shows how many PRs will be opened and how many will be skipped.
5. Click **Confirm** to start opening PRs. A progress banner tracks each suggestion as it completes.
**Suggestions that will be skipped:**
* Suggestions that already have an open or draft PR
* Suggestions with no content (no files changed)
* Closed suggestions
If any requests fail, use **Retry failed** to retry them. Press **Esc** at any time to exit select mode.
## Deep Analysis
[Section titled “Deep Analysis”](#deep-analysis)
**Deep analysis** is one of three options in the New Task composer’s **Mode** chip, alongside **Fast** and **Default**. **Default** is preselected; set **Mode** to **Deep analysis** to switch to it.
* **Fast**: Makes a single direct pass. Best for typos and small wording fixes.
* **Default**: Runs the full writer workflow. Best for most docs changes.
* **Deep analysis**: Runs many agents across many PRs. Best for audits and migrations.
Deep Analysis handles large, complex documentation requests that may take several hours to complete and produce multiple suggestions. The composer’s **Use a template** rail offers starter prompts for common request shapes. Examples include refactoring a section of docs, auditing for consistency, or writing docs from scratch.
For details on when to use Deep Analysis and how to submit requests, see the [Deep Analysis guide](/docs/for-docs/get-the-most-out/pay-down-docs-debt).
## Screenshot Updates
[Section titled “Screenshot Updates”](#screenshot-updates)
Screenshot Updates is a tab in the dashboard’s left sidebar. It shows an org-wide gallery of every screenshot attached to an open suggestion (any suggestion that isn’t closed). The nav item carries a count badge with the number of screenshots on open suggestions, and hides the badge when that count is zero.
Screenshots are grouped by doc collection, under a collection header showing the collection name and a count chip showing how many screenshots that collection has. Screenshots whose suggestion isn’t tied to a doc collection fall under an **Uncategorized** group. The newest screenshots come first, both within a group and across groups. Each screenshot gets its own card, so a suggestion with five screenshots produces five cards.
* Each card shows the thumbnail by default; the suggestion title and the captured date reveal when you hover or focus the card.
* Click a card to open that screenshot’s suggestion, scrolling to and briefly highlighting that specific image. There you can compare it against the previous version and reject it if needed. You can also publish the suggestion to accept it (see [Image preview](#image-preview)).
* When a collection group holds more screenshots than fit, it clips with a fade and adds a **Show more** toggle that reveals the rest. Its header also gains a chevron that collapses the group. A group that already fits shows none of these.
When no open suggestion has any screenshots, the tab shows an empty state noting there are none right now. Screenshots often appear here after [Promptless Capture](/docs/for-docs/get-the-most-out/screenshots) regenerates them following a UI change.
## Triggers page
[Section titled “Triggers page”](#triggers-page)
The Triggers page shows every event that triggered Promptless over the last 30 days. Each trigger appears as a row. A **status pill** on the row reports the outcome at a glance: **researching**, **suggestion created**, **suggestion updated**, **no suggestion**, or **suggestion closed**. Expand a row to see the full timeline of what the trigger produced, read from top to bottom:
* **Received**: The event that fired, such as a GitHub PR or a Slack message, and when it landed.
* **Suggestion created**, **Suggestion updated**, or **Suggestion closed**: An entry for each documentation suggestion the trigger acted on. **Suggestion closed** appears when that trigger’s Promptless run closed the suggestion itself, whatever state its pull request is in. Each entry carries a chip showing where that suggestion’s pull request stands. The chip reads **PR Open**, **Published** (the PR merged), or **Closed** (the PR was closed without merging). Click a suggestion to open it. When a run finishes without producing a suggestion, the timeline notes **No suggestion created** instead.
* **Trigger completed**: When Promptless finished handling the trigger.
While a trigger is still being processed, its timeline shows a **Processing** indicator in place of **Trigger completed**, and its status pill reads **researching**.
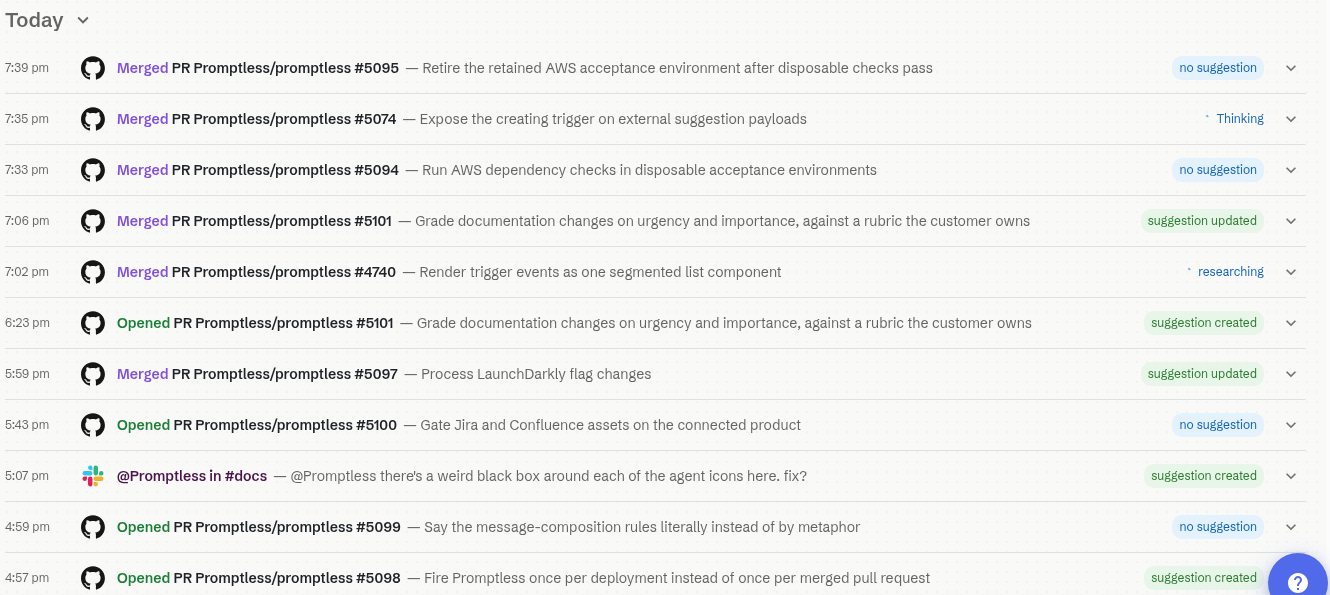
### Agent response
[Section titled “Agent response”](#agent-response)
Any completed trigger whose run recorded a final response shows an **Agent Response:** block when you expand its row. The block previews that response, rendered as Markdown. This is especially useful when a trigger finished with **No suggestion created**, since the response can capture the agent’s reasoning for that outcome. The preview shows a truncated line by default. When the response is long enough to be truncated, a control toggles between **Show more** and **Show less** to reveal or collapse the full response.
### Filter and search
[Section titled “Filter and search”](#filter-and-search)
Use the search box to find triggers by PR info, Slack thread topic, task name, or other summary text, including events older than 30 days. The type and suggestion-activity filters help narrow results further.
The **From** and **To** date fields filter by a specific date range. Date filtering searches your full trigger history, not just the default 30-day window. Clear the dates to return to the default view.
### Group triggers
[Section titled “Group triggers”](#group-triggers)
The **Group by** control organizes the trigger list:
* **None**: Flat list, newest first
* **Event source**: Groups triggers by platform (GitHub, Slack, etc.) with the most recently active source first
* **Date**: Groups triggers by day with headers like “Today”, “Yesterday”, or the calendar date (default)
Click any group header to collapse it. A count pill shows how many triggers are hidden. Click again to expand.
## Research breakdown
[Section titled “Research breakdown”](#research-breakdown)
The research breakdown appears inside a trigger’s expanded row, on the Triggers page or in a suggestion’s **Triggers & Analysis** tab. It shows the research Promptless did before drafting (or skipping) documentation. A summary line like “Promptless Research: 10 files, 2 knowledge base files, 3 searches” appears. Next to it, a toggle reads **Show details** when collapsed and **Hide details** when expanded. Select **Show details** to reveal the detailed list of what the agent read and searched.
The detailed list shows the agent’s work in roughly the order it happened, so you can follow the run as it unfolded. Along the way you see a few kinds of items:
* **Files**: source and documentation files the agent opened, shown as clean repository-relative paths.
* **Knowledge base files**: reads from your [Knowledge Base](https://app.gopromptless.ai/settings/knowledge), such as contribution guidelines or style rules. They appear inline at the point in the sequence where the agent consulted them. Each one is labeled “Read from knowledge base”. It links to that file in the [Agent Knowledge Base editor](/docs/for-docs/get-the-most-out/agent-knowledge-base#view-files) in a new tab.
* **Searches**: content and filename searches the agent ran. Each search includes a chip showing where it ran. A branded chip marks your doc collection, and a **sandbox** chip marks a search of the agent’s own working directory.
* **Webpages and Slack**: external pages the agent fetched and Slack threads it read.
When Promptless delegates part of its research to a specialized subagent, that work appears as an indented branch labeled “Delegated research to ``”. A tool-call count appears alongside it as ”· N tool calls”. The count stands in for that subagent’s work. Much of it is shell commands, which don’t each produce their own row. Older suggestions, created before delegation tracking existed, render flat, without a delegation branch.
If the agent used any of [your own skills](/docs/for-docs/connect/doc-locations/how-promptless-learns-your-docs#use-your-existing-skills), a “Used N of your skills” callout appears next to the summary. This shows you when Promptless applied a workflow you authored. When Promptless delegates research, a “N research agents” callout sits alongside the summary.
Need help with the web interface? Contact us at .
# Promptless for Agent Instructions
> Publish shared agent instructions, understand how they perform in real sessions, and review evidence-backed improvements with Promptless Instruction Governance.
Promptless Instruction Governance (PIG) helps teams maintain the instructions their AI agents use. Keep shared skills, rules, commands, and tool configuration in a versioned **Instruction Hub**. Publish them as plugins, then use evidence from real sessions to improve them.
You can start with instruction publishing on its own. When you are ready to learn from agent sessions, deploy the **trace analyzer** in your infrastructure and enroll the hosts that should send it traces.
**Instruction Hub**Publish shared instructions
Published pluginsthen
**AI agent**Use instructions in real work
Session tracesthen
**Trace analyzer**Find instruction problems
Findingsthen
**Promptless Dashboard**Review evidence and improvements
Reviewed instruction updates → Instruction Hub
Publish instructions on their own, or add trace analysis to learn from sessions. Review proposed improvements and publish accepted changes back through your hub.
See [How it works](/docs/governance/start-here/how-it-works#the-components-at-a-glance) for the full architecture, ownership boundaries, and data flow.
## What you can do with PIG
[Section titled “What you can do with PIG”](#what-you-can-do-with-pig)
* **Give instructions a shared home.** Replace scattered copies with reviewed source files, clear ownership, and a release history.
* **Distribute them to different agents.** The `pig` toolchain builds agent-specific plugins from the same hub. Authors maintain the source; each agent receives a supported format.
* **Find failures from real work.** The trace analyzer examines sessions for missing, stale, conflicting, or ineffective instructions and records findings with supporting evidence.
* **Review improvements before they reach your team.** Findings can lead to proposed changes in your hub. Your team reviews pull requests and publishes accepted changes through its usual Git workflow.
For example, Acme’s writers and developers share a `review-docs` skill. A finding shows that an older skill release omits prerequisite checks, leading agents to approve guides with missing setup steps. A reviewer checks the cited session evidence, merges a correction, and publishes a new release for the team to install.
## Choose how much to set up
[Section titled “Choose how much to set up”](#choose-how-much-to-set-up)
Hub guides are written for technical writers and developers. Deployment guides cover the Kubernetes, identity, storage, and operational decisions that DevOps and GitOps teams manage. You do not need to understand the deployment details to begin authoring instructions.
### Publish instructions first
[Section titled “Publish instructions first”](#publish-instructions-first)
An Instruction Hub needs a Git repository, the `pig` toolchain, a publishing pipeline, and an agent that can install the output. It does not need a trace analyzer, database, bucket, or model-provider account. New hubs have managed trace ingestion disabled by default.
Use this path to establish your source of truth, test the authoring workflow, and get useful instructions into your team’s agents. [Create a hub](/docs/governance/get-started/set-up-your-instruction-hub) or [migrate existing instructions](/docs/governance/get-started/migrate-existing-instructions).
### Add evidence from sessions
[Section titled “Add evidence from sessions”](#add-evidence-from-sessions)
For trace analysis, deploy the analyzer and connect PostgreSQL and your cloud’s object storage. Configure a model provider and your hub repository, then enable host enrollment. Raw traces stay in your storage. The configured model provider receives analysis input, and Promptless receives trace metadata and findings that can include session-derived detail.
The trace analyzer updates automatically to stable releases by default. You can pause updates or pin a release. See [Manage updates and recovery](/docs/governance/deploy-the-worker/manage-updates-and-recovery).
Read the [trust and data model](/docs/governance/start-here/trust-and-data-model) with your deployment team before enabling collection.
## Find your path
[Section titled “Find your path”](#find-your-path)
### Author and publish instructions
[Section titled “Author and publish instructions”](#author-and-publish-instructions)
Author, publish, and install shared instructions without deploying a trace analyzer.
[How it works](/docs/governance/start-here/how-it-works)See the components, dependencies, and data flow, from publishing an instruction to learning from a session.
[Key concepts](/docs/governance/start-here/key-concepts)Look up hubs, assets, plugins, marketplaces, hosts, traces, findings, and releases.
[Set up your Instruction Hub](/docs/governance/get-started/set-up-your-instruction-hub)Create shared instructions and validate a first release your team can install.
[Migrate existing instructions](/docs/governance/get-started/migrate-existing-instructions)Consolidate scattered skills and configuration into one reviewed hub.
[Publish and install plugins](/docs/governance/get-started/publish-and-install-plugins)Build a release to publish, or install a published plugin in your agent.
[Supported agents](/docs/governance/reference/supported-agents)Compare instruction distribution and native trace collection support.
### Deploy trace analysis
[Section titled “Deploy trace analysis”](#deploy-trace-analysis)
Deploy the analyzer, enroll hosts, and act on the findings it produces.
[Trust and data model](/docs/governance/start-here/trust-and-data-model)See which systems receive your data and which credentials connect them.
[Plan your deployment](/docs/governance/deploy-the-worker/plan-your-deployment)Plan the infrastructure and access that trace analysis needs.
[Install the trace analyzer](/docs/governance/deploy-the-worker/deploy-the-analyzer-worker)Set up trace analysis in your cluster with automatic updates, then verify your first session.
[Enroll your hosts](/docs/governance/get-started/enroll-your-hosts)Enable optional trace collection and authorize a Claude or Codex host.
[Understand findings](/docs/governance/findings-and-remediation/understand-findings)Evaluate and triage evidence-backed instruction problems.
[Remediate findings](/docs/governance/findings-and-remediation/remediate-findings)Review a proposed instruction change and publish it through your Git workflow.
# Compute and sizing
> Size the trace analyzer from representative sessions, database load, object growth, and model throughput.
The trace analyzer needs compute for receiving uploads, preparing traces, and running analysis. PostgreSQL stores ingestion and analysis state; the trace bucket stores session objects. Repository mirrors are disposable local storage.
## Start with a measured pilot
[Section titled “Start with a measured pilot”](#start-with-a-measured-pilot)
There is no single capacity target for a number of developers. Session size, agent activity, analysis duration, and model rate limits determine the load. Start with one analyzer replica, then measure representative sessions before increasing concurrency or replicas.
As an initial allocation, the manual Helm example requests 500 millicores and 1 GiB of memory, with a 2 GiB memory limit. These values are a pilot starting point, not a throughput guarantee. The automatic installation uses its release’s workload defaults; review the generated pod requests and limits before admitting production traffic.
```bash
kubectl get deployment acme-analyzer --namespace pig \
-o jsonpath='{.spec.template.spec.containers[*].resources}{"\n"}'
kubectl top pods --namespace pig
```
`kubectl top` requires your cluster’s metrics service. Use your existing monitoring system for measurements over time.
## Measure each constraint
[Section titled “Measure each constraint”](#measure-each-constraint)
| Constraint | Measure | Adjust |
| ------------------- | ---------------------------------------------------------------- | ------------------------------------------------------------------------------ |
| Analyzer compute | CPU saturation, memory peaks, restarts, processing time. | Kubernetes capacity and the supported workload configuration for your release. |
| Analysis throughput | Eligible sessions waiting, time to completion, model throttling. | Model quota and analysis capacity together. |
| PostgreSQL | Connections, query latency, storage growth, disk throughput. | Database size and capacity through Terraform. |
| Trace bucket | Uploaded bytes, object counts, request rates, retrieval errors. | Storage policy and network capacity; keep required objects available. |
| Repository mirror | Checkout size, temporary disk usage, refresh failures. | Node ephemeral storage and repository access. |
A backlog caused by model throttling does not improve by adding pods. Account for database connection growth and model quotas before scaling analysis.
## Availability and upgrades
[Section titled “Availability and upgrades”](#availability-and-upgrades)
Use managed database availability and backups appropriate to your recovery objectives. Budget cluster capacity for migration Jobs and rolling releases in addition to steady-state pods. Distribute workloads according to the release’s supported scheduling settings.
PIG reports infrastructure requirements that block an update. Apply the required cloud change through Terraform and let PIG retry its live checks. For capacity PIG cannot inspect, such as managed database disk headroom, [confirm the target release’s requirements](/docs/governance/deploy-the-worker/manage-updates-and-recovery#confirm-capacity-that-pig-cannot-inspect) using current provider metrics. PIG does not mirror Terraform capacity. Avoid editing generated Deployments: the supervisor reconciles those resources.
Validate any capacity change with the same [complete-session checks](/docs/governance/deploy-the-worker/verify-your-deployment) used at installation.
# Deployment configuration
> Reference the PIGDeployment fields for automatic updates, storage, models, and Secret references.
This reference covers the `PIGDeployment` resource used by the [default Helm installation](/docs/governance/deploy-the-worker/deploy-the-analyzer-worker). The [manual Helm reference](/docs/governance/deploy-the-worker/manual-helm-reference) covers worker chart `0.3.0`; its values are a separate interface.
## Resource identity
[Section titled “Resource identity”](#resource-identity)
```yaml
apiVersion: governance.promptless.ai/v1alpha1
kind: PIGDeployment
metadata:
name: acme
namespace: pig
```
Keep the resource name, namespace, and registered deployment ID stable. The example generates analyzer Deployment and Service `acme-analyzer`. Secret and ConfigMap references resolve in the deployment’s namespace.
The bootstrap chart’s `watchNamespace` selects the analyzer namespace. Install one supervisor for that scope and keep its bootstrap values with your recovery records.
## Release policy
[Section titled “Release policy”](#release-policy)
Fields are under `spec.release`:
| Field | Meaning |
| -------------------------------- | -------------------------------------------------------------------------------------------------------------------- |
| `channel` | `stable` follows every stable release, including major releases and schema migrations. |
| `paused` | `false` permits release transitions. `true` stops new transitions while preserving service and credential refresh. |
| `pinnedVersion` | Empty follows the channel; an exact supported release pins the target. A pause takes precedence. |
| `confirmation.configMapRef.name` | Customer-owned ConfigMap in the deployment namespace with confirmations for the exact deployment and target release. |
The policy coordinates the analyzer and supervisor together. A pin does not bypass compatibility or migration checks. See [updates and recovery](/docs/governance/deploy-the-worker/manage-updates-and-recovery).
The confirmation ConfigMap binds `releaseDigest` and `deploymentID`. Recovery confirmation uses `confirmedAt`, `postgresRecoveryPoint`, and `objectRecoveryPoint`. Operator capacity acknowledgement uses `capacityConfirmedAt`, `capacityRequirementsDigest`, and `capacityEvidence`. Supply the fields required by the target release; see [confirm release prerequisites](/docs/governance/deploy-the-worker/manage-updates-and-recovery#confirm-release-prerequisites). These acknowledgements do not replace live dependency checks or mirror Terraform state.
## Identity and endpoint
[Section titled “Identity and endpoint”](#identity-and-endpoint)
Fields are under `spec`:
| Field | Meaning |
| ------------------------------ | ---------------------------------------------------------------------------------------------------------------------- |
| `serviceAccountName` | Existing analyzer ServiceAccount, such as `pig-analyzer`, with cloud data-access bindings. |
| `podLabels` | Additional analyzer pod labels required by your platform, such as Azure’s workload identity opt-in. |
| `hosted.runtimeURL` | Runtime URL from your Promptless deployment registration. |
| `hosted.deploymentID` | Stable registered deployment identifier. |
| `hosted.installTokenSecretRef` | Secret `name` and `key` containing the deployment token. |
| `endpoint.hostname` | Analyzer hostname reachable from enrolled hosts. |
| `endpoint.ingressClassName` | An existing Kubernetes ingress class. |
| `endpoint.tlsSecretName` | Optional TLS Secret covering the hostname; omit when the ingress controller uses an external certificate, such as ACM. |
| `endpoint.ingressAnnotations` | Controller-specific annotations, including the encoded upload-body limit of at least 10 MiB. |
The generated Service uses port 8080. The supervisor derives the registered configuration from the effective settings. The install token is separate from individual host credentials.
## Storage
[Section titled “Storage”](#storage)
Fields are under `spec.storage`. Configure `postgres` and **exactly one** of `s3`, `azureBlob`, or `gcs`.
| Field | Meaning |
| ----------------------------------------------------------------- | ------------------------------------------------------------------------------------------------- |
| `postgres.dsnSecretRef` | Secret `name` and `key` containing the database connection string with TLS settings. |
| `postgres.caConfigMapRef` | Optional ConfigMap `name` and `key` for a CA bundle mounted at `/etc/pig/postgres-ca/ca.pem`. |
| `s3.region`, `s3.bucket`, `s3.prefix` | AWS region, bucket, and dedicated trace prefix. Uses the analyzer’s AWS workload identity. |
| `azureBlob.accountURL`, `azureBlob.container`, `azureBlob.prefix` | HTTPS storage account URL, private container, and trace prefix. Uses Microsoft Entra Workload ID. |
| `gcs.bucket`, `gcs.prefix` | Google Cloud Storage bucket and trace prefix. Uses Workload Identity Federation for GKE. |
Storage configuration grants no cloud management authority. Changing a location does not move existing data. Plan that transition using the [object-storage guidance](/docs/governance/deploy-the-worker/object-storage).
## Analysis
[Section titled “Analysis”](#analysis)
Fields are under `spec.analysis`:
| Field | Meaning |
| ----------------------- | --------------------------------------------------------------------------------------- |
| `activationAt` | Timezone-aware ISO timestamp for analysis eligibility. Leave empty for ingestion only. |
| `quietWindowHours` | Positive interval after session activity before analysis; the example uses `0.5` hours. |
| `model.provider` | `openai`, `azure_openai`, or `aws_bedrock`. |
| `model.authentication` | `api_key`, or `aws_sigv4` for Bedrock. |
| `model.baseURL` | A supported HTTPS Responses API endpoint. |
| `model.name` | The model or deployment name available in your provider account. |
| `model.apiKeySecretRef` | Secret `name` and `key`; omit for Signature Version 4. |
A nonempty activation time requires complete model settings. An organization administrator selects the instruction repositories the analyzer reads in [PIG Settings](/docs/governance/deploy-the-worker/deploy-the-analyzer-worker#5-select-instruction-repositories); the analyzer reads GitHub repositories with a `main` branch. Hub publishing support for another Git host does not imply analyzer or remediation support for it.
Use the [model-provider reference](/docs/governance/deploy-the-worker/model-providers) for accepted endpoint shapes and authentication. GitHub issues and proposed fixes use write access granted to the connected GitHub App for the selected repositories. A successful analysis clone does not verify that access.
## Validate a change
[Section titled “Validate a change”](#validate-a-change)
Review configuration through its owner, such as your GitOps repository. Validate the manifest against the installed release’s custom resource definition:
```bash
kubectl apply --dry-run=server -f pig-deployment.yaml
```
Apply the change and inspect `kubectl describe pigdeployment acme --namespace pig`. Repeat [deployment verification](/docs/governance/deploy-the-worker/verify-your-deployment) after changes to storage, identities, model access, or endpoints. Schema validation alone cannot prove those dependencies are reachable.
# Deploy on AWS
> Prepare native storage, PostgreSQL, and workload identity with Terraform for an existing EKS cluster, then install PIG with Helm.
Use Terraform to prepare **Amazon RDS for PostgreSQL**, **Amazon S3**, and a workload identity for PIG on your existing EKS cluster. Then bootstrap PIG with Helm. Terraform continues to own cloud infrastructure; PIG maintains its application releases.
## Before you begin
[Section titled “Before you begin”](#before-you-begin)
* Complete [deployment planning](/docs/governance/deploy-the-worker/plan-your-deployment), including your Promptless registration, Instruction Hub, and model access.
* Have Terraform, Git, the AWS CLI, Helm, and `kubectl` available. Use the tool versions required by the selected infrastructure release.
* Prepare an existing VPC, private database subnets across the availability zones required by RDS, and the security group used by your EKS workloads. Enable an IAM OIDC provider for the cluster so the analyzer can assume its dedicated IAM role.
* Have permission to provision the dedicated database, trace storage, and workload identity in that network.
* Choose database capacity, availability, backup retention, trace retention, and encryption settings for your recovery requirements.
This guide reuses your cluster and network. It does not create a new cluster or install an ingress controller. Use your existing secret-delivery and certificate-management systems.
## 1. Get the versioned Terraform example
[Section titled “1. Get the versioned Terraform example”](#1-get-the-versioned-terraform-example)
Choose a release from [PIG deployment releases](https://github.com/Promptless/pig-deploy/releases), then check out that exact tag:
```bash
PIG_INFRA_RELEASE='vREPLACE_WITH_RELEASE'
git clone --branch "$PIG_INFRA_RELEASE" --depth 1 \
https://github.com/Promptless/pig-deploy.git
cd pig-deploy/examples/aws
```
The example pins the cloud module to the same release and declares its Terraform and provider requirements. Preserve the module pin and commit the provider lock file generated by `terraform init` to your infrastructure repository. Infrastructure module versions and PIG application versions are independent.
## 2. Configure and apply infrastructure
[Section titled “2. Configure and apply infrastructure”](#2-configure-and-apply-infrastructure)
1. **Confirm your account and cluster.**
```bash
aws sts get-caller-identity
kubectl config current-context
```
2. **Copy the example inputs.**
```bash
cp terraform.tfvars.example terraform.tfvars
```
Set the AWS region, EKS cluster name and OIDC provider, VPC and database subnet IDs, and the analyzer workload security group. Use namespace `pig`, ServiceAccount `pig-analyzer`, database `pig`, and a dedicated trace prefix such as `acme/traces`.
Review database sizing, availability, backup retention, storage recovery, and deletion protection explicitly. Use private database access and private trace storage. Supply database credentials through your approved secrets workflow; keep secret values out of committed `.tfvars` files.
3. **Initialize and review the plan.** Configure an encrypted remote state backend with access control and locking using your platform’s Terraform workflow before applying.
```bash
terraform init
terraform validate
terraform plan -out=pig.tfplan
```
Review the dedicated database, storage, identity, and network bindings. Stop if the plan replaces your cluster, expands shared permissions, or destroys retained storage unexpectedly. Terraform state and saved plans can contain credentials; store them as secrets even when an output is marked sensitive.
4. **Apply the reviewed plan.**
```bash
terraform apply pig.tfplan
terraform output -json deployment_configuration > deployment-configuration.json
```
Keep this output for the Helm configuration. It contains database connection metadata, the native storage block, ServiceAccount annotations, and any required pod labels. It contains no credential values. Deliver the database DSN through your secret manager and install the provider’s CA bundle separately.
## 3. Connect the infrastructure to PIG
[Section titled “3. Connect the infrastructure to PIG”](#3-connect-the-infrastructure-to-pig)
Use the module’s `deployment_configuration` output as the source of truth. It maps into the common installation as follows:
| Output | Destination |
| ------------------------------ | -------------------------------------------------------------------------------------- |
| `postgres` connection metadata | The DSN in `pig-credentials/postgres-dsn`, with provider-appropriate TLS verification. |
| `storage` | The single native object-storage block under `PIGDeployment.spec.storage`. |
| `service_account_annotations` | Annotations on ServiceAccount `pig/pig-analyzer`. |
| `pod_labels` | `PIGDeployment.spec.podLabels`. |
For AWS, the ServiceAccount annotation is `eks.amazonaws.com/role-arn`. Its value resembles `arn:aws:iam::123456789012:role/acme-pig-analyzer`. Use the output’s actual identity; do not copy the illustrative value.
The role needs object access only to this deployment’s trace prefix, plus bucket metadata and encryption-key access required by the configuration. Keep RDS sizing, backup settings, and IAM changes in Terraform.
Use the provisioned bucket and prefix in the common Helm example:
```yaml
s3:
region: us-west-2
bucket: REPLACE_TRACE_BUCKET
prefix: acme/traces
```
The model is a separate choice. Select a supported endpoint from [model providers](/docs/governance/deploy-the-worker/model-providers); the storage backend does not select or provision it.
## 4. Configure HTTPS ingress
[Section titled “4. Configure HTTPS ingress”](#4-configure-https-ingress)
Install the [AWS Load Balancer Controller](https://kubernetes-sigs.github.io/aws-load-balancer-controller/latest/deploy/installation/) with its own IAM role, and provision an ACM certificate for the analyzer hostname in the ALB’s region. The PIG Terraform module does not create these resources.
Use this `spec.endpoint` configuration in the common Helm installation example:
```yaml
endpoint:
hostname: pig.example.com
ingressClassName: alb
ingressAnnotations:
alb.ingress.kubernetes.io/scheme: internet-facing
alb.ingress.kubernetes.io/target-type: ip
alb.ingress.kubernetes.io/certificate-arn: REPLACE_ACM_CERTIFICATE_ARN
alb.ingress.kubernetes.io/listen-ports: '[{"HTTPS":443}]'
alb.ingress.kubernetes.io/healthcheck-path: /healthz
```
Omit `tlsSecretName`: ALB uses the ACM certificate. Choose an internal scheme if every enrolled host can reach the private endpoint. After the supervisor creates the Ingress and the ALB has healthy targets, point the hostname’s DNS record at the ALB. Verify HTTPS with that hostname before enrolling a host.
## 5. Bootstrap and verify
[Section titled “5. Bootstrap and verify”](#5-bootstrap-and-verify)
Continue with [Install with Helm](/docs/governance/deploy-the-worker/deploy-the-analyzer-worker). Apply the ServiceAccount annotations, pod labels, native storage block, and database Secret from this guide before creating the `PIGDeployment`.
Keep the Helm bootstrap outside Terraform reconciliation. Do not add a `helm_release` resource for the self-updating supervisor or import its generated workloads into Terraform.
Finish with [Verify your deployment](/docs/governance/deploy-the-worker/verify-your-deployment). Confirm native storage writes and reads, a successful analysis, and visible Promptless Dashboard status for one exact session.
## Maintain the infrastructure
[Section titled “Maintain the infrastructure”](#maintain-the-infrastructure)
Use Terraform for database resizing, IAM changes, networking, backup policy, and object retention. Review infrastructure module upgrades as separate plans; PIG’s stable application channel does not upgrade your Terraform modules.
If PIG reports a blocked release that requires an infrastructure change, apply that change through Terraform. PIG resumes once its live checks and any required [release-specific confirmations](/docs/governance/deploy-the-worker/manage-updates-and-recovery#confirm-release-prerequisites) pass. Keep backups and trace retention coordinated, and follow [recovery guidance](/docs/governance/deploy-the-worker/manage-updates-and-recovery) before replacing storage.
For cloud-specific identity setup, see [IAM roles for service accounts](https://docs.aws.amazon.com/eks/latest/userguide/iam-roles-for-service-accounts.html).
# Deploy on Azure
> Prepare native storage, PostgreSQL, and workload identity with Terraform for an existing AKS cluster, then install PIG with Helm.
Use Terraform to prepare **Azure Database for PostgreSQL Flexible Server**, **Azure Blob Storage**, and a workload identity for PIG on your existing AKS cluster. Then bootstrap PIG with Helm. Terraform continues to own cloud infrastructure; PIG maintains its application releases.
Experimental cloud support
This cloud is experimental in 0.3.0. The first release targets AWS clean installation and canonical trace analysis through the Dashboard. Use this guide for evaluation; it does not establish equivalent acceptance on this cloud.
## Before you begin
[Section titled “Before you begin”](#before-you-begin)
* Complete [deployment planning](/docs/governance/deploy-the-worker/plan-your-deployment), including your Promptless registration, Instruction Hub, and model access.
* Have Terraform, Git, the Azure CLI, Helm, and `kubectl` available. Use the tool versions required by the selected infrastructure release.
* Prepare an existing resource group, VNet, delegated PostgreSQL subnet, private endpoint subnet, and private DNS integration. Enable the AKS OIDC issuer and Microsoft Entra Workload ID.
* Have permission to provision the dedicated database, trace storage, and workload identity in that network.
* Choose database capacity, availability, backup retention, trace retention, and encryption settings for your recovery requirements.
This guide reuses your cluster and network. It does not create a new cluster or install an ingress controller. Use your existing secret-delivery and certificate-management systems.
## 1. Get the versioned Terraform example
[Section titled “1. Get the versioned Terraform example”](#1-get-the-versioned-terraform-example)
Choose a release from [PIG deployment releases](https://github.com/Promptless/pig-deploy/releases), then check out that exact tag:
```bash
PIG_INFRA_RELEASE='vREPLACE_WITH_RELEASE'
git clone --branch "$PIG_INFRA_RELEASE" --depth 1 \
https://github.com/Promptless/pig-deploy.git
cd pig-deploy/examples/azure
```
The example pins the cloud module to the same release and declares its Terraform and provider requirements. Preserve the module pin and commit the provider lock file generated by `terraform init` to your infrastructure repository. Infrastructure module versions and PIG application versions are independent.
## 2. Configure and apply infrastructure
[Section titled “2. Configure and apply infrastructure”](#2-configure-and-apply-infrastructure)
1. **Confirm your account and cluster.**
```bash
az account show --query '{subscription:id,tenant:tenantId}' -o table
kubectl config current-context
```
2. **Copy the example inputs.**
```bash
cp terraform.tfvars.example terraform.tfvars
```
Set the Azure subscription, tenant, resource group and region; AKS OIDC issuer; existing subnet IDs and private DNS zone IDs. Use namespace `pig`, ServiceAccount `pig-analyzer`, database `pig`, and a dedicated trace prefix such as `acme/traces`.
Review database sizing, availability, backup retention, storage recovery, and deletion protection explicitly. Use private database access and private trace storage. Supply database credentials through your approved secrets workflow; keep secret values out of committed `.tfvars` files.
3. **Initialize and review the plan.** Configure an encrypted remote state backend with access control and locking using your platform’s Terraform workflow before applying.
```bash
terraform init
terraform validate
terraform plan -out=pig.tfplan
```
Review the dedicated database, storage, identity, and network bindings. Stop if the plan replaces your cluster, expands shared permissions, or destroys retained storage unexpectedly. Terraform state and saved plans can contain credentials; store them as secrets even when an output is marked sensitive.
4. **Apply the reviewed plan.**
```bash
terraform apply pig.tfplan
terraform output -json deployment_configuration > deployment-configuration.json
```
Keep this output for the Helm configuration. It contains database connection metadata, the native storage block, ServiceAccount annotations, and any required pod labels. It contains no credential values. Deliver the database DSN through your secret manager and install the provider’s CA bundle separately.
## 3. Connect the infrastructure to PIG
[Section titled “3. Connect the infrastructure to PIG”](#3-connect-the-infrastructure-to-pig)
Use the module’s `deployment_configuration` output as the source of truth. It maps into the common installation as follows:
| Output | Destination |
| ------------------------------ | -------------------------------------------------------------------------------------- |
| `postgres` connection metadata | The DSN in `pig-credentials/postgres-dsn`, with provider-appropriate TLS verification. |
| `storage` | The single native object-storage block under `PIGDeployment.spec.storage`. |
| `service_account_annotations` | Annotations on ServiceAccount `pig/pig-analyzer`. |
| `pod_labels` | `PIGDeployment.spec.podLabels`. |
For Azure, the ServiceAccount annotation is `azure.workload.identity/client-id`. Its value resembles `REPLACE_MANAGED_IDENTITY_CLIENT_ID`. Use the output’s actual identity; do not copy the illustrative value.
Add `azure.workload.identity/use: "true"` under `spec.podLabels` in `PIGDeployment`. The analyzer pods need this label for workload identity injection. The federated identity is scoped to `system:serviceaccount:pig:pig-analyzer`, and the Blob data role is scoped to the trace container.
Replace the S3 block in the common Helm example with this block, using the provisioned location:
```yaml
azureBlob:
accountURL: https://REPLACE_STORAGE_ACCOUNT.blob.core.windows.net
container: traces
prefix: acme/traces
```
The model is a separate choice. Select a supported endpoint from [model providers](/docs/governance/deploy-the-worker/model-providers); the storage backend does not select or provision it.
## 4. Bootstrap and verify
[Section titled “4. Bootstrap and verify”](#4-bootstrap-and-verify)
Continue with [Install with Helm](/docs/governance/deploy-the-worker/deploy-the-analyzer-worker). Apply the ServiceAccount annotations, pod labels, native storage block, and database Secret from this guide before creating the `PIGDeployment`.
Keep the Helm bootstrap outside Terraform reconciliation. Do not add a `helm_release` resource for the self-updating supervisor or import its generated workloads into Terraform.
Finish with [Verify your deployment](/docs/governance/deploy-the-worker/verify-your-deployment). Confirm native storage writes and reads, a successful analysis, and visible Promptless Dashboard status for one exact session.
## Maintain the infrastructure
[Section titled “Maintain the infrastructure”](#maintain-the-infrastructure)
Use Terraform for database resizing, IAM changes, networking, backup policy, and object retention. Review infrastructure module upgrades as separate plans; PIG’s stable application channel does not upgrade your Terraform modules.
If PIG reports a blocked release that requires an infrastructure change, apply that change through Terraform. PIG resumes once its live checks and any required [release-specific confirmations](/docs/governance/deploy-the-worker/manage-updates-and-recovery#confirm-release-prerequisites) pass. Keep backups and trace retention coordinated, and follow [recovery guidance](/docs/governance/deploy-the-worker/manage-updates-and-recovery) before replacing storage.
For cloud-specific identity setup, see [AKS workload identity](https://learn.microsoft.com/en-us/azure/aks/workload-identity-deploy-cluster).
# Deploy on Google Cloud
> Prepare native storage, PostgreSQL, and workload identity with Terraform for an existing GKE cluster, then install PIG with Helm.
Use Terraform to prepare **Cloud SQL for PostgreSQL**, **Google Cloud Storage**, and a workload identity for PIG on your existing GKE cluster. Then bootstrap PIG with Helm. Terraform continues to own cloud infrastructure; PIG maintains its application releases.
Experimental cloud support
This cloud is experimental in 0.3.0. The first release targets AWS clean installation and canonical trace analysis through the Dashboard. Use this guide for evaluation; it does not establish equivalent acceptance on this cloud.
## Before you begin
[Section titled “Before you begin”](#before-you-begin)
* Complete [deployment planning](/docs/governance/deploy-the-worker/plan-your-deployment), including your Promptless registration, Instruction Hub, and model access.
* Have Terraform, Git, the gcloud CLI, Helm, and `kubectl` available. Use the tool versions required by the selected infrastructure release.
* Prepare an existing project and VPC with private services access for Cloud SQL. Enable Workload Identity Federation for GKE and the required SQL, Storage, and IAM APIs. Use node pools that support the workload identity configuration.
* Have permission to provision the dedicated database, trace storage, and workload identity in that network.
* Choose database capacity, availability, backup retention, trace retention, and encryption settings for your recovery requirements.
This guide reuses your cluster and network. It does not create a new cluster or install an ingress controller. Use your existing secret-delivery and certificate-management systems.
## 1. Get the versioned Terraform example
[Section titled “1. Get the versioned Terraform example”](#1-get-the-versioned-terraform-example)
Choose a release from [PIG deployment releases](https://github.com/Promptless/pig-deploy/releases), then check out that exact tag:
```bash
PIG_INFRA_RELEASE='vREPLACE_WITH_RELEASE'
git clone --branch "$PIG_INFRA_RELEASE" --depth 1 \
https://github.com/Promptless/pig-deploy.git
cd pig-deploy/examples/gcp
```
The example pins the cloud module to the same release and declares its Terraform and provider requirements. Preserve the module pin and commit the provider lock file generated by `terraform init` to your infrastructure repository. Infrastructure module versions and PIG application versions are independent.
## 2. Configure and apply infrastructure
[Section titled “2. Configure and apply infrastructure”](#2-configure-and-apply-infrastructure)
1. **Confirm your account and cluster.**
```bash
gcloud config list project
kubectl config current-context
```
2. **Copy the example inputs.**
```bash
cp terraform.tfvars.example terraform.tfvars
```
Set the project and region, GKE cluster and workload identity pool, existing VPC ID and private services access configuration. Use namespace `pig`, ServiceAccount `pig-analyzer`, database `pig`, and a dedicated trace prefix such as `acme/traces`.
Review database sizing, availability, backup retention, storage recovery, and deletion protection explicitly. Use private database access and private trace storage. Supply database credentials through your approved secrets workflow; keep secret values out of committed `.tfvars` files.
3. **Initialize and review the plan.** Configure an encrypted remote state backend with access control and locking using your platform’s Terraform workflow before applying.
```bash
terraform init
terraform validate
terraform plan -out=pig.tfplan
```
Review the dedicated database, storage, identity, and network bindings. Stop if the plan replaces your cluster, expands shared permissions, or destroys retained storage unexpectedly. Terraform state and saved plans can contain credentials; store them as secrets even when an output is marked sensitive.
4. **Apply the reviewed plan.**
```bash
terraform apply pig.tfplan
terraform output -json deployment_configuration > deployment-configuration.json
```
Keep this output for the Helm configuration. It contains database connection metadata, the native storage block, ServiceAccount annotations, and any required pod labels. It contains no credential values. Deliver the database DSN through your secret manager and install the provider’s CA bundle separately.
## 3. Connect the infrastructure to PIG
[Section titled “3. Connect the infrastructure to PIG”](#3-connect-the-infrastructure-to-pig)
Use the module’s `deployment_configuration` output as the source of truth. It maps into the common installation as follows:
| Output | Destination |
| ------------------------------ | -------------------------------------------------------------------------------------- |
| `postgres` connection metadata | The DSN in `pig-credentials/postgres-dsn`, with provider-appropriate TLS verification. |
| `storage` | The single native object-storage block under `PIGDeployment.spec.storage`. |
| `service_account_annotations` | Annotations on ServiceAccount `pig/pig-analyzer`. |
| `pod_labels` | `PIGDeployment.spec.podLabels`. |
For Google Cloud, the ServiceAccount annotation is `iam.gke.io/gcp-service-account`. Its value resembles `pig-analyzer@REPLACE_PROJECT_ID.iam.gserviceaccount.com`. Use the output’s actual identity; do not copy the illustrative value.
The module binds the Kubernetes ServiceAccount to a Google service account with trace-bucket data access. Database authentication uses the PostgreSQL credential; it does not assume automatic IAM database-token refresh. This recipe uses private Cloud SQL connectivity, without requiring a database proxy in the analyzer pod.
Replace the S3 block in the common Helm example with this block, using the provisioned location:
```yaml
gcs:
bucket: REPLACE_TRACE_BUCKET
prefix: acme/traces
```
The model is a separate choice. Select a supported endpoint from [model providers](/docs/governance/deploy-the-worker/model-providers); the storage backend does not select or provision it.
## 4. Bootstrap and verify
[Section titled “4. Bootstrap and verify”](#4-bootstrap-and-verify)
Continue with [Install with Helm](/docs/governance/deploy-the-worker/deploy-the-analyzer-worker). Apply the ServiceAccount annotations, pod labels, native storage block, and database Secret from this guide before creating the `PIGDeployment`.
Keep the Helm bootstrap outside Terraform reconciliation. Do not add a `helm_release` resource for the self-updating supervisor or import its generated workloads into Terraform.
Finish with [Verify your deployment](/docs/governance/deploy-the-worker/verify-your-deployment). Confirm native storage writes and reads, a successful analysis, and visible Promptless Dashboard status for one exact session.
## Maintain the infrastructure
[Section titled “Maintain the infrastructure”](#maintain-the-infrastructure)
Use Terraform for database resizing, IAM changes, networking, backup policy, and object retention. Review infrastructure module upgrades as separate plans; PIG’s stable application channel does not upgrade your Terraform modules.
If PIG reports a blocked release that requires an infrastructure change, apply that change through Terraform. PIG resumes once its live checks and any required [release-specific confirmations](/docs/governance/deploy-the-worker/manage-updates-and-recovery#confirm-release-prerequisites) pass. Keep backups and trace retention coordinated, and follow [recovery guidance](/docs/governance/deploy-the-worker/manage-updates-and-recovery) before replacing storage.
For cloud-specific identity setup, see [Workload Identity Federation for GKE](https://cloud.google.com/kubernetes-engine/docs/how-to/workload-identity).
# Install with Helm
> Bootstrap automatic trace analysis updates on Kubernetes, configure your storage and model, and verify a real session.
Install PIG on an existing Kubernetes cluster with a one-time Helm bootstrap. Configure a `PIGDeployment` resource to connect your database, trace bucket, and model. PIG then updates the analyzer and supervisor automatically to stable releases.
The 0.3.0 release targets AWS/EKS clean installations. Azure/AKS and GCP/GKE are experimental.
## Before you begin
[Section titled “Before you begin”](#before-you-begin)
Complete [deployment planning](/docs/governance/deploy-the-worker/plan-your-deployment). You need a dedicated PostgreSQL database, native object storage, an analyzer workload identity, and an HTTPS endpoint. Use the AWS, Azure, or Google Cloud Terraform guide if you need to provision these resources.
Have your Promptless deployment ID, runtime URL, and `plih_` install token available. Registration credentials identify this deployment; they are separate from the public installation artifacts and host enrollment credentials.
Use `pig` for the analyzer namespace and `pig-system` for the supervisor. The example deployment name is `acme`. Replace the example names, URLs, and IDs throughout.
## 1. Get a pinned bootstrap chart
[Section titled “1. Get a pinned bootstrap chart”](#1-get-a-pinned-bootstrap-chart)
Choose a release from the public [PIG deployment releases](https://github.com/Promptless/pig-deploy/releases). Read its requirements and use the exact supervisor chart version listed in that release. The chart version selects the bootstrap; your deployment’s release policy controls subsequent updates.
```bash
PIG_CHART_VERSION='REPLACE_WITH_CHART_VERSION'
helm pull oci://ghcr.io/promptless/charts/pig-supervisor \
--version "$PIG_CHART_VERSION" --destination .
```
Keep the chart archive, its release digest, and your bootstrap values with your recovery records. Verify the archive against the published release checksum before installing it.
## 2. Prepare configuration and credentials
[Section titled “2. Prepare configuration and credentials”](#2-prepare-configuration-and-credentials)
1. **Confirm the cluster and create the namespaces.**
```bash
kubectl config current-context
kubectl create namespace pig --dry-run=client -o yaml | kubectl apply -f -
kubectl create namespace pig-system --dry-run=client -o yaml | kubectl apply -f -
```
2. **Configure the analyzer ServiceAccount.** Create `pig-analyzer` in `pig` with the workload identity annotations from your cloud guide. Terraform owns the cloud identity and trust policy; your Kubernetes workflow owns the ServiceAccount. Apply these before starting the analyzer.
analyzer-service-account.yaml
```yaml
apiVersion: v1
kind: ServiceAccount
metadata:
name: pig-analyzer
namespace: pig
annotations: {} # Add your cloud identity annotations.
```
```bash
kubectl apply -f analyzer-service-account.yaml
```
3. **Deliver secrets and certificates.** Use your secret manager to create `pig-credentials` in `pig` with the keys below. If your ingress controller uses Kubernetes TLS Secrets, create `pig-tls` for your analyzer hostname. AWS ALB installations use ACM and omit that Secret; follow the [AWS HTTPS setup](/docs/governance/deploy-the-worker/deploy-on-aws). If PostgreSQL requires a CA bundle, create ConfigMap `pig-postgres-ca` with key `ca.pem`.
| Secret key | Value |
| --------------- | -------------------------------------------------------------- |
| `install-token` | This deployment’s Promptless installation token. |
| `postgres-dsn` | Its dedicated database connection string with TLS settings. |
| `model-api-key` | Your analysis model key; omit for Bedrock Signature Version 4. |
Keep credential values out of Git and Helm arguments. [PostgreSQL configuration](/docs/governance/deploy-the-worker/postgresql) explains the CA mount and connection string.
## 3. Bootstrap PIG
[Section titled “3. Bootstrap PIG”](#3-bootstrap-pig)
Save the bootstrap values:
supervisor-values.yaml
```yaml
watchNamespace: pig
```
Render the pinned chart and review its image identities, Secret access, custom resource definition, and Kubernetes permissions:
```bash
helm lint "./pig-supervisor-${PIG_CHART_VERSION}.tgz" \
--values supervisor-values.yaml
helm template pig-supervisor "./pig-supervisor-${PIG_CHART_VERSION}.tgz" \
--namespace pig-system --values supervisor-values.yaml > rendered-supervisor.yaml
```
Then install it:
```bash
helm install pig-supervisor "./pig-supervisor-${PIG_CHART_VERSION}.tgz" \
--namespace pig-system --values supervisor-values.yaml \
--wait --timeout 10m
```
The supervisor waits for a `PIGDeployment` before starting release transitions. It uses the chart’s scoped Kubernetes permissions; it does not need a cloud management role.
One owner after bootstrap
Keep this release outside Terraform’s `helm_release` resources. If Flux performs the bootstrap, suspend its HelmRelease in Git before creating the deployment below. GitOps can continue managing your desired configuration and secret delivery. Follow [GitOps ownership](/docs/governance/deploy-the-worker/gitops-ownership) for the handoff.
## 4. Configure your deployment
[Section titled “4. Configure your deployment”](#4-configure-your-deployment)
Save the following resource. This example uses S3 and OpenAI; substitute your [native storage block](/docs/governance/deploy-the-worker/object-storage#configure-the-location) and [model settings](/docs/governance/deploy-the-worker/model-providers).
pig-deployment.yaml
```yaml
apiVersion: governance.promptless.ai/v1alpha1
kind: PIGDeployment
metadata:
name: acme
namespace: pig
spec:
release:
channel: stable
paused: false
pinnedVersion: ""
serviceAccountName: pig-analyzer
hosted:
runtimeURL: https://REPLACE_PROMPTLESS_RUNTIME_HOST
deploymentID: REPLACE_DEPLOYMENT_ID
installTokenSecretRef:
name: pig-credentials
key: install-token
endpoint:
hostname: traces.acme.example
ingressClassName: nginx
tlsSecretName: pig-tls
ingressAnnotations:
nginx.ingress.kubernetes.io/proxy-body-size: "10m"
storage:
postgres:
dsnSecretRef:
name: pig-credentials
key: postgres-dsn
caConfigMapRef:
name: pig-postgres-ca
key: ca.pem
s3:
region: us-west-2
bucket: REPLACE_TRACE_BUCKET
prefix: acme/traces
analysis:
activationAt: "2026-09-15T00:00:00Z"
quietWindowHours: 0.5
model:
provider: openai
authentication: api_key
baseURL: https://api.openai.com/v1
name: REPLACE_MODEL_NAME
apiKeySecretRef:
name: pig-credentials
key: model-api-key
```
Choose your collection rollout time for `activationAt`; analysis waits for the session’s quiet window. An organization administrator selects the instruction repositories the analyzer reads in PIG Settings, described in [Select instruction repositories](#5-select-instruction-repositories).
Use an existing ingress class and a certificate covering your hostname. The ingress-nginx annotation permits 10 MiB uploads; configure the equivalent for your controller and every proxy on the path. Omit the PostgreSQL CA reference only if your DSN uses the container’s trusted certificate store.
On Azure, also add the pod labels from the Terraform guide under `spec.podLabels`. Workload identity must reach the pods as well as the ServiceAccount.
Apply the resource after the bootstrap ownership handoff:
```bash
kubectl apply --dry-run=server -f pig-deployment.yaml
kubectl apply -f pig-deployment.yaml
kubectl get pigdeployment acme --namespace pig --watch
```
The supervisor checks dependencies, applies schema migrations, and starts `acme-analyzer`. It derives the registered configuration from the deployment settings; you do not invent a configuration hash.
## 5. Select instruction repositories
[Section titled “5. Select instruction repositories”](#5-select-instruction-repositories)
After the analyzer registers and first checks in, it appears in the Promptless Dashboard. An organization administrator then chooses which repositories the analyzer reads. In **PIG Settings**, open the **Instruction repositories** card to select where your instructions live; analysis reads every selected repository.
1. **Add a repository.** Choose one from the dropdown and select **Add**. The dropdown lists the repositories the connected GitHub App can access. To add a repository that is not listed, grant the GitHub App access to it.
2. **Set per-repository options.** Turn on **GitHub issues** to project a repository’s findings into GitHub issues. Turn on **Proposed fixes** to let remediation open pull requests against it; **Proposed fixes** becomes available once **GitHub issues** is on.
3. **Remove a repository** with **Remove**.
Reading instructions requires Contents read access. GitHub issues and proposed fixes require write access when enabled. Removing a repository preserves existing findings and pull requests.
Members who are not administrators see the selected repositories as a read-only list. For how a finding maps to a repository and its GitHub issue, see [Understand findings](/docs/governance/findings-and-remediation/understand-findings).
## 6. Verify and operate
[Section titled “6. Verify and operate”](#6-verify-and-operate)
Check the deployment conditions and endpoint:
```bash
kubectl describe pigdeployment acme --namespace pig
curl --fail https://traces.acme.example/healthz
```
Then [verify a complete session](/docs/governance/deploy-the-worker/verify-your-deployment): enrollment, durable readable objects, successful analysis, and visible dashboard status. A healthy endpoint completes only the routing check.
Use [updates and recovery](/docs/governance/deploy-the-worker/manage-updates-and-recovery) for pause and pin controls, and [observability](/docs/governance/deploy-the-worker/observability) for ongoing monitoring.
# GitOps ownership
> Keep Terraform, GitOps, and PIG from reconciling the same resources after the one-time bootstrap.
Terraform prepares cloud infrastructure. Helm bootstraps PIG once. After bootstrap, PIG owns its application releases, including supervisor updates. GitOps can continue to own your desired deployment configuration and secret delivery.
## Resource ownership
[Section titled “Resource ownership”](#resource-ownership)
| Owner | Resources |
| ----------------------------- | ---------------------------------------------------------------------------------------------------------------------------------------------------- |
| Terraform | Cloud databases, storage, workload identity trust and grants, networking, backup and retention settings. |
| Your Kubernetes configuration | Namespaces, analyzer ServiceAccount and identity annotations, `PIGDeployment.spec`, external secret delivery, and certificates. |
| PIG | Generated analyzer workloads, migration Jobs, supervisor application resources, and the PIG custom resource definition within installed permissions. |
The supervisor cannot widen its own permission grants. A release requiring new bootstrap permissions blocks until an administrator reviews and installs those grants. Cloud management permissions remain with Terraform.
Do not put the bootstrap in a Terraform `helm_release` resource, or reconcile PIG-generated workloads through another controller. PIG’s release policy is the single owner of their versions. Keep the bootstrap chart and values for recovery, without periodically reapplying them.
## Direct Helm bootstrap
[Section titled “Direct Helm bootstrap”](#direct-helm-bootstrap)
Run the [Helm installation](/docs/governance/deploy-the-worker/deploy-the-analyzer-worker) once. Helm itself does not continuously reconcile resources. After creating `PIGDeployment`, use its `release` fields for application updates, pauses, and pins.
Do not run a later `helm upgrade` over the self-updated supervisor unless following the release’s recovery procedure.
## Bootstrap with Flux
[Section titled “Bootstrap with Flux”](#bootstrap-with-flux)
If Flux installs the bootstrap, hand ownership to PIG before enabling application updates.
1. Create an `OCIRepository` for `oci://ghcr.io/promptless/charts/pig-supervisor`, pinned to the chart digest from your selected release. Create a `HelmRelease` in `pig-system`, with `watchNamespace: pig` in its values. Use the same reviewed chart and values as the direct Helm guide.
2. Keep `PIGDeployment` out of the reconciled path while Flux installs the chart. The supervisor waits for this resource before starting release transitions.
3. Wait for the bootstrap HelmRelease to become ready:
```bash
kubectl wait helmrelease/pig-supervisor --namespace pig-system \
--for=condition=ready --timeout=10m
```
4. Commit `spec.suspend: true` on that **HelmRelease** in Git. Let Flux apply the change, then verify it:
```bash
kubectl get helmrelease pig-supervisor --namespace pig-system \
-o jsonpath='{.spec.suspend}{"\n"}'
```
5. Once the value is `true`, add your `PIGDeployment` to the GitOps path that owns desired configuration. Keep its secret delivery and analyzer ServiceAccount in that path too.
Suspending only the OCIRepository does not suspend the installed release. See Flux’s [HelmRelease suspend control](https://fluxcd.io/flux/components/helm/helmreleases/#suspend).
Keep the bootstrap HelmRelease suspended and present in Git. Deleting it can trigger Helm uninstall; resuming it can restore an older chart over PIG’s self-updates. Do not separately reconcile the chart’s rendered resources through a Kustomization.
## Other GitOps controllers
[Section titled “Other GitOps controllers”](#other-gitops-controllers)
Use a direct Helm bootstrap outside the controller’s managed application set. Let the controller manage only customer-owned configuration from the table above. Turning off automatic sync alone is not a durable ownership boundary if manual sync or pruning can still touch PIG’s generated resources.
If your policy requires continuous Helm reconciliation, choose [manual Helm management](/docs/governance/deploy-the-worker/manual-helm) and make your platform workflow responsible for every release.
## Changes and recovery
[Section titled “Changes and recovery”](#changes-and-recovery)
Commit pause or pin changes to the GitOps source of `PIGDeployment.spec.release`. A live patch can be reverted by your controller if Git still declares another value.
For cluster recovery, restore the same deployment identity and customer-owned configuration. Repeat the bootstrap handoff before creating the restored `PIGDeployment`. Follow [updates and recovery](/docs/governance/deploy-the-worker/manage-updates-and-recovery) to reconnect retained storage safely.
# Manage updates and recovery
> Control automatic stable releases, resolve blocked updates, and recover application and storage state safely.
The trace analyzer updates automatically to stable releases by default. You can pause updates or pin a release. The supervisor installed with your deployment handles release changes, migrations, and its own updates. This guide explains how to control those updates and recover when one cannot complete.
If you chose a [manually managed Helm installation](/docs/governance/deploy-the-worker/manual-helm), your operations team schedules and applies upgrades. The `PIGDeployment` controls below apply to installations managed by the supervisor.
## What updates automatically
[Section titled “What updates automatically”](#what-updates-automatically)
The default policy follows **every stable release**. It includes the analyzer, supervisor, required database migrations, and generated Kubernetes application resources within the permissions granted at installation. A major version or schema change is not automatically excluded.
```yaml
release:
channel: stable
paused: false
pinnedVersion: ""
```
Stable releases include a compatible transition for the installed version, Promptless, and customer data. The supervisor follows any required intermediate migrations instead of jumping directly to an incompatible version. The stable channel is a release policy, not permission to erase data or modify shared infrastructure.
Your team continues to maintain shared clusters, networking, ingress controllers, externally managed secrets, and backup policies. New access requirements or a failed preflight produce a blocked update with a specific action. Once that blocker is resolved, the supervisor resumes the stable-release transition without a separate approval for each release.
## Keep cloud infrastructure in Terraform
[Section titled “Keep cloud infrastructure in Terraform”](#keep-cloud-infrastructure-in-terraform)
Your platform team owns database sizing, native object storage, IAM, networking, and backup and retention policy. The supervisor uses application data access and scoped Kubernetes permissions. It does not resize databases or mutate cloud infrastructure.
If a release needs a cloud change, PIG reports `Blocked=True` with the unmet requirement and required operator action. Review and apply the change through Terraform, then let PIG rerun its checks. An unpaused deployment resumes its stable-release transition once the live checks and any required release confirmations pass.
PIG checks dependencies through its application connections. It does not read Terraform state or keep a copy of provisioned capacity. Your platform team checks requirements PIG cannot verify directly, such as managed database disk headroom. Use the provider’s metrics to confirm that requirement for the target release. Connectivity alone does not prove sufficient capacity.
A blocked target can coexist with a healthy installed version. Avoid broadening the supervisor’s permissions to bypass an infrastructure requirement. Keep the [bootstrap ownership handoff](/docs/governance/deploy-the-worker/gitops-ownership) in place while changing customer-owned infrastructure.
## Follow an update
[Section titled “Follow an update”](#follow-an-update)
The supervisor records the current release, target release, update stage, and a durable migration history. The update sequence is:
1. Resolve and verify the stable release artifacts and its supported upgrade path.
2. Check hosted compatibility, storage access, and model and repository requirements. Check observable capacity and require operator confirmation for release requirements that cannot be verified directly.
3. Require release-specific recovery confirmation before a destructive migration, then run the release’s coordinated schema migrations. Your backup workflow creates and retains the recovery points.
4. Roll out the analyzer and supervisor in the release’s declared order.
5. Verify health, storage access, and hosted synchronization before marking the target installed.
Some transitions can keep ingestion running while analysis pauses. A release that needs an ingestion interruption reports that state. Hosts can retry from their retained native ledgers, so do not delete those ledgers during recovery; successful retries depend on the source still being available.
Inspect the status and events with:
```bash
kubectl get pigdeployment acme --namespace pig \
-o jsonpath='{.status.currentVersion}{" -> "}{.status.targetVersion}{"\n"}'
kubectl describe pigdeployment acme --namespace pig
kubectl logs deployment/pig-supervisor --namespace pig-system --tail=100
```
| Condition | Meaning | Operator response |
| --------------- | ------------------------------------------------ | ------------------------------------------------------------------- |
| `Ready=True` | The current deployment passed supervisor checks. | Continue monitoring real ingestion and analysis. |
| `Updating=True` | A release transition is in progress. | Review the stage and elapsed time; avoid competing manual upgrades. |
| `Blocked=True` | A required operation cannot proceed. | Read the reason and resolve the reported dependency or permission. |
An old deployment can remain ready while its target release is blocked. Use `currentVersion`, `targetVersion`, condition messages, and recent events together. Status never includes secret values or raw trace content.
## Confirm release prerequisites
[Section titled “Confirm release prerequisites”](#confirm-release-prerequisites)
Keep confirmations in a customer-owned ConfigMap in the deployment’s namespace. Reference its name from `spec.release.confirmation.configMapRef.name`. Your GitOps repository or backup workflow manages this object; the supervisor reads it without cloud-management permissions.
Every confirmation identifies the deployment and exact target release using `deploymentID` and `releaseDigest`. A confirmation for another deployment or release cannot authorize the transition.
From a pinned checkout of [pig-deploy](https://github.com/Promptless/pig-deploy), inspect the target release:
```bash
uv run --frozen pig-release-inspect --version REPLACE_WITH_TARGET_VERSION
```
The command validates the catalog and immutable release manifest, then prints `releaseDigest`, `capacityRequirementsDigest`, and the release requirements as JSON. Copy the digests exactly, including the `sha256:` prefix. Use the deployment’s existing `spec.hosted.deploymentID` for `deploymentID`.
### Confirm capacity that PIG cannot inspect
[Section titled “Confirm capacity that PIG cannot inspect”](#confirm-capacity-that-pig-cannot-inspect)
When a target release declares operator capacity requirements, review each requirement against current cloud metrics and the capacity needed during migration. Apply any infrastructure change through Terraform first. Record `capacityConfirmedAt`, the target’s `capacityRequirementsDigest`, and `capacityEvidence` describing the check.
PIG records this as an operator acknowledgement, not a live capacity measurement. It still reruns its live dependency checks. Do not copy Terraform outputs into a capacity ConfigMap or treat a successful Terraform apply as evidence of free space.
### Confirm recovery before a destructive migration
[Section titled “Confirm recovery before a destructive migration”](#confirm-recovery-before-a-destructive-migration)
Create and verify coordinated PostgreSQL and object-storage recovery points using your backup workflow. Record their identifiers as `postgresRecoveryPoint` and `objectRecoveryPoint`, with `confirmedAt`, for the exact target release. Check that the recovery points meet that release’s freshness requirements and remain available under your retention policy.
The supervisor blocks a destructive migration until this confirmation passes. It checks the confirmation again before migration. Recording an identifier does not create a backup or prove that a restore will succeed; rehearse restoration separately. Capacity acknowledgement and recovery confirmation satisfy different prerequisites, even when they share a ConfigMap.
## Pause release adoption
[Section titled “Pause release adoption”](#pause-release-adoption)
In a GitOps deployment, commit this change to `spec.release` in the `PIGDeployment` manifest:
```yaml
release:
channel: stable
paused: true
pinnedVersion: ""
```
For an installation managed directly with `kubectl`, the equivalent command is:
```bash
kubectl patch pigdeployment acme --namespace pig --type merge \
-p '{"spec":{"release":{"paused":true}}}'
```
A pause stops new release transitions, including supervisor updates. It keeps the installed service running and permits credential refresh and status reporting. An already-running migration reaches a documented safe checkpoint before the pause takes effect; deleting its Job is not a pause mechanism.
A pause does not stop instruction-hub publishing or host plugin updates. Those have their own release workflow. It also does not suspend cloud charges or delete queued traces.
## Pin a release and return to stable
[Section titled “Pin a release and return to stable”](#pin-a-release-and-return-to-stable)
Set `pinnedVersion` to an exact release identity provided by Promptless. The supervisor verifies the transition before applying it. `paused: true` takes precedence: a pin does not start an update while paused.
```yaml
release:
channel: stable
paused: false
pinnedVersion: "REPLACE_WITH_SUPPORTED_RELEASE"
```
Pinning the installed version holds it while your team investigates an issue. Choosing an earlier release requests a downgrade; it is allowed only when that release supports the current schema and hosted interface. A pin cannot force an incompatible database downgrade.
To resume automatic stable updates, clear the pin and pause in your source manifest. For a directly managed installation:
```bash
kubectl patch pigdeployment acme --namespace pig --type merge \
-p '{"spec":{"release":{"paused":false,"pinnedVersion":""}}}'
```
Do not patch a GitOps-managed object without updating its source; the GitOps controller can otherwise undo the change. Do not independently pin the supervisor Deployment image: the release policy coordinates supervisor and analyzer versions together.
## Recover from a blocked or failed update
[Section titled “Recover from a blocked or failed update”](#recover-from-a-blocked-or-failed-update)
### A dependency or permission check fails
[Section titled “A dependency or permission check fails”](#a-dependency-or-permission-check-fails)
Keep the last healthy version running. Check the reported resource, action, and identity, then repair the underlying condition. Common causes include rotated tokens, unreachable databases, missing object-storage permissions, insufficient capacity, and unavailable model endpoints. If capacity or a cloud permission is required, review and apply the corresponding Terraform change.
The supervisor retries recoverable failures and preserves its progress. Avoid reinstalling under a different deployment ID; that creates a second identity instead of repairing the existing deployment.
### A migration fails
[Section titled “A migration fails”](#a-migration-fails)
Record the source and target releases and failed migration identifier. Preserve the database, objects, logs, and migration Job evidence. The supervisor blocks application code that requires the incomplete schema and prevents concurrent migration attempts.
Retry only through the migration’s documented resumable path after fixing the cause. If the failure leaves the schema incompatible with the last application release, use a supported forward repair or a coordinated restoration. Rolling back a Deployment or Helm release does not reverse committed PostgreSQL changes.
### The application fails after migration
[Section titled “The application fails after migration”](#the-application-fails-after-migration)
Use the release’s declared rollback compatibility to decide whether the prior application can run against the new schema. The supervisor may revert application resources only when that compatibility is known. Otherwise, hold the deployment and apply a supported forward repair with the Promptless team.
After recovery, repeat the [first-trace verification](/docs/governance/deploy-the-worker/verify-your-deployment), including completed analysis. A healthy controller is not proof that the analyzer has recovered.
### The cluster or supervisor is lost
[Section titled “The cluster or supervisor is lost”](#the-cluster-or-supervisor-is-lost)
Restore the bootstrap configuration and original `PIGDeployment` specification into the recovery cluster. Re-establish analyzer workload identity bindings and Secret delivery. Reconnect the same PostgreSQL database and trace objects using the same deployment identity. Restore network paths and certificates before allowing hosts to upload again.
Repeat the bootstrap ownership handoff before creating the restored `PIGDeployment`: for Flux, install the reviewed recovery bootstrap, then suspend its Helm release. The recovered supervisor checks storage access and application compatibility before resuming. Restore or replace cloud infrastructure through Terraform.
If restoring storage from backups, use a coordinated recovery point for PostgreSQL and object storage. Preserve source watermarks and object references together. Do not run two active deployments against the same database during cutover. Confirm the supported recovery release with Promptless before allowing the supervisor to resume migrations.
## Monitor ongoing operation
[Section titled “Monitor ongoing operation”](#monitor-ongoing-operation)
Alert on blocked updates, supervisor reconciliation failures, ingestion failures, growing analysis delay, unavailable model capacity, and backup failures. A normal release transition may temporarily delay analysis; a persistent backlog needs investigation even when `Ready=True`.
Keep the deployment ID, current/target release, update history, and support contact in your runbook. The [observability guide](/docs/governance/deploy-the-worker/observability) covers the current service’s logs and signals.
## Retire a deployment without erasing traces
[Section titled “Retire a deployment without erasing traces”](#retire-a-deployment-without-erasing-traces)
Disable host enrollment and collection for the deployment in coordination with Promptless, and allow accepted work to finish or record what remains queued. Pause updates, then remove the `PIGDeployment` through its owning GitOps repository or Kubernetes workflow.
Removing the deployment cleans up its generated application resources. It retains PostgreSQL, trace objects, external Secrets, and backups. Remove the supervisor only after it has finished cleanup. Revoke unused application credentials and remove endpoint routing separately.
Delete retained customer data only through your organization’s explicit retention/deletion procedure. Uninstalling PIG does not imply permission to delete it.
# Manually manage the analyzer
> Deploy the current PIG trace analyzer into Kubernetes with Helm, then verify host enrollment, durable trace storage, and completed analysis.
The trace analyzer runs as the `pig-trace-analyzer` service in your infrastructure. It receives traces from enrolled hosts, stores them in your PostgreSQL database and trace bucket, and analyzes sessions using your chosen model provider.
This guide uses worker chart `0.3.0` for operator-managed releases. The published chart pins its worker image by digest. Your operations team schedules and applies each upgrade. For automatic updates with pause and version-pin controls, use the [default Helm installation](/docs/governance/deploy-the-worker/deploy-the-analyzer-worker).
## Before you begin
[Section titled “Before you begin”](#before-you-begin)
Complete the [deployment planning checklist](/docs/governance/deploy-the-worker/plan-your-deployment). You need:
* An existing Kubernetes cluster, Helm 3, and `kubectl` configured for that cluster.
* The public worker chart, a deployment install token beginning with `plih_`, a deployment instance ID, and a configuration hash from Promptless. Obtain these registration values from Promptless.
* A dedicated PostgreSQL database with its trusted CA bundle and a TLS connection string that verifies the server hostname. The database user needs schema migration permissions.
* An S3 bucket, Azure Blob container, or Google Cloud Storage bucket, with read and write access through workload identity.
* An existing ServiceAccount named `pig-analyzer` in namespace `pig`, bound to that identity. Both the analyzer and migration Job use it.
* A reachable HTTPS hostname, a certificate, and an existing ingress controller or equivalent route to the worker Service on port 8080.
* Credentials for your analysis model. An organization administrator selects the instruction repositories the analyzer reads in [PIG Settings](/docs/governance/deploy-the-worker/deploy-the-analyzer-worker#5-select-instruction-repositories) after the analyzer registers.
The complete example below uses Acme’s S3 on EKS. For AKS or GKE, substitute the native storage and identity settings in the [manual Helm reference](/docs/governance/deploy-the-worker/manual-helm-reference#native-storage-and-workload-identity). The [cloud deployment guides](/docs/governance/deploy-the-worker/plan-your-deployment#choose-an-installation-path) cover the infrastructure requirements.
Allow worker egress to PostgreSQL, your object store, Promptless, GitHub, and the model endpoint. Nodes also need container-registry access. See [network and data boundaries](/docs/governance/deploy-the-worker/plan-your-deployment).
## Install the analyzer
[Section titled “Install the analyzer”](#install-the-analyzer)
Caution
If an analyzer is already installed under another Helm release name, complete the [release replacement](#replace-an-instruction-hub-worker-release) first. Installing `pig-trace-analyzer` creates a separate release; it does not stop the existing analyzer.
1. **Prepare the namespace, identity, and secrets.** Confirm the cluster you intend to change:
```bash
kubectl config current-context
kubectl create namespace pig --dry-run=client -o yaml | kubectl apply -f -
```
Create the `pig-analyzer` ServiceAccount through your platform or GitOps workflow before installing Helm. For the EKS example, bind its namespace and name in the IAM trust policy and apply this manifest, replacing the role ARN:
service-account.yaml
```yaml
apiVersion: v1
kind: ServiceAccount
metadata:
name: pig-analyzer
namespace: pig
annotations:
eks.amazonaws.com/role-arn: arn:aws:iam::123456789012:role/acme-pig-worker
```
Create a ConfigMap named `postgres-ca` in `pig` with your database provider’s trusted CA bundle under the key `ca.pem`. The chart mounts it in both the analyzer and migration Job. Use `sslmode=verify-full` in the PostgreSQL DSN.
Create a Secret named `acme-pig-worker` in `pig` through your secret-management system. It must contain these keys:
| Key | Value |
| ------------------------ | ------------------------------------------------------------------------------------------------- |
| `install-token` | Deployment credential supplied by Promptless. This is separate from a host enrollment credential. |
| `customer-postgres-dsn` | PostgreSQL connection string, including the TLS settings your database requires. |
| `analysis-model-api-key` | API key for the model endpoint in the next step. |
For a manual pilot, run the following in Bash. It prompts without echoing credentials, creates the Secret, and removes its temporary file. Keep credentials out of committed manifests and values files.
```bash
bash <<'BASH'
set -eu
umask 077
secret_file=$(mktemp)
trap 'rm -f "$secret_file"' EXIT
for key in install-token customer-postgres-dsn analysis-model-api-key; do
read -r -s -p "$key: " secret_value /dev/tty
printf '%s=%s\n' "$key" "$secret_value" >>"$secret_file"
done
unset secret_value
kubectl --namespace pig create secret generic acme-pig-worker \
--from-env-file="$secret_file" --dry-run=client -o yaml | kubectl apply -f -
BASH
```
The analyzer reads the selected instruction repositories with GitHub App tokens Promptless supplies, scoped to Contents read. GitHub issues and proposed fixes use write access granted to the same GitHub App, which an administrator enables per repository in [PIG Settings](/docs/governance/deploy-the-worker/deploy-the-analyzer-worker#5-select-instruction-repositories). Confirm the connected GitHub App can access each repository you select.
2. **Configure the worker.** Save this as `values.yaml`. Replace every `REPLACE_` value and the hostname with your environment’s values. Choose a model name your provider account can use.
values.yaml
```yaml
secrets:
existingSecretName: acme-pig-worker
installTokenKey: install-token
customerPostgresDsnKey: customer-postgres-dsn
analysisModelApiKeyKey: analysis-model-api-key
instructionHub:
runtimeBaseUrl: https://runtime.gopromptless.ai
deploymentName: acme-production
deploymentInstanceId: REPLACE_DEPLOYMENT_INSTANCE_ID
configHash: REPLACE_CONFIG_HASH
storageBackend: postgres_s3
postgresCaConfigMapName: postgres-ca
postgresCaConfigMapKey: ca.pem
traceObjectS3Bucket: REPLACE_GLOBALLY_UNIQUE_BUCKET
traceObjectS3Prefix: acme/traces
analysis:
activationAt: "2026-09-14T00:00:00Z"
quietWindowHours: 0.5
modelApi:
provider: openai
authentication: api_key
baseUrl: https://api.openai.com/v1
model: REPLACE_MODEL_NAME
serviceAccount:
create: false
name: pig-analyzer
gateway:
enabled: true
className: nginx
annotations:
nginx.ingress.kubernetes.io/proxy-body-size: "10m"
hosts:
- host: traces.acme.example
tls:
- secretName: acme-pig-tls
hosts:
- traces.acme.example
resources:
requests:
cpu: 500m
memory: 1Gi
limits:
memory: 2Gi
```
Set `activationAt` to your chosen analysis start time; use a timezone-aware timestamp. The half-hour quiet window gives sessions time to finish before analysis. These resource values are a starting allocation: adjust them after measuring representative sessions.
The example assumes an existing NGINX IngressClass named `nginx`, a TLS Secret named `acme-pig-tls` in `pig`, and DNS pointing to that ingress. Set `gateway.className` to your controller’s class. If your platform manages the route separately, set `gateway.enabled: false` and route HTTPS traffic to `pig-trace-analyzer` in `pig` on port 8080.
The NGINX annotation permits trace uploads up to 10 MiB. Configure every ingress, load balancer, and proxy on the upload path to accept at least that request-body size. A smaller limit can return HTTP 413 while health checks pass. Other ingress controllers require their equivalent setting.
For an ingestion-only pilot, leave `instructionHub.analysis.activationAt` empty. The chart then omits the model settings from the worker. Complete all analysis settings before enabling analysis. See the [manual Helm reference](/docs/governance/deploy-the-worker/manual-helm-reference) for supported providers and value mappings.
3. **Render and install.** Download the pinned public worker chart, then render it to catch missing required values without changing the cluster:
```bash
helm pull oci://ghcr.io/promptless/charts/pig-trace-analyzer \
--version 0.3.0 --untar
helm lint ./pig-trace-analyzer --values values.yaml
helm template pig-trace-analyzer ./pig-trace-analyzer \
--namespace pig --values values.yaml > rendered-worker.yaml
```
Review the image digest, ingress, service account, CA mount, and Secret references. The published chart supplies `image.digest`; when rendering from a source checkout, set it to the verified worker digest from the matching release. Then install:
```bash
helm upgrade --install pig-trace-analyzer ./pig-trace-analyzer \
--namespace pig \
--values values.yaml \
--wait --timeout 20m
```
A pre-install or pre-upgrade Job applies database schema changes before the new worker starts. Both workloads use the existing `pig-analyzer` ServiceAccount in this example. A ServiceAccount created by the worker chart is unavailable to its pre-install hook, so keep the account under your platform or GitOps workflow.
Caution
Back up your database before upgrades. A failed Helm release does not undo schema changes or restore trace objects. Follow the release’s recovery procedure with an image compatible with the current database schema.
## Upgrade a manual installation
[Section titled “Upgrade a manual installation”](#upgrade-a-manual-installation)
Review the target release’s database, storage, and schema requirements before each upgrade. Apply required infrastructure changes through your platform workflow and verify the recovery points for that exact release before a destructive migration. The manual chart does not enforce the supervisor’s confirmation ConfigMap.
Schedule a maintenance window, stop new analyzer traffic, and quiesce the existing analyzer before running `helm upgrade`. Confirm that its pods have stopped before the pre-upgrade migration Job starts. Helm runs this hook before updating the Deployment; the Deployment’s `Recreate` strategy alone does not prevent the old analyzer from accessing the database during migration. Coordinate this with GitOps reconciliation so it does not restart the old workload.
Install the pinned target chart with your reviewed values, then repeat the complete-session verification below. If migration fails, preserve the Job logs and inspect the schema before restarting the previous image. Follow the release’s recovery procedure; an application rollback does not reverse database changes.
## Replace an instruction-hub-worker release
[Section titled “Replace an instruction-hub-worker release”](#replace-an-instruction-hub-worker-release)
Use this procedure when the existing Helm release is named `instruction-hub-worker`. Substitute your actual namespace, release, and Deployment names if they differ. Keep the registered deployment identity, database, native object-storage location, and host credentials.
1. Suspend GitOps reconciliation and automated deployments for the existing release. Review the target release’s schema requirements and recovery procedure, and verify your database and object-storage recovery points.
2. Prepare the target values using the existing external Secret, ServiceAccount, CA ConfigMap, and TLS Secret. If the old release owns any of these resources, provision externally owned replacements before uninstalling it. Copy credential values through your secret-management workflow without printing them, update the values references, and verify workload-identity trust for the target ServiceAccount.
3. Stop incoming analyzer traffic and scale every existing analyzer Deployment to zero. For the default old release, run:
```bash
kubectl --namespace pig scale deployment instruction-hub-worker --replicas=0
kubectl --namespace pig wait --for=delete pod \
-l app.kubernetes.io/instance=instruction-hub-worker,pod-template-hash \
--timeout=5m
```
Confirm all analyzer Deployment pods have terminated before proceeding. The selector excludes retained migration Job pods.
4. Remove the old Helm release while retaining its history:
```bash
helm uninstall instruction-hub-worker --namespace pig \
--keep-history --wait --timeout 20m
kubectl --namespace pig get deployment instruction-hub-worker --ignore-not-found
```
The Deployment lookup must return no object. Preserve the namespace, external credentials and identity resources, database, and object store.
5. Follow [Render and install](#install-the-analyzer) with the reviewed target chart and values. Update any external route or DNS alias after the new ingress exists, then [verify a complete session](#verify-a-complete-session).
If replacement fails, keep the analyzer stopped and repair forward with an image compatible with the database’s current schema. Do not restart a schema-1 image after schema revision 2 has been applied.
## Verify a complete session
[Section titled “Verify a complete session”](#verify-a-complete-session)
Follow [Verify your deployment](/docs/governance/deploy-the-worker/verify-your-deployment). Use `deployment/pig-trace-analyzer` for analyzer log commands. The same enrollment, storage, analysis, and dashboard checks apply to this installation.
## Troubleshooting
[Section titled “Troubleshooting”](#troubleshooting)
| Symptom | Check and next action |
| --------------------------------------- | ----------------------------------------------------------------------------------------------------------------------------------------------------------------------------------------------------- |
| `helm template` reports a missing value | Fill in the required deployment settings and all model settings when `activationAt` is set. |
| Migration fails | Read `kubectl -n pig logs job/pig-trace-analyzer-migrate`. Check PostgreSQL reachability, TLS, schema permissions, and the migration service account. Successful hook Jobs are deleted automatically. |
| Pod cannot start | Inspect pod events for missing Secret keys or image-pull failures, then worker logs for configuration validation errors. |
| HTTPS fails | Check DNS, certificate coverage, IngressClass, and the route to Service port 8080. |
| Host checks in but traces do not arrive | Check collector status, capture policy, and host-to-worker upload access. Preserve the host’s local collection state. |
| Trace object remains pending or failed | Check workload identity, bucket or container permissions, encryption-key access, and `trace_object_last_error`. |
| Analysis never starts | Confirm activation time, a complete canonical trace, the quiet window, model configuration, and selected instruction repositories with analysis enabled in PIG Settings. |
| Analysis fails | Use `analysis_run_id` and `error_category` to investigate repository access, provider authentication, rate limits, and worker resources. |
Do not delete database rows, the trace-object prefix, or collection watermarks to clear a stalled deployment. Preserve the evidence, fix the failing dependency, and use the [observability and recovery guidance](/docs/governance/deploy-the-worker/observability).
## Next steps
[Section titled “Next steps”](#next-steps)
Review [findings](/docs/governance/findings-and-remediation/understand-findings), configure [observability](/docs/governance/deploy-the-worker/observability), and record an upgrade owner. Each upgrade in this installation remains an operator-controlled release. Do not install a supervisor to manage the same workload without an ownership transfer.
# Manual Helm reference
> Configure the current trace analyzer's deployment, storage, model, and secrets, and map Helm values to worker settings.
This page describes the current worker chart, version `0.3.0`. Helm values become environment variables in the worker. Start with [Manually manage the analyzer](/docs/governance/deploy-the-worker/manual-helm) for a complete values file.
Configuration scope
This reference covers the worker Helm chart. The [automatic-update configuration](/docs/governance/deploy-the-worker/configuration-reference) uses `PIGDeployment` fields, which are not worker chart values.
## Deployment and storage
[Section titled “Deployment and storage”](#deployment-and-storage)
Unless noted, Helm keys in this table are under `instructionHub`. Environment-variable suffixes have the prefix `INSTRUCTION_HUB_`.
| Helm key | Environment-variable suffix | Meaning |
| ---------------------- | --------------------------- | ---------------------------------------------------------------------------------------------- |
| `runtimeBaseUrl` | `RUNTIME_BASE_URL` | Promptless endpoint supplied during registration. |
| `deploymentName` | `DEPLOYMENT_NAME` | Human-readable deployment name; use `acme-production` in the Acme example. |
| `deploymentInstanceId` | `DEPLOYMENT_INSTANCE_ID` | Stable registered deployment identifier from Promptless. |
| `configHash` | `CONFIG_HASH` | Registered configuration hash from Promptless. Coordinate configuration changes with the team. |
| `storageBackend` | `STORAGE_BACKEND` | `postgres_s3`, `postgres_azure_blob`, or `postgres_gcs`. |
| `traceObjectS3Bucket` | `TRACE_OBJECT_S3_BUCKET` | S3 bucket for raw ranges and canonical trace objects. Required for `postgres_s3`. |
| `traceObjectS3Prefix` | `TRACE_OBJECT_S3_PREFIX` | Object prefix; defaults to `trace-objects`. Acme uses `acme/traces`. |
| `maxTraceBatchBytes` | `MAX_TRACE_BATCH_BYTES` | Maximum decoded trace-batch size, in bytes. Default `268435456` (256 MiB); must be positive. |
| `logLevel` | `LOG_LEVEL` | `DEBUG`, `INFO`, `WARNING`, `ERROR`, or `CRITICAL`. Default `INFO`. |
The install token and PostgreSQL DSN are also required. They come from Secret references, described below. Keep the database, bucket, and prefix stable across restarts and upgrades. Changing a storage location does not migrate existing data.
The service listens on port 8080 by default. Use that value for `service.workerPort` and ingress routing in the current chart. The analysis repository mirror uses an ephemeral `emptyDir`; it can be rebuilt after a restart and does not require a persistent volume. Trace data and analysis state live in your object store and PostgreSQL.
## Native storage and workload identity
[Section titled “Native storage and workload identity”](#native-storage-and-workload-identity)
Select one backend. Keep the relevant values under `instructionHub`:
* AWS S3
```yaml
instructionHub:
storageBackend: postgres_s3
traceObjectS3Bucket: acme-pig-traces
traceObjectS3Prefix: acme/traces
```
Grant the analyzer’s AWS identity access to the bucket and trace prefix. For EKS IRSA, annotate the existing ServiceAccount with `eks.amazonaws.com/role-arn` and bind its namespace and name in the role’s trust policy.
* Azure Blob Storage
```yaml
instructionHub:
storageBackend: postgres_azure_blob
traceObjectAzureAccountUrl: https://REPLACE_STORAGE_ACCOUNT.blob.core.windows.net
traceObjectAzureContainer: traces
traceObjectPrefix: acme/traces
podLabels:
azure.workload.identity/use: "true"
```
Configure AKS workload identity and annotate the existing ServiceAccount with `azure.workload.identity/client-id`. Scope the Blob data role to the trace container. The chart applies `podLabels` to both the analyzer and migration Job.
* Google Cloud Storage
```yaml
instructionHub:
storageBackend: postgres_gcs
traceObjectGcsBucket: acme-pig-traces
traceObjectPrefix: acme/traces
```
Configure GKE Workload Identity Federation and grant the identity access to the trace bucket. If using IAM service account impersonation, annotate the existing Kubernetes ServiceAccount with `iam.gke.io/gcp-service-account` and configure its impersonation binding.
The SDK for the selected backend discovers credentials through workload identity. The chart does not accept storage access keys or arbitrary `env` and `envFrom` values.
| Helm key | Environment-variable suffix |
| ---------------------------- | -------------------------------- |
| `traceObjectAzureAccountUrl` | `TRACE_OBJECT_AZURE_ACCOUNT_URL` |
| `traceObjectAzureContainer` | `TRACE_OBJECT_AZURE_CONTAINER` |
| `traceObjectGcsBucket` | `TRACE_OBJECT_GCS_BUCKET` |
| `traceObjectPrefix` | `TRACE_OBJECT_PREFIX` |
These suffixes use the `INSTRUCTION_HUB_` prefix. `traceObjectPrefix` defaults to `trace-objects` and applies to Azure and GCS. S3 uses `traceObjectS3Prefix`.
## Service account, database TLS, and image
[Section titled “Service account, database TLS, and image”](#service-account-database-tls-and-image)
Create the workload identity ServiceAccount before installing the chart, then use it for both workloads:
```yaml
serviceAccount:
create: false
name: pig-analyzer
migrationJob:
serviceAccountName: pig-analyzer
instructionHub:
postgresCaConfigMapName: postgres-ca
postgresCaConfigMapKey: ca.pem
```
The pre-install migration hook runs before Helm creates ordinary resources. Its ServiceAccount, credential Secret, and CA ConfigMap must already exist in the release namespace. The migration Job otherwise defaults to the namespace’s `default` ServiceAccount.
Create `postgres-ca` with the trusted database CA bundle under `ca.pem`, or change the two ConfigMap values above. Both workloads mount the selected key at `/etc/pig/postgres-ca/ca.pem` and set `PGSSLROOTCERT` to that path. Use `sslmode=verify-full` in the DSN. See [PostgreSQL requirements](/docs/governance/deploy-the-worker/postgresql) for TLS and schema permissions.
The published chart pins the worker image through `image.repository` and `image.digest`. A source checkout requires a verified `image.digest` in the form `sha256:<64 lowercase hex characters>`. Use the digest from the matching release; do not replace it with a mutable tag.
## Analysis activation
[Section titled “Analysis activation”](#analysis-activation)
All Helm keys below are under `instructionHub.analysis`. The environment-variable suffixes have the prefix `INSTRUCTION_HUB_ANALYSIS_`.
| Helm key | Environment-variable suffix | Meaning |
| ----------------------- | --------------------------- | ---------------------------------------------------------------------------------------------------------------- |
| `activationAt` | `ACTIVATION_AT` | Timezone-aware ISO timestamp for enabling analysis. Empty leaves trace analysis inactive. |
| `quietWindowHours` | `QUIET_WINDOW_HOURS` | Positive quiet period before a session is eligible; default `0.5` hours. |
| `repository.mirrorRoot` | `MIRROR_ROOT` | Default `/var/lib/instruction-hub/analysis-mirrors`. Keep the default to use the chart’s mounted mirror storage. |
When `activationAt` is nonempty, configure all model fields below. The worker validates those settings together and refuses partial analysis configuration. Changing the quiet window does not enable analysis by itself.
An organization administrator selects the instruction repositories the analyzer reads in [PIG Settings](/docs/governance/deploy-the-worker/deploy-the-analyzer-worker#5-select-instruction-repositories). The analyzer receives GitHub App tokens scoped to Contents read for those repositories from Promptless. The analyzer reads GitHub repositories with a `main` branch; GitLab publishing support in the hub toolchain does not imply GitLab analyzer or remediation support. See [Supported agents and platforms](/docs/governance/reference/supported-agents) for the separate compatibility boundaries.
## Model provider
[Section titled “Model provider”](#model-provider)
These Helm keys are under `instructionHub.analysis.modelApi`:
| Helm key | Worker environment variable | Meaning |
| ---------------- | ----------------------------------------------- | ------------------------------------------------------------------------------------------------ |
| `provider` | `INSTRUCTION_HUB_ANALYSIS_MODEL_PROVIDER` | `openai`, `azure_openai`, or `aws_bedrock`. |
| `authentication` | `INSTRUCTION_HUB_ANALYSIS_MODEL_AUTHENTICATION` | `api_key`, or `aws_sigv4` for Bedrock only. |
| `baseUrl` | `INSTRUCTION_HUB_ANALYSIS_MODEL_BASE_URL` | Supported HTTPS Responses API endpoint. |
| `model` | `INSTRUCTION_HUB_ANALYSIS_MODEL_NAME` | Model or deployment name available through that endpoint. Select it explicitly for your account. |
| Provider | Accepted endpoint shape | Authentication |
| -------------- | --------------------------------------------------------------------------------------------------- | --------------------- |
| `openai` | `https://api.openai.com/v1` | API key. |
| `azure_openai` | `https://RESOURCE.openai.azure.com/openai/v1` or `https://RESOURCE.services.ai.azure.com/openai/v1` | API key. |
| `aws_bedrock` | `https://bedrock-mantle.REGION.api.aws/v1` or the same host with `/openai/v1` | API key or AWS SigV4. |
Replace `RESOURCE` and `REGION`. URLs must not contain embedded credentials, an explicit port, query parameters, or a fragment. Ordinary Bedrock Runtime URLs and arbitrary OpenAI-compatible endpoints do not pass the current provider validation. GKE deployments can use one of the supported providers; there is no Vertex AI provider option.
For `api_key`, supply `analysis-model-api-key` in the worker Secret. For `aws_sigv4`, select `aws_bedrock`, omit the model API key, and grant the worker’s AWS identity access to the selected model. S3 and model authorization are separate permissions even when they use one identity.
The analyzer sends session content and relevant instruction context to this provider. Choose its region and data-handling terms accordingly; see [Trust and data model](/docs/governance/start-here/trust-and-data-model).
## Secret references
[Section titled “Secret references”](#secret-references)
Use `secrets.existingSecretName` to reference a Secret in the worker namespace. The chart defaults to these keys:
| Helm mapping | Default Secret key | Worker environment variable |
| -------------------------------- | ------------------------ | ---------------------------------------- |
| `secrets.installTokenKey` | `install-token` | `INSTRUCTION_HUB_INSTALL_TOKEN` |
| `secrets.customerPostgresDsnKey` | `customer-postgres-dsn` | `INSTRUCTION_HUB_CUSTOMER_POSTGRES_DSN` |
| `secrets.analysisModelApiKeyKey` | `analysis-model-api-key` | `INSTRUCTION_HUB_ANALYSIS_MODEL_API_KEY` |
The model key is referenced when an activation time is configured with `api_key`. The analyzer receives GitHub App tokens for the selected instruction repositories from Promptless, so the worker Secret holds no repository credential.
The chart also supports creating a Secret from values, but an existing Secret keeps credential values out of your GitOps configuration. Use your secret-management system to rotate credentials. Restart the worker after updating environment-backed Secret values so the process receives them.
Sentry uses a separate Secret reference. See [Enable Sentry](#enable-sentry) for the exact values.
## Validate a configuration change
[Section titled “Validate a configuration change”](#validate-a-configuration-change)
Render the chart with your values and review the generated references and endpoints. Apply through the deployment’s owner: your Helm workflow or its GitOps controller. Do not let a supervisor manage the same worker resources.
After rollout, repeat the [complete-session verification](/docs/governance/deploy-the-worker/verify-your-deployment). Configuration validation and a healthy pod do not prove that credentials can access the database, bucket, or model.
## Enable Datadog
[Section titled “Enable Datadog”](#enable-datadog)
If your cluster already runs a Datadog Agent that accepts APM traffic, add these Helm values:
observability-values.yaml
```yaml
observability:
environment: production
datadog:
enabled: true
env: production
service: acme-pig-worker
agentUrl: http://datadog-agent.datadog:8126
site: datadoghq.com
```
Replace the Agent URL and site for your installation. The chart sets `DD_TRACE_ENABLED`, `DD_ENV`, `DD_SERVICE`, `DD_VERSION`, `DD_TRACE_AGENT_URL`, and `DD_SITE`, and adds a log-discovery annotation. Configure the Agent’s container-log collection and network access separately.
The chart exposes the listed settings; it does not pass arbitrary `DD_*` environment variables from values. Analysis tracing can include LLM observability data. Review your telemetry collection and retention settings before enabling it for sensitive sessions.
## Enable Sentry
[Section titled “Enable Sentry”](#enable-sentry)
Create a Secret named `acme-pig-sentry` with a `SENTRY_DSN` key using your secret-management system, then add:
sentry-values.yaml
```yaml
observability:
environment: production
sentry:
enabled: true
existingSecretName: acme-pig-sentry
dsnKey: SENTRY_DSN
```
The chart supplies `SENTRY_DSN`, `SENTRY_ENVIRONMENT`, and `SENTRY_RELEASE` to the worker and migration Job. Error reporting is enabled by the DSN; Sentry performance tracing is disabled in the worker’s current setup.
Note
Opting into external telemetry adds another data destination. Logs and error reports can contain operational context. Apply your organization’s access and retention controls, and review the [data boundaries](/docs/governance/start-here/trust-and-data-model).
# Model providers
> Choose the analyzer model endpoint and authentication independently from your Kubernetes and storage provider.
The trace analyzer can use the same supported model provider as your agents. Choose it independently from the cloud hosting PIG. For example, an analyzer on GKE with Cloud Storage can use OpenAI or Azure OpenAI.
Support for Anthropic’s Claude models is coming soon.
## Supported endpoints
[Section titled “Supported endpoints”](#supported-endpoints)
| Provider value | Responses API base URL | Authentication |
| -------------- | --------------------------------------------------------------------------------------------------- | ------------------------ |
| `openai` | `https://api.openai.com/v1` | `api_key` |
| `azure_openai` | `https://RESOURCE.openai.azure.com/openai/v1` or `https://RESOURCE.services.ai.azure.com/openai/v1` | `api_key` |
| `aws_bedrock` | `https://bedrock-mantle.REGION.api.aws/v1` or the same host with `/openai/v1` | `api_key` or `aws_sigv4` |
Replace `RESOURCE` and `REGION` with your provider settings. Use a model or deployment name available to your account through that endpoint. Azure uses the model deployment name.
URLs must use HTTPS without embedded credentials, an explicit port, query parameters, or a fragment. Ordinary Bedrock Runtime URLs and arbitrary OpenAI-compatible endpoints are not accepted. Deploying on Google Cloud does not add Vertex AI model support.
## Configure API key authentication
[Section titled “Configure API key authentication”](#configure-api-key-authentication)
Set these fields under `spec.analysis` and deliver the key through your secret manager:
```yaml
model:
provider: openai
authentication: api_key
baseURL: https://api.openai.com/v1
name: REPLACE_MODEL_NAME
apiKeySecretRef:
name: pig-credentials
key: model-api-key
```
For Bedrock Signature Version 4, use `provider: aws_bedrock` and `authentication: aws_sigv4`, and omit `apiKeySecretRef`. Grant the analyzer’s AWS identity access to the chosen model. Storage permissions alone do not authorize inference.
## Plan access, quota, and data handling
[Section titled “Plan access, quota, and data handling”](#plan-access-quota-and-data-handling)
The analyzer sends session content and relevant instruction context to your selected model endpoint. Choose a region and provider policy that meet your requirements, as described in [Trust and data model](/docs/governance/start-here/trust-and-data-model).
Reserve quota for analysis alongside your agents’ traffic. Monitor rate limits, latency, and analysis completion time before expanding collection. Changing cluster size does not increase model quota.
The model configuration takes effect with the rest of the analysis settings: activation time and quiet window. Use a real session to [verify successful analysis](/docs/governance/deploy-the-worker/verify-your-deployment).
# Networking and identity
> Configure trace upload ingress, private data access, outbound dependencies, and separate application identities.
Enrolled hosts send traces to an HTTPS endpoint in your infrastructure. The analyzer connects to your database, trace bucket, GitHub, model provider, and Promptless. A private endpoint works when every enrolled host can reach it.
Upload ingress
**Enrolled hosts**Workstations, laptops, and agent hosts
Session tracesthen
**Trace analyzer**Your HTTPS endpoint · port 443
Connections initiated by the analyzer
**Trace analyzer**Your cluster
Trace objectsthen
**Trace bucket**Your storage · HTTPS 443
Analysis statethen
**PostgreSQL**Your database · TLS, usually TCP 5432
Findings, remediations, & analyzer statusthen
**Promptless**Promptless cluster · HTTPS 443
Hub source & proposed updatesthen
**Instruction Hub**GitHub repository and API · HTTPS 443
Trace digestthen
**Model provider**Reuse the provider your agents use · HTTPS 443
Database and trace storage stay in your infrastructure. Arrows show who initiates each connection; requests and responses travel over that connection. The table below also covers release downloads and identity endpoints.
## Allow the required paths
[Section titled “Allow the required paths”](#allow-the-required-paths)
| Source | Destination | Purpose |
| ---------------------------- | ----------------------------------------------------------------- | ------------------------------------------------------------------------------ |
| Enrolled hosts | Analyzer ingress, HTTPS 443. | Enrollment, check-ins, and trace uploads. |
| Analyzer and migration Jobs | Your PostgreSQL endpoint, normally TCP 5432. | Data access and schema migrations over TLS. |
| Analyzer | Your trace storage endpoint, HTTPS 443. | Write raw uploads and read trace objects. |
| Analyzer | Registered Promptless runtime URL, HTTPS 443. | Policy, status, findings, and remediation synchronization. |
| Analyzer | GitHub repositories and required GitHub API endpoints, HTTPS 443. | Read the selected instruction repositories and coordinate connected workflows. |
| Analyzer | Your model endpoint, HTTPS 443. | Analyze sessions using your provider account. |
| Supervisor and cluster nodes | Release metadata and artifact registries, HTTPS 443. | Resolve releases and pull images. |
| Workloads using federation | Your cloud’s identity endpoints. | Obtain and refresh workload credentials. |
Allow cluster DNS and your platform’s required control-plane traffic. Apply policies to migration Jobs as well as long-running pods. Storage private endpoints need matching private DNS and routing; creating an endpoint alone does not make it reachable.
## Route uploads and health checks
[Section titled “Route uploads and health checks”](#route-uploads-and-health-checks)
The analyzer Service listens on port 8080. Route these paths through your HTTPS ingress:
* `/healthz`
* `/v0/host-enrollment/policy`
* `/v0/host-enrollment/check-ins`
* `/v0/traces/batches`
Configure every proxy and load balancer on the upload path to accept **at least 10 MiB** per encoded request. For ingress-nginx:
```yaml
endpoint:
ingressAnnotations:
nginx.ingress.kubernetes.io/proxy-body-size: "10m"
```
Use your ingress controller’s equivalent setting. A smaller limit can reject uploads with HTTP 413 while `/healthz` still succeeds. The decoded trace-batch limit is a separate application setting.
## Separate identities by purpose
[Section titled “Separate identities by purpose”](#separate-identities-by-purpose)
| Identity | Scope |
| ----------------------------- | --------------------------------------------------------------------------------------------------------- |
| Host enrollment credential | An individual enrolled host’s collection access. |
| Deployment installation token | The registered analyzer’s connection to Promptless. |
| Analyzer workload identity | Its configured trace objects and, if selected, authorized model access. |
| PostgreSQL role | The dedicated PIG database and schema migrations. |
| Instruction repository access | GitHub App tokens Promptless supplies for the selected instruction repositories, scoped to Contents read. |
| Supervisor ServiceAccount | PIG application resources and its own updates within installed Kubernetes RBAC. |
| Terraform execution identity | Reviewed cloud infrastructure changes made by your platform team. |
Keep cloud management privileges with your Terraform workflow. The supervisor does not need them. A model’s authorization remains separate from storage access even when both use the same workload identity.
Deliver application credentials through your secret manager, rotate them in place, and preserve Secret names referenced by `PIGDeployment`. Keep TLS certificate renewal in your existing certificate-management workflow.
# Object storage
> Configure native S3, Azure Blob Storage, or Google Cloud Storage for private trace objects and recoverable retention.
The trace bucket holds raw uploads and canonical trace objects in your cloud account. PostgreSQL stores their references and processing state. Configure exactly one object-storage backend for each deployment.
## Choose a native backend
[Section titled “Choose a native backend”](#choose-a-native-backend)
| Platform | Storage | Workload authentication |
| ------------ | ---------------------------------------------------- | ------------------------------------------------------------------- |
| AWS | Amazon S3 bucket and prefix. | An IAM role bound to the analyzer’s Kubernetes ServiceAccount. |
| Azure | Blob Storage account, private container, and prefix. | Microsoft Entra Workload ID bound to the analyzer’s ServiceAccount. |
| Google Cloud | Cloud Storage bucket and prefix. | Workload Identity Federation for GKE. |
The Terraform guides configure native storage in the same cloud as the cluster. Your analysis model is a separate choice.
## Configure the location
[Section titled “Configure the location”](#configure-the-location)
Choose one block under `spec.storage`, alongside `postgres`:
Amazon S3
```yaml
s3:
region: us-west-2
bucket: acme-pig-traces
prefix: acme/traces
```
Azure Blob Storage
```yaml
azureBlob:
accountURL: https://acmepig.blob.core.windows.net
container: traces
prefix: acme/traces
```
Google Cloud Storage
```yaml
gcs:
bucket: acme-pig-traces
prefix: acme/traces
```
Use private storage with public access disabled, encryption at rest, and HTTPS in transit. Bind the data-access identity to `pig/pig-analyzer`. Keep storage credentials out of distributed host plugins.
## Scope data access
[Section titled “Scope data access”](#scope-data-access)
The analyzer must write trace objects and read them back. Scope permissions to the deployment’s bucket or container and prefix where the provider supports it. Include required bucket metadata or listing permissions and encryption-key access for your selected configuration.
The cloud modules define the provider-specific grants. Review those grants with the Terraform plan. Azure’s built-in Storage Blob Data Contributor role includes deletion; use a custom role if your policy requires narrower access. See [Azure’s Blob data roles](https://learn.microsoft.com/en-us/azure/storage/blobs/assign-azure-role-data-access).
Workload identities should refresh credentials without copying temporary tokens into Kubernetes Secrets. Application data access does not require permission to create buckets, resize databases, or change IAM.
## Retention and recovery
[Section titled “Retention and recovery”](#retention-and-recovery)
Set object retention, version recovery, and backup policies alongside your PostgreSQL recovery policy. Do not expire objects while live rows or retained database backups still reference them. Archive tiers that require restoration can prevent analysis from reading a trace.
Changing the configured bucket, container, or prefix does not migrate existing objects. Plan a storage migration with Promptless before changing it for an active deployment. Preserve both raw and canonical objects needed for recovery and analysis.
During [deployment verification](/docs/governance/deploy-the-worker/verify-your-deployment), check an exact session’s recorded object location and confirm it is readable. A successful upload request does not prove durable storage.
# Observability and troubleshooting
> Observe host uploads, durable trace storage, analysis, and hosted synchronization, and diagnose failures without losing trace data.
Monitor PIG as a flow: hosts upload sessions, the worker stores traces, analysis completes, and findings and status synchronize to the Promptless Dashboard. A healthy pod covers only part of that flow.
The analyzer emits structured logs by default. Datadog tracing and Sentry error reporting are optional. The [supervisor](/docs/governance/deploy-the-worker/manage-updates-and-recovery) reports release and migration status for deployments with automatic updates.
## Checks to keep visible
[Section titled “Checks to keep visible”](#checks-to-keep-visible)
| Stage | Evidence of progress | Investigate when |
| ---------------------- | --------------------------------------------------------------------------------------------------------------------- | -------------------------------------------------------------------------------------------- |
| Host collection | Recent successful collector status and host check-in. | An active pilot host stops checking in or uploading. |
| Durable storage | Recent `agent_traces.last_ingested_at`, a completed canonical object, and a readable object at the recorded location. | Storage errors appear, objects remain pending, or active hosts stop producing stored traces. |
| Analysis | `Trace analysis run succeeded`, correlated by `trace_record_id` and `analysis_run_id`. | Failures repeat or eligible quiet sessions do not complete. |
| Hosted synchronization | Deployment status and newly projected trace metadata or findings reach Promptless. | Local work completes but hosted state remains stale. |
| Remediation | An outcome explaining a pull request, external owner, or missing evidence. | A finding has no visible progress after prerequisites are met. |
Set thresholds around your team’s working hours, expected trace volume, and quiet window. An idle host or a successful analysis with zero findings does not indicate a failure. Establish a baseline with the [pilot-session checks](/docs/governance/deploy-the-worker/verify-your-deployment) before alerting.
## Read structured logs
[Section titled “Read structured logs”](#read-structured-logs)
For the deployment name used in the default Helm guide:
```bash
kubectl --namespace pig logs deployment/acme-analyzer --since=1h
kubectl --namespace pig get pods
```
The worker writes structured JSON logs to container stdout. Analysis-process logs join the service’s log stream. Your platform’s log collector must forward those logs if you want retention or centralized search; stdout alone does not send them to Datadog.
Correlate analysis messages with `analysis_run_id`, `trace_record_id`, `analyzer_version`, and `repository_sha`. Successful runs include `successful_finding_write_count`; failed runs include `failure_category`. Keep these identifiers when contacting support, along with the PIG release and time window.
If a pod is restarting, inspect its previous logs with `kubectl -n pig logs POD_NAME --previous`. Avoid dumping Secret contents or full session transcripts into a support ticket.
## Optional telemetry integrations
[Section titled “Optional telemetry integrations”](#optional-telemetry-integrations)
Forward structured stdout logs with your existing cluster log collector. Apply your organization’s access and retention controls to operational context and any session data collected by optional telemetry.
For the operator-managed worker chart, the [manual Helm reference](/docs/governance/deploy-the-worker/manual-helm-reference#enable-datadog) covers Datadog and Sentry settings. Those chart values are not `PIGDeployment` fields.
## Diagnose by the first failing stage
[Section titled “Diagnose by the first failing stage”](#diagnose-by-the-first-failing-stage)
### Host cannot enroll or upload
[Section titled “Host cannot enroll or upload”](#host-cannot-enroll-or-upload)
Check the host credential, hosted deployment registration, hostname, TLS certificate, and connectivity from the host’s network. Enrollment and upload routes must reach the worker, not just `/healthz`. Review [host enrollment troubleshooting](/docs/governance/get-started/enroll-your-hosts).
### Host checks in, but storage does not complete
[Section titled “Host checks in, but storage does not complete”](#host-checks-in-but-storage-does-not-complete)
Inspect the exact session in `agent_traces`, including `trace_object_status` and `trace_object_last_error`. Check PostgreSQL availability and object-storage authorization, location, prefix, and encryption-key permissions. Keep the same bucket and database while fixing access.
### Storage succeeds, but analysis fails
[Section titled “Storage succeeds, but analysis fails”](#storage-succeeds-but-analysis-fails)
Confirm that analysis is enabled, the session is eligible after its quiet window, and the repository and model settings are complete. Use the run’s failure category to narrow the investigation. Test repository read access and model authorization independently; neither follows from successful object-storage access.
The worker retries transient failures during an analysis run. If the run reaches `failed`, fix the dependency and contact Promptless for supported re-analysis. Preserve its run ID and stored traces. An unchanged failed session revision does not automatically retry after recovery. Avoid ad hoc backfill Jobs or edits to analysis rows.
### Local analysis succeeds, but hosted state is stale
[Section titled “Local analysis succeeds, but hosted state is stale”](#local-analysis-succeeds-but-hosted-state-is-stale)
Check outbound access to Promptless and the registered install token, deployment ID, and configuration hash. Finding projection also requires the hosted repository connection to work. A zero-finding run has no new issue to project. Check the run and deployment status before treating a missing issue as a failure.
### An upgrade is blocked or fails
[Section titled “An upgrade is blocked or fails”](#an-upgrade-is-blocked-or-fails)
Inspect the current and target releases, conditions, and supervisor logs:
```bash
kubectl describe pigdeployment acme --namespace pig
kubectl logs deployment/pig-supervisor --namespace pig-system --since=1h
kubectl get jobs --namespace pig
```
Preserve the failed migration Job’s logs before retrying. Resolve the reported dependency through its owner: Terraform for cloud resources, your secret manager for credentials, and PIG for application releases. See [updates and recovery](/docs/governance/deploy-the-worker/manage-updates-and-recovery) before choosing a rollback.
For the manual worker chart, inspect `job/pig-trace-analyzer-migrate` and `helm history pig-trace-analyzer --namespace pig`. The chart removes successful hook Jobs and replaces the earlier hook on the next attempt.
These names assume the release replacement is complete. For an existing installation, find its names with `helm list --namespace pig` and `kubectl get deployments,jobs --namespace pig`. Follow the [manual release replacement](/docs/governance/deploy-the-worker/manual-helm#replace-an-instruction-hub-worker-release) before installing under the new name.
## Preserve data during recovery
[Section titled “Preserve data during recovery”](#preserve-data-during-recovery)
Keep PostgreSQL backups and object-storage retention and version recovery under your organization’s recovery policy. Rehearse restoring them as a consistent set: restoring only the database or only objects can leave records and content out of sync.
Restarting the worker can rebuild its disposable repository mirror. It should retain the same registered deployment identity, PostgreSQL database, and trace prefix. Do not clear host collection state, delete traces, or reset database tables to force a retry.
For Helm-managed releases, coordinate restoration and any compatible application rollback with Promptless. For the supervisor’s pause, blocked-upgrade, and recovery behavior, see [Manage updates and recovery](/docs/governance/deploy-the-worker/manage-updates-and-recovery).
# Deploy trace analysis
> Choose an installation path and prepare the cluster, storage, identities, and network access for PIG trace analysis.
Deploy the trace analyzer in your infrastructure to analyze agent sessions using your model provider. Session data lives in your PostgreSQL database and trace bucket. The Promptless Dashboard shows findings, remediations, analyzer status, and agent instruction health.
Installation has two stages: prepare your cloud infrastructure, then bootstrap PIG with Helm. The analyzer and its update controller, the supervisor, follow stable releases automatically. You can pause updates or pin a release.
The 0.3.0 release targets clean installations on AWS/EKS. Azure/AKS and Google Cloud/GKE are experimental and are not covered by the first release’s cloud acceptance.
## Choose an installation path
[Section titled “Choose an installation path”](#choose-an-installation-path)
[Kubernetes with Helm](/docs/governance/deploy-the-worker/deploy-the-analyzer-worker)Use an existing cluster, PostgreSQL database, and trace bucket.
[AWS with Terraform](/docs/governance/deploy-the-worker/deploy-on-aws)Prepare RDS, S3, and workload identity for an existing EKS cluster.
[Azure with Terraform (experimental)](/docs/governance/deploy-the-worker/deploy-on-azure)Prepare PostgreSQL, Blob Storage, and workload identity for an existing AKS cluster.
[Google Cloud with Terraform (experimental)](/docs/governance/deploy-the-worker/deploy-on-gcp)Prepare Cloud SQL, Cloud Storage, and workload identity for an existing GKE cluster.
The cloud guides create dedicated PIG infrastructure in your existing network. They finish with the same Helm installation. Use [manual Helm management](/docs/governance/deploy-the-worker/manual-helm) if your team needs to apply every application upgrade itself.
## Before you begin
[Section titled “Before you begin”](#before-you-begin)
| Requirement | What to prepare |
| ------------------------ | ----------------------------------------------------------------------------------------------------------------------------------------------------- |
| Kubernetes | An existing cluster, `kubectl`, Helm 3 or later, and permission to install the PIG custom resource definition and scoped RBAC. |
| PostgreSQL | A dedicated database, schema-owner credentials, TLS, backups, and private connectivity from the analyzer and migration Jobs. |
| Trace bucket | Private S3, Azure Blob Storage, or Google Cloud Storage with a dedicated prefix and a workload identity that can read and write objects. |
| HTTPS endpoint | A hostname, certificate, and ingress reachable from enrolled hosts. Every proxy must accept encoded uploads of at least 10 MiB. |
| Promptless registration | Your deployment ID, runtime URL, and installation token. Keep this identity stable across upgrades and recovery. |
| Instruction repositories | GitHub repositories with a readable `main` branch, selected in PIG Settings and reachable through the connected GitHub App with Contents read access. |
| Model access | A supported Responses API endpoint, model name, authorization, and enough quota for analysis. |
Select infrastructure regions to meet your data residency requirements. The model provider can be in a different cloud; choose it independently from your trace bucket. See [model providers](/docs/governance/deploy-the-worker/model-providers) for supported endpoints.
## Assign ownership
[Section titled “Assign ownership”](#assign-ownership)
| Owner | Maintains |
| ------------------------------------------------ | ----------------------------------------------------------------------------------------------------------------------------------- |
| Your platform team, using Terraform | Cloud databases and their capacity, trace storage, networking, IAM, encryption keys, backup and retention policies. |
| Your Kubernetes configuration and secret manager | Namespaces, analyzer workload identity, desired `PIGDeployment` configuration, secret delivery, and certificates. |
| PIG | Analyzer and supervisor application releases, generated workloads, and database schema migrations within the installed permissions. |
Keep the one-time Helm bootstrap outside Terraform’s ongoing reconciliation. After bootstrap, PIG updates its own workloads. A second controller restoring the original chart would undo those updates. [GitOps ownership](/docs/governance/deploy-the-worker/gitops-ownership) explains the handoff.
A release that needs more infrastructure capacity or access reports a blocked update. Your team reviews and applies the Terraform change; PIG resumes when its live checks and any required [release-specific confirmations](/docs/governance/deploy-the-worker/manage-updates-and-recovery#confirm-release-prerequisites) pass. PIG does not resize cloud databases or change IAM and backup policies.
## Plan for production
[Section titled “Plan for production”](#plan-for-production)
Before expanding beyond a pilot, measure [compute and capacity](/docs/governance/deploy-the-worker/compute-and-sizing), configure coordinated [database](/docs/governance/deploy-the-worker/postgresql) and [object-storage](/docs/governance/deploy-the-worker/object-storage) recovery, and confirm [network access](/docs/governance/deploy-the-worker/networking-and-identity).
Finish installation by [verifying a complete session](/docs/governance/deploy-the-worker/verify-your-deployment). A ready pod or successful health check alone does not verify trace analysis.
# PostgreSQL
> Prepare private PostgreSQL connectivity, schema permissions, TLS, and recovery for trace analysis.
PIG uses PostgreSQL for trace metadata, ingestion progress, analysis runs, and synchronization state. Give each deployment a dedicated database and retain it across application upgrades.
## Database requirements
[Section titled “Database requirements”](#database-requirements)
* Use a PostgreSQL version supported by your selected PIG release.
* Give the application database role ownership of the PIG schema and permission to run its migrations. It does not need cloud administrator permissions.
* Allow the analyzer and migration Jobs to reach the database, normally on TCP 5432, over private networking.
* Require TLS and validate the database certificate with the provider’s CA bundle and supported verification mode.
* Configure automated backups, recovery retention, availability, and deletion protection through your infrastructure workflow.
The cloud guides use Amazon RDS for PostgreSQL, Azure Database for PostgreSQL Flexible Server, and Google Cloud SQL for PostgreSQL. A workload identity for the trace bucket does not automatically provide database authentication.
## Deliver the connection string
[Section titled “Deliver the connection string”](#deliver-the-connection-string)
Use your secret manager to deliver `pig-credentials/postgres-dsn` in namespace `pig`. URL-encode reserved characters in the username and password. For a database with a hostname-verifiable certificate:
```text
postgresql://pig_analyzer:REPLACE_PASSWORD@REPLACE_DATABASE_HOST:5432/pig?sslmode=verify-full&sslrootcert=/etc/pig/postgres-ca/ca.pem
```
Set the TLS mode for the actual certificate configuration. Cloud SQL CA modes and server certificates differ; follow the [Cloud SQL certificate guidance](https://cloud.google.com/sql/docs/postgres/authorize-ssl) for your instance. Do not disable TLS to bypass a certificate error.
Create ConfigMap `pig-postgres-ca` with key `ca.pem` from your provider’s CA bundle. Reference it in `PIGDeployment`:
```yaml
storage:
postgres:
dsnSecretRef:
name: pig-credentials
key: postgres-dsn
caConfigMapRef:
name: pig-postgres-ca
key: ca.pem
```
The CA mounts at `/etc/pig/postgres-ca/ca.pem` in both analyzer and migration containers. Omit `caConfigMapRef` only when the container’s trust store already validates the certificate and the DSN does not reference this file.
## Migrations and connection capacity
[Section titled “Migrations and connection capacity”](#migrations-and-connection-capacity)
PIG coordinates schema migrations with application releases. Keep migration access available during upgrades. Reserve database connections for migrations and operations as well as analyzer replicas.
Terraform owns the database instance’s version, size, networking, and backups. PIG owns its application schema. Do not use Terraform to manage PIG tables or run competing schema migrations.
## Back up and restore
[Section titled “Back up and restore”](#back-up-and-restore)
Set your recovery objectives before choosing backup retention. Record a recovery point that preserves database object references and their corresponding trace objects. Object lifecycle rules must retain data needed by your database backups.
Before a destructive migration, provide [recovery confirmation for the exact target release](/docs/governance/deploy-the-worker/manage-updates-and-recovery#confirm-recovery-before-a-destructive-migration). Your backup workflow supplies the recovery-point identifiers; PIG does not create cloud backups.
Rehearse restoration with an isolated database and trace location. Never run two active deployments against one database during recovery. Follow [updates and recovery](/docs/governance/deploy-the-worker/manage-updates-and-recovery) before restoring production or changing application versions.
# Verify your deployment
> Confirm host enrollment, durable trace objects, successful analysis, and visible dashboard status for one real session.
Verify one session from collection through completed analysis before expanding your rollout. Keep its session ID and deployment ID so you can correlate every check. An analysis with zero findings is a successful result.
**Host enrolled**Confirm the host and deployment identity
then
**Trace stored**Read the exact object using the analyzer identity`trace_object_status = written`
then
**Analysis completed**Find a succeeded run for that session`status = succeeded`
then
**Dashboard current**Confirm the session and analyzer status are visible
Follow the same session through all four checks. Ready pods and upload acknowledgments alone do not prove success. A succeeded analysis can have zero findings.
## 1. Check the deployment and endpoint
[Section titled “1. Check the deployment and endpoint”](#1-check-the-deployment-and-endpoint)
For the automatic installation:
```bash
kubectl describe pigdeployment acme --namespace pig
kubectl logs deployment/acme-analyzer --namespace pig --tail=100
curl --fail https://traces.acme.example/healthz
```
Run the HTTPS check from the network your enrolled hosts use. Confirm the certificate, hostname, and routing. `Ready=True` means deployment checks passed; it does not prove a host can upload and complete analysis. Deployment verification also confirms selected-source readiness: an organization administrator selects instruction repositories in [PIG Settings](/docs/governance/deploy-the-worker/deploy-the-analyzer-worker#5-select-instruction-repositories) and enables analysis before the analyzer runs it.
For the manual worker chart, use `deployment/pig-trace-analyzer` in log commands and `helm status pig-trace-analyzer --namespace pig` for release status.
These names assume the release replacement is complete. For an existing installation, find its names with `helm list --namespace pig` and `kubectl get deployments,jobs --namespace pig`. Follow the [manual release replacement](/docs/governance/deploy-the-worker/manual-helm#replace-an-instruction-hub-worker-release) before installing under the new name.
## 2. Enroll a host and create a session
[Section titled “2. Enroll a host and create a session”](#2-enroll-a-host-and-create-a-session)
1. Follow [Enroll your hosts](/docs/governance/get-started/enroll-your-hosts) on one supported test device. Confirm its endpoint and deployment identity match this installation.
2. Start a new agent session after the configured analysis activation time. Use an installed Instruction Hub skill and complete the session normally.
3. Confirm the host checks in and its collector uploads the session. Record the agent source and exact session ID.
Use `claude`, `codex`, or `claude-desktop` as the source in the queries below. Replace `REPLACE_SESSION_ID` with the recorded ID.
## 3. Verify durable storage
[Section titled “3. Verify durable storage”](#3-verify-durable-storage)
Connect to the dedicated PIG database with a read-only session. Query only the pilot session:
```sql
BEGIN READ ONLY;
SELECT id, source, session_id, trace_object_status, trace_object_uri,
last_ingested_at, trace_object_last_error
FROM agent_traces
WHERE source = 'codex' AND session_id = 'REPLACE_SESSION_ID';
COMMIT;
```
Confirm `trace_object_status = 'written'` and an ingestion timestamp matching your pilot. `trace_object_uri` records the canonical object location for every supported storage backend.
Use the recorded canonical object location to inspect that exact object with your cloud’s storage tools. Do not infer its name from the session ID or select a nearby object by timestamp. Inspect the raw-object references too if upload reconstruction is under investigation.
* S3
Confirm the recorded bucket and key with your normal S3 inspection tools. The recorded URI begins with `s3://`.
* Azure Blob Storage
Confirm the recorded account, container, and blob name in Azure Storage Explorer or your approved Blob inspection tool.
* Google Cloud Storage
Confirm the recorded bucket and object name in Cloud Storage or your approved storage inspection tool.
The object must be readable through the analyzer’s configured identity. An administrator’s successful read alone does not verify the workload’s access. Do not copy session content into tickets or installation logs.
## 4. Confirm completed analysis
[Section titled “4. Confirm completed analysis”](#4-confirm-completed-analysis)
Allow the configured quiet window to pass after session activity stops. In analyzer logs, find `Trace analysis run succeeded` for the pilot’s `trace_record_id`. Keep its `analysis_run_id` and `repository_sha`.
You can also check the database:
```sql
BEGIN READ ONLY;
SELECT r.id, r.status, r.error_category, r.repository_sha,
r.successful_finding_write_count, r.completed_at
FROM agent_analysis_runs AS r
JOIN agent_traces AS t ON t.id = r.agent_trace_id
WHERE t.source = 'codex' AND t.session_id = 'REPLACE_SESSION_ID'
ORDER BY r.queued_at DESC
LIMIT 5;
COMMIT;
```
At least one run for the pilot’s completed session must have `status = 'succeeded'`. Zero in `successful_finding_write_count` is valid. A queued or failed run has not passed this check.
## 5. Check the Promptless Dashboard
[Section titled “5. Check the Promptless Dashboard”](#5-check-the-promptless-dashboard)
Confirm the deployment and pilot session appear with current analyzer status. If the run produced findings, open their evidence and check the host and installed instruction attribution. Confirm the connected hub’s issue workflow receives the finding where configured.
A local success with stale dashboard status indicates a synchronization problem. Follow [observability and troubleshooting](/docs/governance/deploy-the-worker/observability) from the first failing stage.
## Record acceptance
[Section titled “Record acceptance”](#record-acceptance)
Keep the deployment ID, release, agent source, session ID, trace record ID, analysis run ID, and verification time in your deployment runbook. Record the outcome of all four checks: enrollment, readable durable storage, succeeded analysis, and dashboard visibility.
Repeat these checks after a storage migration, recovery, or material identity change.
# Remediate findings
> Turn supported findings into focused instruction changes, review remediation pull requests, and verify the next published release.
Remediation turns a supported finding into a proposed response. When the Instruction Hub owns the cause, a remediation agent can prepare a focused pull request. Your team decides whether to merge it under the repository’s review and CI rules.
A proposed fix opens in the finding’s destination repository. That destination is the selected instruction repository chosen for its GitHub issue. It requires that repository to have **Proposed fixes** enabled in PIG Settings.
For Acme, a missing product-version check might require a small change to the documentation skill. An expired deployment credential belongs to an infrastructure owner and should not become another paragraph in the skill.
**Promptless Dashboard**Review the finding and evidence
Finding & evidencethen
**Remediation agent**Investigate and prepare a focused change in your cluster
Pull requestthen
**Instruction Hub**Your team reviews and merges; CI publishes
Published pluginsthen
**AI agent**Refresh plugins and verify the correction in a new session
This path applies when the hub owns the problem. Other outcomes can record an external owner, request a decision, or explain why no change is proposed.
## Before you begin
[Section titled “Before you begin”](#before-you-begin)
You need a high-confidence [finding](/docs/governance/findings-and-remediation/understand-findings), a connected GitHub Instruction Hub, and someone authorized to review proposed changes. The worker must have working model access, and Promptless must have the repository connection needed to issue remediation credentials.
Remediation currently targets GitHub repositories. Publishing plugins from GitLab is a separate toolchain capability.
## How remediation chooses a response
[Section titled “How remediation chooses a response”](#how-remediation-chooses-a-response)
The remediation agent reads the finding and its evidence, then inspects the relevant hub assets in an isolated checkout. It determines whether the hub can address the supported cause.
| Outcome | What happens next |
| ----------------------------------------------------------------------------- | ---------------------------------------------------------------------------------------------------------------- |
| A narrow hub bug has one clear correction | The agent prepares the focused change and checks it. |
| The hub can address the problem, but the choice changes policy or capability | The workflow can ask for a decision in Slack before editing. Review the options and their tradeoffs. |
| A tool, permission, credential, or instruction outside the hub owns the cause | The agent updates the finding notes with the external input and responsible owner. It does not invent a hub fix. |
| The cause remains uncertain | The outcome explains the missing evidence and no pull request opens. |
The agent receives a repository-scoped GitHub credential for the remediation task and uses the configured model. Isolation separates the checkout and task execution; it does not mean analysis has no model credentials or no access to session evidence.
## Review a proposed change
[Section titled “Review a proposed change”](#review-a-proposed-change)
For a hub change, the agent works on a dedicated branch and runs relevant checks. It then opens a pull request against `main` in the finding’s destination repository. The workflow records the pull request against the finding. Repeated evidence and retried attempts should be followed through that recorded history rather than treated as independent fixes.
Review the pull request in this order:
1. **Match the change to the finding.** Confirm the proposed behavior addresses the observed failure and stays within the hub’s ownership.
2. **Check the scope.** Prefer a focused correction, simplification, or removal over an unrelated expansion of instructions.
3. **Exercise a representative task.** For Acme’s documentation example, try both the affected product version and a version that previously worked.
4. **Review validation results.** Require the hub’s validation and build checks, plus any repository-specific CI or evaluation you maintain.
5. **Approve and merge through your normal controls.** CODEOWNERS, required reviews, and branch protection remain yours to configure.
A recorded pull request proves a proposal exists. It does not prove that the change fixes every affected session. PIG does not supply a universal behavior-evaluation gate or automatically merge the proposal for you.
## Publish and verify adoption
[Section titled “Publish and verify adoption”](#publish-and-verify-adoption)
After merge, use the hub’s [publish workflow](/docs/governance/get-started/publish-and-install-plugins) to release the updated plugin artifacts. A merged source change and a published release are separate checkpoints; confirm the release completed before asking users to update.
Refresh the plugin through the supported agent’s installation or update flow. Confirm the expected plugin version on a pilot host, then run a new representative session. For enrolled hosts, check collection and subsequent analysis as well.
Adoption across the team depends on hosts refreshing their installed plugins. Do not assume every machine has the fix because the release succeeded. Preserve the finding and release links so reviewers can relate later evidence to the version users actually ran.
## Troubleshooting
[Section titled “Troubleshooting”](#troubleshooting)
| Situation | Next action |
| ------------------------------------------------------ | ------------------------------------------------------------------------------------------------------------------------------------------------ |
| The finding is high confidence but has no pull request | Read its outcome and notes. It may need an external owner, a decision, or more ownership evidence. |
| The workflow is waiting for a decision | Have the appropriate owner choose the intended behavior; avoid approving a policy change solely to unblock automation. |
| Repository access fails | Ask the operator to check the hosted repository connection and remediation credential path. The analyzer’s clone token is a separate credential. |
| CI rejects the proposal | Review the failure and update the branch through the normal repository workflow. Do not bypass required checks. |
| The source change merged but users see old behavior | Confirm publication, the installed plugin version, and whether a conflicting local instruction still applies. |
| The problem recurs after update | Compare new evidence with the release and installed version before concluding the fix failed or opening a duplicate change. |
Next, use [observability](/docs/governance/deploy-the-worker/observability) to monitor continued analysis and keep the hub’s review and publishing workflow healthy.
# Understand findings
> Read instruction-governance findings, distinguish severity from confidence, and decide who owns the next action.
A finding describes an instruction problem supported by evidence from real agent sessions. It helps your team decide what to change, why the change matters, and who should own it.
For example, Acme’s documentation skill might tell an agent to verify every example but omit how to choose the correct product version. A finding can connect repeated incorrect examples to that missing guidance. A failed API request caused by an expired credential may instead belong to the team that manages the credential.
## Before you begin
[Section titled “Before you begin”](#before-you-begin)
You need access to your connected Instruction Hub and the finding’s issue or hosted record. An operator should already have [verified completed analysis](/docs/governance/deploy-the-worker/verify-your-deployment). A successful analysis can produce zero findings.
## Read the evidence before choosing a fix
[Section titled “Read the evidence before choosing a fix”](#read-the-evidence-before-choosing-a-fix)
Start with the summary, impact, and cited occurrences. Check that the described behavior happened and that the instruction failure explains it. Severity and confidence answer different questions:
| Field | What it tells you | How to use it |
| --------------------------------------------- | -------------------------------------------------------------- | ---------------------------------------------------------------------------------------- |
| Severity: `low`, `medium`, `high`, `critical` | How serious the observed problem is. | Prioritize the effect on users and your systems. |
| Confidence: `low` or `high` | How strongly the evidence supports the finding. | Separate a suspected problem from one supported well enough for remediation. |
| Instruction failure | The gap, conflict, or misleading guidance behind the behavior. | Locate the instruction that needs attention, or question whether the hub owns the cause. |
| Evidence | Cited occurrences and a summary of what happened. | Compare the claim with the session details. |
| Notes | Additional context, uncertainty, or an external owner. | Check whether action belongs outside the hub. |
High severity does not automatically mean high confidence. A serious suspected failure may still need more evidence. Later analysis can add occurrences to an existing finding and promote its confidence when the evidence supports that change.
The analyzer uses a readable session digest to cite evidence. A `digest_range` identifies a location in that digest; it is unrelated to the cryptographic hashes used to verify stored traces.
## Follow the finding into your repository
[Section titled “Follow the finding into your repository”](#follow-the-finding-into-your-repository)
PIG analyzes every instruction repository your organization selects in PIG Settings. Each finding records the instruction source it came from: the repository and the exact commit the analyzer read. The finding lists these sources under **Instruction sources**, each linked to that commit.
The worker sends finding updates to Promptless. Promptless creates or updates a GitHub issue for the finding in its destination repository. The issue carries the finding’s title, impact, instruction failure, severity, confidence, and evidence. A destination repository must have **GitHub issues** enabled in PIG Settings.
Promptless creates the issue automatically when the finding’s recorded sources resolve to one selected repository that has GitHub issues enabled. Sometimes the finding needs a destination first. This happens when the sources span more than one selected repository. It also happens when the finding records no source and your organization has more than one repository selected. An organization administrator then opens the finding, selects a repository under **Instruction sources**, and chooses **Use repository**. The destination is set once per finding. Promptless then creates the issue and any proposed fix in that repository.
Removing an instruction repository in PIG Settings stops future analysis and issue automation for that source. Findings already recorded against it keep their instruction sources, issues, and pull requests.
Recurring evidence can update an existing finding and its issue as more sessions are analyzed. Use the finding identity and linked issue to follow that history. Issue projection is a separate step from local analysis: a completed run does not by itself prove that GitHub access is working.
Finding text and evidence summaries can include session details. Make sure the destination repository’s access matches your intended audience, as described in [Trust and data model](/docs/governance/start-here/trust-and-data-model).
## Decide the next action
[Section titled “Decide the next action”](#decide-the-next-action)
1. **Confirm the observed problem.** Read the impact and evidence, including enough surrounding context to avoid correcting intentional behavior.
2. **Identify the owner.** Shared hub instructions, a repository-local instruction, a tool bug, and a missing permission have different owners.
3. **Check for an existing response.** Read the finding notes, linked pull request, and current hub instructions before proposing a duplicate fix.
4. **Review the remediation outcome.** High-confidence findings can enter the [remediation workflow](/docs/governance/findings-and-remediation/remediate-findings). That workflow may propose a hub change, ask for a policy decision, or identify an external action.
The expected outcome is a clear owner and a justified next action. Every finding does not need a new instruction or a pull request.
## Troubleshooting
[Section titled “Troubleshooting”](#troubleshooting)
| Situation | What to check |
| ---------------------------------------------------------------- | ------------------------------------------------------------------------------------------------------------------------------------------------------------------------------------------------------------------- |
| The run succeeded, but no finding appeared | Zero findings is valid. Confirm the run belongs to the session you intended to analyze. |
| A local finding has no GitHub issue | Ask the operator to check hosted synchronization and the repository connection. |
| The finding asks you to select a repository for its GitHub issue | Its recorded sources map to more than one selected repository, or to none. An organization administrator opens the finding and, under **Instruction sources**, selects a repository that has GitHub issues enabled. |
| Evidence seems inconsistent with the current hub | Compare the analyzed repository revision with the current instructions and the session’s installed plugin version. |
| No remediation pull request opened | Check confidence, ownership notes, pending decisions, repository access, and the remediation outcome. |
| Similar issues appear to overlap | Compare their failure mechanism and evidence before treating them as duplicates; different symptoms can have one cause, and similar symptoms can have different causes. |
Next, [review and ship a remediation](/docs/governance/findings-and-remediation/remediate-findings).
# Enroll your hosts
> Enable optional trace collection, authorize a Claude or Codex host, and verify that its sessions reach your trace analyzer.
Host enrollment connects a person’s agent installation to your trace analyzer. Instructions work without enrollment. Enable collection when you want PIG to analyze how those instructions perform in real sessions.
This guide continues the Acme example. It covers Claude Code and Codex; the Claude collector can also discover Claude Desktop traces on the same machine. Cursor and Gemini plugins do not currently collect native traces.
1\. Authorize the host
**Host runtime**Start enrollment from the installed plugin
Enrollment requestthen
**Promptless enrollment**An organization member approves in the browser
Host credentialthen
**Host runtime**Retrieve and store the credential locally
2\. Upload to your analyzer
**Host trace collector**Authenticate with the host credential
Session tracesthen
**Trace analyzer**Receive uploads at your HTTPS endpoint
Promptless authorizes enrollment. The host sends session traces directly to your analyzer using its own host credential.
## Before you start
[Section titled “Before you start”](#before-you-start)
You need an [available analyzer](/docs/governance/deploy-the-worker/deploy-the-analyzer-worker), a published hub, and the installed `pig` plugin. Install Python 3.9 or later on the host. A signed-in Promptless organization member must approve enrollment. Claude’s generated launcher also needs Node.js. Codex’s generated hooks use a POSIX shell.
Your operator should provide the analyzer’s HTTPS address and confirm its organization identity. For Acme, this guide uses `https://traces.acme.example`. The host must reach that address and the Promptless enrollment service.
Note
Trace collection can include prompts, responses, tool calls, and code or documents present in sessions. On first discovery, the collector can upload existing session history, not just sessions started after enrollment. Review the [data boundaries](/docs/governance/start-here/trust-and-data-model) and agree on the pilot hosts and repositories before enabling collection.
1. **Enable collection in the hub**
Change the existing setting in `hub.yaml`:
hub.yaml
```yaml
trace_ingestion:
enabled: true
```
Run `pig verify`, commit the change, and publish it through your hub’s CI. Then [update the installed plugins](/docs/governance/get-started/publish-and-install-plugins#keep-installations-current) on your pilot host.
The compiler adds the host runtime and collection hooks to the literal `pig` plugin for Claude and Codex. It does not add them to `docs` or `dev`, and it does not provision an analyzer. With the setting omitted or `false`, generated runtime files and collection hooks are absent.
2. **Set the analyzer address**
Set this environment variable in the environment that actually launches the agent:
```bash
export PROMPTLESS_WORKER_BASE_URL="https://traces.acme.example"
```
For a terminal agent, launch it from that shell. For a desktop agent, use your organization’s desktop environment configuration and restart the application. A variable exported in a separate terminal may not reach an already running GUI application.
Do this before the first session with collection enabled. The runtime has a compiled-in Promptless worker default; a customer deployment must explicitly point hosts at its own analyzer.
3. **Approve the host**
Start a new Claude Code or Codex session. The generated startup hook initializes the local runtime and starts enrollment when needed. In the browser, sign in to the correct Promptless organization and approve the host. Any signed-in organization member can approve; organization administrator access is not required.
The approval page is hosted at `https://app.gopromptless.ai/instruction-hub/enroll`. It is separate from the analyzer URL. The runtime uses a local `127.0.0.1` callback during approval and retrieves a one-time host credential afterward. Enrollment records the approving user.
If you need to start enrollment manually, find the installed `pig` plugin directory in your agent’s plugin installation details and substitute its absolute path:
```bash
PIG_PLUGIN_ROOT="/absolute/path/to/installed/pig"
python3 "$PIG_PLUGIN_ROOT/runtime/promptless-host-runtime" enroll --host codex
```
Use `--host claude` for Claude Code or `--host claude-desktop` for Claude Desktop. The runtime is bundled inside the plugin; it is not installed as a global `promptless-host-runtime` terminal command. If the `runtime` directory is missing, check that you published and installed the release with trace ingestion enabled.
The host stores its `plihost_` credential locally with owner-only access. It is different from the analyzer’s deployment credential. Do not copy host credentials between machines or into your hub.
4. **Verify collection and analysis**
After manual enrollment, start a new session to let the startup hook fetch the host’s configuration. You can also request that initialization explicitly:
```bash
python3 "$PIG_PLUGIN_ROOT/runtime/promptless-host-runtime" ensure --host codex
python3 "$PIG_PLUGIN_ROOT/runtime/promptless-host-runtime" status --host codex
```
Use the same host family as in enrollment. Run a small, non-sensitive task in a repository configured for analysis, then finish the session. The operator should verify all three outcomes:
1. **Enrollment.** The analyzer recognizes the host and accepts its check-in.
2. **Stored trace.** The native session has reached the analyzer and its raw data is stored in the configured trace bucket.
3. **Completed analysis.** After the configured quiet period, the session has a completed analysis run for the expected repository.
A completed run can produce no findings. That is a valid result; pod readiness, enrollment, and an upload acknowledgment alone are not evidence that analysis completed. Use the operator’s [deployment verification steps](/docs/governance/deploy-the-worker/deploy-the-analyzer-worker) to inspect the server-side result.
## How collection continues
[Section titled “How collection continues”](#how-collection-continues)
Generated hooks run collection in the background during session startup and supported terminal events. They do not require a scheduled task. Claude Code also attempts to collect Claude Desktop traces it can discover locally. Installing a plugin only in another application does not create a standalone Claude Desktop collection schedule.
The runtime tracks source progress locally and uploads incremental trace data. A connectivity problem can delay collection without interrupting the agent task. Keep the native session files and runtime state intact while troubleshooting so the collector can retry. See [Trace object and sources](/docs/governance/reference/trace-object-and-sources) for source details.
## Troubleshooting
[Section titled “Troubleshooting”](#troubleshooting)
| Symptom | What to check |
| ---------------------------------------------- | -------------------------------------------------------------------------------------------------------------------------------------- |
| Nothing happens at session startup | Confirm the enabled release of `pig` is installed, hooks are allowed, and Python is available; Claude’s launcher also needs Node.js |
| The wrong deployment appears during approval | Set `PROMPTLESS_WORKER_BASE_URL` in the agent’s process environment and restart it before retrying |
| The browser cannot finish approval | Sign in to the correct organization; check access to Promptless, the analyzer, and the local loopback callback |
| Host is enrolled but no trace appears | Complete a supported native session; inspect runtime diagnostics and check the host’s collection policy and network access |
| Trace is stored but analysis does not complete | Ask the operator to check the selected instruction repositories, quiet-period eligibility, model configuration, and the analysis queue |
| A collected repository is not analyzed | The current analyzer binds GitHub repositories by repository ID; GitLab publishing support does not imply GitLab analysis support |
Local diagnostics are stored under `~/.promptless/instruction-hub/`, including `last-bootstrap-status.json` and `host-runtime-diagnostics.jsonl`. Review them for the failed stage before sharing a redacted excerpt with your operator. Enrollment state contains credentials and should not be pasted into a ticket.
To clear local enrollment for one host family before approving it again:
```bash
python3 "$PIG_PLUGIN_ROOT/runtime/promptless-host-runtime" reset --host codex --yes
```
Reset is a troubleshooting action. It does not remove server-side traces or implement organization-wide revocation.
## Stop or expand collection
[Section titled “Stop or expand collection”](#stop-or-expand-collection)
To remove generated collection hooks, set `trace_ingestion.enabled: false`, publish, and update the installed plugins on affected hosts. Hosts still running an older enabled release retain its hooks until updated. Existing traces are not deleted by this configuration change.
After the pilot meets all three verification outcomes, enroll the next agreed group of hosts. Continue to [findings and remediation](/docs/governance/findings-and-remediation/understand-findings) to turn analysis into reviewed instruction improvements.
# Migrate existing instructions
> Consolidate scattered skills and agent instructions into a shared hub without losing repository-specific guidance.
Move instructions into a hub when several people or repositories need the same guidance. A useful first migration gives one team a small, reviewed set of shared procedures while preserving the local context each project needs.
This guide covers adopting your first hub from scattered instructions. Begin with the scaffold from [Set up your Instruction Hub](/docs/governance/get-started/set-up-your-instruction-hub), and work on a migration branch. Keep the original instructions available until you have tested the published plugins.
## Inventory what you already use
[Section titled “Inventory what you already use”](#inventory-what-you-already-use)
List the source, owner, audience, and intended destination of each instruction. Include repository files, personal skills that teammates share, MCP configurations, and instructions copied into team documents.
| Existing instruction | Decision | Destination in the Acme example |
| ---------------------------------------------------- | ----------------------------------------- | ------------------------------------------------- |
| Documentation review procedure used by several teams | Share and assign an owner | `assets/skills/review-docs/SKILL.md` in `docs` |
| Bug investigation procedure | Share | `assets/skills/investigate-bug/SKILL.md` in `dev` |
| Commands for testing one service | Keep local | That service’s `AGENTS.md` or equivalent |
| Product terminology used across documentation | Share as reference material | The relevant skill’s `references/` directory |
| A developer’s private API token in an MCP config | Replace with host-provided authentication | Reviewed config in `assets/mcps/` |
| Two conflicting versions of the same procedure | Reconcile with their owners | One canonical skill |
Do not move an entire repository instruction file into a shared plugin just because some paragraphs apply broadly. Extract the reusable task and keep paths, build commands, and local conventions with the project.
## Import one source at a time
[Section titled “Import one source at a time”](#import-one-source-at-a-time)
From your hub checkout:
```bash
git switch -c migrate-instructions
pig scan --hub . --source /path/to/acme-docs
git status --short
git diff
```
`pig scan` leaves the source repository unchanged. Its imports are deliberately limited:
| Source | What happens |
| ----------------------------------------------------------------------------- | -------------------------------------------------------------------------------------------- |
| Direct skill directories under `.agents/skills/` | Copies each skill and its supporting files into `assets/skills/` |
| First root file found in `.mcp.json`, `mcp.json`, `mcp.yaml`, `mcp.yml` order | Copies it as the `repo-mcp` asset |
| `.cursor/mcp.json` | Imports a Cursor-specific asset when it is not already covered by the root MCP configuration |
| Root `AGENTS.md`, `CLAUDE.md`, and `GEMINI.md` | Records an inventory in `hub.repo-context.json`; does not copy or convert their instructions |
| Other skill locations, rules, commands, agents, and hooks | Requires manual migration |
Imported references are added to `plugins/pig.yaml`. Move those references into `plugins/docs.yaml` or `plugins/dev.yaml` when the instructions belong to that audience. Leave shared assets in `pig`, or include the same asset in several plugins when needed.
Caution
Scan replaces an existing skill with the same generated ID, and MCP imports use fixed IDs such as `repo-mcp`. It also replaces the repository-context inventory with the latest scan. Review and commit each source separately; scanning several repositories at once can overwrite earlier imports.
Before scanning another repository, give conflicting assets distinct IDs and update their plugin references. Skill IDs come from their directory names, normalized to lowercase letters, digits, and hyphens. To compare same-named skills, scan the second repository into a separate temporary hub. Copy only the reviewed result into the main migration branch.
Use `git status` to find new files as well as `git diff` to see changes to tracked files. Inspect new skill directories and MCP configurations directly. Record source repository names in your migration notes: `hub.repo-context.json` is an inventory of the most recent scan, not a migration ledger for all repositories.
## Migrate instructions the scanner does not import
[Section titled “Migrate instructions the scanner does not import”](#migrate-instructions-the-scanner-does-not-import)
For a skill stored under a different host directory, copy its complete directory into `assets/skills//`, keeping `SKILL.md` and any relative references together. Replace machine-specific paths and commands with instructions that the intended audience can use. Add `skill:` to the appropriate plugin.
For a shared passage in `AGENTS.md` or `CLAUDE.md`, write a focused skill with a description explaining when it applies. Keep the original repository file’s local instructions. The [setup guide](/docs/governance/get-started/set-up-your-instruction-hub) provides a starting format in its skill-authoring step.
Rules, commands, agents, and hooks need explicit target support metadata. For example, a Cursor rule in `assets/rules/docs-style.mdc` can use this adjacent `docs-style.asset.yaml` file:
```yaml
support:
cursor:
mode: native
```
Add `rule:docs-style` to its plugin. This declaration distributes the native rule to Cursor; it does not make it a Claude or Codex rule. For guidance that must apply across agents, consider a portable skill. Review [support modes](/docs/governance/reference/supported-agents#asset-support) before translating host-specific behavior.
Review scripts before sharing them and replace embedded credentials with the host’s supported authentication mechanism. Check that supporting files contain no private material outside the intended audience. The toolchain rejects symlinks; copy the actual reviewed files instead.
## Validate and pilot the migration
[Section titled “Validate and pilot the migration”](#validate-and-pilot-the-migration)
```bash
pig validate --hub .
pig verify --hub .
```
Review the changes with the instruction owners, then [publish the hub and install the plugins](/docs/governance/get-started/publish-and-install-plugins) on a pilot machine. Try a representative task in each agent your team uses:
1. Confirm the intended plugin is installed and its skill is available.
2. Invoke the skill against a real draft or code change.
3. Check its reference files and helper scripts work from the installed location.
4. Confirm the agent still reads the project’s local instructions.
5. Check for duplicate skills or conflicting rules from old installations.
Treat compilation and host installation as separate checks. A portable source file can compile correctly while an instruction still assumes a tool or permission the receiving agent lacks.
## Retire the duplicate sources
[Section titled “Retire the duplicate sources”](#retire-the-duplicate-sources)
After the pilot succeeds, tell teammates which plugins to install and which earlier copies they replace. Remove only the shared instructions now delivered by those plugins. Retain project-specific files and any guidance the hub does not yet cover.
Keep the migration commit and original source history so you can restore the prior files if the pilot exposes a gap. Make subsequent changes in the hub and use normal pull-request review; avoid maintaining another copy by hand in each project.
The migration is complete when teammates can install the published release, complete the intended tasks, and identify where to propose the next instruction change. Trace collection is optional; add it later by [planning an analyzer deployment](/docs/governance/deploy-the-worker/plan-your-deployment) and [enrolling your hosts](/docs/governance/get-started/enroll-your-hosts).
# Publish and install plugins
> Publish an Acme Instruction Hub with GitHub or GitLab CI, install its plugins, and verify that your agents can use the instructions.
Publishing makes a reviewed version of your hub available to your team. Installation gives each agent the plugins that person needs. Acme publishes `pig`, `docs`, and `dev`; a technical writer installs `pig` and `docs`, while a developer can also install `dev`.
**Instruction Hub**Your team authors and reviews shared source
Reviewed sourcethen
**Publishing CI**The pig toolchain validates, builds, and publishes
Published pluginsthen
**AI agent**Install or refresh plugins, then reload
Publishing and installation are separate steps. A released plugin reaches an agent when that host installs or refreshes it.
## Before you start
[Section titled “Before you start”](#before-you-start)
This page serves two readers. A **publisher** sets up CI once so the hub compiles and releases; an **installer** adds the published marketplace and installs plugins for their own agent.
To publish, you need:
* A [validated hub](/docs/governance/get-started/set-up-your-instruction-hub).
* A GitHub or GitLab repository you can configure.
* Permission for CI to write to that repository and push to its protected release branches.
The examples use `acme/acme-instruction-hub` and a source branch named `main`. Replace the organization, repository, and branch with yours.
To install, you need:
* An agent that supports one of the [build targets](/docs/governance/reference/supported-agents).
* Read access to the published hub.
For a private hub, both CI and each person installing plugins need repository access. A successful CI build does not grant that access to your teammates.
Already installing from a hub someone else publishes? Skip ahead to [Install the plugins](#install-the-plugins).
## Publish your hub
[Section titled “Publish your hub”](#publish-your-hub)
Publishing runs in CI. Set up the workflow for your Git provider, then push it.
* GitHub
1. **Create the two workflow files in your hub.** The check workflow validates and compiles pull requests. The publish workflow runs after a merge to `main` and serializes releases.
.github/workflows/instruction-hub-check.yml
```yaml
name: Check Instruction Hub
on:
pull_request:
workflow_dispatch:
permissions:
contents: read
jobs:
instruction-hub:
uses: Promptless/pig-toolchain/.github/workflows/pr-check.yml@main
```
.github/workflows/instruction-hub-publish.yml
```yaml
name: Publish Instruction Hub
on:
push:
branches: [main]
workflow_dispatch:
permissions:
contents: write
concurrency:
group: instruction-hub-release
cancel-in-progress: false
jobs:
instruction-hub:
if: github.ref == 'refs/heads/main'
uses: Promptless/pig-toolchain/.github/workflows/publish.yml@main
with:
source-branch: main
```
2. **Commit the workflow files and push them.** Create an empty `acme/acme-instruction-hub` repository on GitHub first if you have not already.
```bash
git add .github/workflows
git commit -m "Add instruction hub publishing"
git remote add origin https://github.com/acme/acme-instruction-hub.git
git push -u origin main
```
If `origin` already exists, use that remote instead of adding it again.
3. **Inspect the run.** In **Actions**, open **Publish Instruction Hub** and check its result. The workflow uses the repository’s automatic `GITHUB_TOKEN`; this example needs no separate GitHub token. Repository permissions and branch rules must allow the workflow to update both `main` and `release/stable`.
The workflows use the toolchain’s current `main` revision, which the CI logs record. If your organization reviews toolchain updates separately, pin both `uses` references to the same reviewed toolchain commit and update them together.
If your hub lives below the repository root, set the `hub-root` input in both jobs; the default is `.`. The publishing workflow also accepts `release-branch` if you use a different release branch. Keep the concurrency group and `cancel-in-progress: false` so two runs do not publish overlapping releases.
* GitLab
1. **Add the supported CI template to your hub’s `.gitlab-ci.yml`.**
.gitlab-ci.yml
```yaml
include:
- remote: https://raw.githubusercontent.com/Promptless/pig-toolchain/main/templates/gitlab/instruction-hub.yml
```
Use a Linux runner that supports the template’s container image. If you already have custom stages, match the template jobs to those stages:
.gitlab-ci.yml with existing stages
```yaml
stages: [verify, publish]
include:
- remote: https://raw.githubusercontent.com/Promptless/pig-toolchain/main/templates/gitlab/instruction-hub.yml
inputs:
check-stage: verify
publish-stage: publish
release-branch: release/stable
toolchain-ref: main
```
2. **Allow the pipeline to push to your repository.** In the project settings, open **CI/CD → Job token permissions** and enable **Allow Git push requests to the repository**. The user who starts the pipeline must have permission to push to the source and release branches. Publishing uses `CI_JOB_TOKEN`, with no GitHub publishing credential.
3. **Push the configuration and inspect the jobs.** Open the validation and publishing jobs in **Build → Pipelines**. The template validates merge requests and publishes pushes to the default branch. A manually started pipeline on another branch validates without publishing. Git pushes made by the job token do not start another pipeline.
For a reviewed toolchain pin, replace `main` in both the remote template URL and `toolchain-ref` with the same full toolchain commit.
## Verify the published release
[Section titled “Verify the published release”](#verify-the-published-release)
A successful first publication creates `release/stable`, publishes all three plugins, and updates the source branch’s marketplace pointers and version. Review those changes in your Git provider before asking the team to install.
For subsequent changes, the workflow compares the content with the previous release. Changed content normally advances the patch version; unchanged content does not need a new release. To choose a higher minor or major version deliberately, update the source configuration before merging:
```bash
pig set-version --hub . --version 0.2.0
pig verify --hub .
```
Commit the version change along with the instructions. All plugins in the hub share that version. Do not manually edit generated version fields.
Note
Publishing checks that the source and previous release still match the revisions it started from. If either branch advances during the job, publication stops instead of overwriting it. Refresh from the latest source and rerun the workflow; do not bypass the check with a force push.
## Understand the release branches
[Section titled “Understand the release branches”](#understand-the-release-branches)
Keep authored instructions, `hub.yaml`, and `plugins/*.yaml` on `main`. The publishing workflow compiles every plugin in `stable_plugins` for each configured target and maintains a separate `release/stable` branch containing the generated output.
| Output | Purpose |
| ---------------------------- | ---------------------------------------------------------------- |
| `dist///` | An installable Claude, Codex, Cursor plugin, or Gemini extension |
| Target marketplace manifests | A catalog of the available plugins for Claude, Codex, and Cursor |
| `hub.release.json` | Version and content identity of the compiled release |
| `hub.stable.json` | Information about the published stable release |
On the source branch, marketplace entries point to the generated plugins on `release/stable`. Add the source repository to an agent’s marketplace, so it can follow those pointers. Gemini uses extension directories instead of a marketplace.
You can inspect a local build with `pig build`. For routine review, use `pig verify`: it compiles in a temporary directory without changing generated files in your checkout. Neither command publishes a release.
## Install the plugins
[Section titled “Install the plugins”](#install-the-plugins)
Choose the instructions for your agent, then install for the one agent you use. Installing `pig` does not enable trace collection by itself: the default hub configuration has `trace_ingestion.enabled: false`.
The commands below use the GitHub example URL `https://github.com/acme/acme-instruction-hub.git`. For a GitLab-hosted hub, substitute your full GitLab repository URL ending in `.git`.
* Claude Code
1. **Add the source repository.** Inside Claude Code, add the marketplace. These are Claude Code slash commands, not terminal commands.
```text
/plugin marketplace add https://github.com/acme/acme-instruction-hub.git
```
2. **Install the plugins.** Install `pig` and `docs`; developers can also run `/plugin install dev@acme-instruction-hub`.
```text
/plugin install pig@acme-instruction-hub
/plugin install docs@acme-instruction-hub
```
Use `/plugin` to review installed plugins and their scope. Choose user scope for personal use across projects, or the appropriate project scope for a repository.
3. **Reload and verify.** Run `/reload-plugins` or restart Claude Code, then try `/docs:review-docs` on a documentation change. See [Claude Code’s plugin installation guide](https://code.claude.com/docs/en/discover-plugins).
* Codex
These are terminal commands for the Codex CLI, not in-app commands. Flags like `--ref` and `--json` are shell arguments. If you are not comfortable with the command line, ask a teammate who is.
1. **Add the marketplace and install the plugins.** With a Codex CLI that supports plugins, run:
```bash
codex plugin marketplace add https://github.com/acme/acme-instruction-hub.git --ref main
codex plugin add pig@acme-instruction-hub
codex plugin add docs@acme-instruction-hub
codex plugin add dev@acme-instruction-hub
codex plugin list --marketplace acme-instruction-hub --json
```
2. **Review the installed plugins in the Codex app.** Open **Plugins**, find the installed Acme plugins, and review the skills. Where the task’s **Sources → Use plugins** control is available, select the relevant installed plugin. Availability and labels depend on the Codex surface and workspace settings; see [OpenAI’s plugin guide](https://help.openai.com/en/articles/20001256/).
3. **Verify in a task.** Start a task and ask Codex to use the Acme documentation review skill on a small change. Confirm that it can read the skill and any supporting files. A marketplace listing alone does not verify installation in the desktop app.
* Cursor
1. **Import the marketplace (team administrator, once).** Your team administrator does this one time for a GitHub-hosted hub. Open **Dashboard → Plugins → Team Marketplaces → Add Marketplace** and use **Import from Repo** with the source repository. Review the imported `pig`, `docs`, and `dev` plugins and the marketplace access settings.
2. **Install the plugins you need (each developer).** Once the marketplace is imported, open **Customize**, find the Acme plugins, and install the ones you need. See [Cursor’s team marketplace guide](https://cursor.com/docs/plugins).
3. **Verify in a new agent task.** Invoke the documentation review skill and confirm that its instructions are available. Skills remain skills in the generated Cursor plugin; they are not converted into always-on rules.
The toolchain also generates GitLab release references, but Cursor’s documented team import flow is for GitHub. Confirm that your Cursor installation supports your chosen GitLab import route before committing to that distribution path. Git access and a valid generated manifest are separate from successful marketplace import.
* Gemini CLI
This path uses `git` and the Gemini CLI in your terminal. If you are not comfortable with the command line, ask a teammate who is to install the extensions for you.
1. **Clone the release branch and install the extension directories.**
```bash
git clone --branch release/stable --single-branch \
https://github.com/acme/acme-instruction-hub.git acme-instruction-hub-release
gemini extensions install ./acme-instruction-hub-release/dist/gemini/pig
gemini extensions install ./acme-instruction-hub-release/dist/gemini/docs
gemini extensions install ./acme-instruction-hub-release/dist/gemini/dev
gemini extensions list
```
2. **Restart and verify.** Restart Gemini CLI and try the documentation review skill. Installing from a local directory copies that extension into Gemini’s installation; keeping the clone current alone does not update the installed extension. See the [Gemini CLI extension reference](https://geminicli.com/docs/extensions/reference/).
## Keep installations current
[Section titled “Keep installations current”](#keep-installations-current)
Publication and host installation are separate steps. Do not assume that every agent refreshes every installed plugin whenever it starts.
Claude and Codex receive an `update-instruction-hub` skill in `pig`, even when trace ingestion is disabled. Ask the agent to use that skill to update the Acme Instruction Hub. It updates the marketplace and installed plugins and reloads them where the host supports it. Check the installed version afterward. In Claude Code, you can also manage updates through `/plugin`; in Codex, a marketplace refresh by itself does not prove installed plugins were updated.
For Cursor, configure marketplace refresh with your team administrator, then verify the version on a developer’s host. For Gemini, update the release checkout and run `gemini extensions update docs` for each installed extension before restarting the CLI.
## Troubleshooting
[Section titled “Troubleshooting”](#troubleshooting)
| Symptom | What to check |
| --------------------------------------------- | ---------------------------------------------------------------------------------------------------------------------------------------------------------------------------------------------------------------------- |
| CI validates but cannot publish | Workflow write permissions, protected branch rules, and the GitLab job token push setting |
| Publication stops after a newer commit | Update from the latest source and rerun; another source or release change made the run stale |
| Marketplace is visible but installation fails | The user’s Git credentials must read the repository and its `release/stable` branch |
| A plugin or skill is missing | With hub access, check `stable_plugins`, the plugin’s `includes`, target support, and the installed version. Without it, ask your hub’s publisher to confirm the plugin is in the release and supported for your agent |
| Updated instructions are not used | Refresh installed plugins and reload the agent; check for older local copies of the same skill |
Once an installed skill works in a real task, your hub is ready for team use. To learn from agent sessions, continue to [Enroll your hosts](/docs/governance/get-started/enroll-your-hosts) after your analyzer is available.
# Set up your Instruction Hub
> Create a shared instruction repository, organize skills into plugins, and validate a first release for your team.
An Instruction Hub is a Git repository containing your team’s shared instructions and the plugins that distribute them. Authors edit ordinary Markdown and configuration files, review changes in pull requests, and publish a version that colleagues can install in their agents.
This guide creates an Acme hub with a documentation review skill and a bug investigation skill. You can use the hub without deploying trace analysis. If you already have instructions to consolidate, create the scaffold here, then follow [Migrate existing instructions](/docs/governance/get-started/migrate-existing-instructions).
## Before you begin
[Section titled “Before you begin”](#before-you-begin)
You need Git, Python 3.11 or later, and permission to create a repository on GitHub or GitLab. Choose someone to maintain the hub and a reviewer for each instruction area. The examples use `Acme`, marketplace ID `acme-instruction-hub`, and plugin IDs `pig`, `docs`, and `dev`; replace the organization and repository URL with yours.
Install the toolchain from its public Git repository in a dedicated virtual environment:
```bash
python3 -m venv ~/.venvs/pig
source ~/.venvs/pig/bin/activate
python -m pip install "git+https://github.com/Promptless/pig-toolchain.git@main"
pig --help
```
These are macOS/Linux shell commands. On Windows, activate the environment with its `Scripts/Activate.ps1` script. Activate this environment again when you return to authoring. Your teammates only need the toolchain if they edit or validate hub source; installing a published plugin does not require it.
1. **Create the repository**
```bash
mkdir acme-instruction-hub
cd acme-instruction-hub
git init -b main
pig init --hub . --org Acme \
--marketplace-id acme-instruction-hub \
--marketplace-name "Acme Instruction Hub" \
--version 0.1.0
```
The command writes `hub.yaml`, creates `plugins/pig.yaml`, and prepares the asset directories. Keep the `pig` plugin: the toolchain requires that literal ID and adds the hub’s update skill to its Claude and Codex versions.
2. **Write your first skills**
A skill explains when to use a repeatable task, what to do, and what to return. Start with a small procedure that you can try against real work.
Create the directories:
```bash
mkdir -p assets/skills/review-docs assets/skills/investigate-bug
```
Save this as `assets/skills/review-docs/SKILL.md`:
assets/skills/review-docs/SKILL.md
```markdown
---
name: review-docs
description: >-
Use when reviewing a documentation draft or pull request for accuracy,
missing steps, or clarity. Return findings with concrete corrections.
---
# Review documentation
## Scope
Review the files or change set the user names. Otherwise, inspect staged,
unstaged, and untracked documentation changes. Read the repository's local
instructions and identify the intended reader and the task they must complete.
If no documentation is in scope, say so and stop.
## Review
1. Check factual claims, commands, configuration keys, and examples against
the implementation or official documentation for the relevant version.
Flag unsupported claims; do not make them sound more certain.
2. Walk through the reader's task. Check prerequisite access, step order,
expected results, and recovery from likely errors.
3. Check whether the reader can find, understand, and use the information.
Flag vague instructions, undefined terms, buried actions, and repetition.
Keep technical terms the audience needs and drop stylistic preferences.
4. Run the repository's documented checks and preview the affected pages.
Inspect navigation, links, code blocks, and callouts. Do not execute
examples that change production data or infrastructure during a review.
## Return findings
Put findings first, ordered by severity: critical issues block the task;
important issues cause a wrong action or a material misunderstanding.
Each finding needs a file:line location, the affected claim or passage,
supporting evidence, the reader impact, and a concrete correction.
State which checks ran and what remains unverified. If there are no findings,
say so. Return the review without editing or publishing the draft.
```
Save a second skill as `assets/skills/investigate-bug/SKILL.md`:
assets/skills/investigate-bug/SKILL.md
```markdown
---
name: investigate-bug
description: >-
Use when a bug report, error, or failed request needs a diagnosis.
Reproduce the failure, trace the relevant code and logs, and report
the supported cause and a proposed fix.
---
# Investigate a bug
## Scope
Start with the reported failure and read the repository's local instructions.
Keep production access read-only. Use the project's documented tooling for
logs, traces, and database queries, scoped to the affected request or session.
Do not retry production jobs, change data, or deploy a fix without approval.
## Investigate
1. Record expected and actual behavior, the environment and release, the
failing input or request ID, and when the problem began. Ask for missing
details only when they block the next useful check.
2. Reproduce the smallest failing case locally with the existing test or
development setup. Record the command and observed result. If local
reproduction is unavailable, anchor the investigation to a specific
failed request and its logs; do not claim it was reproduced.
3. Trace the failing operation through the code for the affected release.
Correlate logs and stored state by request or session ID and timestamp.
Compare a successful case when available. Check recent changes when
their timing could explain the failure.
4. State a candidate cause and the evidence that would confirm or disprove
it. Run the smallest check that distinguishes it from other explanations.
Separate the original failure from downstream errors; an error message
or a nearby deployment alone does not establish the cause.
5. Identify the smallest fix and a regression test for the original failure.
Keep diagnosis separate from implementation unless the user requested both.
## Report
Lead with the cause and its decisive evidence, or state that the cause remains
unconfirmed. Include the reproduction, affected behavior, relevant file:line
locations and log references, and the proposed fix and regression test.
Separate observed facts from hypotheses. Name any remaining uncertainty and
the next check that would resolve it. Redact credentials and sensitive data.
```
Keep reusable reference material and helper scripts beside a skill in `references/` and `scripts/`. Use relative links inside the skill so those files remain usable after installation. Keep project-specific build commands and directory conventions in each project’s own instructions.
3. **Group skills into plugins**
A plugin is the unit a teammate installs. Group instructions by the work people do, so a writer can install `docs` and a developer can install `dev`, or both.
Create `plugins/docs.yaml`:
plugins/docs.yaml
```yaml
id: docs
name: Acme Docs
owners:
- docs-team
includes:
- skill:review-docs
```
Create `plugins/dev.yaml`:
plugins/dev.yaml
```yaml
id: dev
name: Acme Dev
owners:
- engineering
includes:
- skill:investigate-bug
- skill:review-docs
```
The `owners` field records ownership; configure repository review rules separately if you want enforced approvals. An `includes` entry has the form `kind:id` and must name an asset that exists in the hub.
Update `hub.yaml` to publish all three plugins:
hub.yaml
```yaml
org: Acme
marketplace:
id: acme-instruction-hub
name: Acme Instruction Hub
version: 0.1.0
stable_plugins: [pig, docs, dev]
targets: [claude, codex, gemini, cursor]
trace_ingestion:
enabled: false
```
`marketplace.id` identifies the catalog, while each plugin has its own literal ID. The compiler does not add an organization prefix. Choose stable names; renaming an installed plugin creates a different identity. If your team installs multiple hubs, use explicit IDs such as `acme-docs` for customer plugins to avoid confusing namespaces. The required `pig` ID stays unchanged.
`version` is shared by the generated plugins. Publishing advances it when the output changes; you do not need to bump it for each edit. See [Publishing and updates](/docs/governance/get-started/publish-and-install-plugins).
4. **Understand the layout**
```text
hub.yaml # Marketplace, version, plugins, and targets
plugins/
pig.yaml # Required shared PIG plugin
docs.yaml # Documentation team's selection
dev.yaml # Development team's selection
assets/
skills/review-docs/SKILL.md # Documentation accuracy and clarity review
skills/investigate-bug/SKILL.md # Evidence-based bug diagnosis
rules/ # Rules with target support metadata
agents/ # Specialist agent definitions
commands/ # Agent commands
hooks/ # Lifecycle actions
mcps/ # MCP server configuration
```
Skills are the simplest starting point. The toolchain also supports rules, agents, commands, hooks, and MCP configurations. These capabilities differ by host; see [Supported agents](/docs/governance/reference/supported-agents) before adding an instruction that depends on a particular agent feature.
5. **Validate and save your work**
```bash
pig validate --hub .
pig verify --hub .
git add hub.yaml plugins assets
git commit -m "Create Acme Instruction Hub"
```
`validate` checks the source configuration, references, and asset declarations. `verify` also compiles every stable plugin for every configured target in a temporary directory. It prints a verified release ID and leaves generated files out of your source checkout.
Note
Validation catches several unsafe configuration patterns, including literal secrets in MCP settings and symlinks in assets. It is not a general secret scan. Review imported files, scripts, and examples before committing them.
If validation reports a missing asset, check both the directory name and the plugin’s `includes` entry. If a capability is unsupported, either adapt its instructions to a portable skill or declare its target support explicitly. Do not treat a successful build as proof that an agent followed the procedure; test that after installation.
You now have a versioned source hub ready for review. Continue to [Publish and install plugins](/docs/governance/get-started/publish-and-install-plugins). When you want feedback from real agent sessions, [deploy trace analysis](/docs/governance/deploy-the-worker/deploy-the-analyzer-worker) and then [enable collection and enroll hosts](/docs/governance/get-started/enroll-your-hosts).
# Frequently asked questions
> Answers about Instruction Hub setup, migration, supported agents, trace data, deployments, updates, and reviewing improvements.
## Setting up an Instruction Hub
[Section titled “Setting up an Instruction Hub”](#setting-up-an-instruction-hub)
### Can we use an Instruction Hub without deploying an analyzer?
[Section titled “Can we use an Instruction Hub without deploying an analyzer?”](#can-we-use-an-instruction-hub-without-deploying-an-analyzer)
Yes. Publish and install your instructions with `trace_ingestion.enabled: false`, which is the default. That workflow does not require a worker, database, bucket, or model-provider credentials. See [Set up your Instruction Hub](/docs/governance/get-started/set-up-your-instruction-hub).
### Do we have to move every AGENTS.md or CLAUDE.md into the hub?
[Section titled “Do we have to move every AGENTS.md or CLAUDE.md into the hub?”](#do-we-have-to-move-every-agentsmd-or-claudemd-into-the-hub)
No. Move reusable instructions into shared hub assets and keep repository-specific context beside the project it describes. `pig scan` records root context files in its inventory; it does not automatically turn them into shared skills. See [Migrate existing instructions](/docs/governance/get-started/migrate-existing-instructions).
### What does pig scan import automatically?
[Section titled “What does pig scan import automatically?”](#what-does-pig-scan-import-automatically)
It imports skills from `.agents/skills` and supported root or Cursor MCP configuration. Other instruction layouts and asset kinds need a reviewed manual migration. Scan one source at a time and inspect the diff, because an existing destination asset with the same ID can be replaced. The [migration guide](/docs/governance/get-started/migrate-existing-instructions) covers inventory, naming conflicts, and pilot rollout.
### Why is the pig plugin required?
[Section titled “Why is the pig plugin required?”](#why-is-the-pig-plugin-required)
It is the canonical home for the toolchain-managed update skill and optional collection integration. It can also contain shared assets. Keep `pig` in `stable_plugins`, and organize additional instructions into plugins such as Acme’s `docs` and `dev`. See [Key concepts](/docs/governance/start-here/key-concepts#the-required-pig-plugin).
### Can we publish from GitLab?
[Section titled “Can we publish from GitLab?”](#can-we-publish-from-gitlab)
Yes. Hub publishing supports GitHub Actions and GitLab CI. Agent installation support still varies: test the team’s actual desktop importer, particularly Cursor with a GitLab repository. The current analyzer’s hub binding and remediation integration require GitHub and a `main` branch. See [Publish and install plugins](/docs/governance/get-started/publish-and-install-plugins).
## Agents and session data
[Section titled “Agents and session data”](#agents-and-session-data)
### Which agents does PIG support?
[Section titled “Which agents does PIG support?”](#which-agents-does-pig-support)
The toolchain builds instructions for Claude, Codex, Cursor, and Gemini. Native trace ingestion supports Claude Code, Claude Desktop, and Codex. These are separate capabilities; building a Cursor or Gemini plugin does not enable native collection for it. See [Supported agents](/docs/governance/reference/supported-agents).
### What leaves an enrolled host?
[Section titled “What leaves an enrolled host?”](#what-leaves-an-enrolled-host)
The collector uploads native session records and related collection metadata to your analyzer. Your configured model provider receives analysis input. Promptless receives trace status plus findings and evidence summaries, which can describe session details. See [Trust and data model](/docs/governance/start-here/trust-and-data-model).
### Will enrolling a host upload its old sessions?
[Section titled “Will enrolling a host upload its old sessions?”](#will-enrolling-a-host-upload-its-old-sessions)
It can. When a discovered native source has no acknowledged upload position, collection starts from the beginning and can upload existing session history. Subsequent collection resumes from the position recorded in the upload ledger. Agree on pilot hosts and repositories before enrollment, then verify a new session. See [Enroll your hosts](/docs/governance/get-started/enroll-your-hosts).
### Does disabling trace ingestion delete data?
[Section titled “Does disabling trace ingestion delete data?”](#does-disabling-trace-ingestion-delete-data)
No. After publishing and refreshing installed plugins, the new release no longer includes managed collection hooks. Older installed versions keep their hooks until refreshed. Previously stored traces, findings, and the analyzer deployment remain. Manage their retention separately. See [Trust and data model](/docs/governance/start-here/trust-and-data-model).
## Deployment and updates
[Section titled “Deployment and updates”](#deployment-and-updates)
### What does the analyzer need to run?
[Section titled “What does the analyzer need to run?”](#what-does-the-analyzer-need-to-run)
The current service needs a Kubernetes deployment, PostgreSQL, native object storage, a Promptless deployment token, and network access between those systems. Analysis also needs a configured model provider and a verified GitHub hub repository with a `main` branch. Private repositories need read credentials. Start with [Plan your deployment](/docs/governance/deploy-the-worker/plan-your-deployment).
### Can we deploy on Azure or Google Cloud?
[Section titled “Can we deploy on Azure or Google Cloud?”](#can-we-deploy-on-azure-or-google-cloud)
Azure and Google Cloud are experimental in 0.3.0. The first release targets AWS/EKS clean installation and canonical trace analysis through the Dashboard. The evaluation guides use native Blob Storage on Azure and Cloud Storage on Google Cloud; their availability does not establish equivalent cloud acceptance. Terraform prepares infrastructure before the common Helm bootstrap. See the [AWS](/docs/governance/deploy-the-worker/deploy-on-aws), [Azure](/docs/governance/deploy-the-worker/deploy-on-azure), and [GCP](/docs/governance/deploy-the-worker/deploy-on-gcp) guides for their prerequisites and configuration.
### Does the trace analyzer update automatically?
[Section titled “Does the trace analyzer update automatically?”](#does-the-trace-analyzer-update-automatically)
The trace analyzer updates automatically to stable releases by default. You can pause updates or pin a release. The supervisor coordinates application and schema updates. Operators apply required infrastructure changes through Terraform, including changes to databases, storage, cloud identities, and networking. See [Manage updates and recovery](/docs/governance/deploy-the-worker/manage-updates-and-recovery).
If your team needs to schedule and apply every upgrade, choose [manually managed Helm](/docs/governance/deploy-the-worker/manual-helm) during installation.
### Does a healthy pod mean analysis is working?
[Section titled “Does a healthy pod mean analysis is working?”](#does-a-healthy-pod-mean-analysis-is-working)
No. Verify that an enrolled host can upload, the trace is stored, and analysis completes. A completed analysis may produce no finding. The health endpoint alone does not establish the entire path. See [Observability](/docs/governance/deploy-the-worker/observability).
### How do we verify plugin installation across our hosts?
[Section titled “How do we verify plugin installation across our hosts?”](#how-do-we-verify-plugin-installation-across-our-hosts)
Track rollout through your release and enrollment records. Follow the [plugin installation checks](/docs/governance/get-started/publish-and-install-plugins) on each host. Enrollment and trace collection do not prove that every plugin is installed and loaded.
## Findings and changes
[Section titled “Findings and changes”](#findings-and-changes)
### Does PIG merge instruction changes automatically?
[Section titled “Does PIG merge instruction changes automatically?”](#does-pig-merge-instruction-changes-automatically)
The documented workflow produces a proposed pull request for your team to review. Apply your repository’s checks and merge controls before publishing a new hub release. See [Remediate findings](/docs/governance/findings-and-remediation/remediate-findings).
### Does every finding need an instruction change?
[Section titled “Does every finding need an instruction change?”](#does-every-finding-need-an-instruction-change)
No. A finding may require work on a tool, integration, or external system. Review the explanation and evidence before deciding who should act. See [Understand findings](/docs/governance/findings-and-remediation/understand-findings).
### Which systems use GitHub credentials?
[Section titled “Which systems use GitHub credentials?”](#which-systems-use-github-credentials)
The analyzer can use a configured read token for a private hub. Promptless uses the connected GitHub integration to coordinate issues and provides repository-scoped credentials for remediation tasks. Keep these credentials separate from deployment and per-host credentials. See [Trust and data model](/docs/governance/start-here/trust-and-data-model#credentials-and-access).
## Get support
[Section titled “Get support”](#get-support)
Contact for setup or deployment help. Include the affected component, deployment or hub version, and the step that failed. Share redacted diagnostics rather than credentials or raw session transcripts.
# The pig CLI reference
> Public pig commands for creating, importing, validating, compiling, versioning, and inspecting an Instruction Hub.
The `pig` CLI manages the source and generated plugins in an Instruction Hub. Install the toolchain with Python 3.11 or later using the [setup guide](/docs/governance/get-started/set-up-your-instruction-hub). The package exposes equivalent `pig` and `promptless-instruction-hub` commands.
Run `pig --help` or `pig --help` to inspect your installed version’s options. Commands that work on hub source accept `--hub`, which defaults to the current directory. `pig status` takes a manifest path instead.
| Command | Changes files? | Result |
| ------------- | -------------------------- | ----------------------------------------------------------- |
| `init` | Yes | Creates missing hub configuration and directories |
| `scan` | Yes | Imports supported assets and replaces the context inventory |
| `validate` | No | Checks source configuration and asset references |
| `verify` | No changes to the hub | Validates and compiles a temporary release |
| `build` | Yes, except with `--check` | Writes distribution files and manifests |
| `set-version` | Yes | Updates the shared version in `hub.yaml` |
| `status` | No | Reads local release metadata |
These commands do not install plugins into agents, enroll hosts, or deploy the analyzer. Publishing runs through [GitHub or GitLab CI](/docs/governance/get-started/publish-and-install-plugins); there is no public `pig publish` command.
## `pig init`
[Section titled “pig init”](#pig-init)
Create a hub with the mandatory `plugins/pig.yaml`, asset directories, and output directories. Existing files are preserved. The initial configuration includes all four targets and disables trace ingestion.
```bash
pig init --hub ./acme-instruction-hub \
--org Acme \
--marketplace-id acme-instruction-hub \
--marketplace-name "Acme Instruction Hub" \
--version 0.1.0
```
| Option | Default | Meaning |
| ------------------------- | ----------------------------------------------- | ----------------------------- |
| `--hub PATH` | Current directory | Hub to initialize |
| `--org NAME` | `Promptless` | Organization display name |
| `--marketplace-id ID` | Derived from the organization name | Stable marketplace identifier |
| `--marketplace-name NAME` | Organization name followed by `Instruction Hub` | Marketplace display name |
| `--version VERSION` | `0.1.0` | Initial shared plugin version |
Use `marketplace.id` and `marketplace.name` in `hub.yaml` for marketplace identity. Each `plugins/*.yaml` file has its own literal `id` and display `name`; no organization prefix is added automatically. `version` applies to the whole hub, and `stable_plugins` selects which plugins to release.
## `pig scan`
[Section titled “pig scan”](#pig-scan)
Import reusable assets from one source directory into a hub:
```bash
pig scan --hub ./acme-instruction-hub --source ./acme-docs
```
Both `--hub` and `--source` default to the current directory. Use explicit paths when the source repository and hub are different directories.
The scanner imports skills found immediately under `.agents/skills/`, including their supporting files. It imports a root MCP configuration from the first matching `.mcp.json`, `mcp.json`, `mcp.yaml`, or `mcp.yml`, and a distinct `.cursor/mcp.json` configuration when it is not already covered by the root configuration. Imported assets are added to the `pig` plugin’s `includes` list.
Root `AGENTS.md`, `CLAUDE.md`, and `GEMINI.md` are recorded in `hub.repo-context.json` with content identity and size. They are not converted into shared instructions. Other skill locations, rules, commands, hooks, and subagent definitions require manual migration.
**Scan writes to the hub.** Reusing a skill ID replaces that destination skill directory; recognized MCP destinations and the context inventory can also be replaced. The command does not merge conflicting instructions or edit the source repository. Review each source’s import before scanning another. Follow [Migrate existing instructions](/docs/governance/get-started/migrate-existing-instructions) for a safe sequence.
## `pig validate`
[Section titled “pig validate”](#pig-validate)
Check source configuration, plugin definitions, referenced assets, target support declarations, file restrictions, and recognized MCP configuration constraints:
```bash
pig validate --hub ./acme-instruction-hub
```
A successful result reports the number of stable assets. It does not compile the plugins or prove that the instructions behave correctly in an agent. Checks reject disallowed symlinks and recognized literal-secret patterns; they are not a comprehensive secret scanner. Review imported credentials separately.
## `pig verify`
[Section titled “pig verify”](#pig-verify)
Validate the hub, compile all selected targets in a temporary directory, and report the resulting release identity:
```bash
pig verify --hub ./acme-instruction-hub
```
Use this before committing or reviewing instruction changes. It leaves the hub’s working files unchanged. A successful compile verifies generated structure, not marketplace authentication, desktop installation, or the quality of the agent’s work.
## `pig build`
[Section titled “pig build”](#pig-build)
Compile each plugin in `stable_plugins` for every target in `targets`:
```bash
pig build --hub ./acme-instruction-hub
```
The output includes `dist///`, target marketplace manifests where supported, and release metadata. Keep authored changes in `assets/`, `plugins/`, and `hub.yaml`; a later build can replace generated files.
Use `--check` to compare existing generated output with a fresh compilation without rewriting it:
```bash
pig build --hub ./acme-instruction-hub --check
```
A stale or missing generated file causes a failure. This is useful when a workflow deliberately checks generated artifacts. For an authoring branch that leaves generated output to CI, use `pig verify` instead.
## `pig set-version`
[Section titled “pig set-version”](#pig-set-version)
Update `hub.yaml` to a chosen shared plugin version:
```bash
pig set-version --hub ./acme-instruction-hub --version 0.2.0
pig verify --hub ./acme-instruction-hub
```
`--version` is required. Commit the change through the normal review process. The command does not build or publish; publishing resolves the next release against the previous stable version and synchronizes generated versions.
## `pig status`
[Section titled “pig status”](#pig-status)
Print release metadata as JSON from a local manifest:
```bash
pig status --manifest ./acme-instruction-hub/hub.release.json
```
`--manifest` defaults to `hub.release.json` in the current directory. This command has no `--hub` option. Run a build or use a release checkout before reading its manifest. `pig status` does not query installed agents, host enrollment, or the analyzer.
## Diagnose a failed command
[Section titled “Diagnose a failed command”](#diagnose-a-failed-command)
Read the error’s file path and asset reference first. Common causes are a missing `skill:` reference, a duplicate plugin ID, an unsupported asset conversion, or stale generated output with `build --check`.
Correct source files and rerun `pig validate` and `pig verify`. Once they pass, continue to [publishing and installation](/docs/governance/get-started/publish-and-install-plugins) and test one installed skill in a real task.
# Supported agents
> Compare plugin distribution, asset portability, native trace collection, and repository support in PIG.
An agent can use your hub’s instructions without sending traces to PIG. Plugin distribution, native trace collection, and repository analysis have different support boundaries.
## Agent support
[Section titled “Agent support”](#agent-support)
| Agent | Generated instruction distribution | Native trace collection |
| -------------- | ---------------------------------- | ---------------------------------------------------------------------------- |
| Claude Code | Claude plugin and marketplace | Yes, through the opt-in `pig` runtime and generated hooks |
| Codex | Codex plugin and marketplace | Yes, through the opt-in `pig` runtime and generated hooks |
| Cursor | Cursor plugin and marketplace | Not currently supported |
| Gemini CLI | Gemini extension | Not currently supported |
| Claude Desktop | Not a separate compiler target | Its native traces can be discovered by the Claude collector on the same host |
The `targets` entries in `hub.yaml` are `claude`, `codex`, `cursor`, and `gemini`. Include only the targets you distribute, or keep all four from `pig init`.
Trace collection defaults to off. When enabled, the toolchain adds runtime files and collection hooks only to the literal `pig` plugin for Claude and Codex. Claude Code’s hook also attempts local Claude Desktop collection; this does not create a separate collection schedule inside Claude Desktop. See [host enrollment](/docs/governance/get-started/enroll-your-hosts).
## Asset support
[Section titled “Asset support”](#asset-support)
The hub stores assets independently from plugins. A plugin’s `includes` references choose which assets it distributes. Asset metadata determines how each target receives them.
| Asset | Default behavior | Authoring guidance |
| --------------------------------------- | -------------------------------------------- | ------------------------------------------------------------------------------------------------------- |
| Skills in `assets/skills//SKILL.md` | Agent Skills on all four targets | Prefer this format for shared, task-oriented guidance; include supporting files in the skill directory |
| MCP configurations in `assets/mcps/` | Native MCP configuration on all four targets | Verify the server’s transport, command, credentials, and host-specific settings on every target you use |
| Rules in `assets/rules/` | Unsupported until declared | Add explicit target support; do not assume a repository rule applies identically across agents |
| Agent definitions in `assets/agents/` | Unsupported until declared | Declare native support or a supported conversion for each intended target |
| Commands in `assets/commands/` | Unsupported until declared | Review the host’s invocation and file format |
| Hooks in `assets/hooks/` | Unsupported until declared | Review event names, commands, and the host’s execution environment |
Skills use `agent-skill` mode by default, including in Cursor. They do not become always-on Cursor rules. An explicit Cursor rule uses `.mdc` output when its support declaration selects that behavior.
Place metadata for a directory asset in its `asset.yaml`. For a file asset, use a sibling named `.asset.yaml`. For example, a Cursor-only rule at `assets/rules/docs-style.md` can use:
assets/rules/docs-style.asset.yaml
```yaml
support:
cursor:
mode: native
```
Other targets retain the rule’s default unsupported status. To record a deliberate exclusion for a particular target, use `mode: unsupported` with a `reason`:
```yaml
support:
cursor:
mode: native
codex:
mode: unsupported
reason: This rule depends on Cursor file matching.
```
Support declarations describe the intended output; they do not make arbitrary host formats portable. Use `pig verify` to check the selected conversions, then install and exercise the asset on each target. A supported Markdown agent definition can be native on Claude and converted to an Agent Skill on Codex. That conversion does not preserve a separate subagent’s execution or model-selection behavior.
## Git provider support
[Section titled “Git provider support”](#git-provider-support)
| Capability | GitHub | GitLab |
| ------------------------------------------------------- | ---------------------------------------------------------------- | -------------------------------------------------------------------------- |
| Author and review hub source | Yes | Yes |
| Validate and publish generated releases | Reusable GitHub Actions | GitLab CI template |
| Distribute generated plugins | Supported, subject to the agent’s access and import requirements | Supported by the toolchain; the agent must support the chosen import route |
| Bind repositories for trace analysis and finding issues | Yes | Not currently supported |
Cursor’s documented team marketplace import flow uses GitHub. A generated GitLab marketplace and working Git credentials do not prove that a particular Cursor importer accepts it. Pilot that path before rolling it out. See [installation by agent](/docs/governance/get-started/publish-and-install-plugins#install-the-plugins).
The current analyzer uses configured GitHub repository IDs to associate traces with repositories and manage findings. Publishing an Instruction Hub on GitLab does not by itself add GitLab repository analysis. Choose the hub’s Git provider separately from the repositories your analyzer can currently process.
## Verify your combination
[Section titled “Verify your combination”](#verify-your-combination)
For Acme, start with one writer and one developer using the `docs` and `dev` plugins. Confirm that each agent lists the installed plugin, loads the intended skill and supporting files, and follows it on a representative task. Repeat that check after an asset’s target support changes.
If collection is enabled, also confirm host enrollment, a stored trace, and a completed analysis run. The [deployment guide](/docs/governance/deploy-the-worker/deploy-the-analyzer-worker) covers those operator checks; the [trace reference](/docs/governance/reference/trace-object-and-sources) describes the native sources.
# Trace object and sources
> Native trace discovery, reliable uploads, and the session records your analyzer stores for investigation and analysis.
PIG reads native session files on an enrolled host and sends their contents to your analyzer. The analyzer stores the raw records and builds a canonical trace, a common representation of one agent session. This lets analysis work across different native formats while retaining the original evidence.
## Native sources
[Section titled “Native sources”](#native-sources)
The collector supports three source families. Startup and terminal hooks can supply a transcript path directly. Background catch-up also discovers files in the following locations:
| Source | Host value | Default discovery locations |
| -------------- | ---------------- | ------------------------------------------------------------------------------------------------------- |
| Claude Code | `claude` | `~/.claude/projects/**/*.jsonl` |
| Codex | `codex` | `sessions/**/*.jsonl` and `archived_sessions/**/*.jsonl` beneath `CODEX_HOME`, or `~/.codex` when unset |
| Claude Desktop | `claude-desktop` | `**/audit.jsonl` beneath the two supported session directories in Claude’s application data |
For Claude Desktop, the supported session directories are `local-agent-mode-sessions` and `claude-code-sessions`. Their parent application directory depends on the operating system:
| Platform | Claude application directory |
| -------- | ---------------------------------------------------------------------------------- |
| macOS | `~/Library/Application Support/Claude/` |
| Windows | `%APPDATA%/Claude/`, or `~/AppData/Roaming/Claude/` when `APPDATA` is unset |
| Linux | `$XDG_CONFIG_HOME/Claude/`, or `~/.config/Claude/` when `XDG_CONFIG_HOME` is unset |
These are discovery paths implemented by the collector. They do not mean every agent application is available on every platform or writes every listed format. Claude Desktop collection depends on the audit files being present and readable.
Claude Code’s generated hooks also attempt local Claude Desktop collection. Codex uses its own generated hooks. Cursor and Gemini currently distribute instructions without native trace collection. See [Supported agents](/docs/governance/reference/supported-agents) for the distinction.
## Upload progress and retries
[Section titled “Upload progress and retries”](#upload-progress-and-retries)
The local ledger at `~/.promptless/instruction-hub/host-runtime-ledger.json` records progress for each source. The collector reads new ranges, compresses their contents with gzip, and base64-encodes them for transport. It sends authenticated batches to the analyzer’s `POST /v0/traces/batches?target=` endpoint, where `` is a value from the table above.
The worker validates the source and target, stores the native data, and returns acknowledged ranges. Only a matching acknowledgment advances the host’s recorded progress. A retry can therefore resend a range whose response was lost. If the worker already accepted part of that range, the runtime checks the worker’s content proof before reconciling its offset.
Do not edit the ledger to force an upload or treat an HTTP success alone as evidence of completed analysis. Preserve native files while an outage is being resolved. File truncation, replaced content, malformed records, and oversized records require accounting beyond simply advancing a byte counter.
When a file is first discovered, collection can begin at its start. Existing history can therefore be uploaded after first enrollment. Catch-up skips very recent files while they are inside the collector’s idle grace period; a hook’s explicit transcript path receives priority.
## Stored trace records
[Section titled “Stored trace records”](#stored-trace-records)
The analyzer stores raw native artifacts in your trace bucket and maintains canonical session objects alongside them. PostgreSQL holds the associated metadata, ingestion progress, and analysis state.
A canonical object uses `schema_version: 1` and contains these top-level fields:
| Field | Meaning |
| ------------------- | ---------------------------------------------------------------------------------------------------------------------------- |
| `schema_version` | The canonical object format version |
| `session` | Source and session identity, agent type, observed models, and optional repository or parent-agent context |
| `lifecycle` | Session state and timestamps, with native event time separate from ingestion time |
| `sources` | Source file identities, raw artifact references, observed offsets, ingestion counts, and skipped or truncated content counts |
| `rollups` | Observed token usage, tool counts, compactions, and record accounting |
| `context_artifacts` | Trace observations of instructions used, such as skill invocations or instruction-file references |
| `preamble` | Events before the first turn |
| `pending` | Events not yet attached to a turn |
| `turns` | Ordered turns containing the session’s events |
`context_artifacts` records what the trace reveals. It is separate from the instruction and repository snapshot prepared for analysis, described in [Trust and data model](/docs/governance/start-here/trust-and-data-model).
Events have a `kind`, a global sequence number `seq`, and source evidence where available. The kinds are:
| Kind | Content |
| ------------------- | ------------------------------------------------------------ |
| `user_message` | User input that opens a turn |
| `assistant_message` | Assistant output, with its observed audience where available |
| `reasoning` | Reasoning content exposed by the native trace |
| `tool_call` | A tool invocation and its input |
| `tool_result` | A tool’s output or error |
| `compaction` | A compaction summary |
| `session_event` | Session lifecycle or other agent machinery |
| `other` | A record not represented by a more specific event kind |
Sequence numbers are contiguous in document order. Native events carry a `src` reference identifying their source entry, record, and byte offset. When the canonical view truncates a payload inline, the original uploaded bytes remain in the referenced raw artifact. Unknown event kinds and malformed records are different cases; parse coverage records what could not be decoded or modeled.
## Use the records to investigate
[Section titled “Use the records to investigate”](#use-the-records-to-investigate)
For an Acme pilot session, first check that the expected source and session ID appear in the analyzer. Then confirm the raw artifacts are stored, review ingestion or parse gaps, and check the analysis run’s status. A stored trace can still be waiting for the quiet period, repository resolution, or model access.
Use [observability](/docs/governance/deploy-the-worker/observability) to investigate those stages. If the session never reaches the analyzer, start with the host’s [enrollment and collection checks](/docs/governance/get-started/enroll-your-hosts#troubleshooting).
# How it works
> Understand PIG's components and dependencies, from publishing instructions to collecting traces and reviewing improvements.
PIG connects **publishing instructions** with **learning from sessions**. You can publish instructions independently. Adding trace analysis gives your team evidence about how those instructions perform in practice.
This page explains the components, where they run, and what each one depends on. For individual terms, see [Key concepts](/docs/governance/start-here/key-concepts).
## The components at a glance
[Section titled “The components at a glance”](#the-components-at-a-glance)
Scroll horizontally to view the architecture.
**********************************************************
#### Instruction Hub
Git repository
Published plugins
### Host machineworkstation, laptop, agent host
#### AI agent
Trace collector hooks installed by Instruction Hub plugin
Session
#### Model provider
Reuse the same model provider your agents use
Trace digest
Session traces
Detected instruction issues & proposed updates
### Your cluster
#### Trace analyzer
Looks for agent errors, mistakes, inefficiency, misconfiguration, etc.
Auto-updates on by default
Trace objects
#### Trace bucket
Object storage: S3, GCS, etc.
Analysis state
#### PostgreSQL
Findings, remediations, & analyzer status
### Promptless cluster
#### Promptless Dashboard
Review findings, remediations, analyzer status and agent instruction health
1. Instruction Hub → Published plugins → AI agent.
2. AI agent → Session → Model provider shared with the trace analyzer.
3. Host trace collector → Session traces → Trace analyzer.
4. Trace analyzer → Detected instruction issues and proposed updates → Instruction Hub.
5. Trace analyzer → Trace digest → Model provider shared with the AI agent.
6. Trace analyzer → Trace objects → Trace bucket.
7. Trace analyzer → Analysis state → PostgreSQL.
8. Trace analyzer → Findings, remediations, and analyzer status → Promptless Dashboard.
Raw traces are stored in your trace bucket. Trace digests are sent to the model provider your agents use.
### Components every hub uses
[Section titled “Components every hub uses”](#components-every-hub-uses)
| Component | Where it runs | What it does | Depends on |
| -------------------------------------------------------------------------------- | --------------------------------------- | ----------------------------------------------------------------------- | --------------------------------------------------------- |
| Instruction Hub | Your Git repository | Holds instruction source, plugin definitions, and release configuration | Authors and reviewers |
| [`pig` toolchain](https://github.com/Promptless/pig-toolchain) and publishing CI | An author’s machine and your CI runners | Validate source, build plugins, and publish releases | Hub source and repository publishing permissions |
| Marketplace and released plugins | Your release repository | Make the compiled instructions available to agents | A successful publish and agent access to the repository |
| Agent and host runtime | Each user’s workstation or agent host | Load installed instructions; optionally enroll and upload native traces | An installed plugin; analyzer connectivity for collection |
### Components used only for trace analysis
[Section titled “Components used only for trace analysis”](#components-used-only-for-trace-analysis)
| Component | Where it runs | What it does | Depends on |
| -------------- | --------------------------------- | ----------------------------------------------------------------------------------------------------------- | ------------------------------------------------------------------------------------------------------ |
| Trace analyzer | Your Kubernetes cluster | Accept traces, reconstruct sessions, run analysis, and propose improvements | PostgreSQL, native object storage, Promptless, model access, and the selected instruction repositories |
| Trace bucket | Your cloud account | Store raw trace chunks and reconstructed sessions | Private object storage and analyzer access |
| PostgreSQL | Your cloud account | Store host identity, ingestion progress, and analysis state | Dedicated database and analyzer access |
| Promptless | Promptless infrastructure | Manage enrollment and deployment coordination; record findings and coordinate GitHub issues and remediation | Your organization’s deployment and repository connections |
| Model provider | Your configured provider endpoint | Process session and instruction context for analysis and remediation | Model access and configured credentials |
The deployed trace analyzer service is named `pig-trace-analyzer`. Its analysis component is called the **Friction Analyzer**. These names refer to a service and a component inside it; you do not install two analysis services.
## Publish an instruction
[Section titled “Publish an instruction”](#publish-an-instruction)
1. **Author shared source**
Acme keeps a `review-docs` skill in its Instruction Hub. The skill defines the review scope, accuracy and clarity checks, and the evidence each finding needs. Acme includes it in a `docs` plugin for writers and a `dev` plugin for developers.
The skill is an **asset**; the plugin is a named selection of assets. Updating the shared source changes both plugins on the next publish. Repository-specific facts, such as one project’s build command, can remain in that repository rather than being generalized for every team.
2. **Validate and build**
The author runs `pig validate` to check the hub and `pig verify` to compile it in a temporary directory. CI runs the same checks on the pull request. These checks catch configuration and build errors; reviewers still need to assess whether the instructions are correct and useful.
The toolchain builds for the configured targets: Claude, Codex, Cursor, and Gemini. Different targets support different asset types and installation mechanisms. A successful build does not prove the desktop agent has installed the plugin or can execute every instruction it contains.
3. **Publish and install**
After review and merge, a GitHub or GitLab publishing pipeline builds the release output. It updates the release branch and marketplace pointers and records the hub version. Authors work with source on the default branch; agents install the released output.
Acme’s writers install the `docs` plugin and its developers install `dev`. Both install the required `pig` plugin, which includes the managed hub-update skill for Claude and Codex. That skill helps refresh the marketplace and installed plugins. Each host’s installation and reload behavior still applies.
See [Publish and install plugins](/docs/governance/get-started/publish-and-install-plugins) for CI configuration and the installation checks.
## Learn from a session
[Section titled “Learn from a session”](#learn-from-a-session)
1. **Prepare the analyzer and enable collection**
Your platform team deploys the analyzer and connects its database, bucket, and model provider. It configures a deployment with Promptless and makes the analyzer reachable from the hosts that will upload traces. An organization administrator selects the instruction repositories the analyzer reads in PIG Settings.
The hub owner then enables `trace_ingestion.enabled`, publishes a new release, and refreshes installed plugins. This adds the managed collection runtime to the Claude and Codex versions of the `pig` plugin. The setting does not create infrastructure or enroll hosts by itself.
2. **Enroll each host**
A host opens the browser enrollment flow. A signed-in organization member approves it, and Promptless issues a credential for that host and deployment. The host uses that credential to authenticate to your analyzer.
The collector reads supported native session logs: Claude Code, Claude Desktop, and Codex. A Claude Desktop source must actually exist and be enrolled; installing a Claude plugin alone does not make Desktop traces available. Cursor and Gemini plugin builds do not include native trace collection.
3. **Collect and store the trace**
As sessions run, the collector uploads new complete lines from native logs. Your analyzer stores raw chunks and reconstructed traces in your trace bucket, with host attribution, ingestion progress, and analysis state in PostgreSQL.
The host retains its upload ledger and retries unacknowledged ranges on later collection passes. First collection can upload existing session history when a source has no acknowledged offset. Later collection resumes from the acknowledged position. For source and retry details, see [Trace object and sources](/docs/governance/reference/trace-object-and-sources).
4. **Analyze the session**
The analyzer examines sessions after they finish or become quiet. It uses session evidence and instruction-hub context to investigate instruction failures. That work calls the model provider you configured.
For example, an older release of Acme’s `review-docs` skill omits prerequisite checks. Agents following it repeatedly approve setup guides without checking required permissions. The analyzer can identify the missing instruction and cite the observed reviews. A completed analysis can also produce no finding; absence of a finding is not an ingestion failure.
5. **Review and improve**
The analyzer writes findings and evidence to Promptless. Promptless coordinates their GitHub issues and remediation state. When a finding warrants an instruction change, an isolated remediation task in the worker can prepare a pull request against the hub.
Acme’s reviewer checks the evidence and the proposed instructions, runs the relevant checks, and merges an accepted fix. The hub’s publishing pipeline distributes a new release. Refreshing the installed plugins makes the correction available to the team’s agents.
An organization administrator selects the instruction repositories the analyzer reads in PIG Settings. Each is a GitHub repository with a `main` branch, and the analyzer receives GitHub App tokens from Promptless to read them. GitLab hub publishing does not imply GitLab analyzer or remediation support.
## Keep the two update paths distinct
[Section titled “Keep the two update paths distinct”](#keep-the-two-update-paths-distinct)
**Instruction releases** change the content your agents install. Hub owners publish them through Git, and agent users refresh their plugins.
**Analyzer releases** change the service that collects and studies traces. The trace analyzer updates automatically to stable releases by default. You can pause updates or pin a release. See [Manage updates and recovery](/docs/governance/deploy-the-worker/manage-updates-and-recovery).
## Next steps
[Section titled “Next steps”](#next-steps)
* [Set up an Instruction Hub](/docs/governance/get-started/set-up-your-instruction-hub) to begin publishing.
* [Migrate existing instructions](/docs/governance/get-started/migrate-existing-instructions) if your team already has shared guidance.
* Review the [trust and data model](/docs/governance/start-here/trust-and-data-model), then [plan your deployment](/docs/governance/deploy-the-worker/plan-your-deployment) to add analysis.
# Key concepts
> Definitions and examples for Instruction Hubs, assets, plugins, marketplaces, releases, hosts, traces, findings, and the trace analyzer.
Use this glossary while [setting up your hub](/docs/governance/get-started/set-up-your-instruction-hub) or [planning a deployment](/docs/governance/deploy-the-worker/plan-your-deployment). [How it works](/docs/governance/start-here/how-it-works) connects the terms into a complete workflow.
## Instruction Hub
[Section titled “Instruction Hub”](#instruction-hub)
An **Instruction Hub** is a Git repository containing the shared instructions your team maintains for AI agents. It holds authored assets, plugin definitions, and a `hub.yaml` configuration. Your team reviews changes in pull requests before publishing them.
A hub is the source of truth for shared guidance. Keep project context in each repository’s `AGENTS.md` or `CLAUDE.md`, and move reusable procedures into shared assets.
For example, Acme’s hub contains one documentation-review skill used by both its writers and developers.
## Assets
[Section titled “Assets”](#assets)
An **asset** is one unit of source content or configuration in the hub. Assets live under `assets/` and use references such as `skill:review-docs` in plugin definitions.
| Kind | Purpose | Example |
| --------- | --------------------------------------------------------- | ----------------------------------------- |
| `skill` | A reusable procedure with a description of when to use it | Review a documentation change |
| `rule` | Guidance that applies in a defined context | Follow the team’s API terminology |
| `agent` | Instructions for a specialist role | Investigate a failed documentation build |
| `command` | A named entry point for a task | Prepare release notes |
| `hook` | An action tied to an agent lifecycle event | Run a check when a session ends |
| `mcp` | Configuration for a Model Context Protocol server | Connect to a documentation search service |
A skill normally contains `SKILL.md` and can include supporting references, templates, or scripts. Asset metadata describes target support. Native formats and supported conversions vary by agent; the compiler does not make an unavailable tool or host feature exist. See [Supported agents](/docs/governance/reference/supported-agents).
## Plugins
[Section titled “Plugins”](#plugins)
A **plugin** is a named group of assets that a user installs. Its source definition lives in `plugins/.yaml`; its compiled output lives in `dist///`.
For example, `plugins/docs.yaml` can select the documentation skill:
```yaml
id: docs
name: Acme Docs
includes:
- skill:review-docs
```
Acme can also include that asset in `plugins/dev.yaml`. The two plugins have different audiences but share the same authored procedure.
The ID is the plugin’s literal identity. The toolchain does not automatically prefix `docs` with your organization or marketplace ID. Choose IDs deliberately, especially if users install plugins from several hubs.
### The required pig plugin
[Section titled “The required pig plugin”](#the-required-pig-plugin)
Every hub includes a plugin with the exact ID `pig`, listed in `stable_plugins`. It can contain shared instruction assets, including those added by `pig scan`.
The toolchain adds the managed `update-instruction-hub` skill to this plugin for Claude and Codex. When trace ingestion is enabled, this same plugin receives the managed enrollment hooks and collection runtime. Other plugins such as `docs` and `dev` do not receive those managed collection hooks.
## Marketplace
[Section titled “Marketplace”](#marketplace)
A **marketplace** is the catalog through which supported agents discover your released plugins. Its identity belongs to the hub and is separate from individual plugin IDs.
Acme’s configuration could contain:
```yaml
org: Acme
marketplace:
id: acme-instruction-hub
name: Acme Instruction Hub
version: 0.1.0
stable_plugins: [pig, docs, dev]
targets: [claude, codex, cursor, gemini]
trace_ingestion:
enabled: false
```
The example assumes matching definitions for all three plugins. The generated catalog and installation process depend on the agent; Gemini uses extensions. See [Publish and install plugins](/docs/governance/get-started/publish-and-install-plugins).
## The pig toolchain
[Section titled “The pig toolchain”](#the-pig-toolchain)
**`pig`** is the command-line tool that scaffolds, validates, scans, and compiles a hub. Its Python package is `promptless-instruction-hub`; the same CLI is also available under that longer command name.
Authors run it locally, and CI runs it when checking and publishing changes. It is not a server. `pig verify` checks a build in a temporary directory; `pig build` writes generated output. Publishing is performed by the CI integration, not by a `pig publish` command. See the [CLI reference](/docs/governance/reference/pig-cli-reference).
## Targets and releases
[Section titled “Targets and releases”](#targets-and-releases)
A **target** is an agent format the toolchain builds: `claude`, `codex`, `cursor`, or `gemini`. A **hub release** is the versioned result of compiling the selected plugins for the selected targets.
`version` in `hub.yaml` is the hub’s semantic version. The release pipeline writes release metadata to `hub.release.json` and the stable pointer to `hub.stable.json`. A published release and an installed plugin are different states: users must install or refresh the plugin before an agent can load the new content.
An **analyzer release** versions the deployed analysis service separately from the hub’s instructions. Updating one does not automatically update the other.
## Hosts and the host runtime
[Section titled “Hosts and the host runtime”](#hosts-and-the-host-runtime)
A **host** is an enrolled agent environment on a workstation or other machine. Its identity lets PIG attribute traces and collection status to the right source.
The **host runtime**, `promptless-host-runtime`, is the collector included in Claude and Codex versions of the `pig` plugin when `trace_ingestion.enabled` is `true`. Generated lifecycle hooks start collection work without blocking the agent session.
Native trace sources are Claude Code, Claude Desktop, and Codex. Plugin-distribution support for Cursor or Gemini does not mean PIG collects their native traces.
## Enrollment and policy
[Section titled “Enrollment and policy”](#enrollment-and-policy)
**Enrollment** is the browser approval that associates a host with a Promptless organization and analyzer deployment. A signed-in organization member approves the request. The host receives its own credential, which it uses for authenticated requests to the analyzer.
The **host policy** tells the collector which host types and collection settings are enabled. Installing a plugin, enabling collection in `hub.yaml`, and enrolling a host are separate steps. See [Enroll your hosts](/docs/governance/get-started/enroll-your-hosts).
## Traces and sessions
[Section titled “Traces and sessions”](#traces-and-sessions)
A **session** is a period of work recorded by an agent. A **trace** is PIG’s representation of that session, reconstructed from the agent’s native logs. It can include messages, tool activity, timestamps, and other source records.
Raw uploads preserve the original records. The **canonical trace** organizes those records into a common representation for analysis. PostgreSQL records ingestion and analysis state; your trace bucket holds raw chunks and trace objects. See [Trace object and sources](/docs/governance/reference/trace-object-and-sources).
## The worker and Friction Analyzer
[Section titled “The worker and Friction Analyzer”](#the-worker-and-friction-analyzer)
The **trace analyzer** is the customer-deployed `pig-trace-analyzer` service. It accepts authenticated uploads, stores trace data, runs analysis, and coordinates results with Promptless.
The **Friction Analyzer** is the analysis component inside that service. It examines completed or quiet sessions using the configured model provider and instruction-hub context. There is no separate Friction Analyzer installation.
The service requires PostgreSQL and native object storage (S3, Azure Blob Storage, or Google Cloud Storage). Analysis also requires model configuration and a verified GitHub hub repository with a `main` branch. See [Plan your deployment](/docs/governance/deploy-the-worker/plan-your-deployment).
## Findings and evidence
[Section titled “Findings and evidence”](#findings-and-evidence)
A **finding** describes an instruction problem observed in session analysis. It includes an explanation, impact, confidence, and supporting evidence. An **evidence occurrence** connects the finding to a particular session and what happened there.
Multiple sessions can support the same finding. Evidence helps a reviewer distinguish a recurring instruction problem from an isolated mistake. A session may complete analysis without producing a finding. See [Understand findings](/docs/governance/findings-and-remediation/understand-findings).
## Remediation
[Section titled “Remediation”](#remediation)
**Remediation** is the work to address a finding. When an instruction change is appropriate, PIG can prepare a pull request against your hub. Your team reviews the proposed fix and uses its normal checks and merge controls before publishing it.
A finding may need a change to a tool, integration, or external system instead of a hub edit. See [Remediate findings](/docs/governance/findings-and-remediation/remediate-findings).
## Promptless
[Section titled “Promptless”](#promptless)
**Promptless** manages enrollment credentials and deployment coordination, stores findings, and coordinates their GitHub issues and remediation state.
Its trace-status records exclude raw transcripts. Findings are a separate data flow and can describe session details. Analysis also sends session-derived input to your configured model provider. See [Trust and data model](/docs/governance/start-here/trust-and-data-model).
## Automatic updates
[Section titled “Automatic updates”](#automatic-updates)
The trace analyzer updates automatically to stable releases by default. You can pause updates or pin a release. Updates coordinate the analyzer, database migrations, and dedicated PIG resources within the permissions your platform team grants. Shared clusters and networking remain under your team’s control. See [Manage updates and recovery](/docs/governance/deploy-the-worker/manage-updates-and-recovery).
# Trust and data model
> Understand where PIG stores traces, what Promptless and your model provider receive, and which credentials connect each component.
PIG stores raw traces and canonical trace objects in your infrastructure. Analysis sends session-derived input to the model provider you configure. Promptless receives trace status and findings, whose text can describe details from a session.
Use this page to decide which hosts to enroll, where to run analysis, and who should have access to the resulting data. The [architecture overview](/docs/governance/start-here/how-it-works) shows how the components connect.
## Where data goes
[Section titled “Where data goes”](#where-data-goes)
| Data | Destination | Purpose |
| -------------------------------------------------------- | ------------------------------------------------------- | ---------------------------------------------------------- |
| Instruction assets and plugin definitions | Your Git repository and CI | Review and publish shared instructions |
| Compiled plugins | Installed agent hosts | Make instructions available during agent work |
| Native transcript records | Your analyzer and trace bucket | Preserve the source evidence for analysis |
| Canonical traces and optional context snapshots | Your customer-owned storage | Reconstruct sessions and the context available to an agent |
| Host attribution, ingestion progress, and analysis state | Your PostgreSQL database | Track uploads and coordinate processing |
| Session and instruction context | Your configured model provider | Analyze behavior and prepare proposed improvements |
| Trace identity, counts, and processing status | Promptless | Show collection and analysis progress |
| Findings, evidence summaries, and remediation state | Promptless and connected GitHub issues or pull requests | Explain problems and review proposed changes |
| Configured operational telemetry | Your selected observability systems | Diagnose deployment and analysis failures |
A native transcript can contain prompts, tool arguments and outputs, file excerpts, and other content the agent records. Treat it according to the sensitivity of the work your agents perform. This collection path preserves native records; do not assume it removes secrets from transcripts before upload.
## From hosts to your analyzer
[Section titled “From hosts to your analyzer”](#from-hosts-to-your-analyzer)
After you enable managed trace ingestion and enroll a host, its collector sends new complete records from supported session logs to your analyzer. Uploads use HTTPS and include source identity, offsets, checksums, and collector information so the analyzer can authenticate and reconcile them.
Optional analysis-context snapshots describe what instructions, tools, or artifacts were available and which hub release was installed. The worker stores these alongside the session context in customer-owned storage.
The collector keeps a local upload ledger that records acknowledged ranges. If an upload fails, it can retry those ranges on a later collection pass. A newly discovered source can upload its existing session history from the beginning; subsequent collection resumes from the acknowledged position. Do not delete local transcripts while relying on them to recover uploads that have not reached the analyzer.
Collection only happens for enabled, supported host sources. Merely creating a hub does not enable it: `trace_ingestion.enabled` defaults to `false`. Disabling the setting and refreshing installed plugins removes the managed hooks from those new installations. Previously ingested data and your deployed analyzer remain unchanged.
## From the analyzer to Promptless
[Section titled “From the analyzer to Promptless”](#from-the-analyzer-to-promptless)
The analyzer sends a limited **trace-status projection**: identifiers, host attribution, timestamps, lifecycle and processing status, and event and turn counts. This projection excludes raw and canonical transcript content, prompts, tool activity, working directories, Git metadata, models, and source fingerprints.
**Findings are a separate flow.** Their summaries, impact descriptions, explanations, and evidence occurrences are written to Promptless. These are model-authored descriptions and can refer to session content. Connected GitHub issues and remediation pull requests also make that information available to people who can access the repository.
## From the analyzer to your model provider
[Section titled “From the analyzer to your model provider”](#from-the-analyzer-to-your-model-provider)
The analyzer sends session-derived input and relevant instruction context to the configured model endpoint. You choose the provider, endpoint, model, and authentication in the deployment configuration.
Current providers are OpenAI, Azure OpenAI, and AWS Bedrock. Available authentication depends on the provider; Bedrock can use AWS identity, while API-key configurations require the corresponding key. Hosting the analyzer on Azure or GCP does not automatically select a model provider.
Review the provider’s data-handling terms and your organization’s model-access policy for the workloads you will collect. See [Configuration reference](/docs/governance/deploy-the-worker/configuration-reference) for the available settings.
## Credentials and access
[Section titled “Credentials and access”](#credentials-and-access)
| Credential or identity | Used by | Grants access to |
| ---------------------------------- | ---------------------------------------------- | ------------------------------------------------------- |
| Deployment install token, `plih_…` | Your analyzer | Promptless for the configured deployment |
| Per-host credential, `plihost_…` | An enrolled host | Your analyzer’s authenticated host endpoints |
| PostgreSQL credentials | Analyzer and migration job | The customer database and required schema operations |
| Cloud workload identity | Analyzer | The configured trace bucket and authorized model access |
| Model API key | Analyzer, for API-key authentication | The configured model endpoint |
| Analysis repository token | Analyzer, when needed for a private repository | Read access to the configured GitHub hub |
| Remediation repository token | An isolated remediation task | Repository-scoped operations to prepare its change |
An organization member approves enrollment in Promptless. The host caches its own credential locally and sends it to your analyzer for authenticated requests. The analyzer validates the credential through Promptless using its hash, deployment identity, and host target. A credential for one host family or deployment cannot be substituted for another.
The deployment token belongs in your cluster’s secret-management system, not in distributed plugins. Host credentials are individual credentials rather than one shared secret distributed to the whole team.
Repository credentials have distinct roles. The analyzer’s configured read token allows it to retrieve private hub source. Promptless uses the connected GitHub integration for issues and supplies a repository-scoped token for an isolated remediation task. Neither token is part of an uploaded trace or a published plugin.
## Your operational responsibilities
[Section titled “Your operational responsibilities”](#your-operational-responsibilities)
Choose database and bucket access, encryption, retention, backup, and restore settings according to your requirements. Configure HTTPS for host-to-analyzer traffic and use the intended network access path, such as your organization’s VPN. Limit repository and observability access to the people who need the information they contain.
Treat logs as another data surface. The worker emits structured diagnostics, and trace-related labels or analysis details may appear there. Apply your normal log access and retention controls when enabling an observability integration.
Automatic updates maintain PIG application releases and schema migrations within the installed permissions. Your team owns cloud infrastructure, including database sizing, storage, IAM, and backups, through Terraform. See the [installation guide](/docs/governance/deploy-the-worker/gitops-ownership) for the permission and ownership model.
## Next steps
[Section titled “Next steps”](#next-steps)
Review [deployment planning](/docs/governance/deploy-the-worker/plan-your-deployment) with your platform team, then deploy the analyzer [with Helm](/docs/governance/deploy-the-worker/deploy-the-analyzer-worker) or a cloud recipe. Next, [enroll a pilot host](/docs/governance/get-started/enroll-your-hosts) and verify its collection path before expanding to more users.
# Component fixtures
> Internal fixture page that renders Starlight Asides, Cards, CardGrid, LinkCard, and Steps components to preview and verify how they appear.
# Component fixtures
[Section titled “Component fixtures”](#component-fixtures)
Note
Info block
Note
Note block
Tip
Tip block
Caution
Warning block
Tip
Success block
[Card One](/docs/for-docs/start-here/welcome)Card one body
Card Two
Card two body
1. **Step one.** First step
2. **Step two.** Second step
Accordion item
Accordion body
**`TEST_VALUE`** (*string, required*)
Param description

Frame caption
# Marketing images
> How to generate Promptless marketing composites (headline + logo + product screenshot) at exact dimensions, and the current set.
Note
These are Linear-style marketing composites. Each has a headline and the Promptless logo on a dark gradient, with a product screenshot floated on the right. They’re generated to exact pixel dimensions for app listings (Microsoft Teams, Slack, etc.) and live in `public/assets/marketing/`. See the [Media Kit](/docs/media-kit) for logos and brand colors.
## Generate one
[Section titled “Generate one”](#generate-one)
The generator is a small Node script, and no browser is required. From the repo root:
```bash
npm run marketing:image -- \
--headline "Turn conversations|into docs updates" \
--screenshot public/assets/integrations-page.png \
--out public/assets/marketing/teams-listing.png \
--eyebrow "Promptless for Microsoft Teams"
```
`|` (or `\n`) forces a hard line break; otherwise the headline wraps to fit its column. Defaults are **1366×768** with a **1024 KB** size cap, so a minimal run only needs `--headline`, `--screenshot`, and `--out`.
### Options
[Section titled “Options”](#options)
| Flag | Default | Notes |
| -------------- | ------------------------------- | ------------------------------------------ |
| `--headline` | *(required)* | `\|` or `\n` for hard breaks; wraps to fit |
| `--screenshot` | *(required)* | Product screenshot to embed |
| `--out` | *(required)* | Output path (`.jpg` if it must fall back) |
| `--eyebrow` | *(none)* | Small accent label above the headline |
| `--logo` | `public/assets/logo_darkbg.svg` | Any svg/png |
| `--width` | `1366` | Exact output width |
| `--height` | `768` | Exact output height |
| `--max-kb` | `1024` | Size cap; triggers compression fallbacks |
| `--scale` | `2` | Supersample factor for crispness |
| `--bg-top` | `#15171d` | Gradient color at the top (almost black) |
| `--bg-bottom` | `#000000` | Gradient color at the bottom (pure black) |
| `--fg` | `#ffffff` | Headline color |
| `--accent` | `#8ea2ff` | Eyebrow color |
### How it works
[Section titled “How it works”](#how-it-works)
[Satori](https://github.com/vercel/satori) lays out a flexbox tree (so the headline wraps within its column automatically) and emits an SVG with text as vector paths. [`@resvg/resvg-js`](https://github.com/yisibl/resvg-js) rasterizes it, using the vendored static Inter TTFs. Then `sharp` downscales to the exact size and compresses under the cap. Full notes are in `scripts/marketing-image/README.md`.
Tip
Because the screenshots are referenced from `public/assets/`, Promptless keeps them current. When the app UI changes, the embedded screenshots are updated like any other doc asset. Re-running the script then refreshes these composites.
## Current set
[Section titled “Current set”](#current-set)
docs-in-sync.png — npm run marketing:image — —headline “Keep your docs|in sync, automatically” —screenshot public/assets/promptless\_1\_listen.png —out public/assets/marketing/docs-in-sync.png
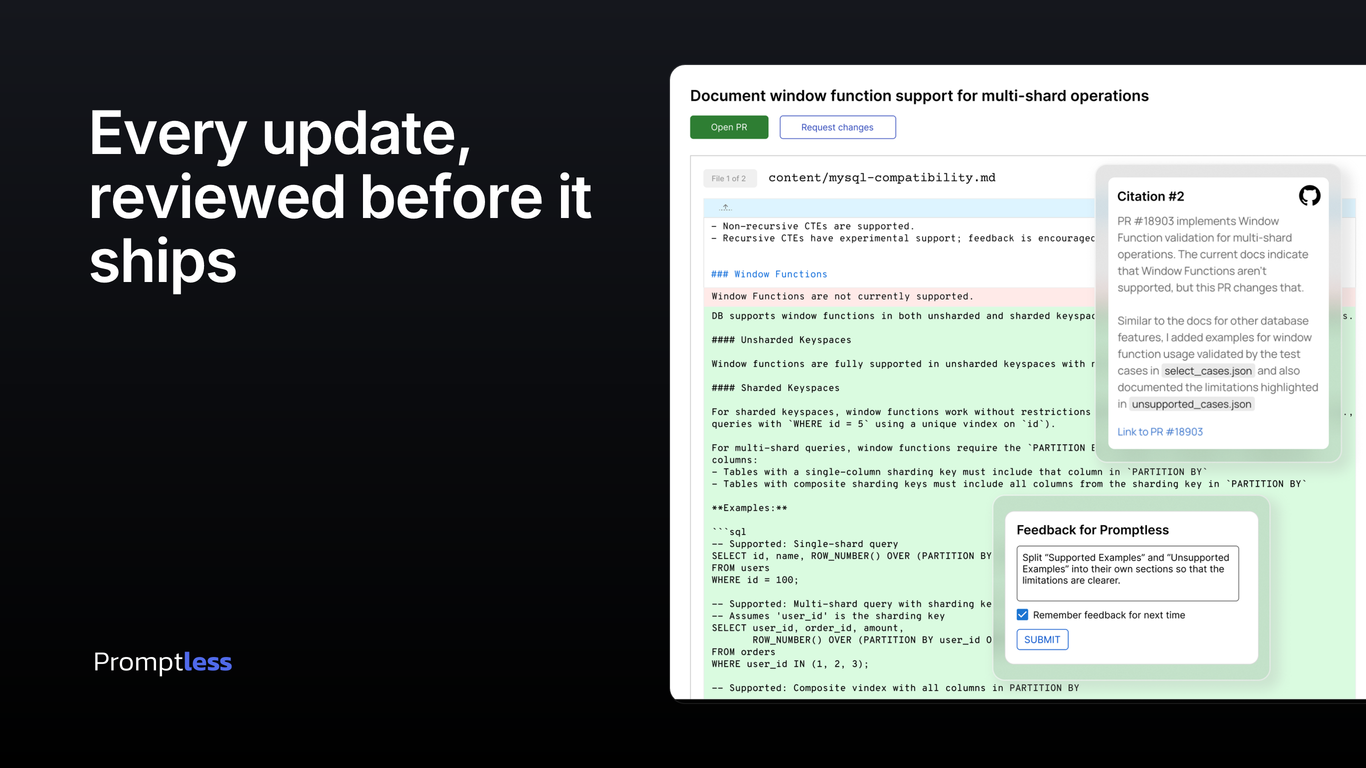
reviewed-before-ship.png — npm run marketing:image — —headline “Every update,|reviewed before it ships” —screenshot public/assets/promptless\_1\_review\.png —out public/assets/marketing/reviewed-before-ship.png
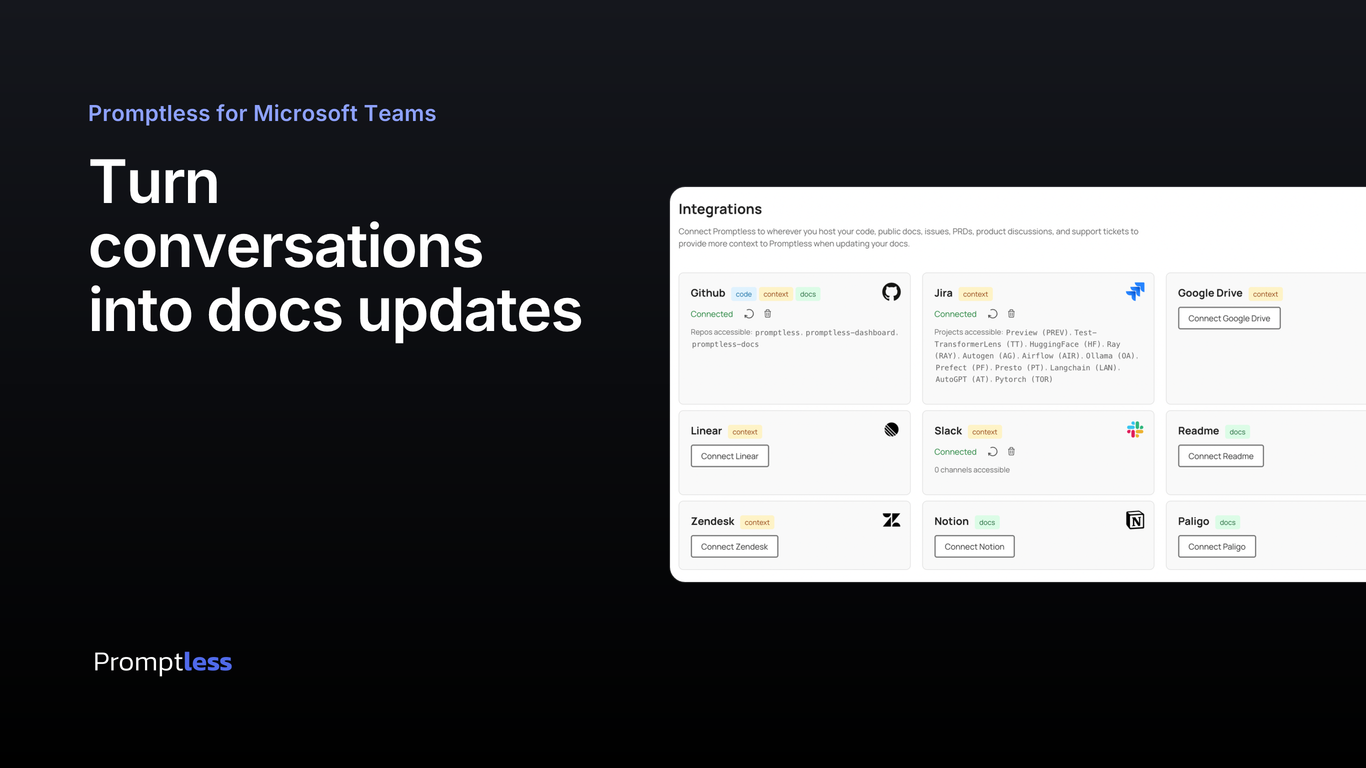
teams-listing.png — npm run marketing:image — —eyebrow “Promptless for Microsoft Teams” —headline “Turn conversations|into docs updates” —screenshot public/assets/integrations-page.png —out public/assets/marketing/teams-listing.png
### Vercel Marketplace gallery
[Section titled “Vercel Marketplace gallery”](#vercel-marketplace-gallery)
The Vercel Integration Console takes 1 to 8 gallery images at 16:9, 1920×1080. These two pass `--width` and `--height` rather than taking the 1366×768 default. Upload them in the order below: what starts a docs update, then what you review.
A third image showing the connected integrations is still missing. It needs a capture from a clean workspace, for the reasons given in [#902](https://github.com/Promptless/promptless.ai/pull/902).
vercel-code-ships.png — npm run marketing:image — —eyebrow “Promptless Starport” —headline “Your docs update|when your code ships” —screenshot public/assets/promptless\_1\_listen.png —out public/assets/marketing/vercel-code-ships.png —width 1920 —height 1080
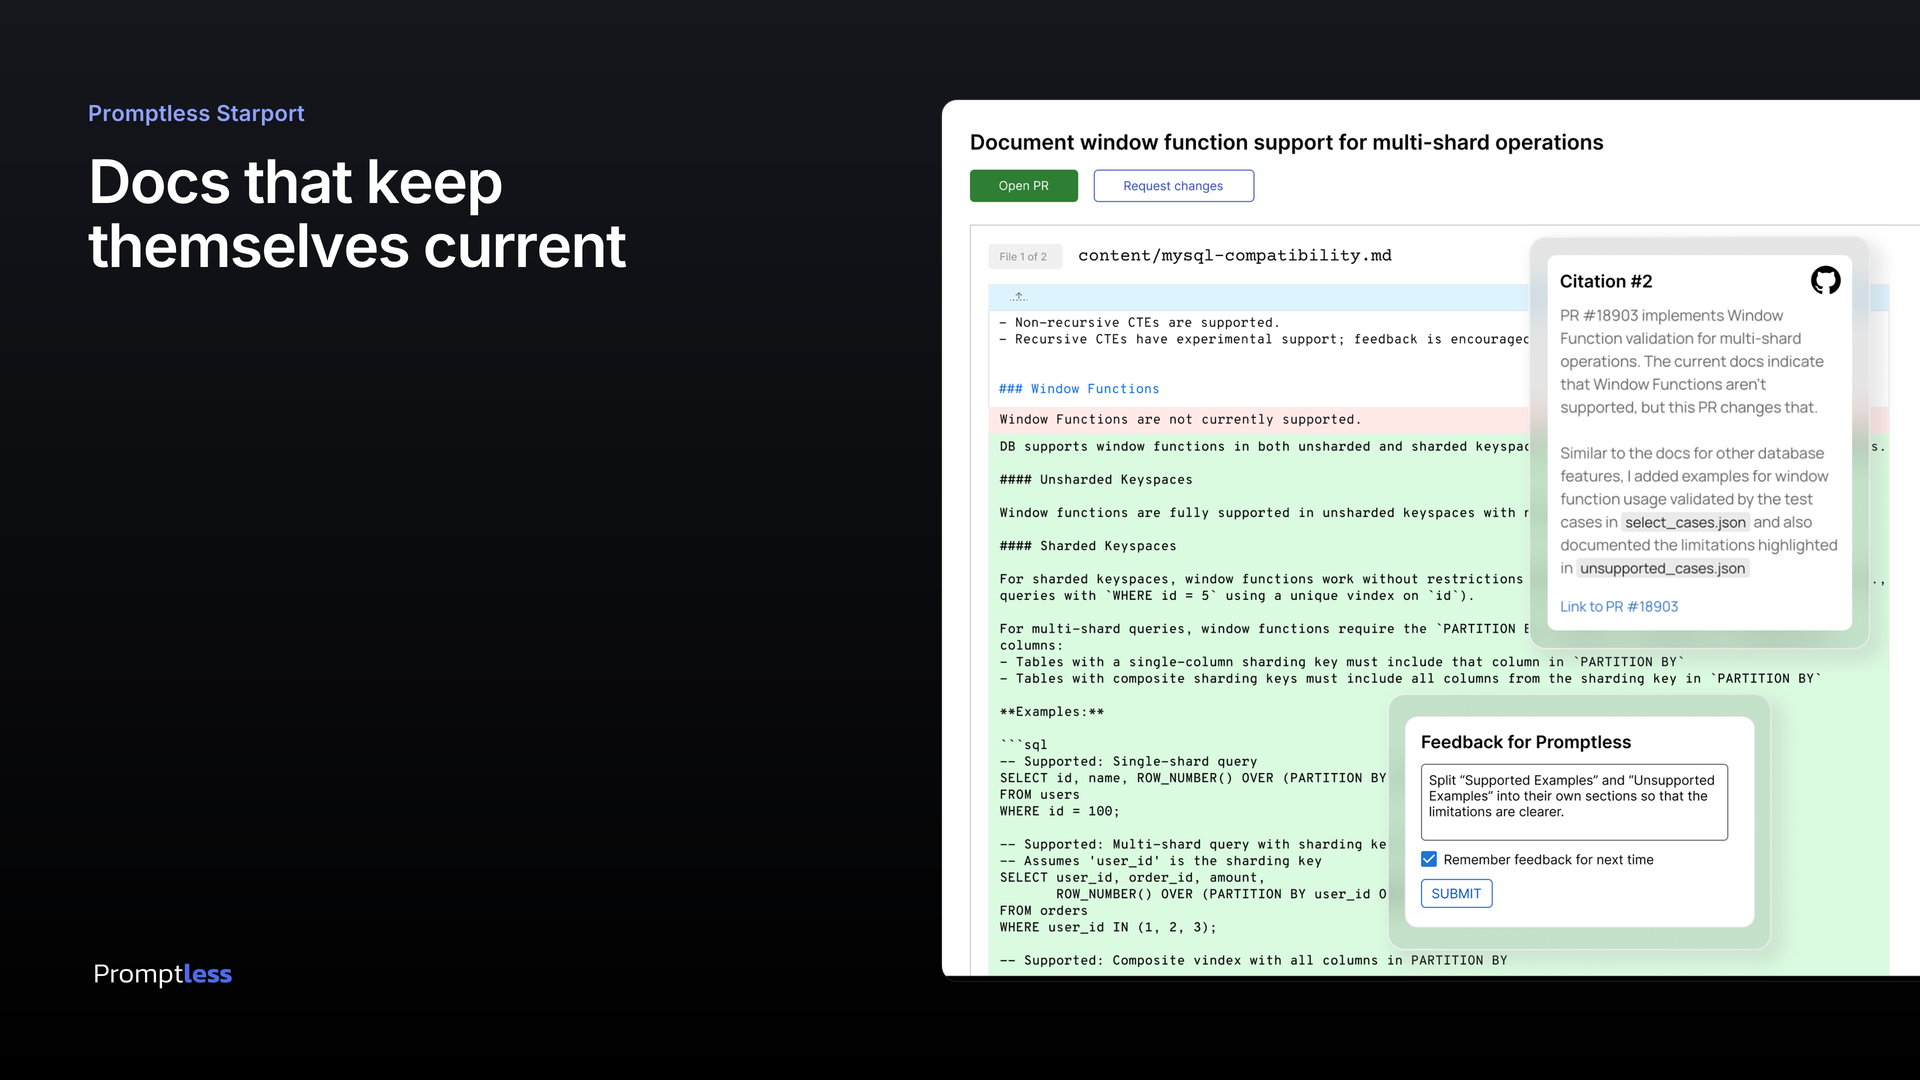
vercel-docs-current.png — npm run marketing:image — —eyebrow “Promptless Starport” —headline “Docs that keep|themselves current” —screenshot public/assets/promptless\_1\_review\.png —out public/assets/marketing/vercel-docs-current.png —width 1920 —height 1080
# Promptless media kit
> Official Promptless logos, brand colors, and product screenshots for press, partners, and integrations.
Note
This is the official Promptless brand center. Everything here (logos, colors, and product screenshots) is kept current by Promptless itself, so the app screenshots below always reflect the latest interface. Bookmark [promptless.ai/media-kit](https://promptless.ai/media-kit) for the canonical link.
For press, partnership, or integration use, please use the assets on this page as-is. If you need a format or resolution you don’t see here, reach out to .
## Logos
[Section titled “Logos”](#logos)
Download the file that fits your background. Use the full logo wherever space allows; reach for the icon-only mark when you need a compact, square footprint (avatars, app tiles, favicons).
### Primary logo
[Section titled “Primary logo”](#primary-logo)

Light backgrounds[Download SVG](/assets/logo.svg)

Dark backgrounds[Download SVG](/assets/logo_darkbg.svg)
### Wordmark
[Section titled “Wordmark”](#wordmark)

Black wordmark[Download SVG](/assets/text_logo_black.svg)

White wordmark[Download SVG](/assets/text_logo_white.svg)
### Icon
[Section titled “Icon”](#icon)
The square mark for avatars, app tiles, and favicons.

Blue icon[SVG](/assets/square_logo_blue.svg)

White icon[SVG](/assets/square_logo_white.svg)

Icon (PNG)[PNG](/assets/squarelogo.png)
## Brand colors
[Section titled “Brand colors”](#brand-colors)
**Promptless Blue**\
\#1F4AD6
**Accent Blue**\
\#396DF1
**Deep Blue**\
\#1E3FA8
**Tint**\
\#E7EFFF
**Ink**\
\#111827
## Product screenshots
[Section titled “Product screenshots”](#product-screenshots)
These screenshots show Promptless in action across its core workflow: Listen, Research, Review, and Publish. They’re maintained alongside the product, so they always match the current interface. For ready-made promo composites (headline + logo + screenshot, sized for app listings), see [Marketing Images](/docs/marketing-images).
Listen — Promptless watches your code, tickets, and conversations for changes that affect docs.
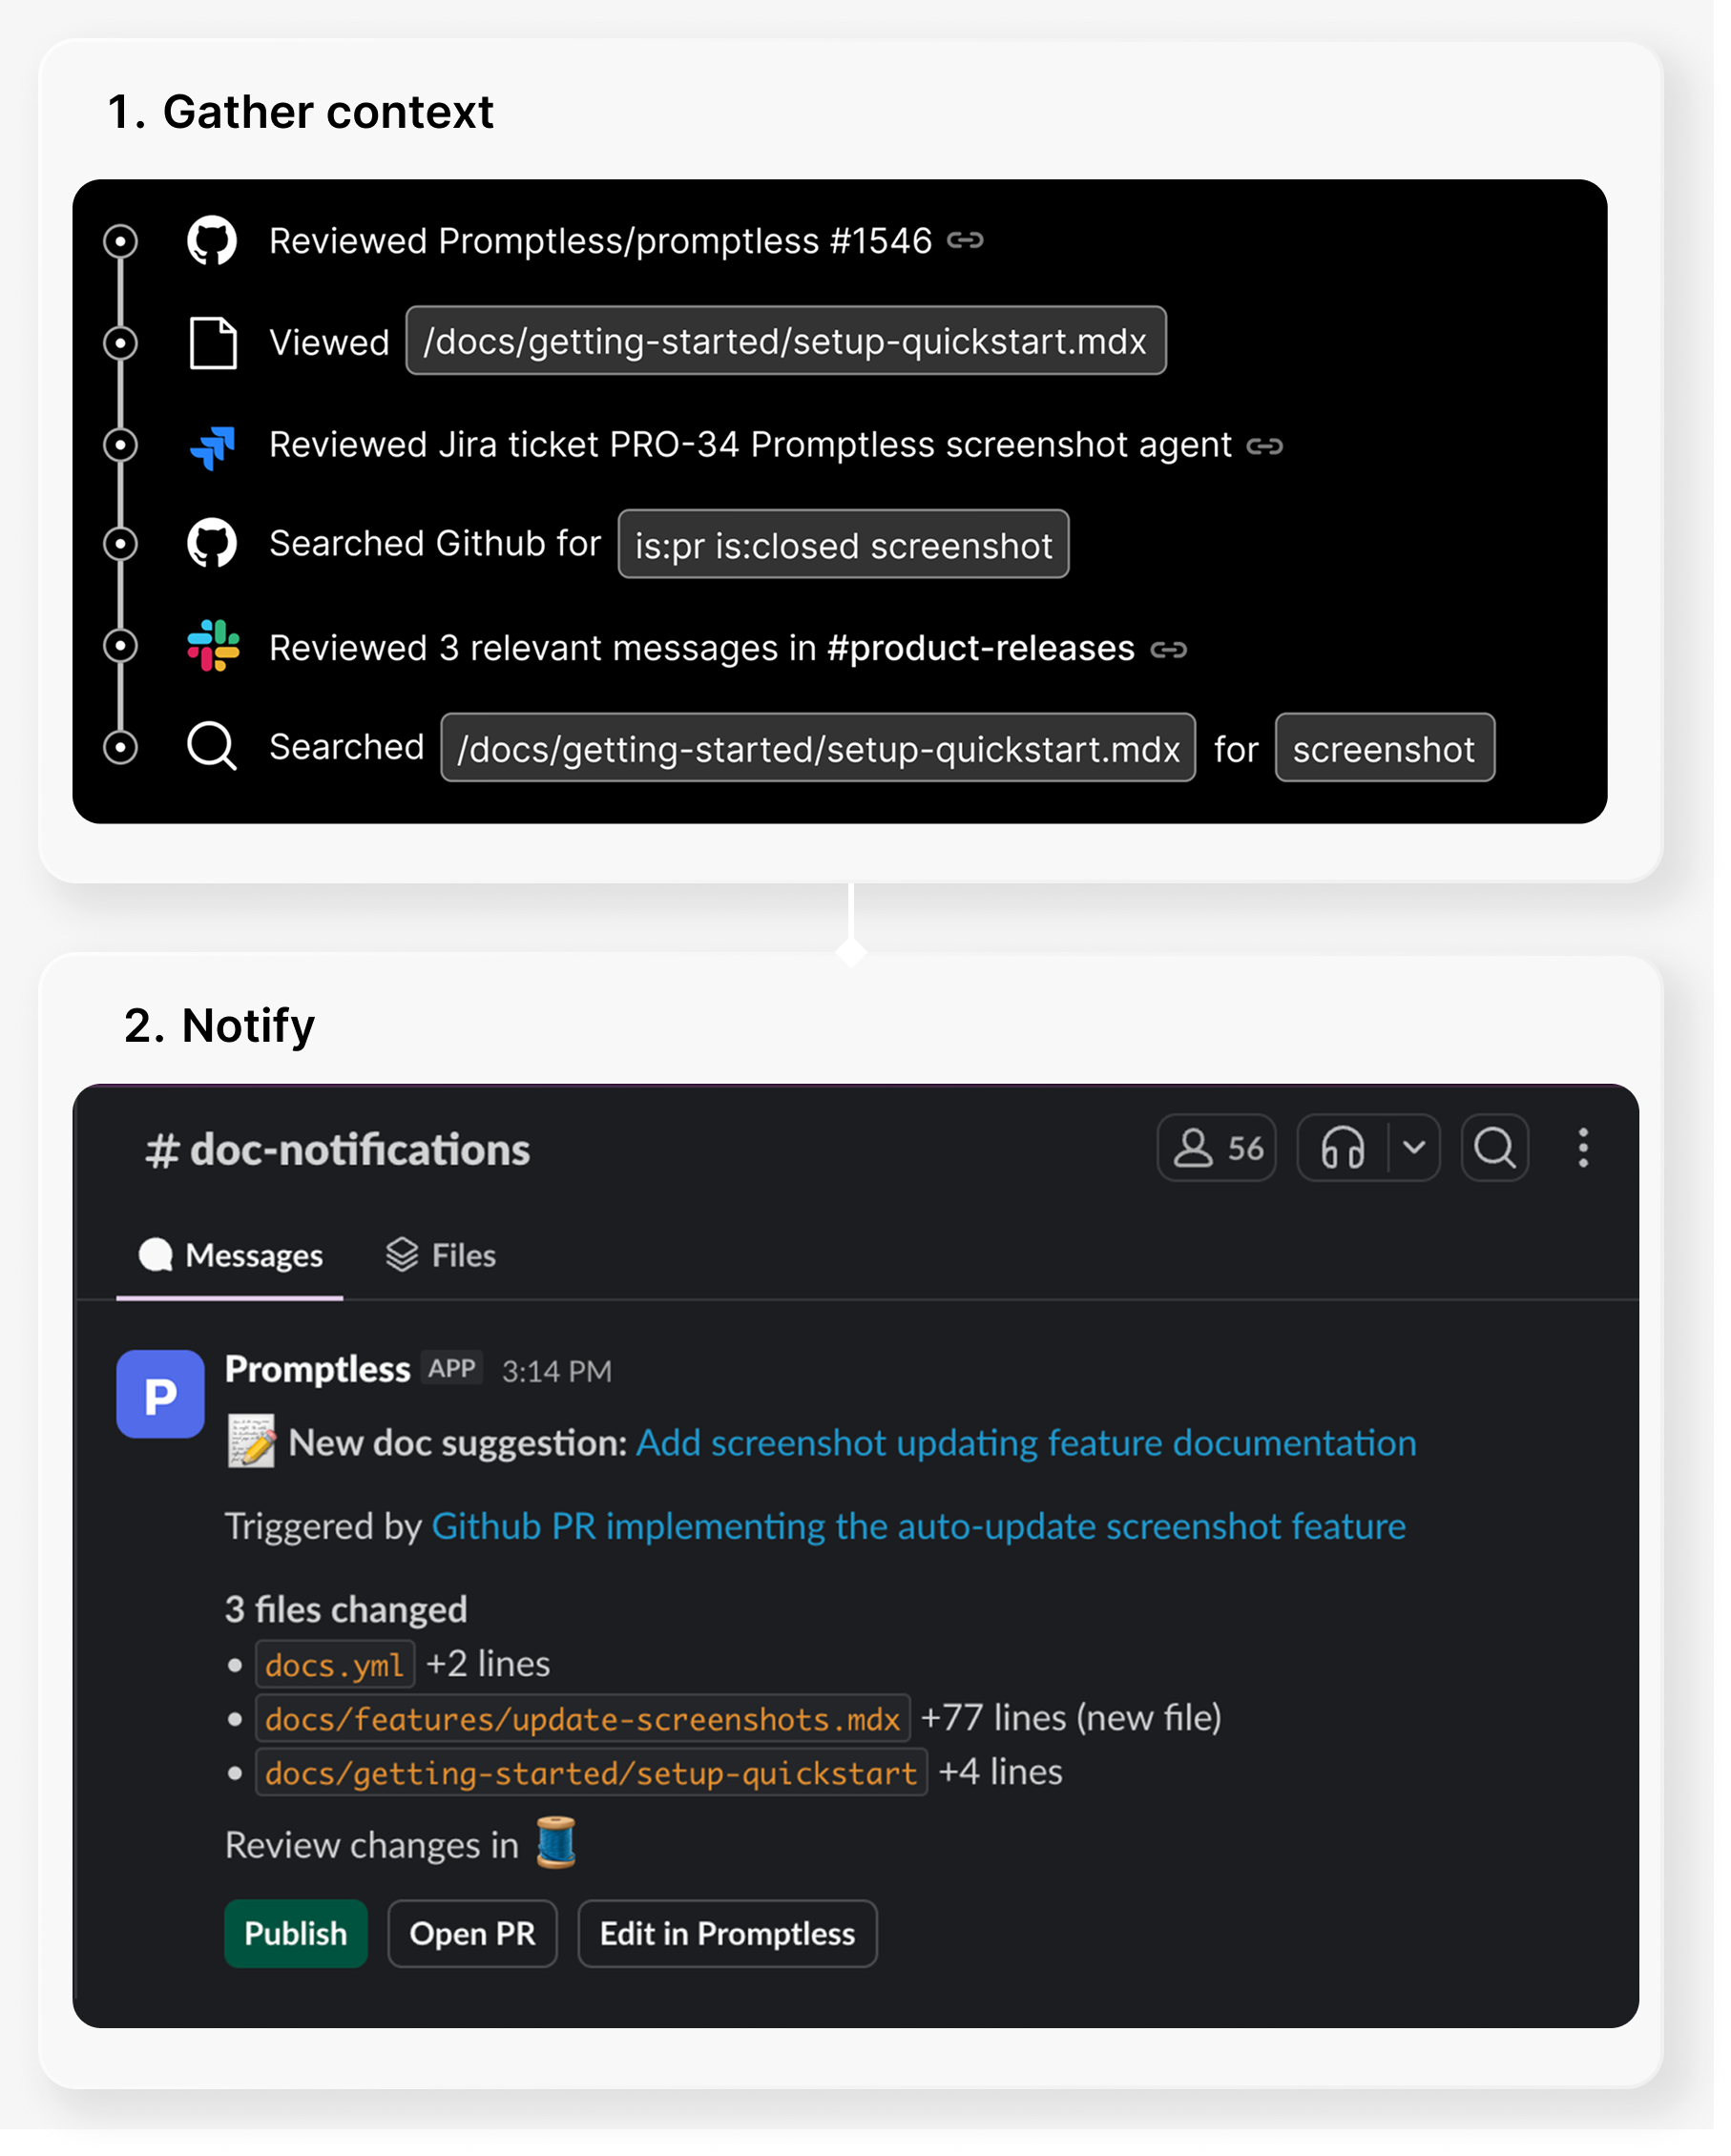
Research — Promptless gathers the context it needs to draft accurate updates.
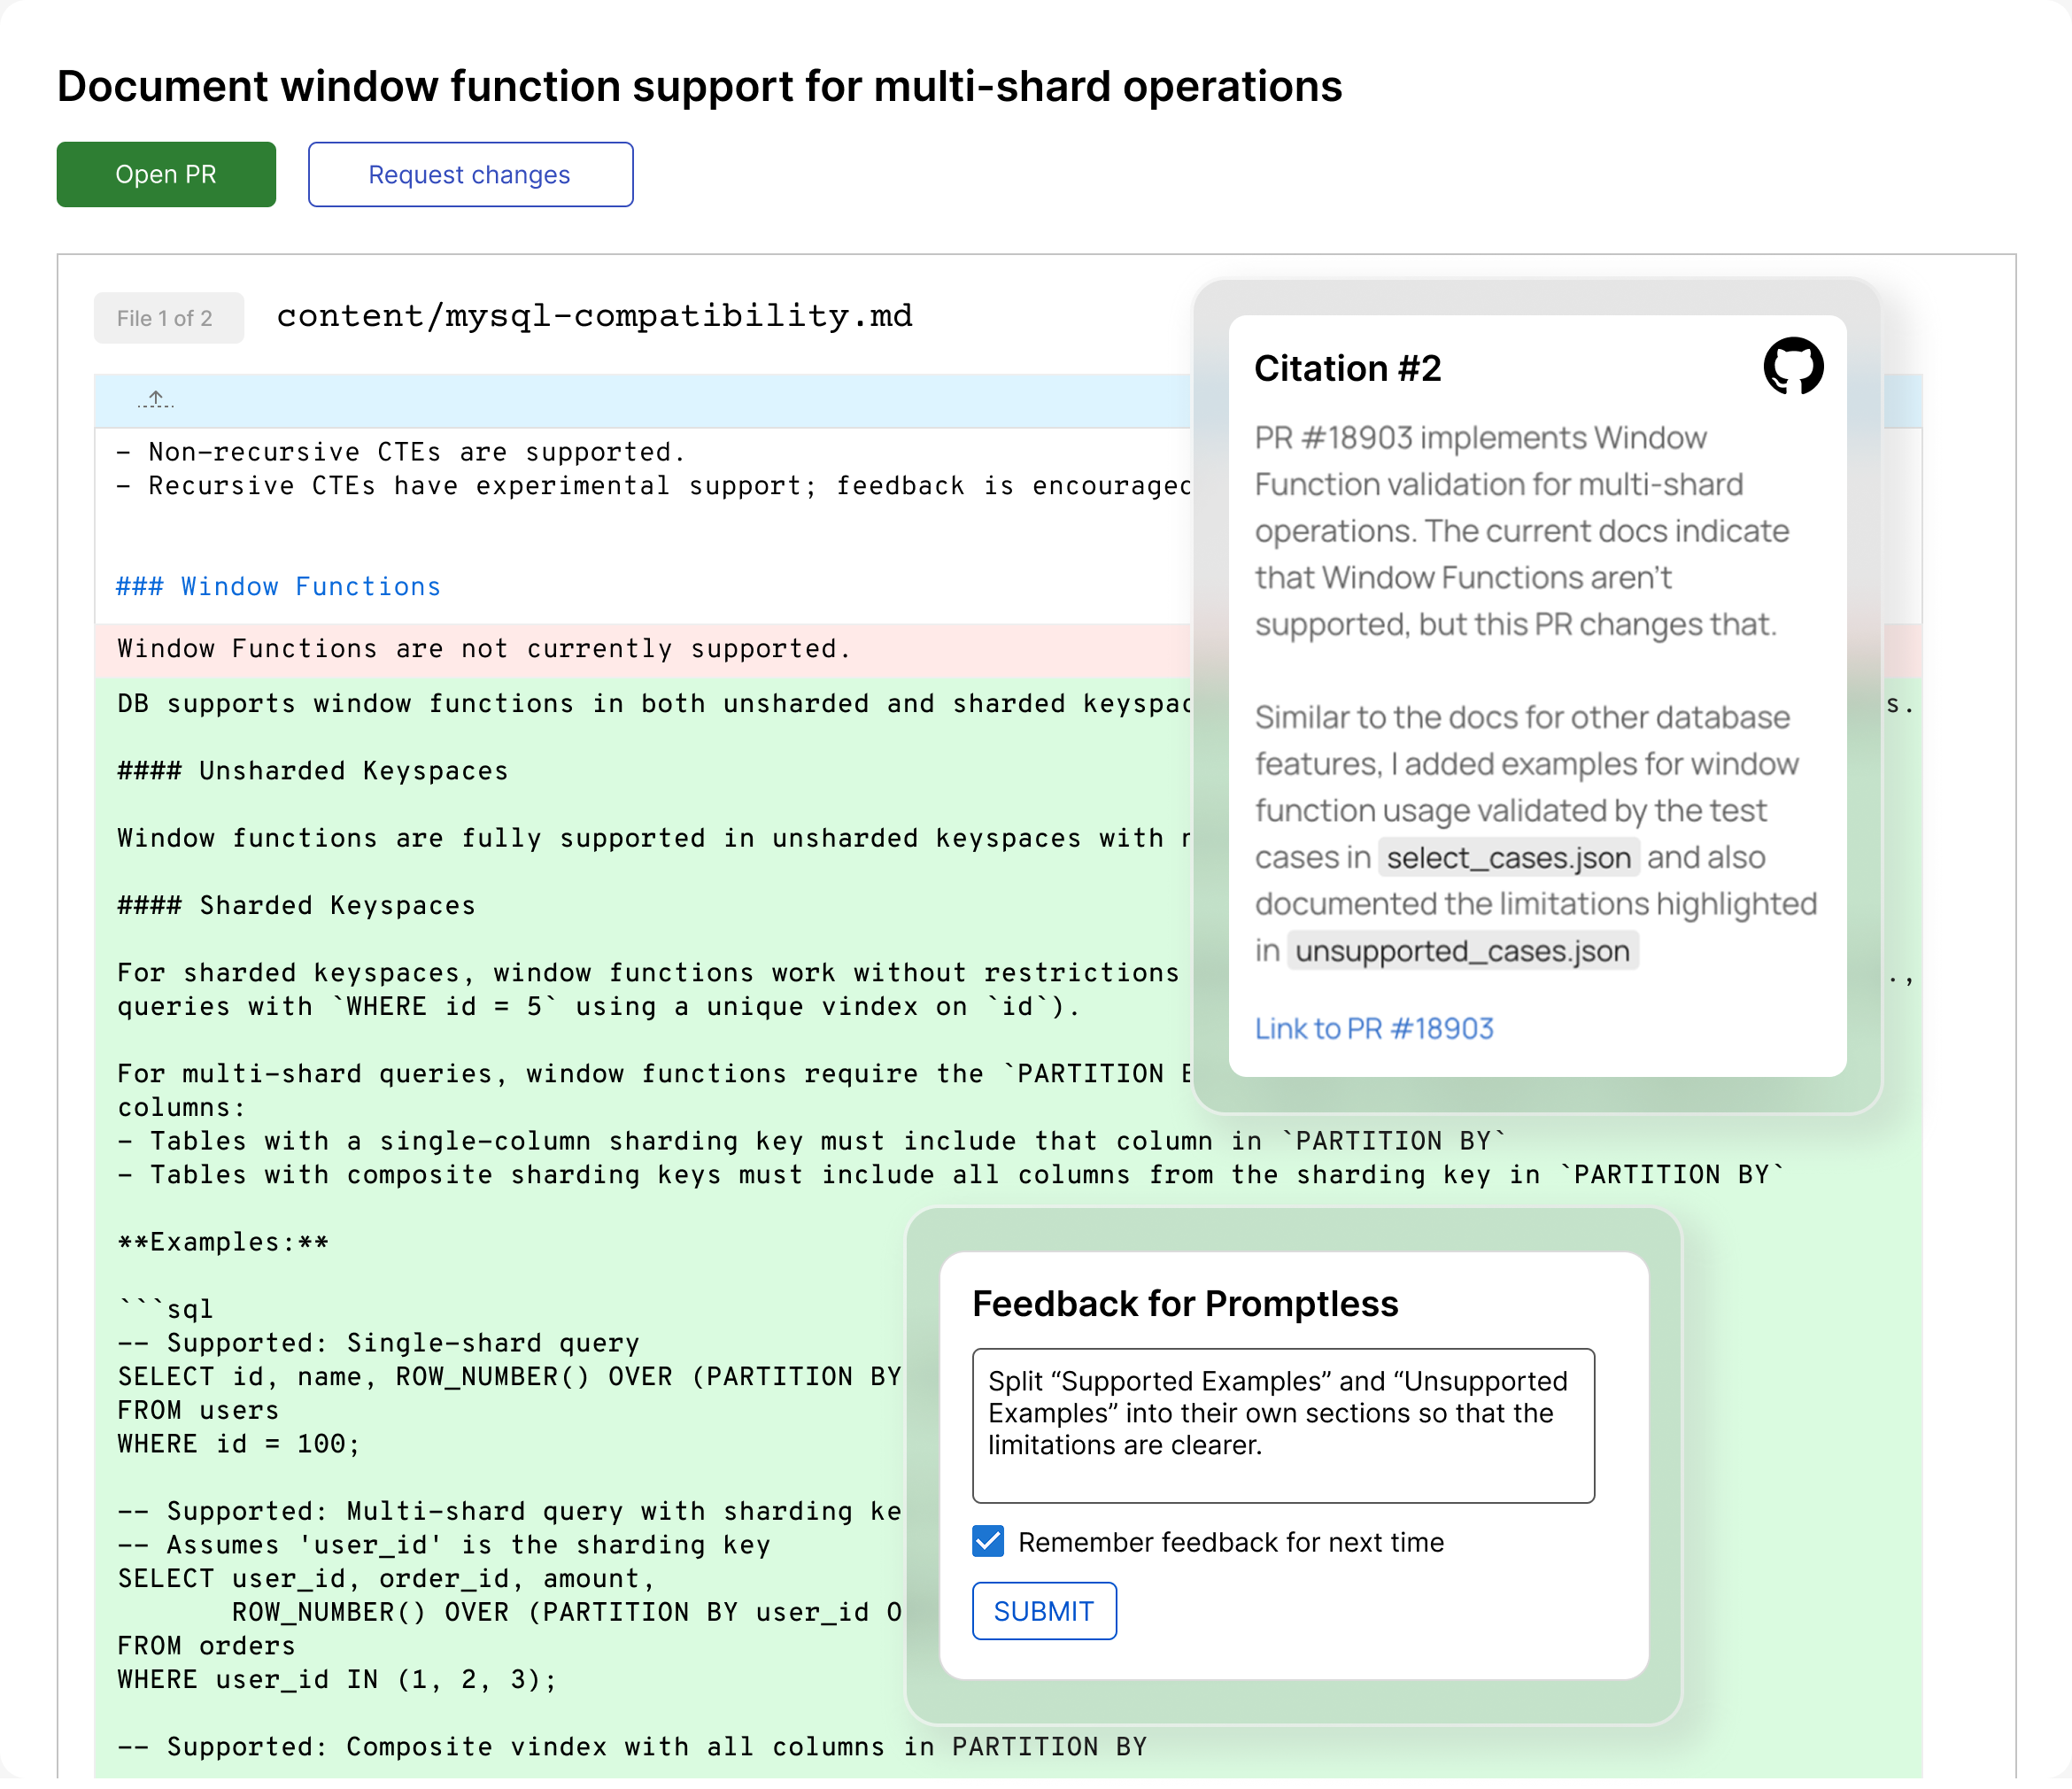
Review — proposed doc changes arrive as a pull request for human review.
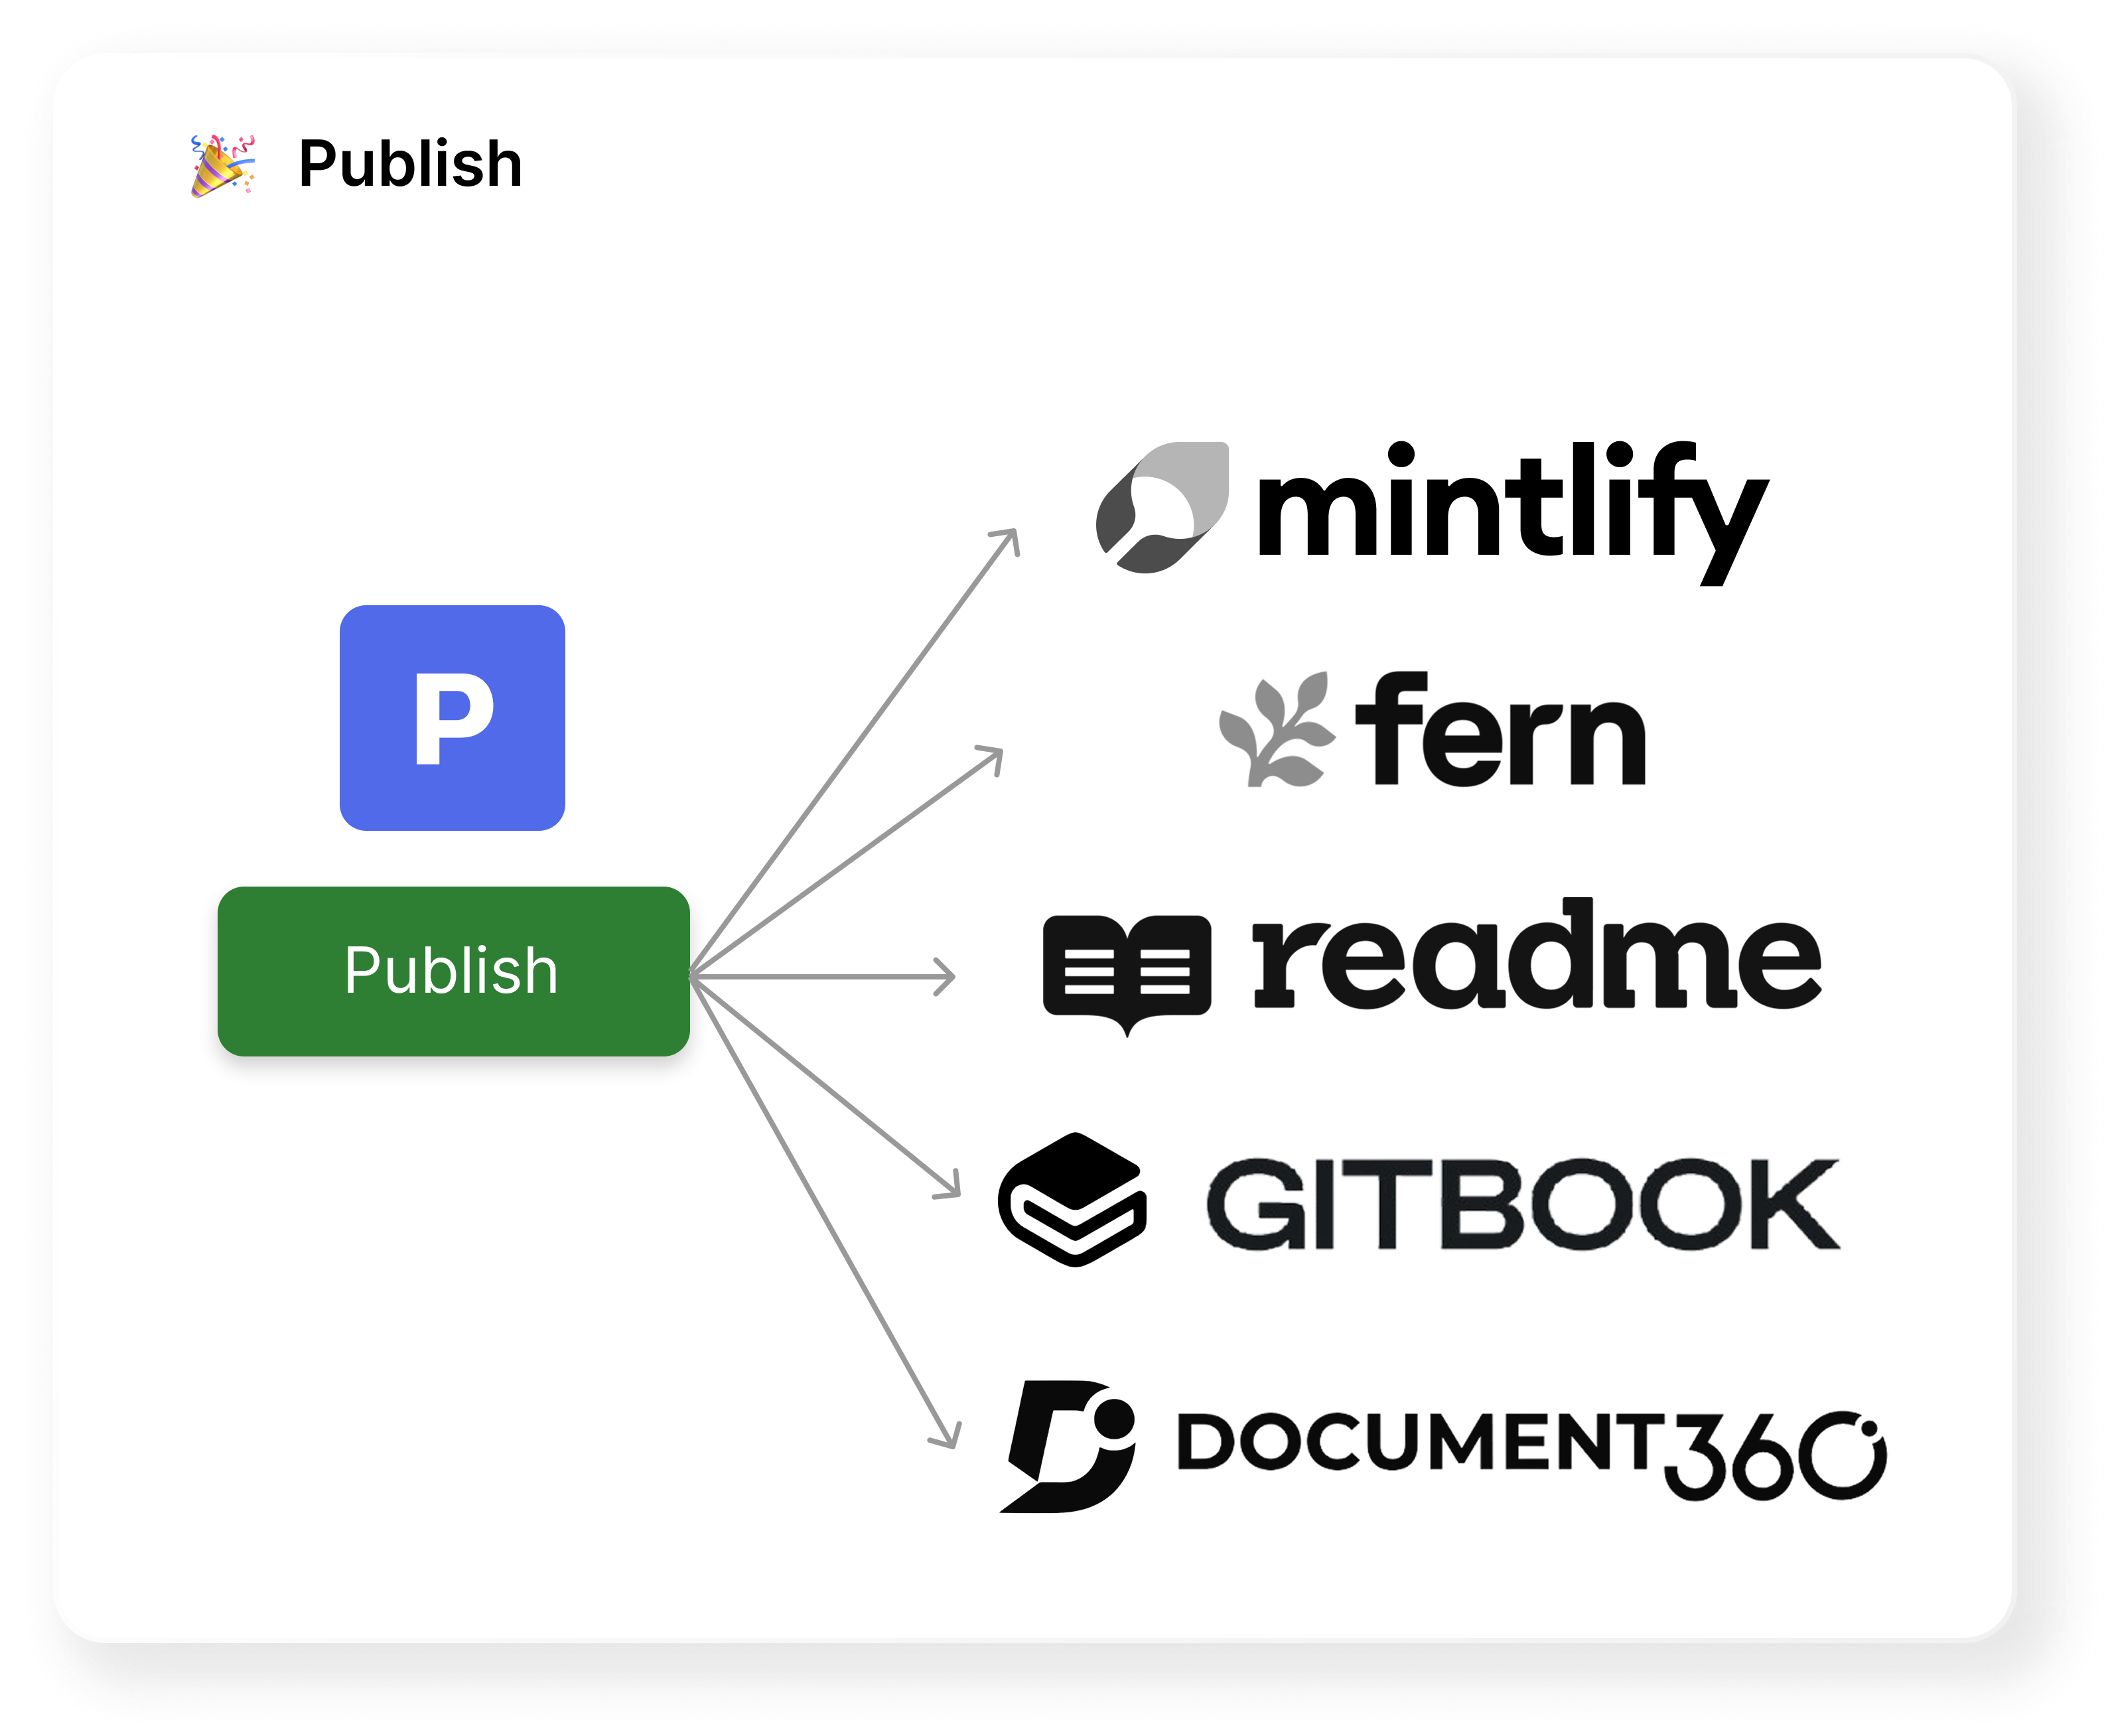
Publish — approved updates ship to your live docs.
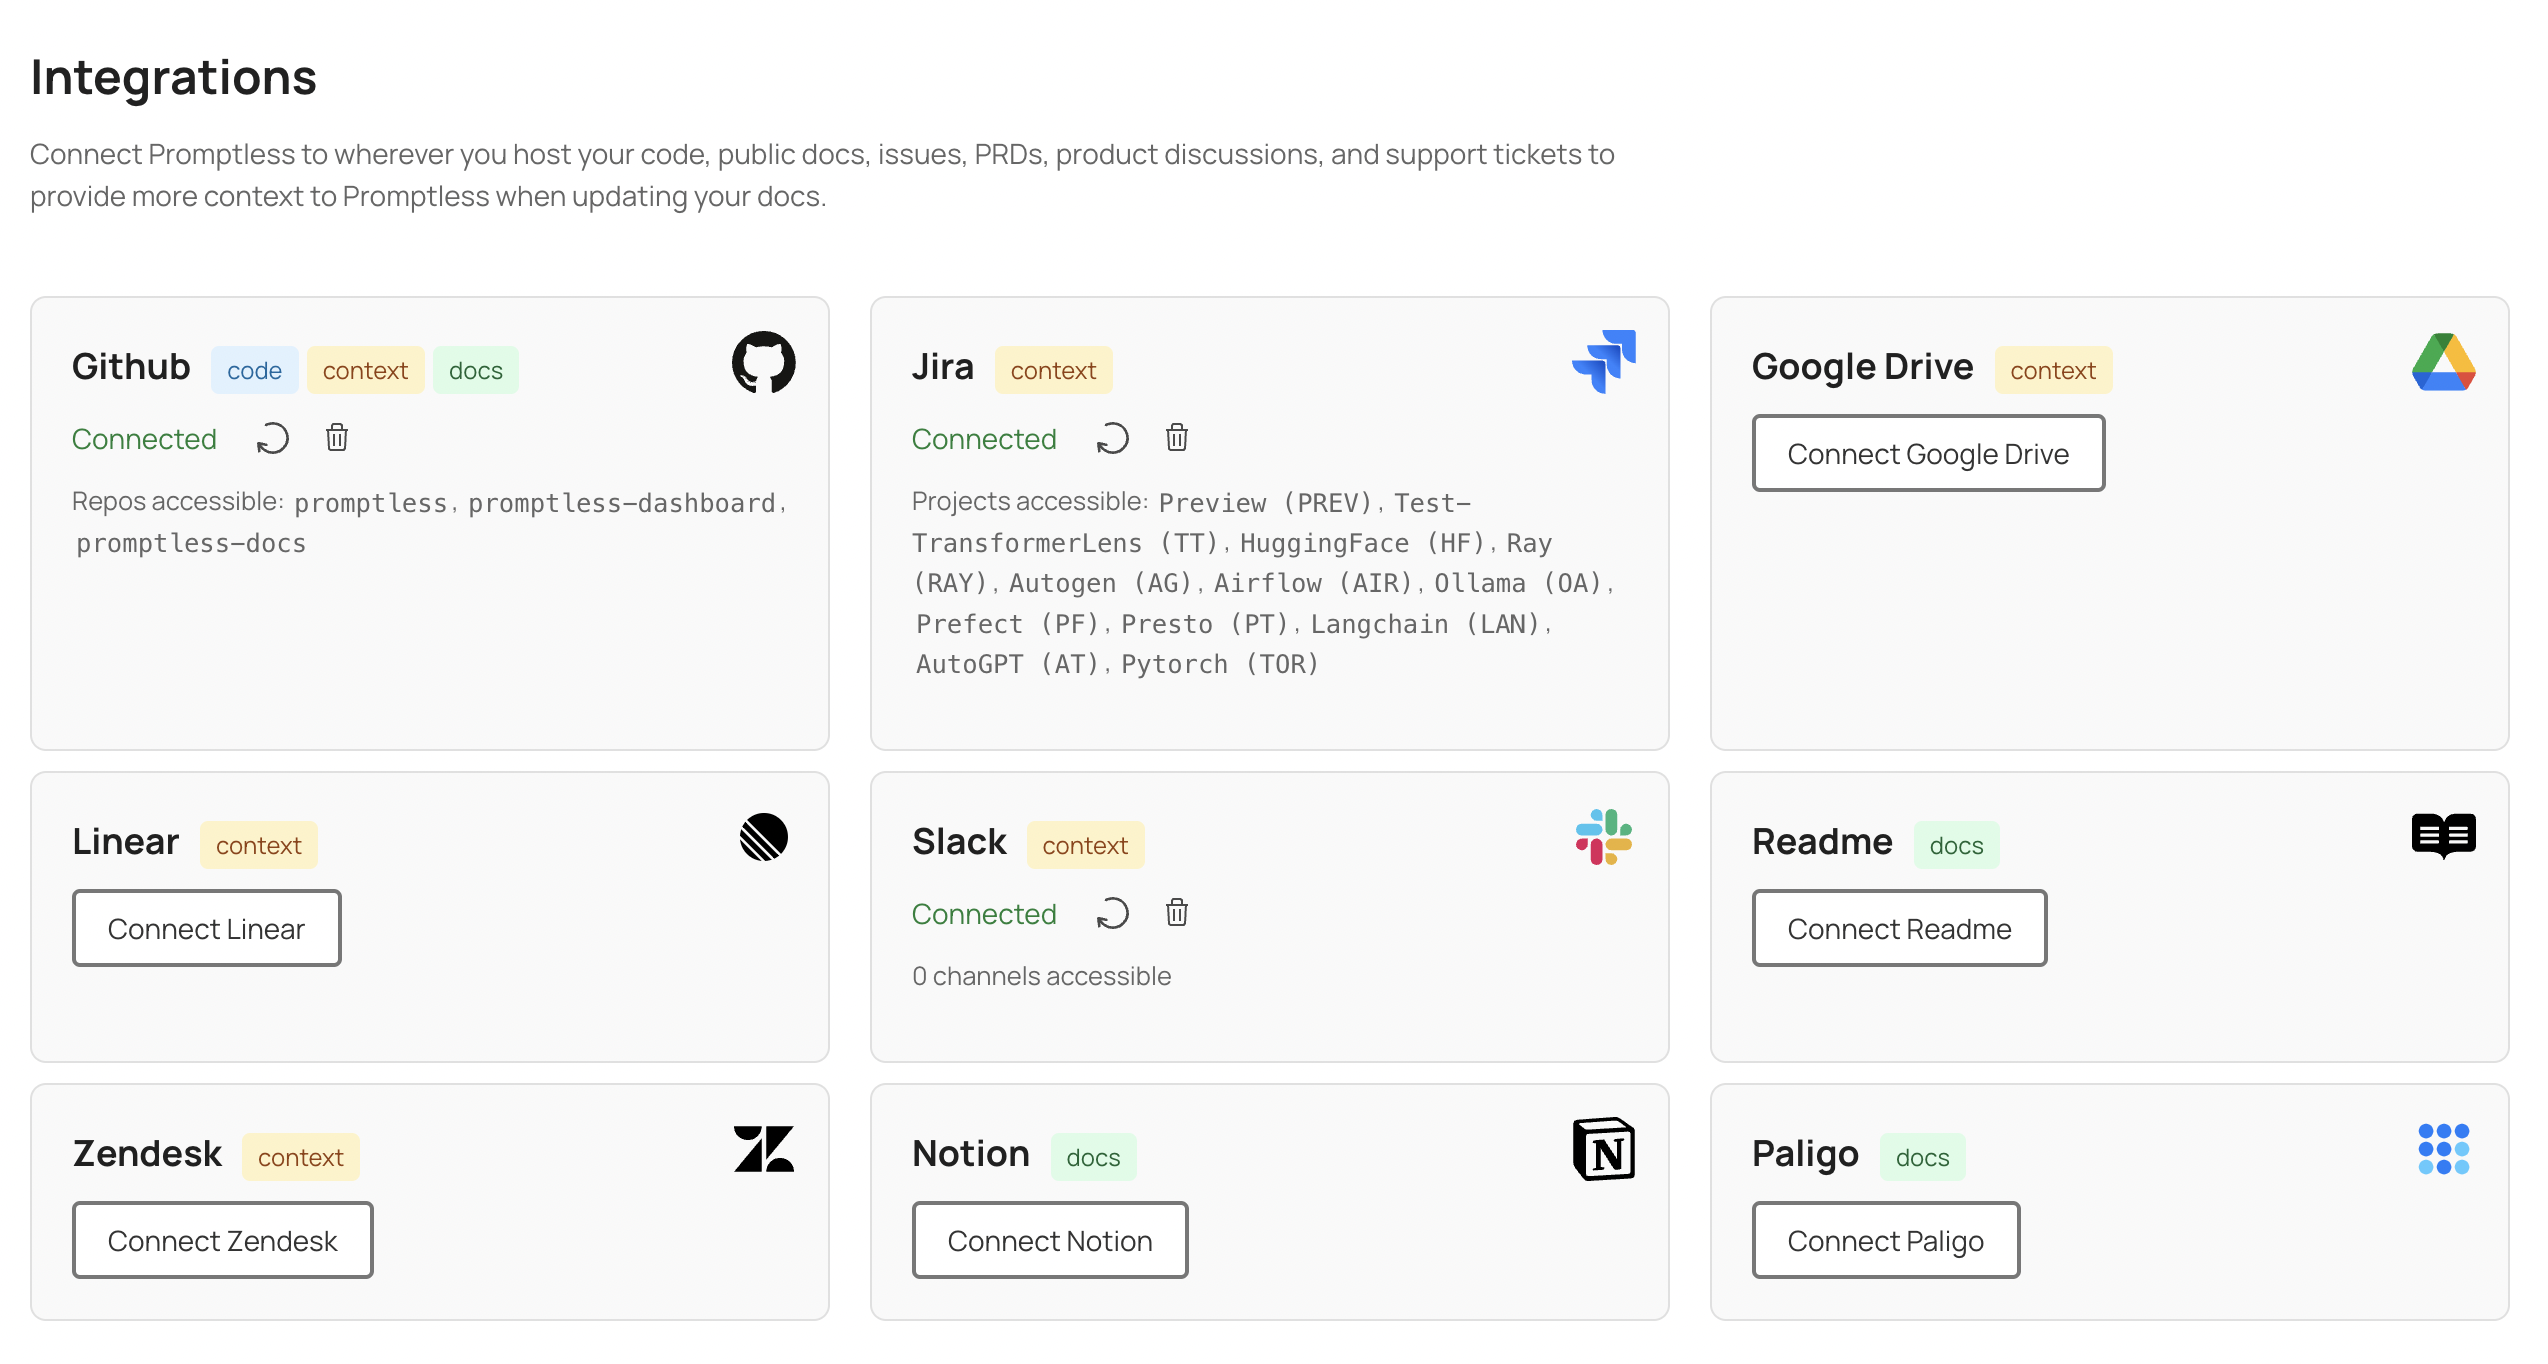
The Promptless web interface, where teams manage projects and integrations.
## Usage guidelines
[Section titled “Usage guidelines”](#usage-guidelines)
* **Do** use the official logos and colors on this page without modification.
* **Do** give the logo clear space and keep it legible. Choose the light or dark variant to suit the background.
* **Don’t** stretch, recolor, rotate, add effects to, or otherwise alter the logo.
* **Don’t** imply partnership or endorsement that doesn’t exist.
Tip
Need a different format, a higher resolution, or a screenshot of a specific feature? Email and we’ll help.